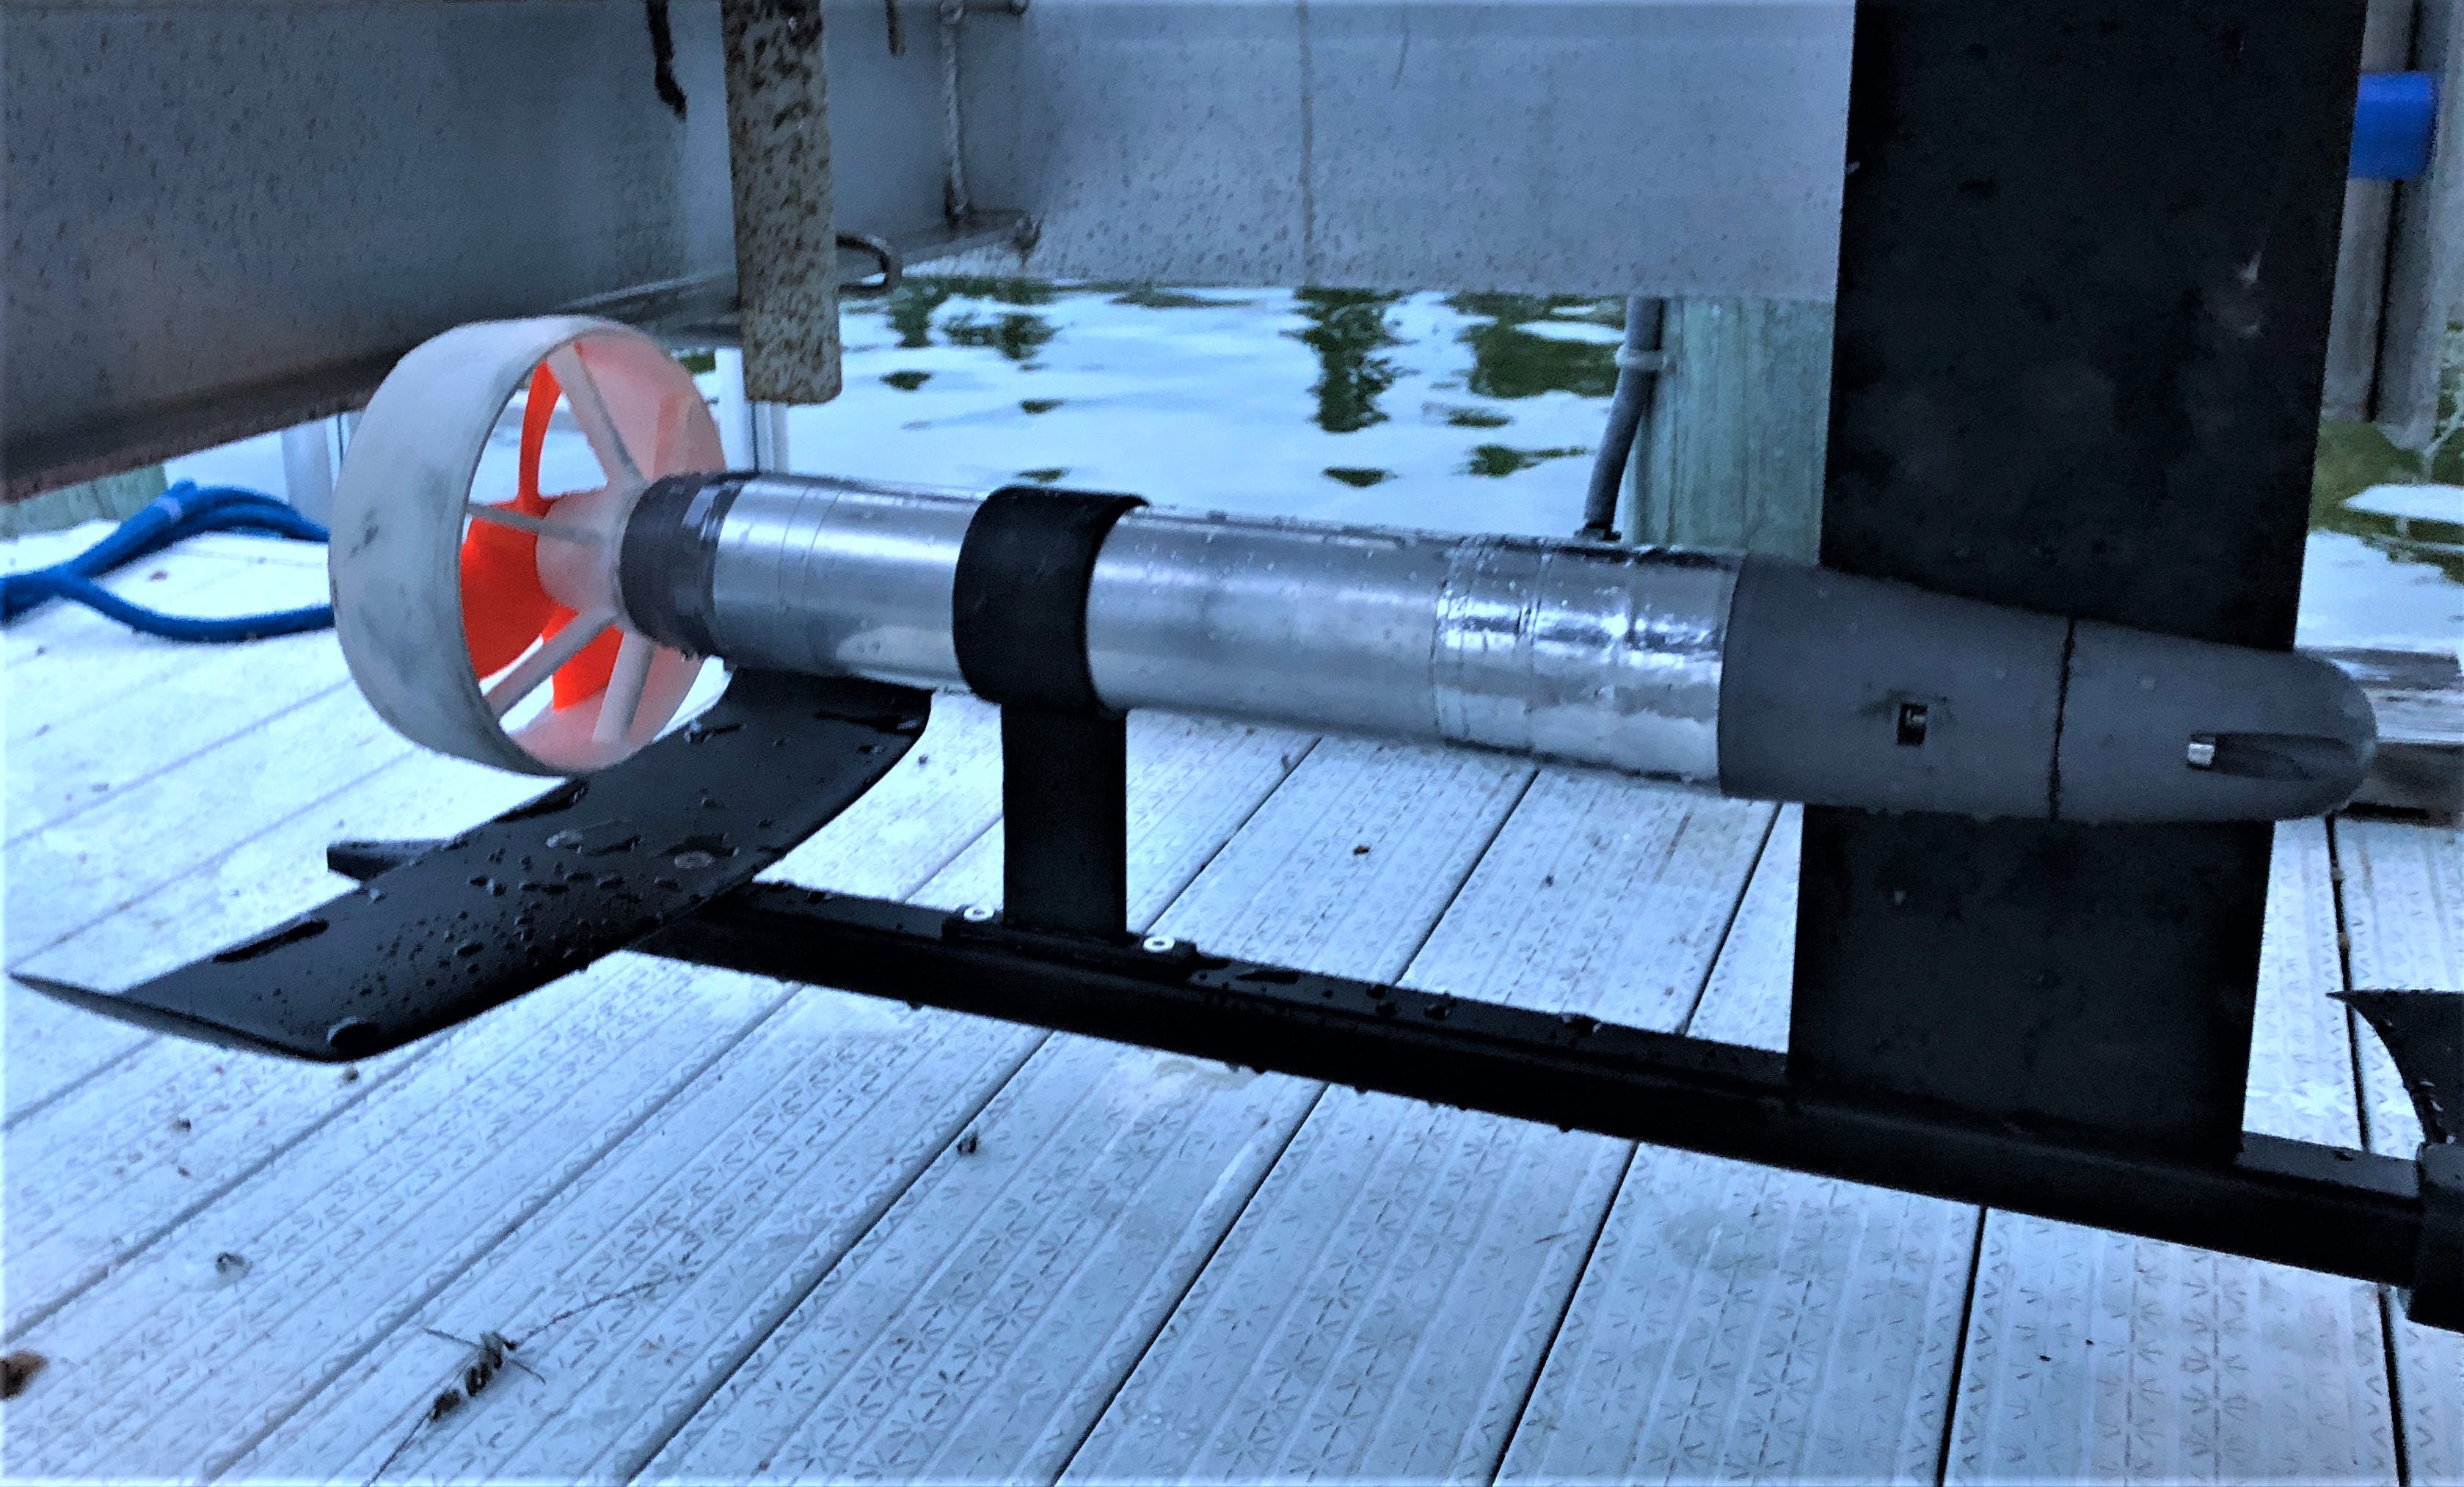
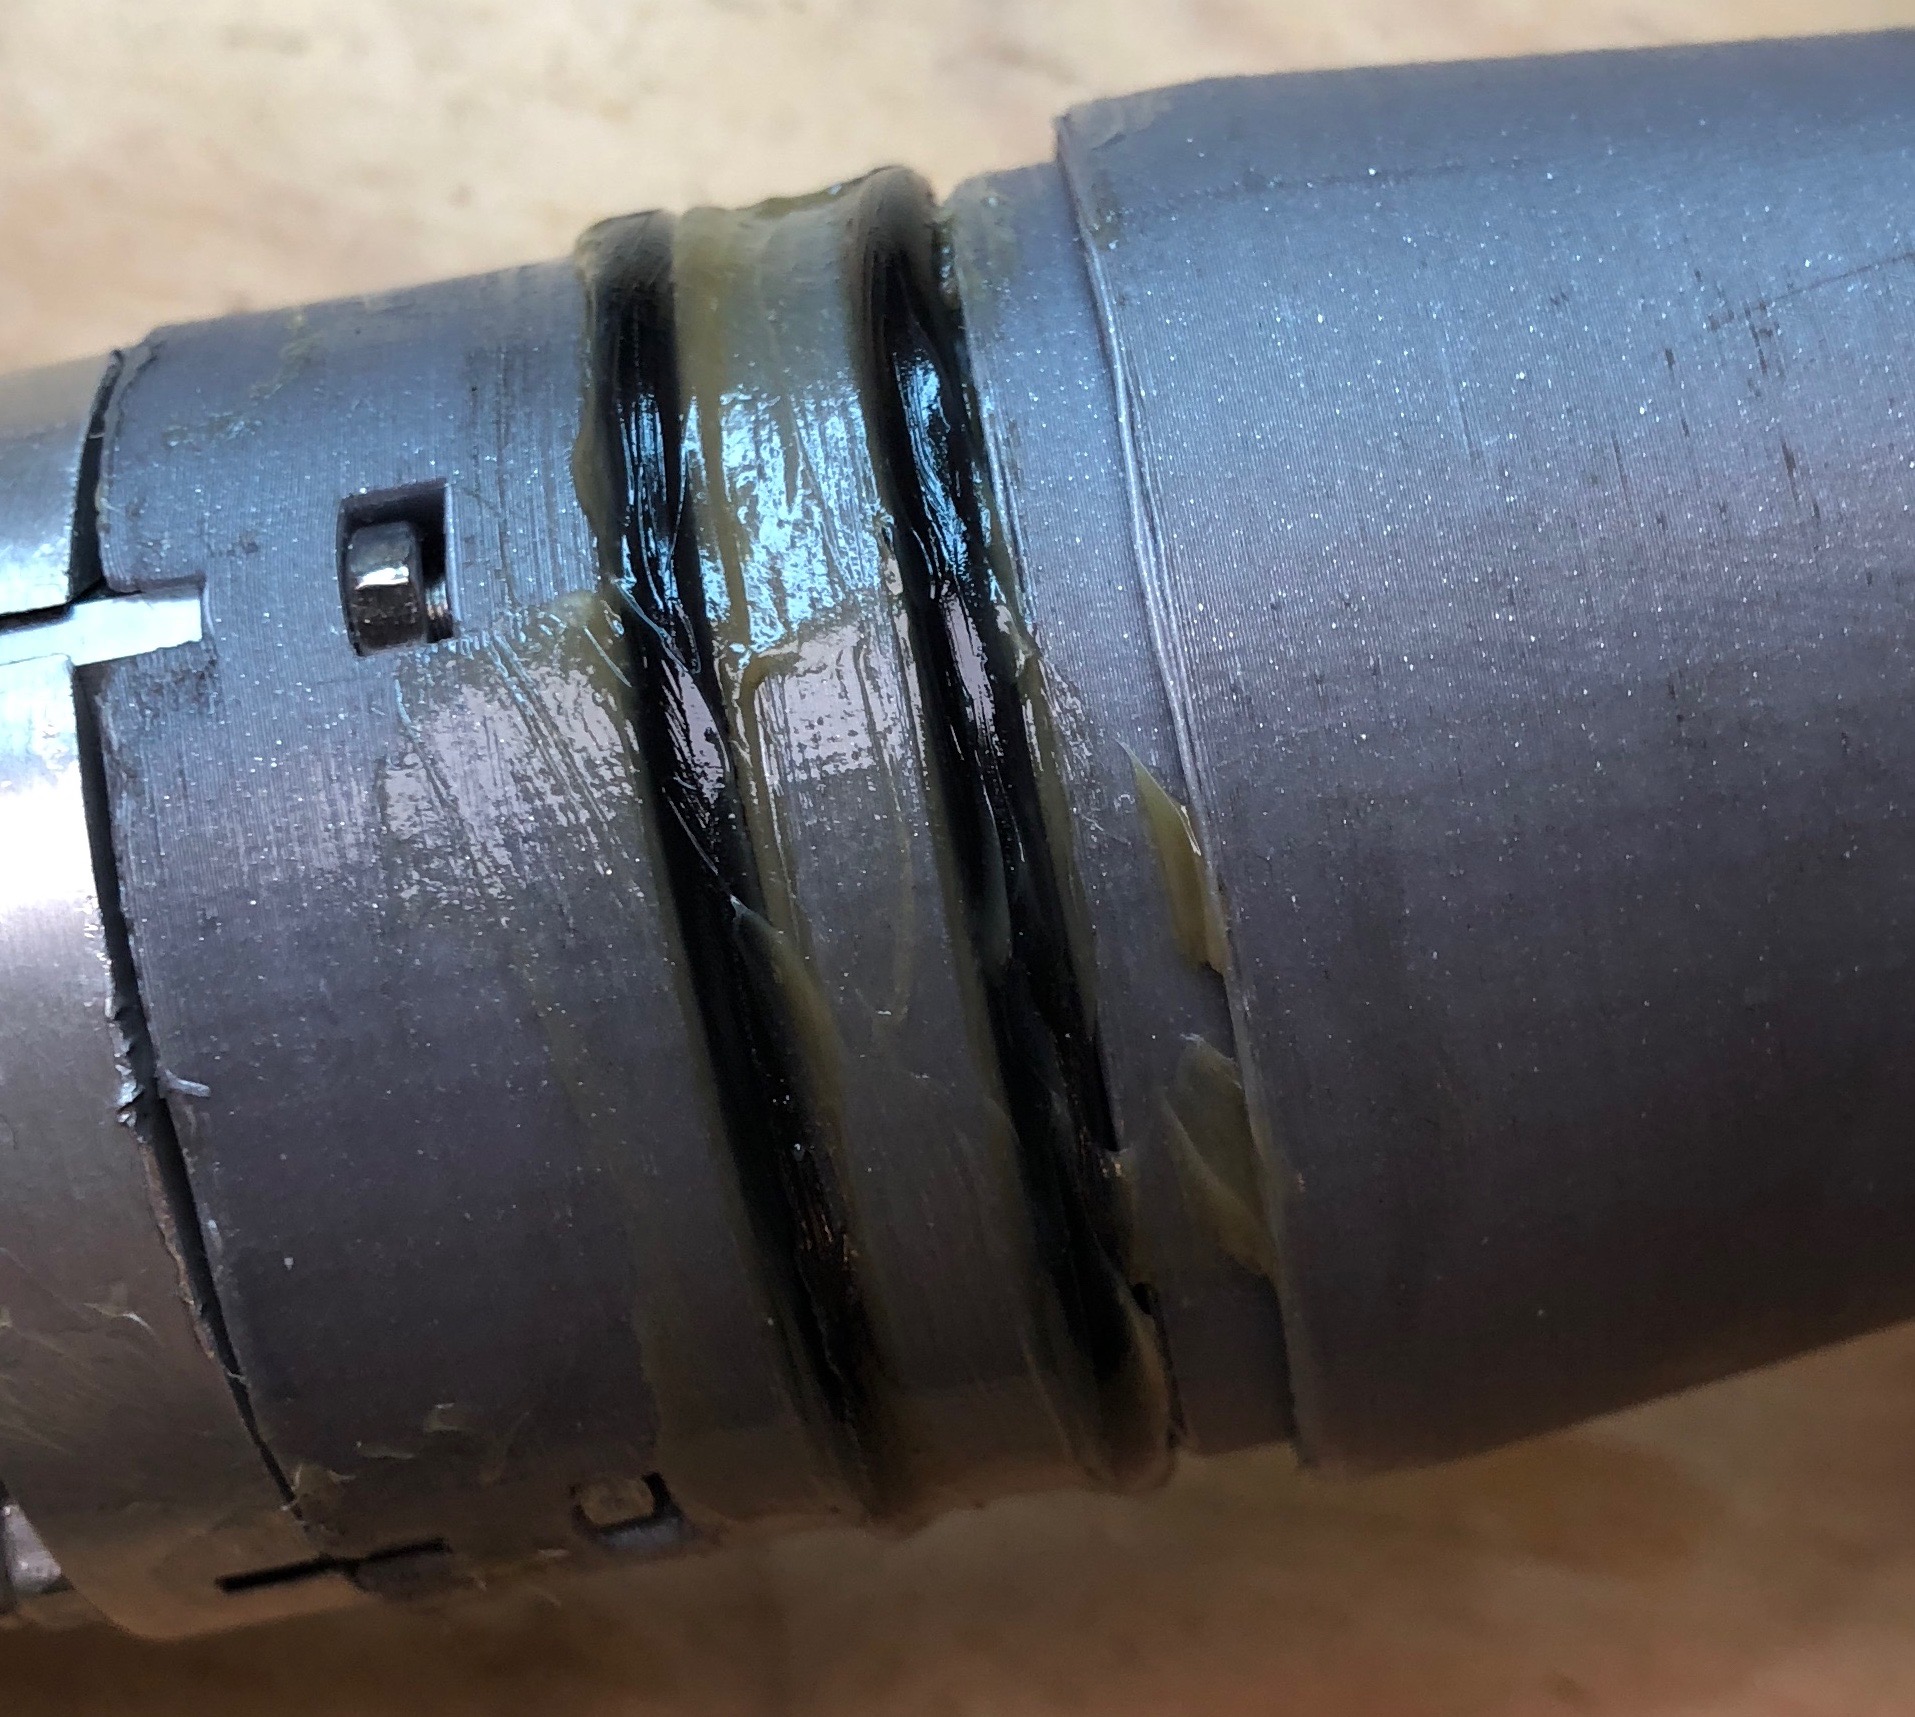
Major milestone today: The drive pod is completed and sealed! Per above I used the metal from a beer can to fill the gap between the outer tube and the motor+gearbox+sealmount (“motor unit”) to ensure good heat transfer. I also added thermal paste which was a mistake. The addition of the paste made the motor wrapped in the can metal too thick to fit into the tube, the paste is HUGELY messy (it does come off with soap and water) and it is slippery, making it impossible to get a tight grip on the motor unit and the tube to twist the former into the latter. So I started again with a new clean beer can (longer can this time – making sure it covered all of the motor AND my metal motor-gearbox mount) and skipped the heat paste. This time the fit was snug and successful. As suggested by others I put lots of grease all around (and under) the two O-rings on the sealmount. This helps the O-rings seal better and also makes sliding the tube over then easier. Tip: Don’t put the grease on the O-rings until you have slid the motor unit almost all the way into the tube. Otherwise you will get grease on your hands and again have trouble gripping the motor unit. Once everything was together I gave it a good wipe down and then added waterproof Gorilla Tape to the joint for added protection. This can be easily cut off if I need to reopen the drive pod.
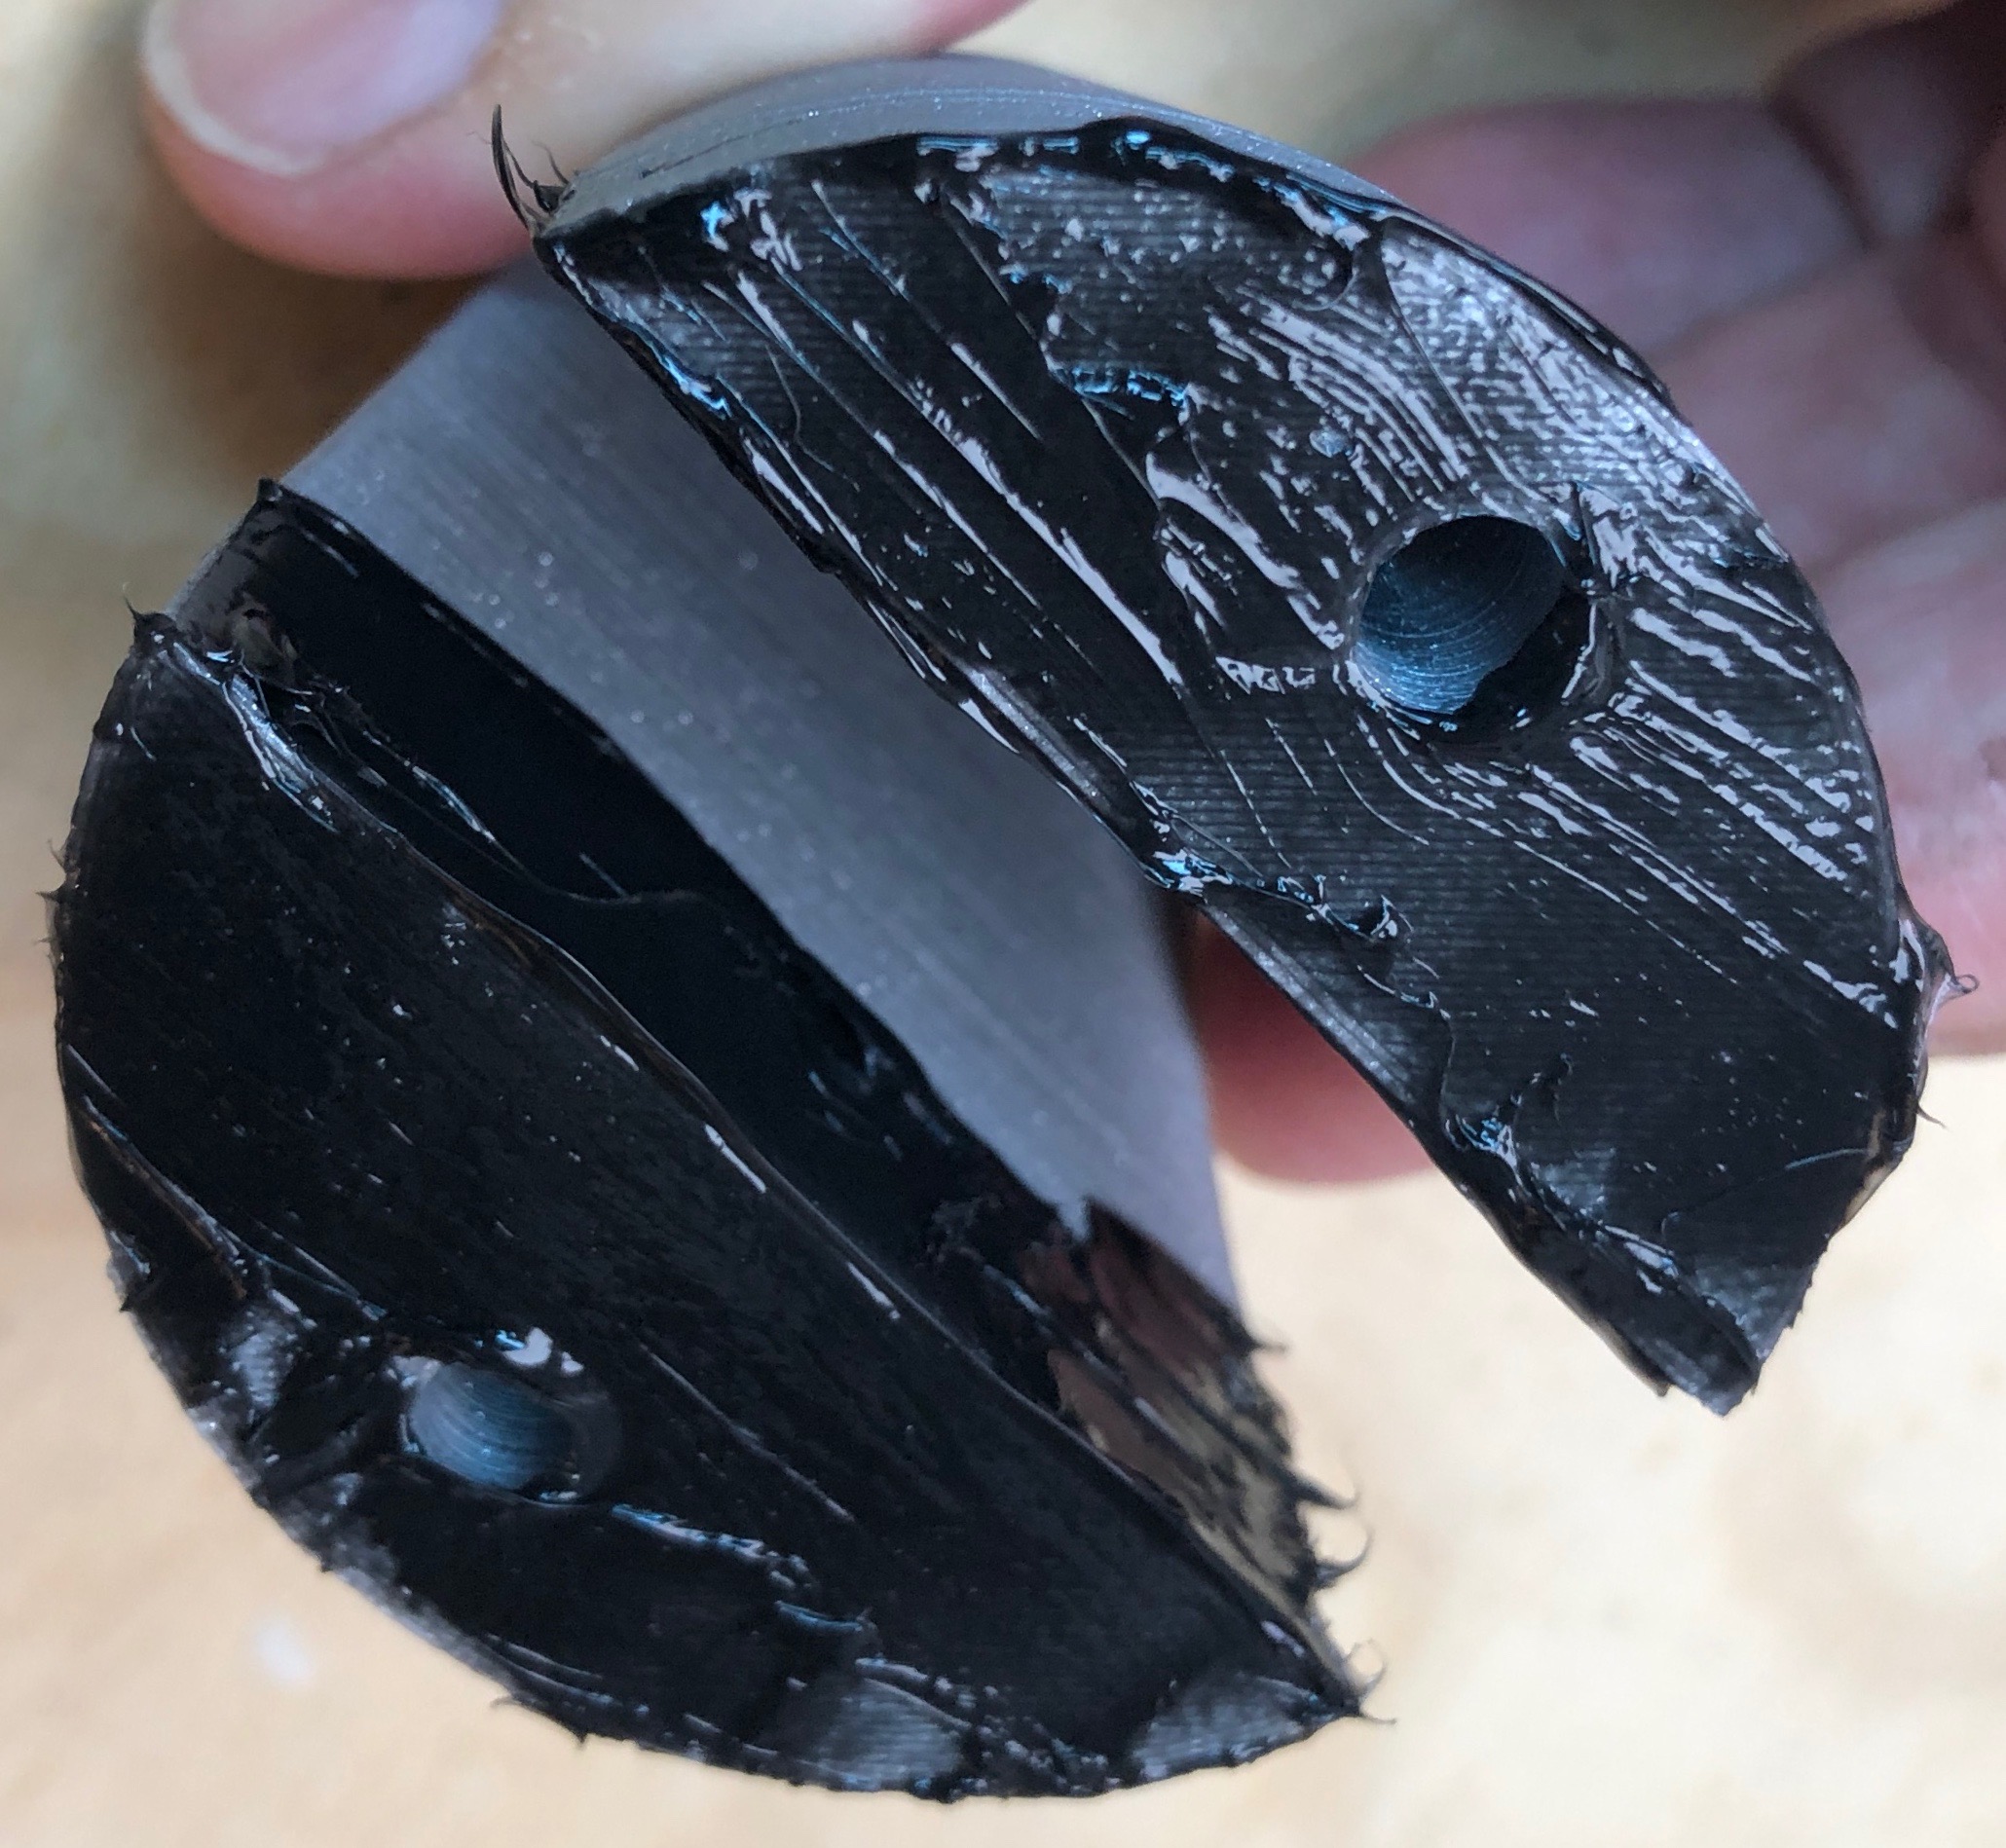
I took a “belt and suspenders” (redundancy) approach when sealing all joints or openings that must keep water out of the drive pod. Where the three wires pass through the rear mast clamp I used silicone on the inside of the clamp (closest to the motor) and Flex Seal Spray on the outside (closest to the mast). I also added a gasket seal to the inside edges of the front and rear mast clamps to help minimize any water intrusion into that area around the mast. When mounting the rear mast clamp onto the motor tube I again used silicone at the very bottom inside of the clamp where the end of the tube beds inside the rear clamp. Then I used two-part epoxy along the last inch of the joint where the rear mast mount ends and the tube begins. Finally, I wrapped this permanent joint with waterproof tape. As you can see I am using multiple sealants/adhesives in multiple areas for each joint to triple-ensure there are no leaks. NOTE: None of this has been water-tested yet.
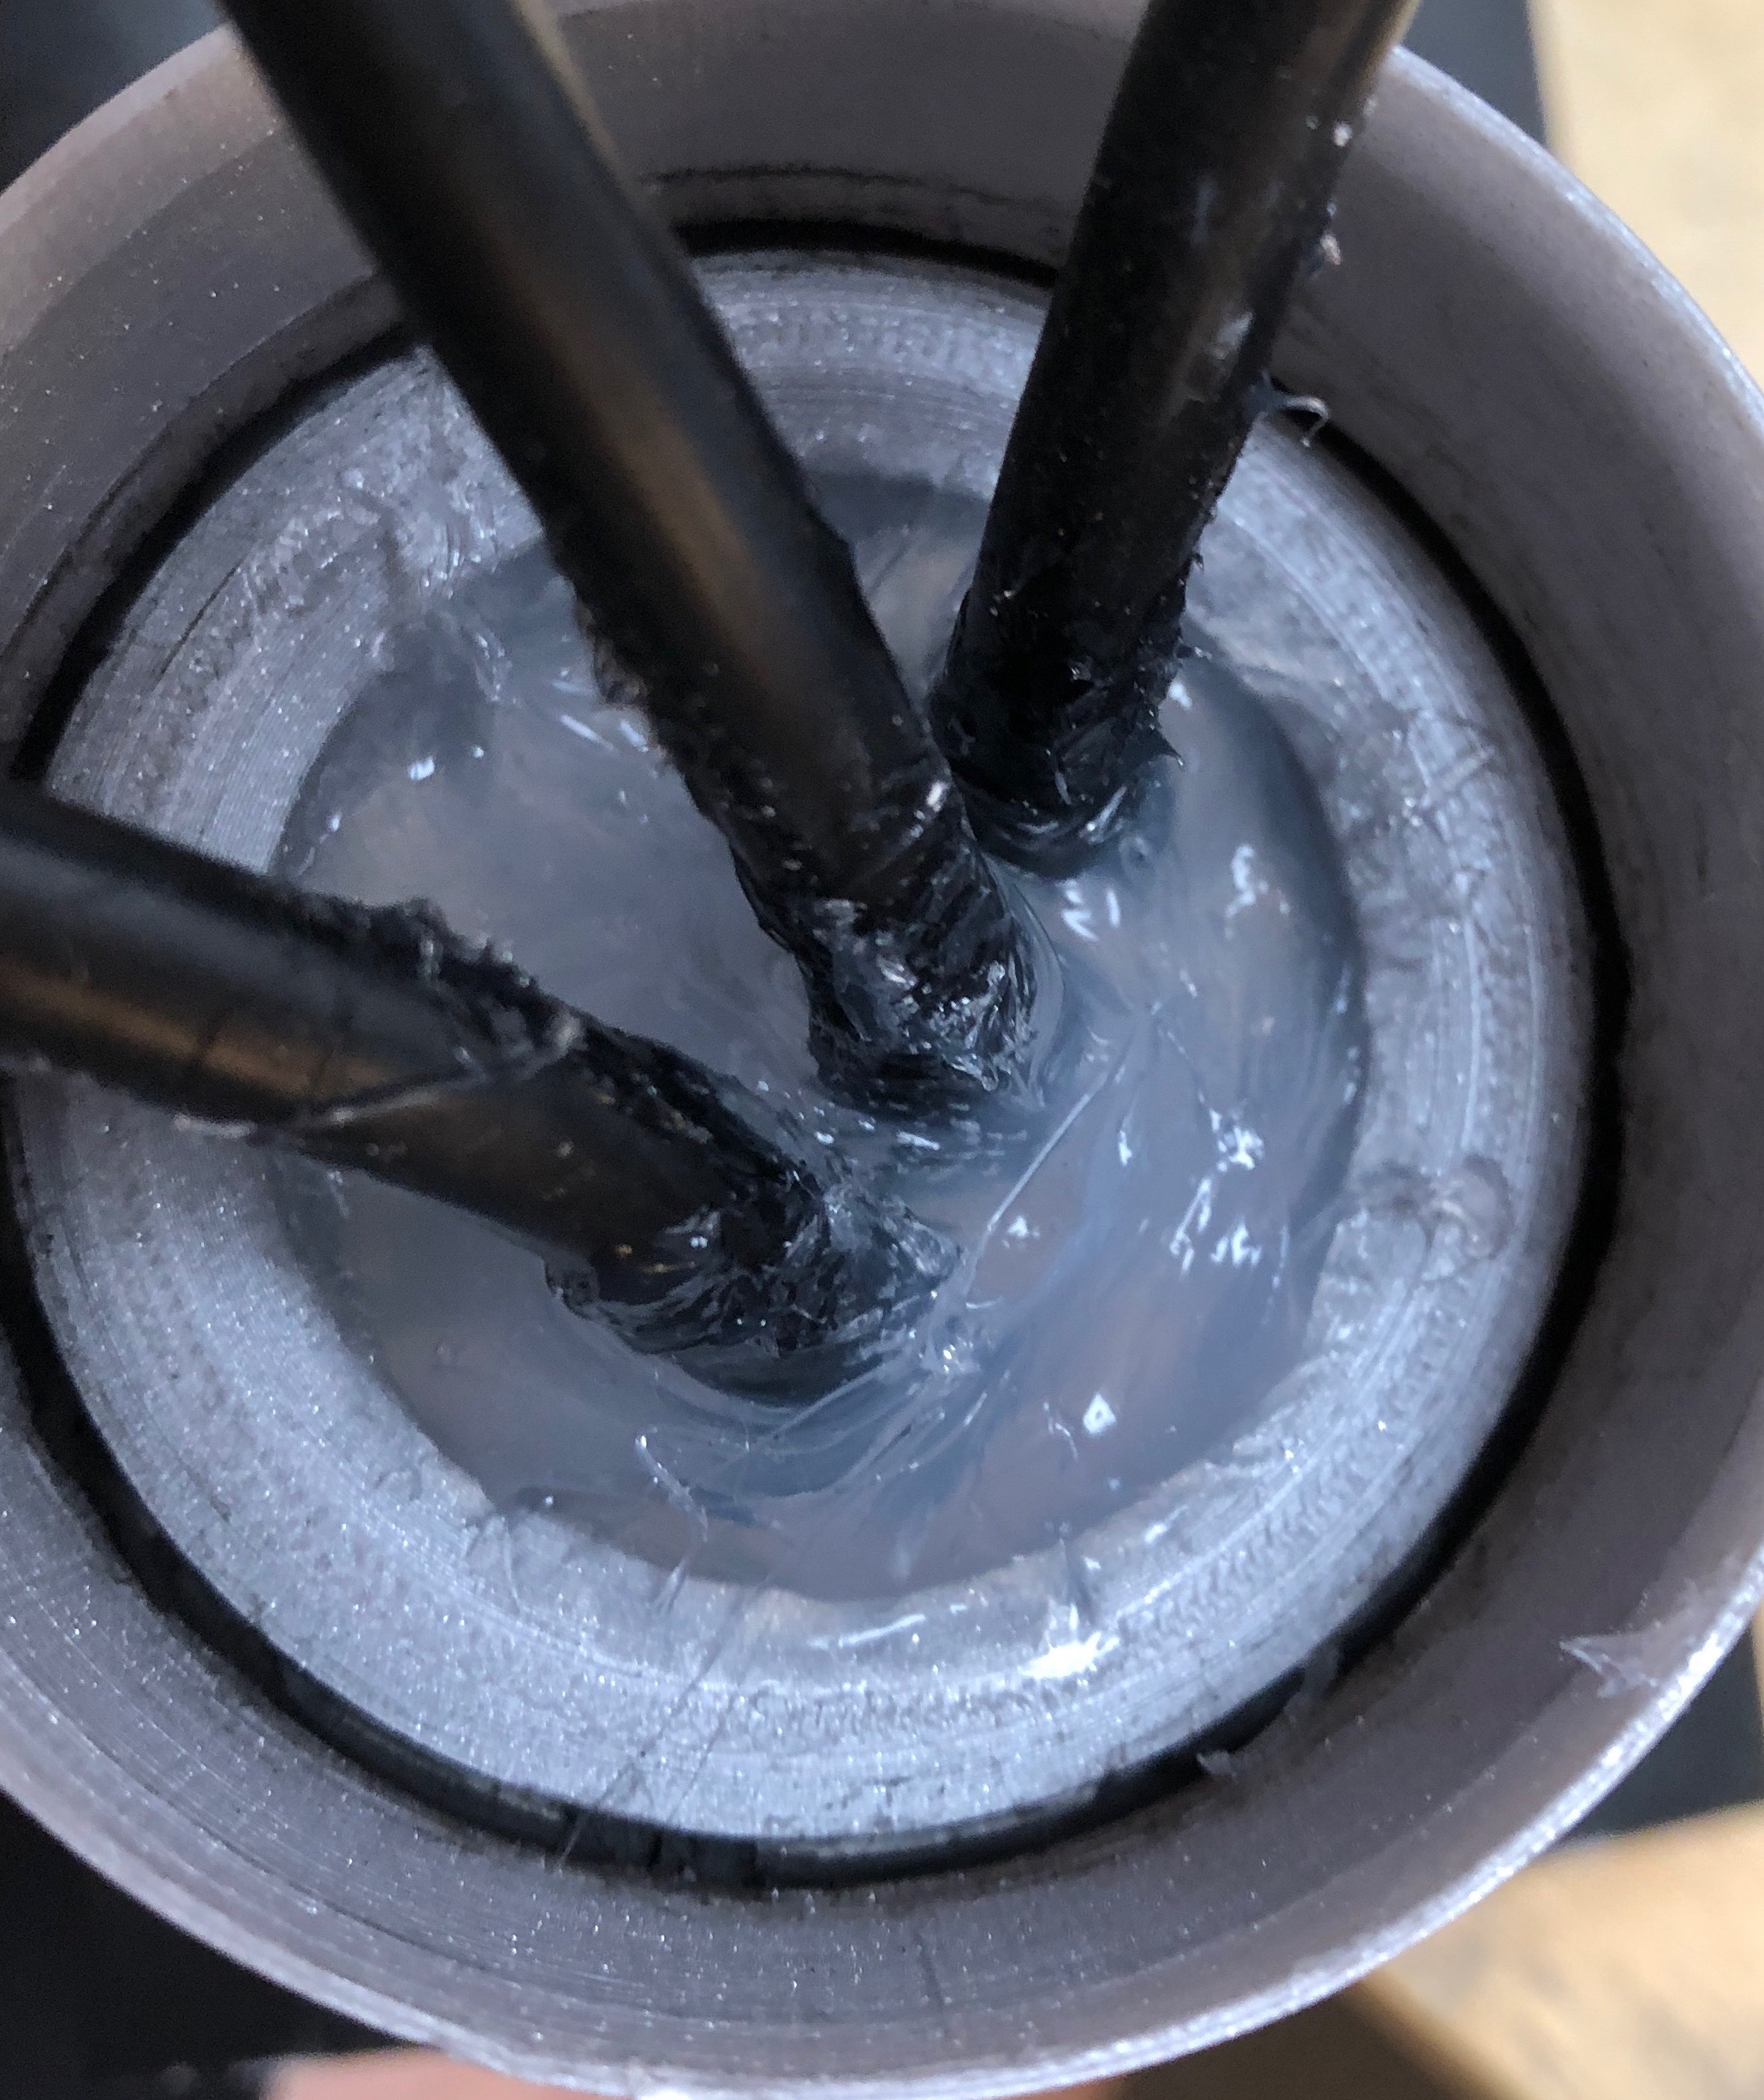
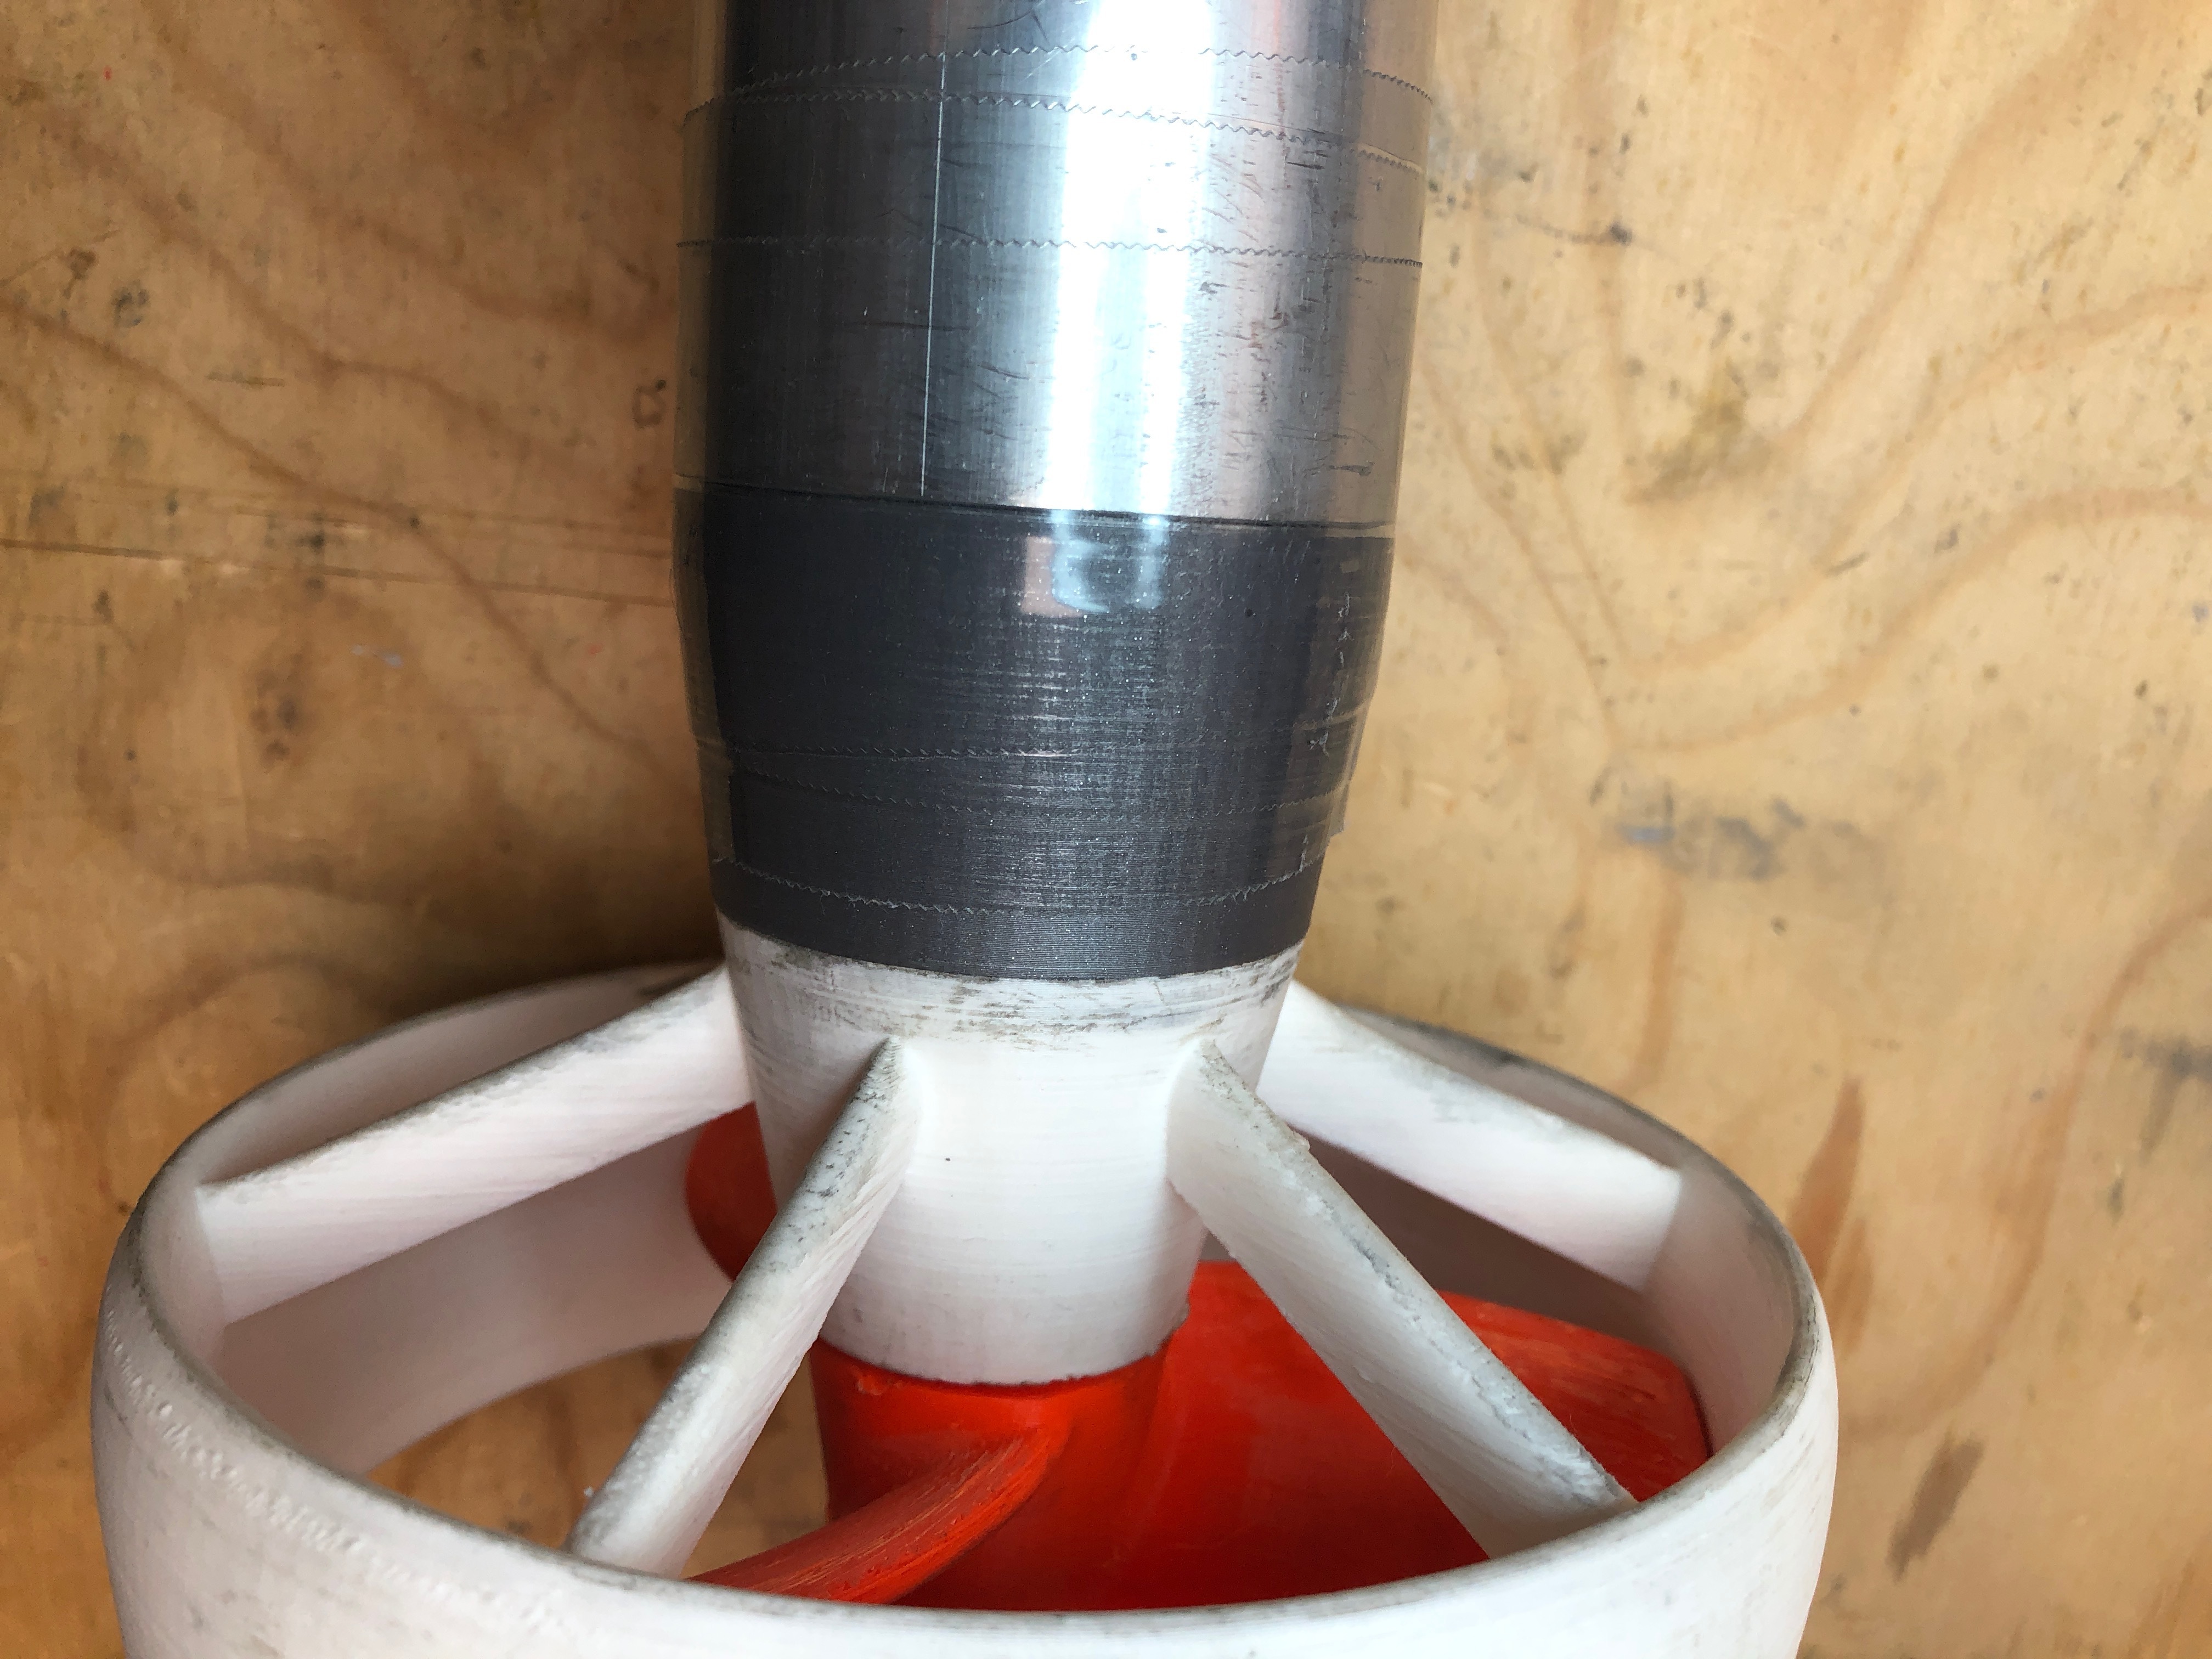
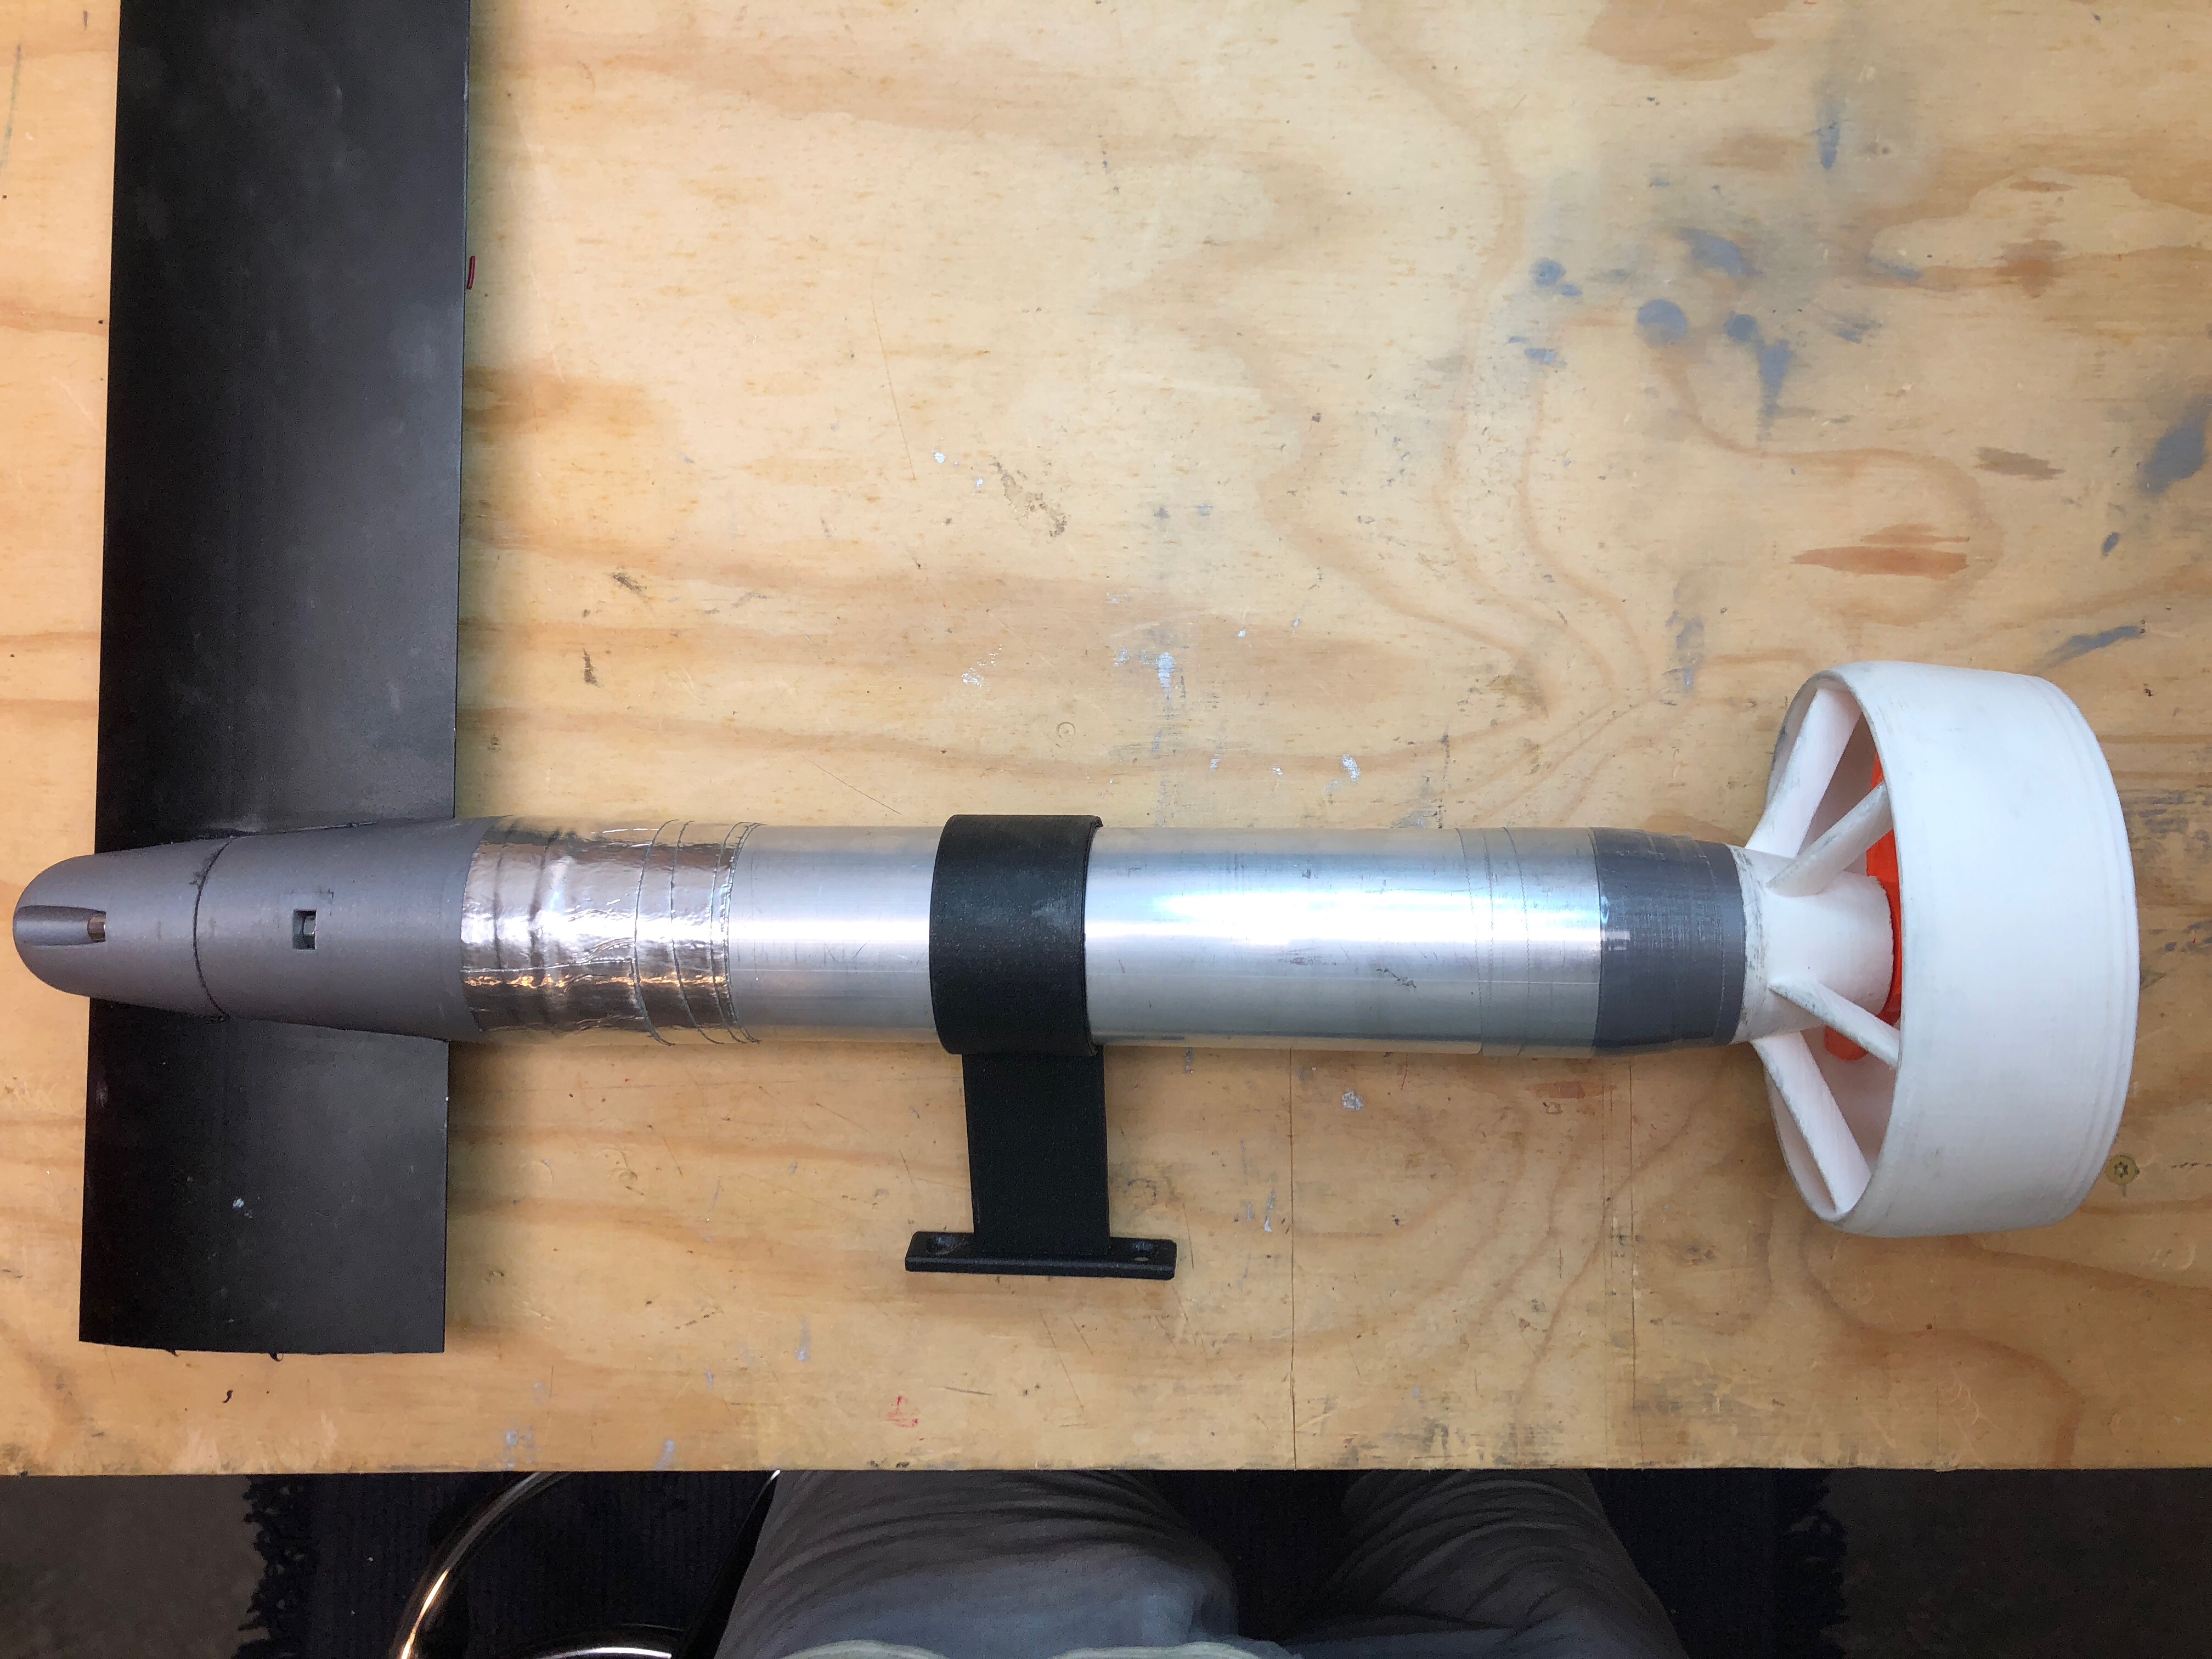
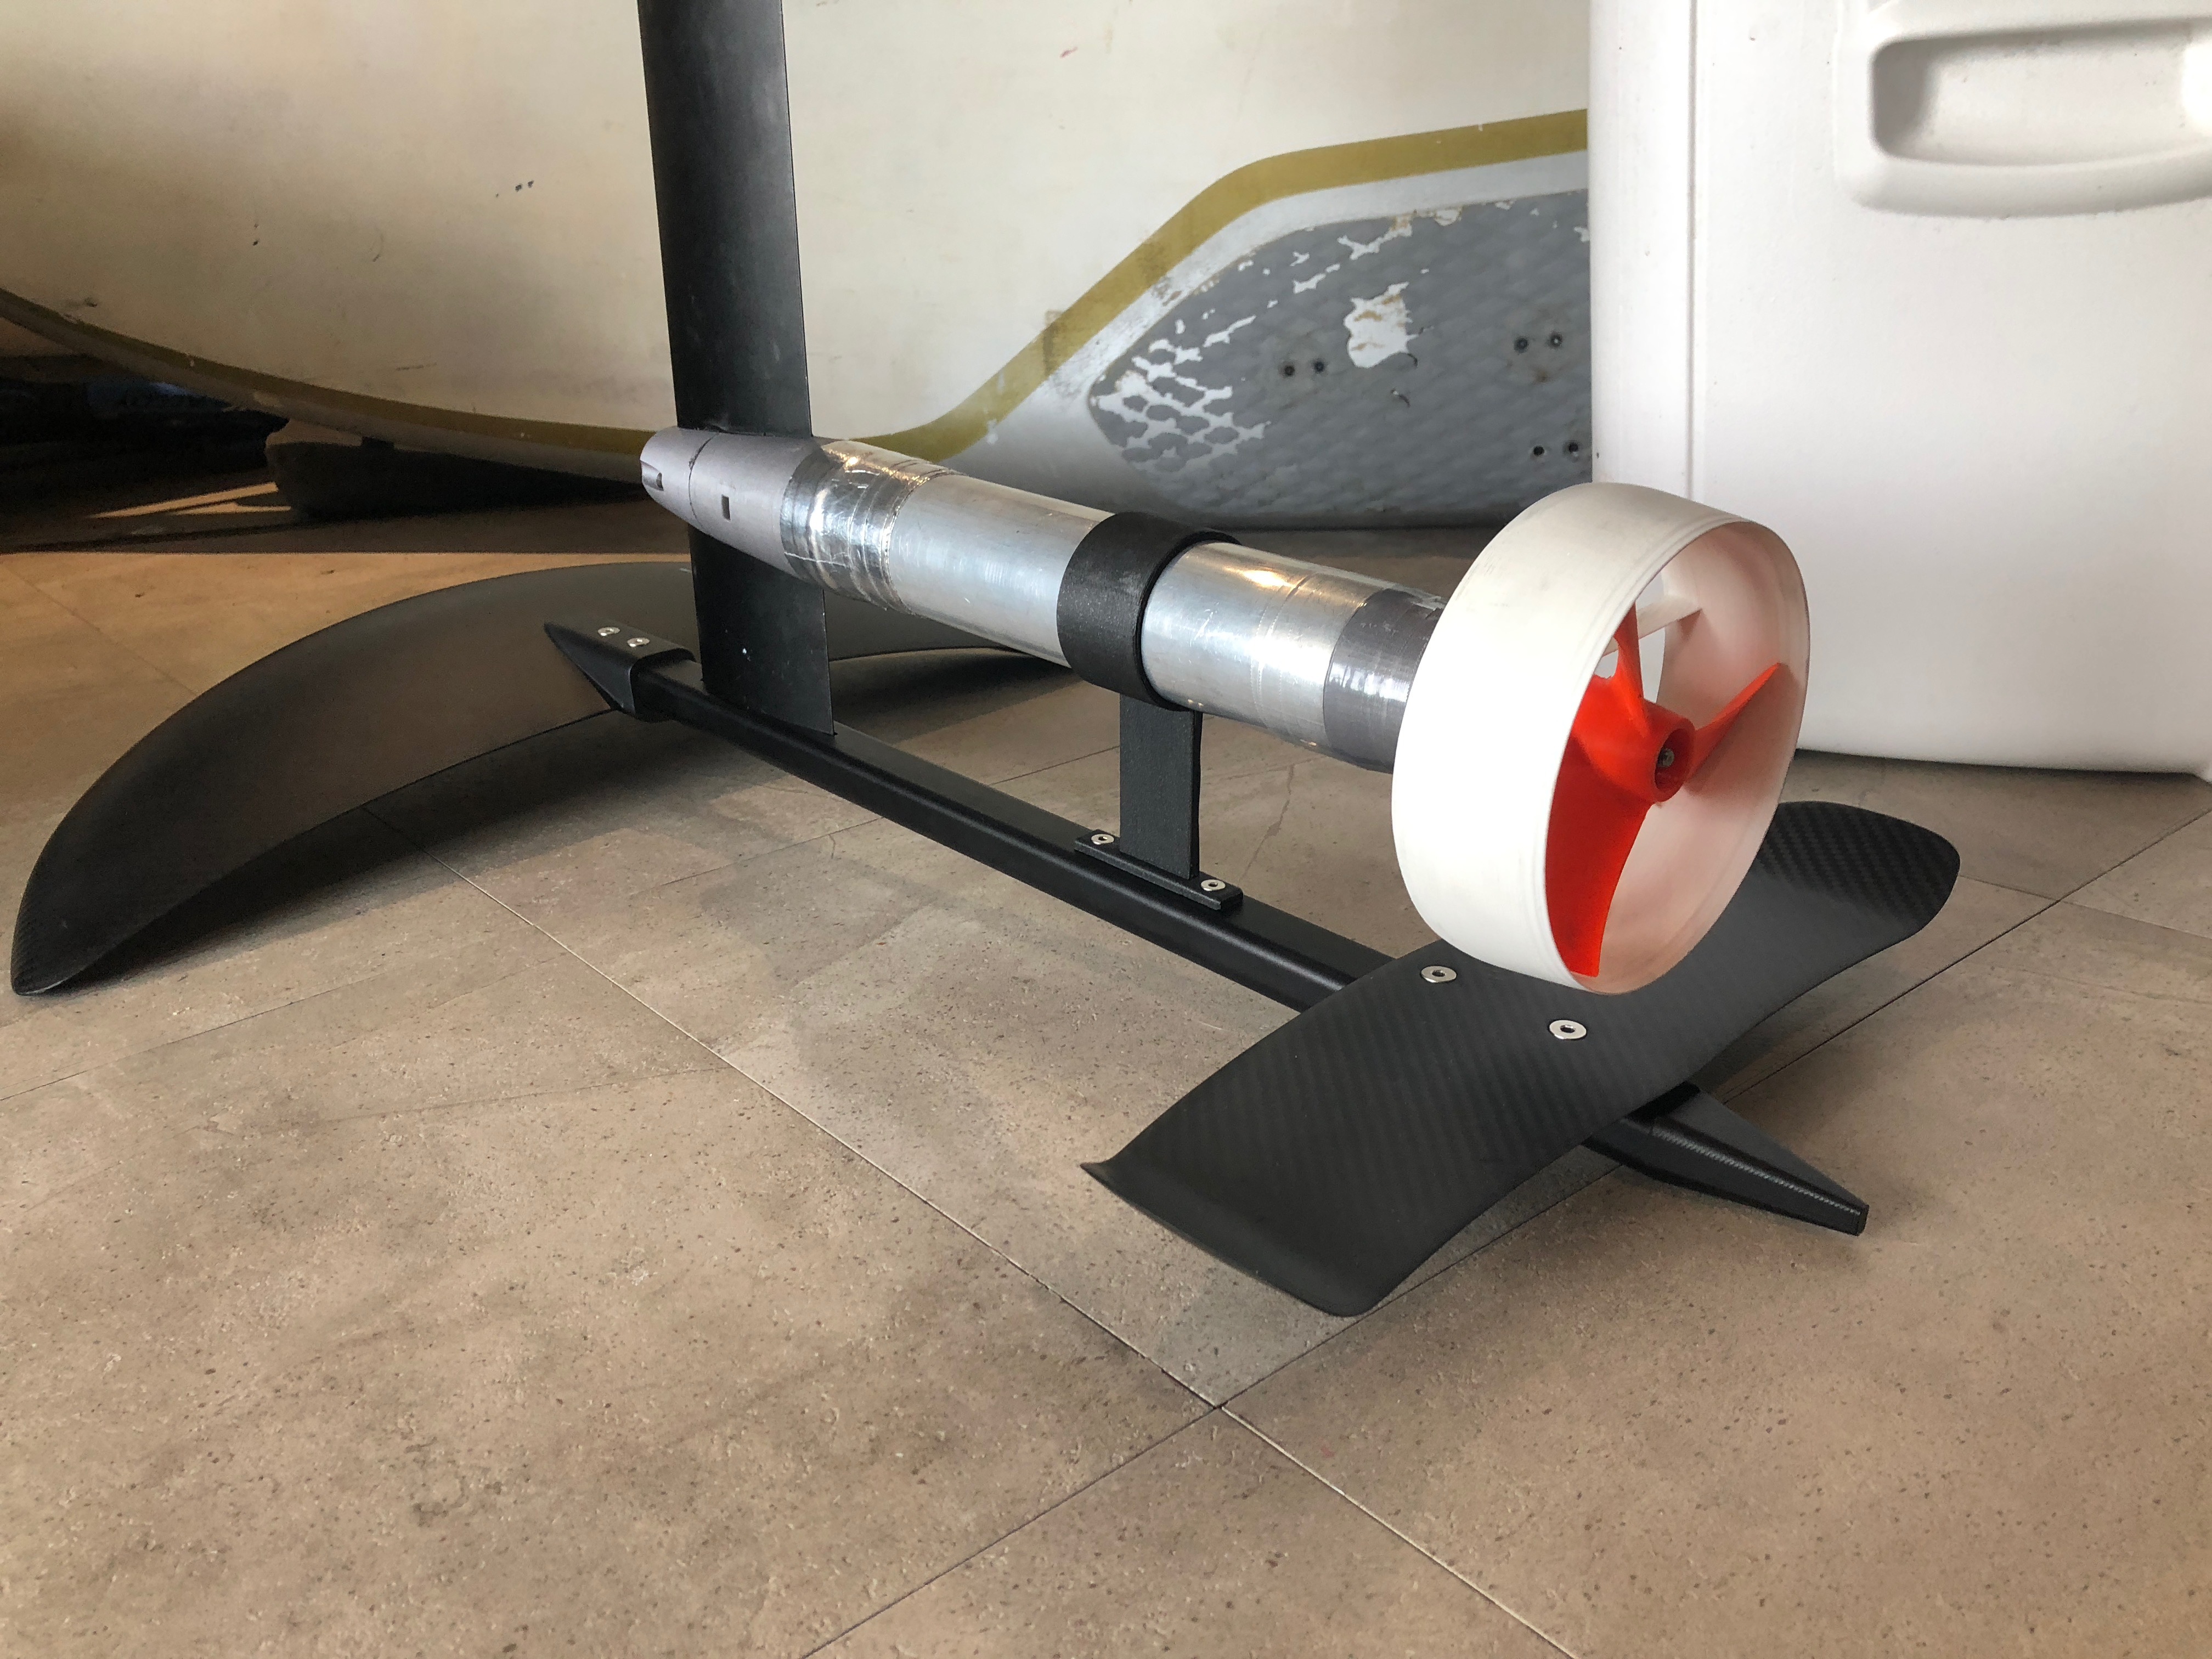
I elected to use enough wire to allow the motor to slide all the way out of the tube and retained the banana connectors so the drive unit could be detached. This requires a longer tube to house the longer wires. I made sure the banana connectors fit very tightly and then sealed them in heat shrink tubing which can be easily removed if I need to disconnect. Note the black drive pod support that mounts to the foil fuselage.
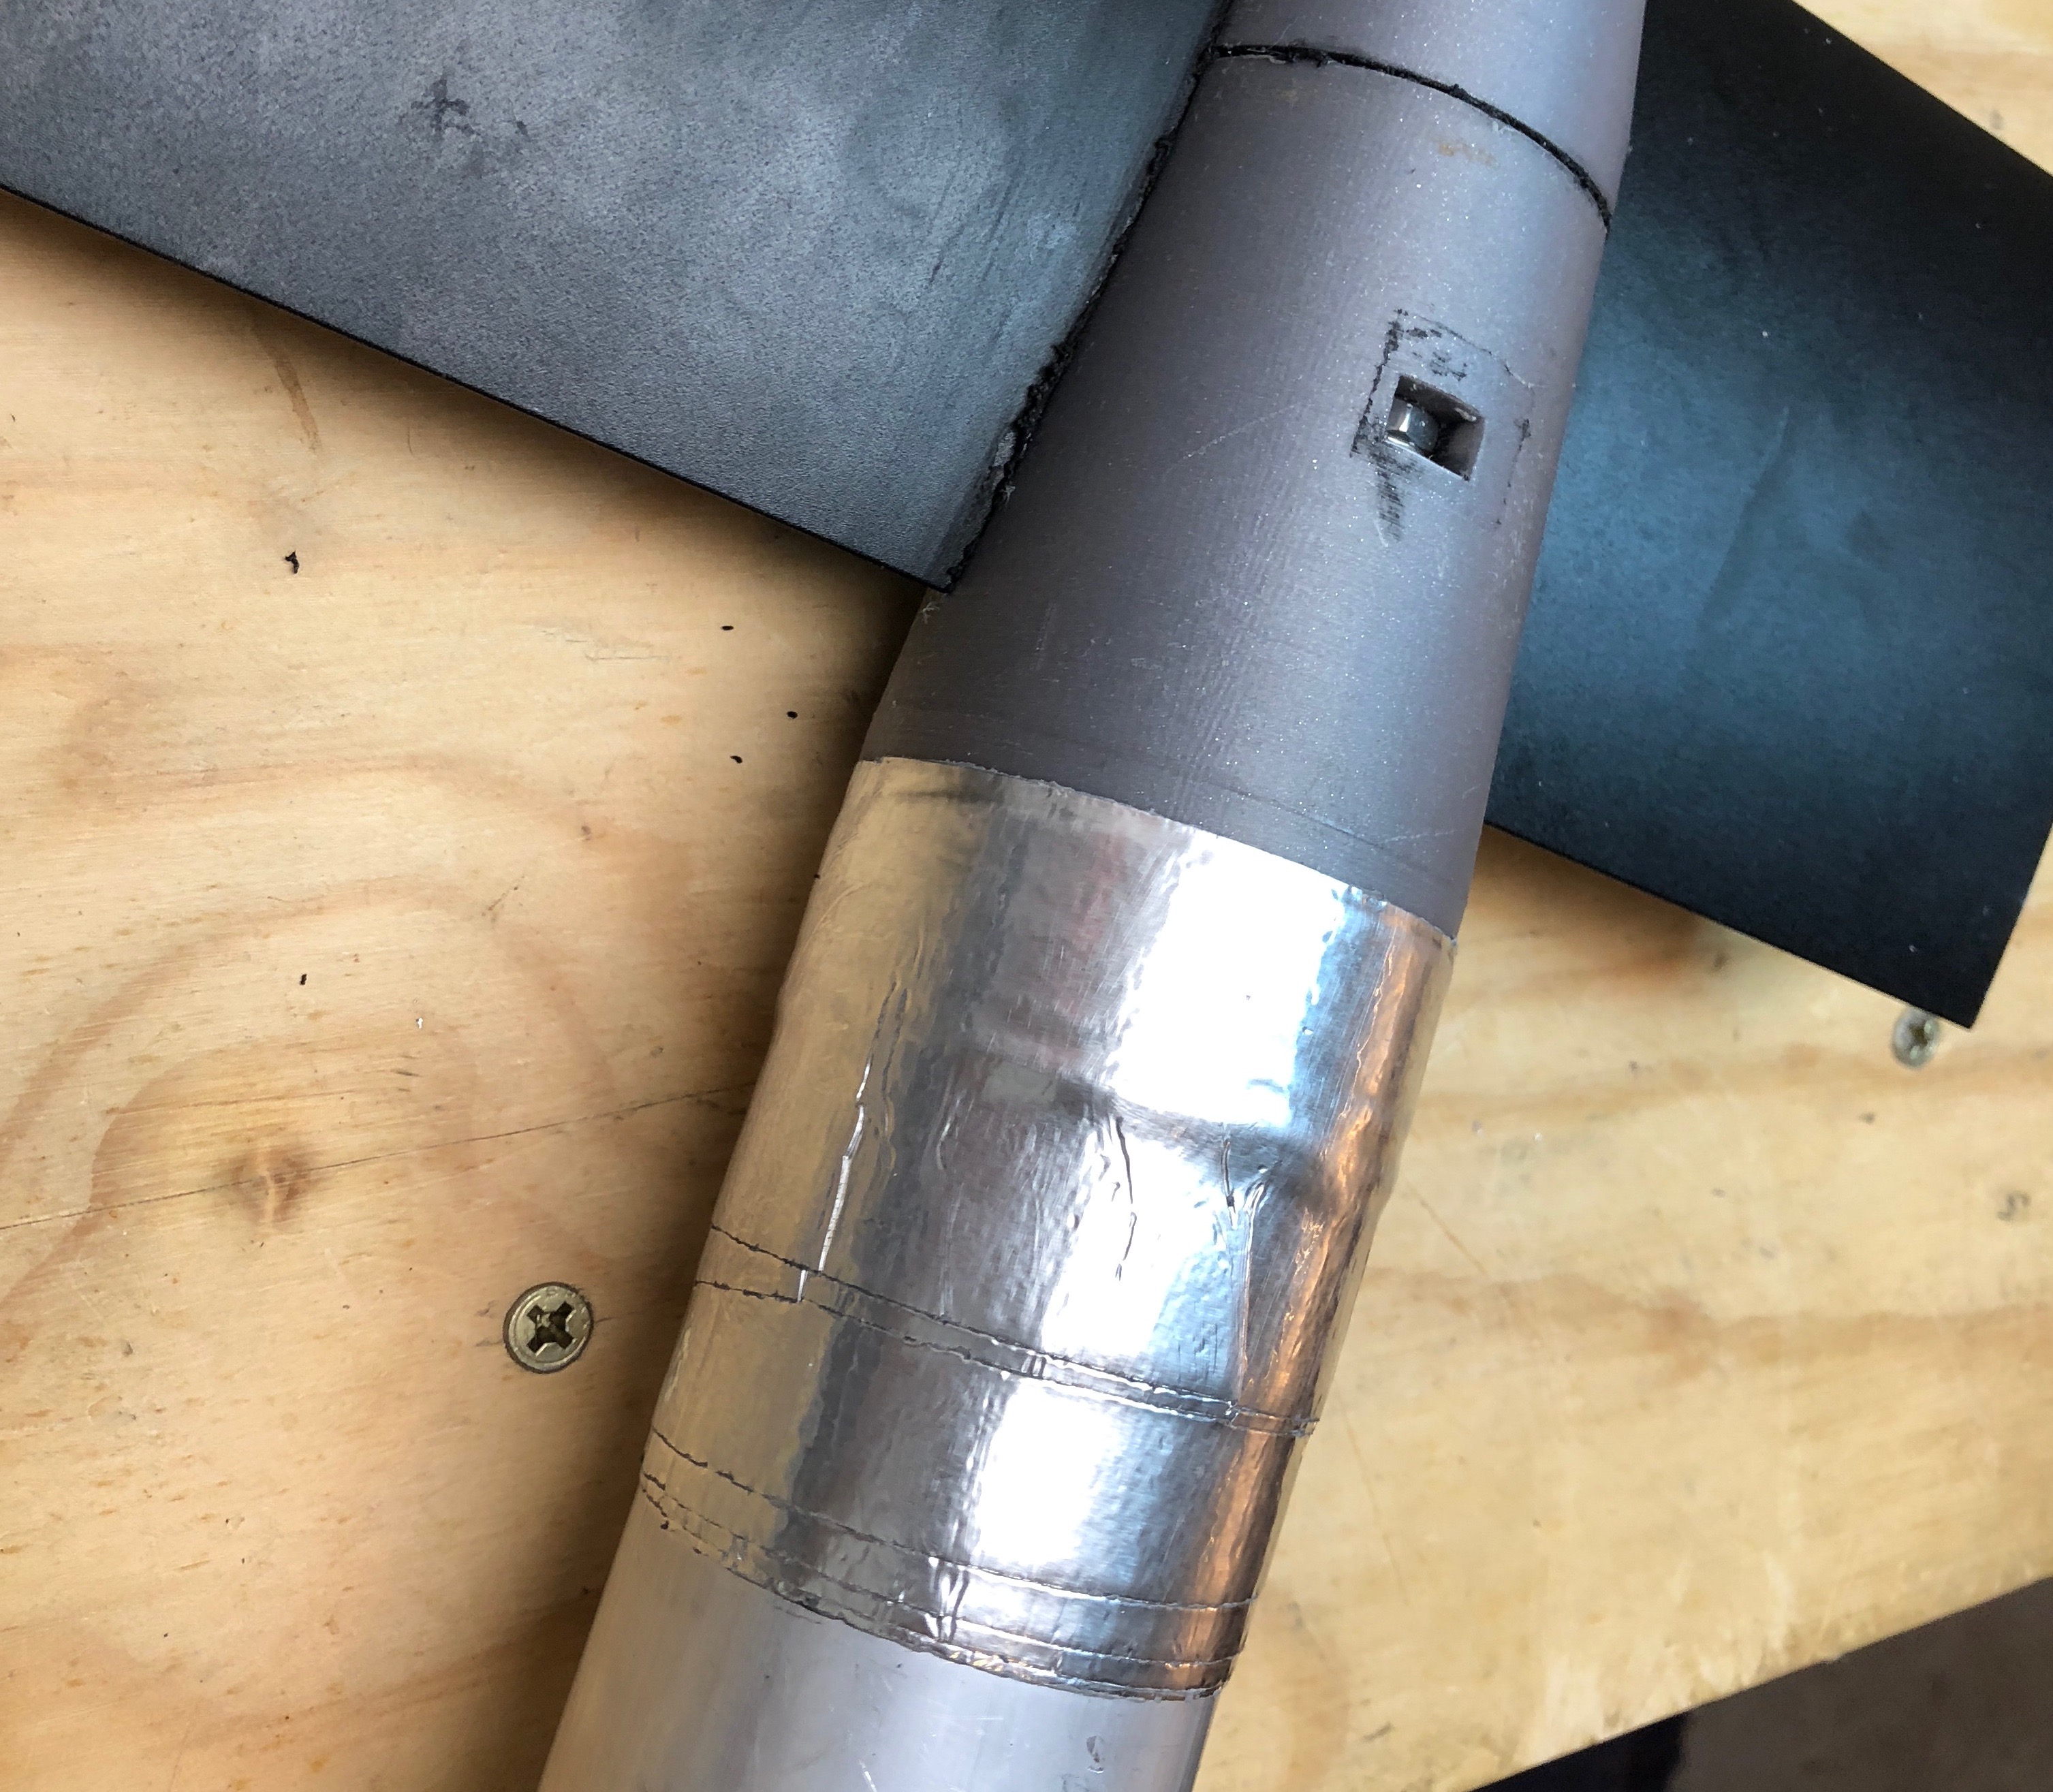
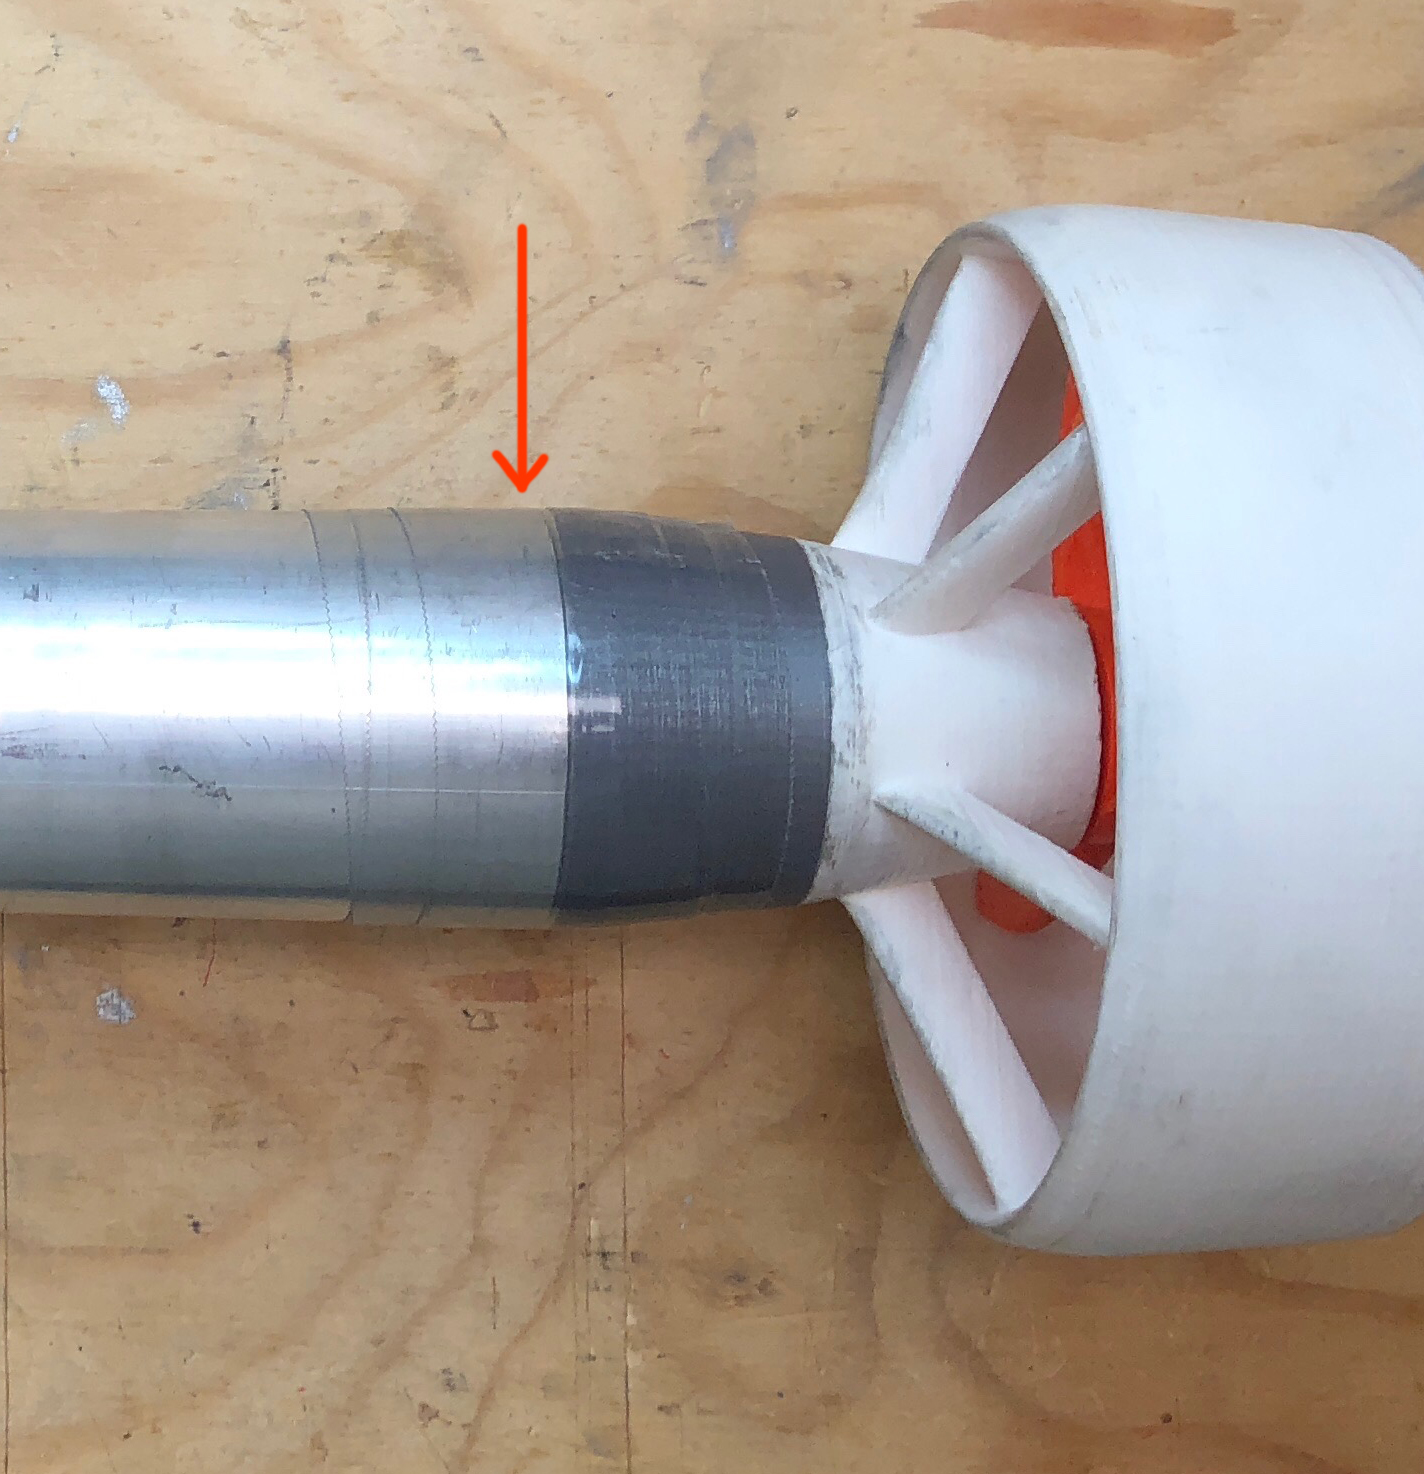
Don’t forget the 2 clamping screws at the very end of the aluminium tube after the second o-ring to not have the sealmount rotating in the tube, and the 2 others in the duct. Very important.
I think you may have some bonding issues. If you greased the seals, there is no doubt there will be grease inside the tube which means nothing will bond to the tube.
Also, as Fabien has pointed out, you need to lock up the whole unit with crews to stop it rotating.
Thanks @Fabien_n and @Jezza. PacificMeister said in a POST that tape worked for him so I wasn’t sure if I needed the screws or not. But I am all about redundancy so should probably add them. My sealmount is PLA. How did you hold the screws firmly in place? As for the grease I only used it at the prop end of the tube where the O-rings are so there is no bonding substance at that end – except for the tape which is only extra protection above and beyond the two O-rings. That end is made to be removable.
personally I put that
http://eshop-simaf.com/fr/insert-pose-a-chaud/474-insert-a-frapper-laiton-m3-x-65-serplast-quantite-sachet-20.html
3’03
")
Thanks…Those look good. I suppose you would ideally add the hole for them during the design phase rather than drilling it after the part is printed?
My parts are all aluminium and so I threaded all place where screws went.
You should be able to drill in and then thread the hole if you printed with 100% infill.
I print in 100% and I pierce after …
the top actually is the aluminum with tapping
I did nothing to seal them. From what I have read here on this forum it is not necessary to do so as long as you are printing solid and your walls are not too thin. Some builders have coated their PLA parts to be sure. See this post for options.
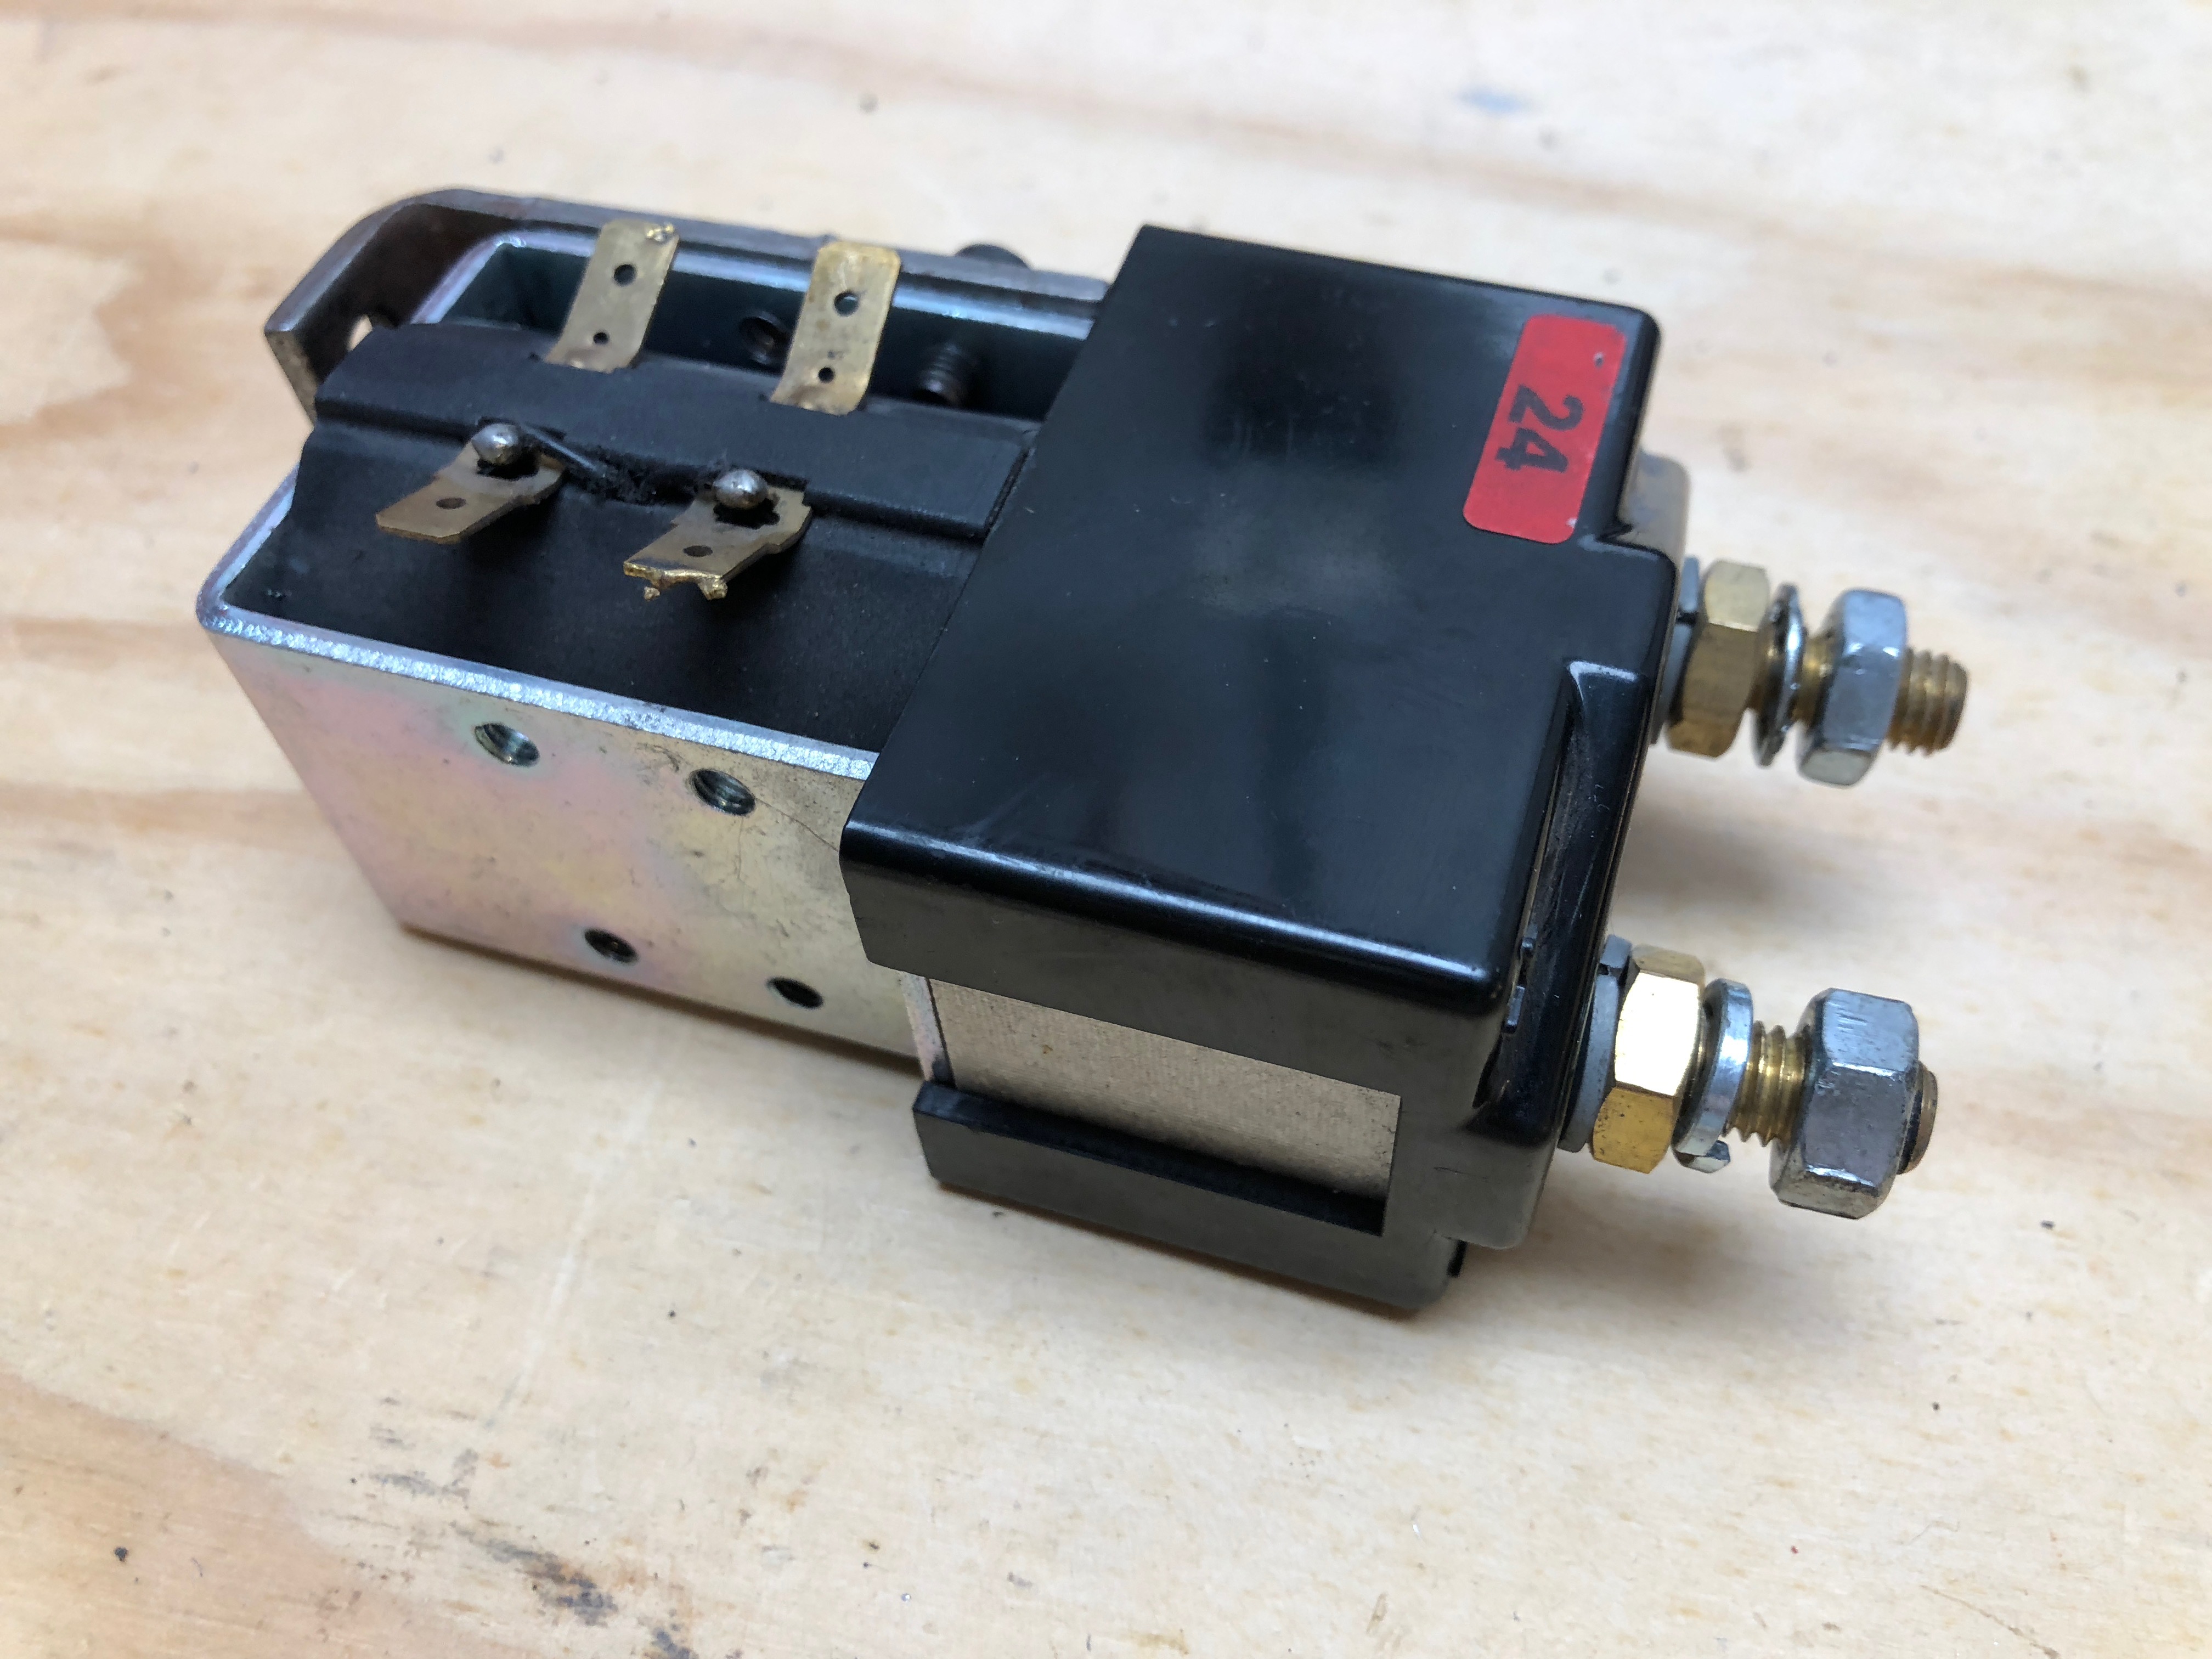
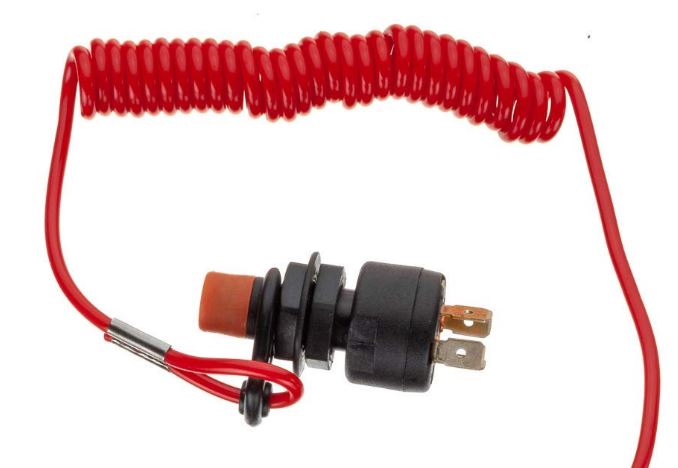
My efoil is ready for water testing. All that I am missing is some form of kill switch. I bought a fork lift relay and tether but have done nothing with it. It is quite bulky and I’m not sure how to manage the spark I assume it will cause. (Can I place a resistor between the two terminals to eliminate the spark?). I do have a 150 amp fuse on the neg side of the battery-to-esc input. Suggestions encouraged!
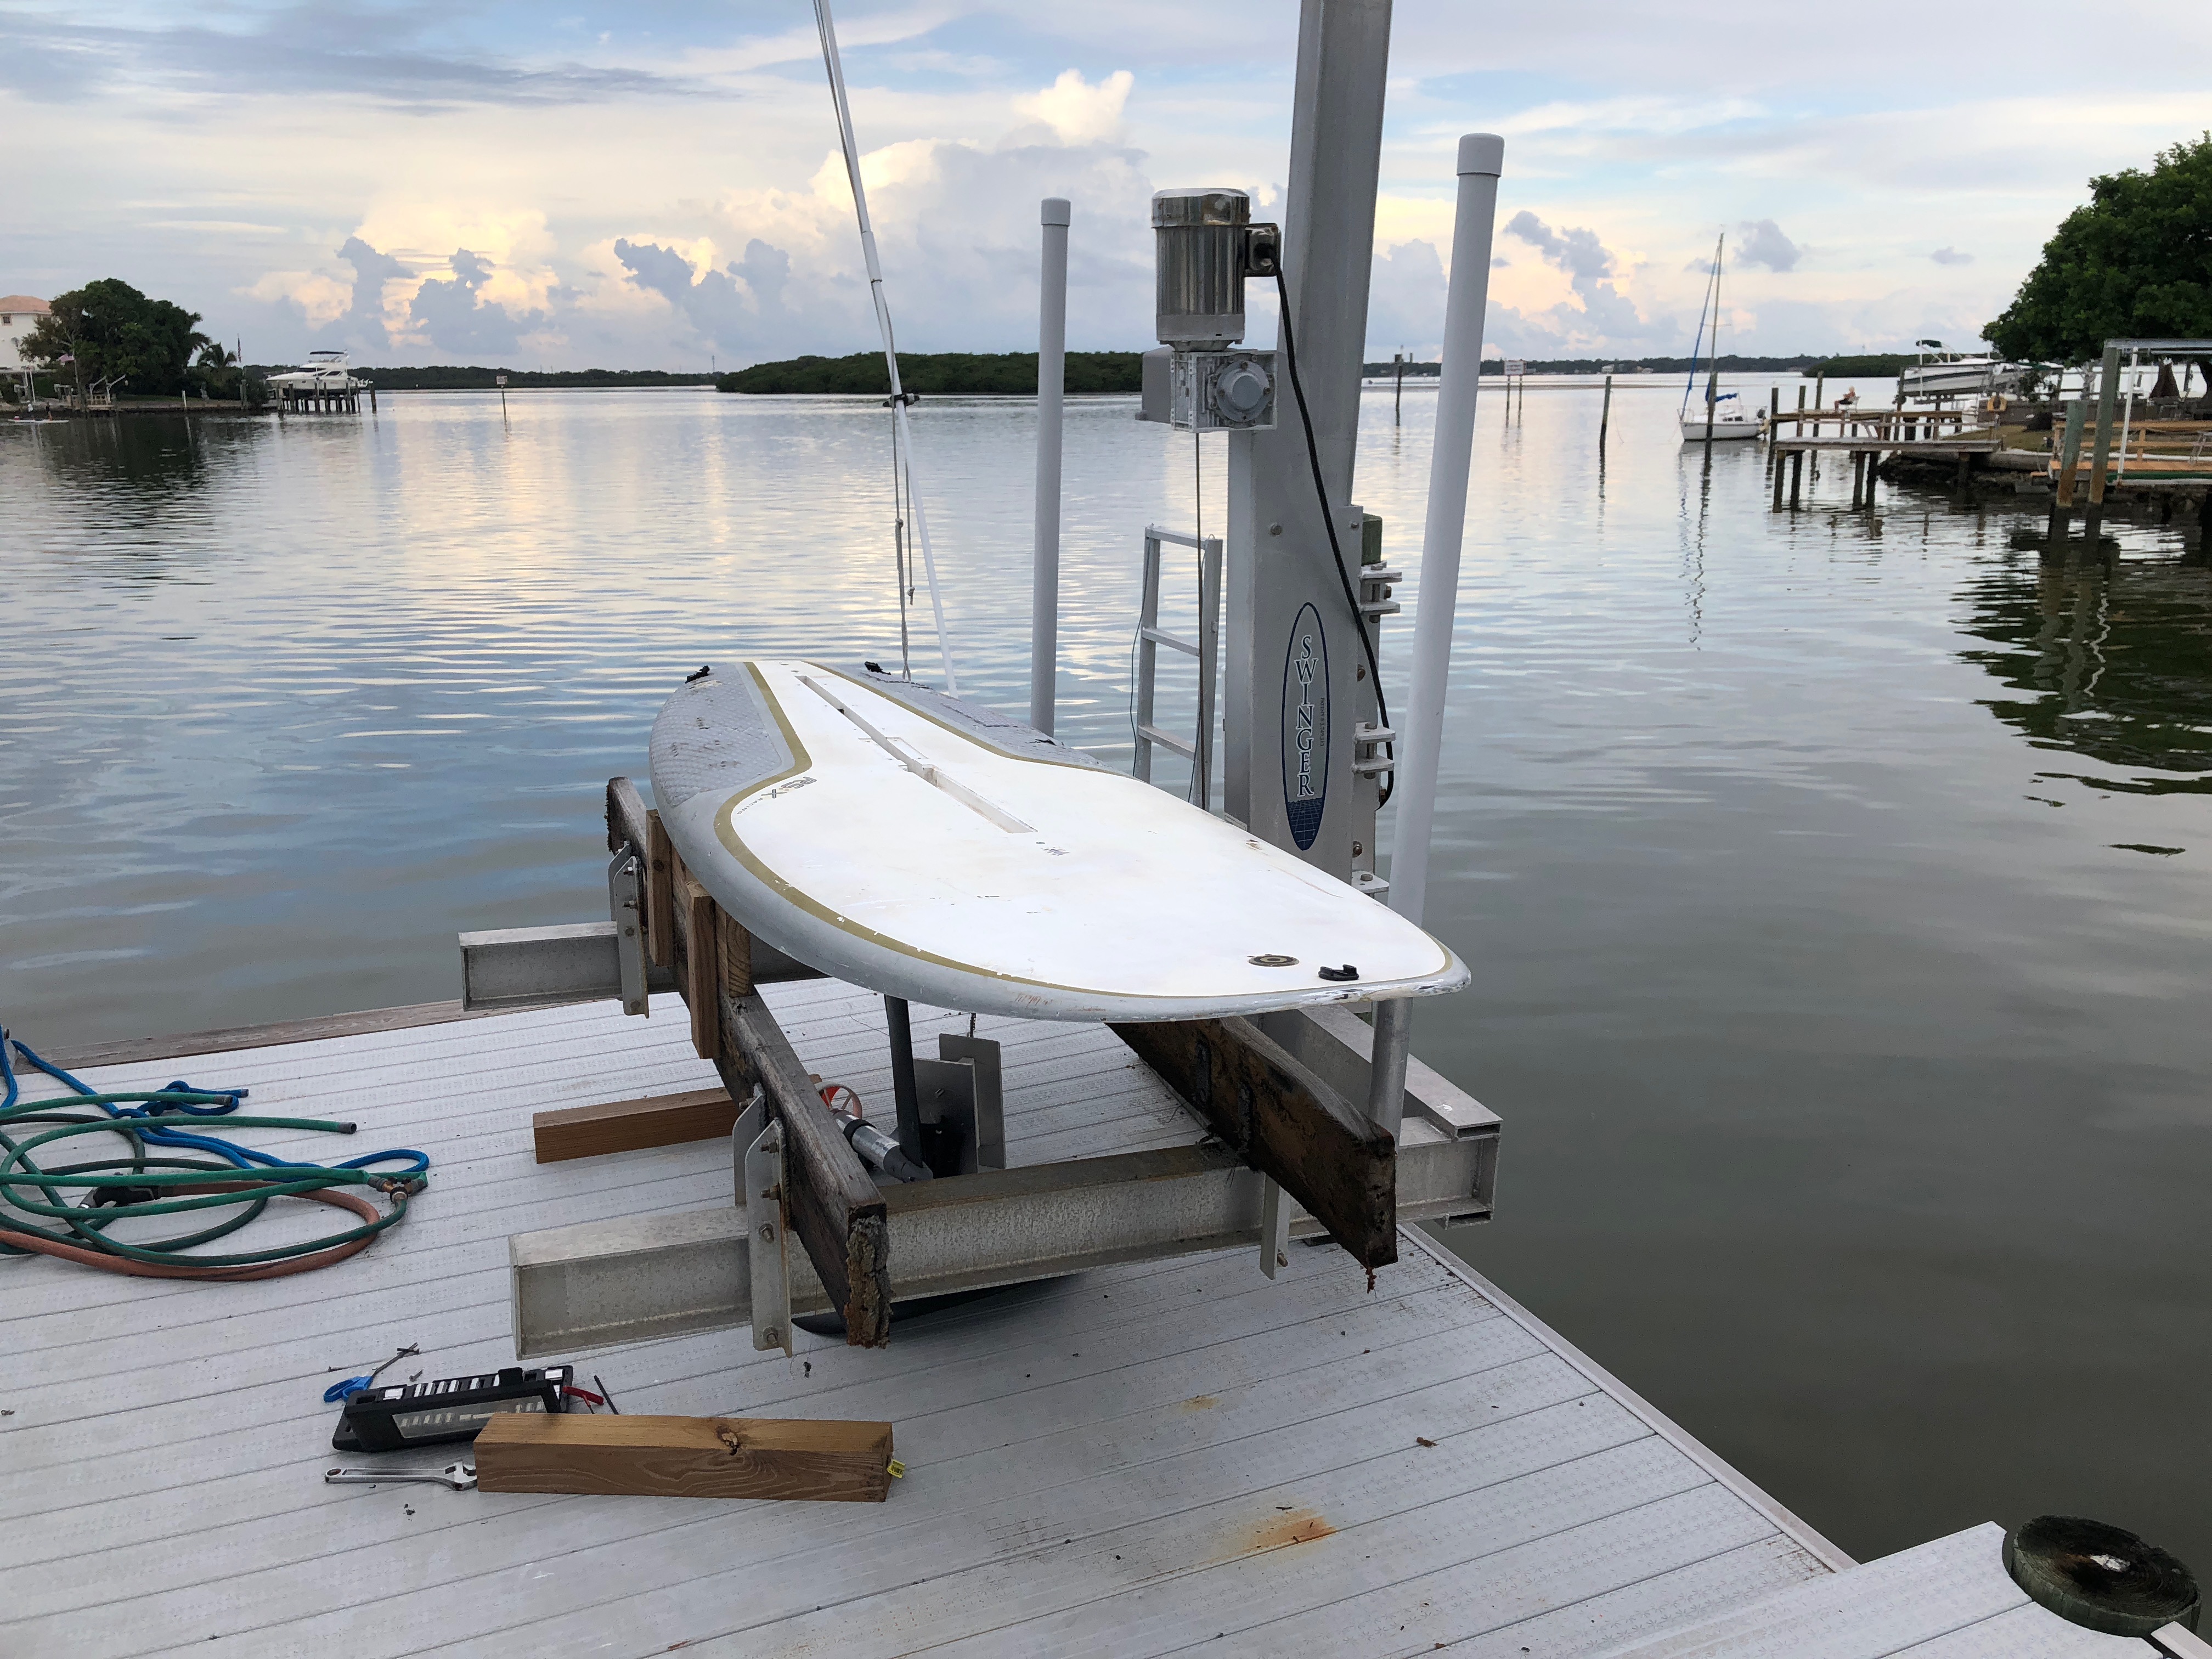
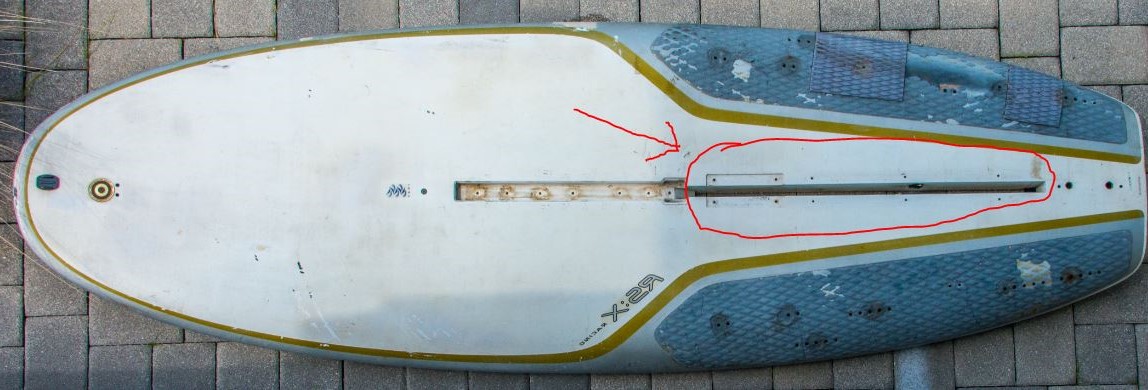
My efoil weighs in at a whopping 67 lbs (30 kilos). That breaks down to 23.4 lbs for the foil, drive pod and foil mount; 10.8 lbs for the electronics box; and 32.6 lbs for the board. Add me at 180 lbs and the take-off weight is 247 lbs (112 kilos). Note my board (NeilPryde RSX) has intentionally been left uncut so that I can do my initial testing and easily paddle home if something fails. Eventually it will likely shed 15 lbs. I have also taken advantage of a thru-hull slot in the board – once the housing for the fold-down dagger board – to create a simple bolt-on mount for the foil. No fiberglass work required. It can easily be slid forward or aft to find just the right balance point.
How do you crimp these things? What tool did you use?
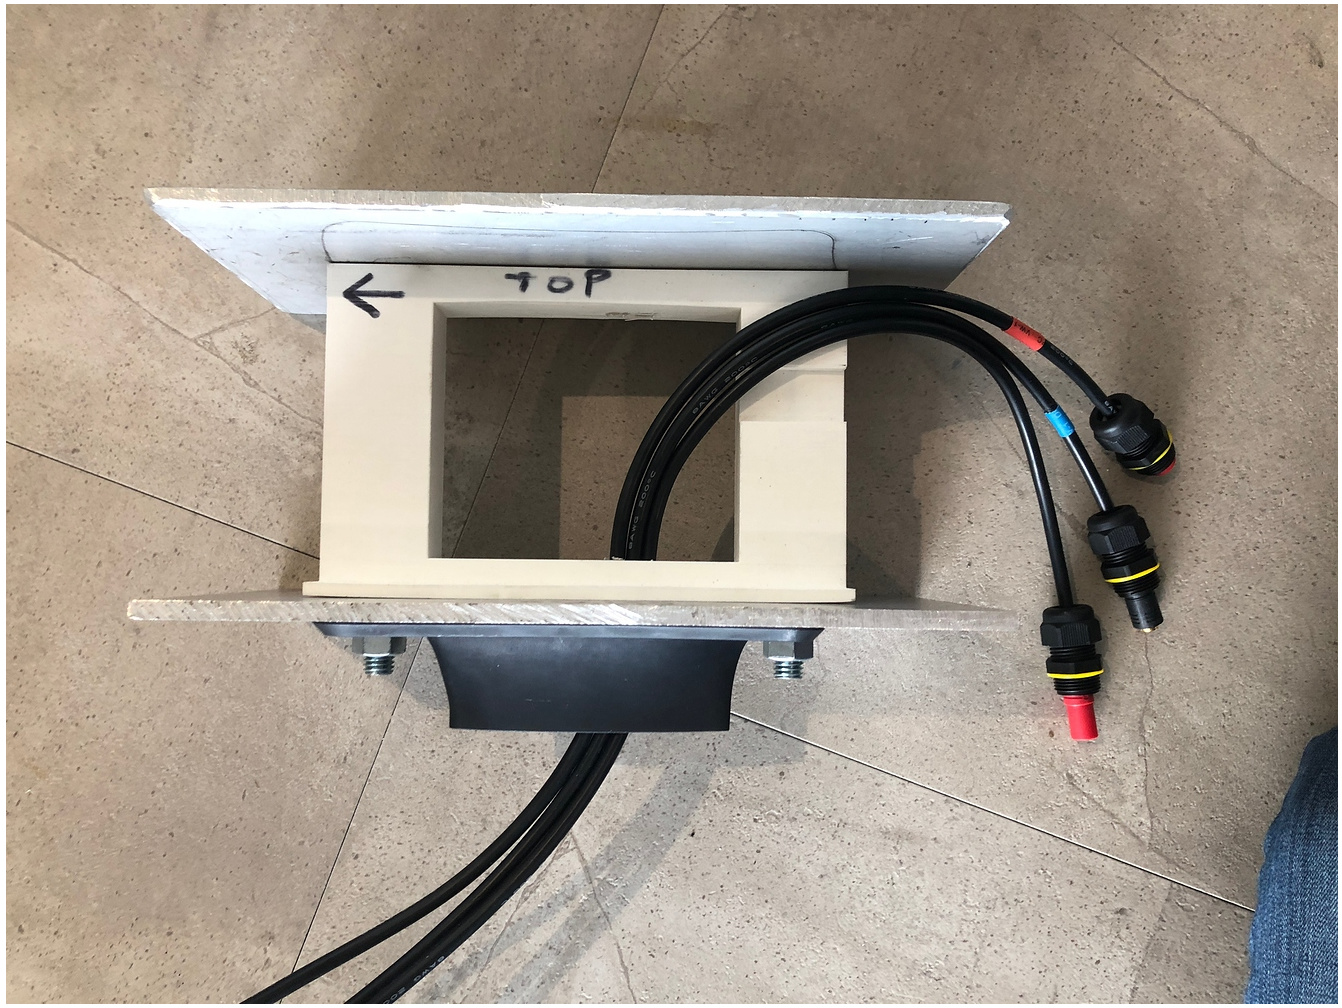
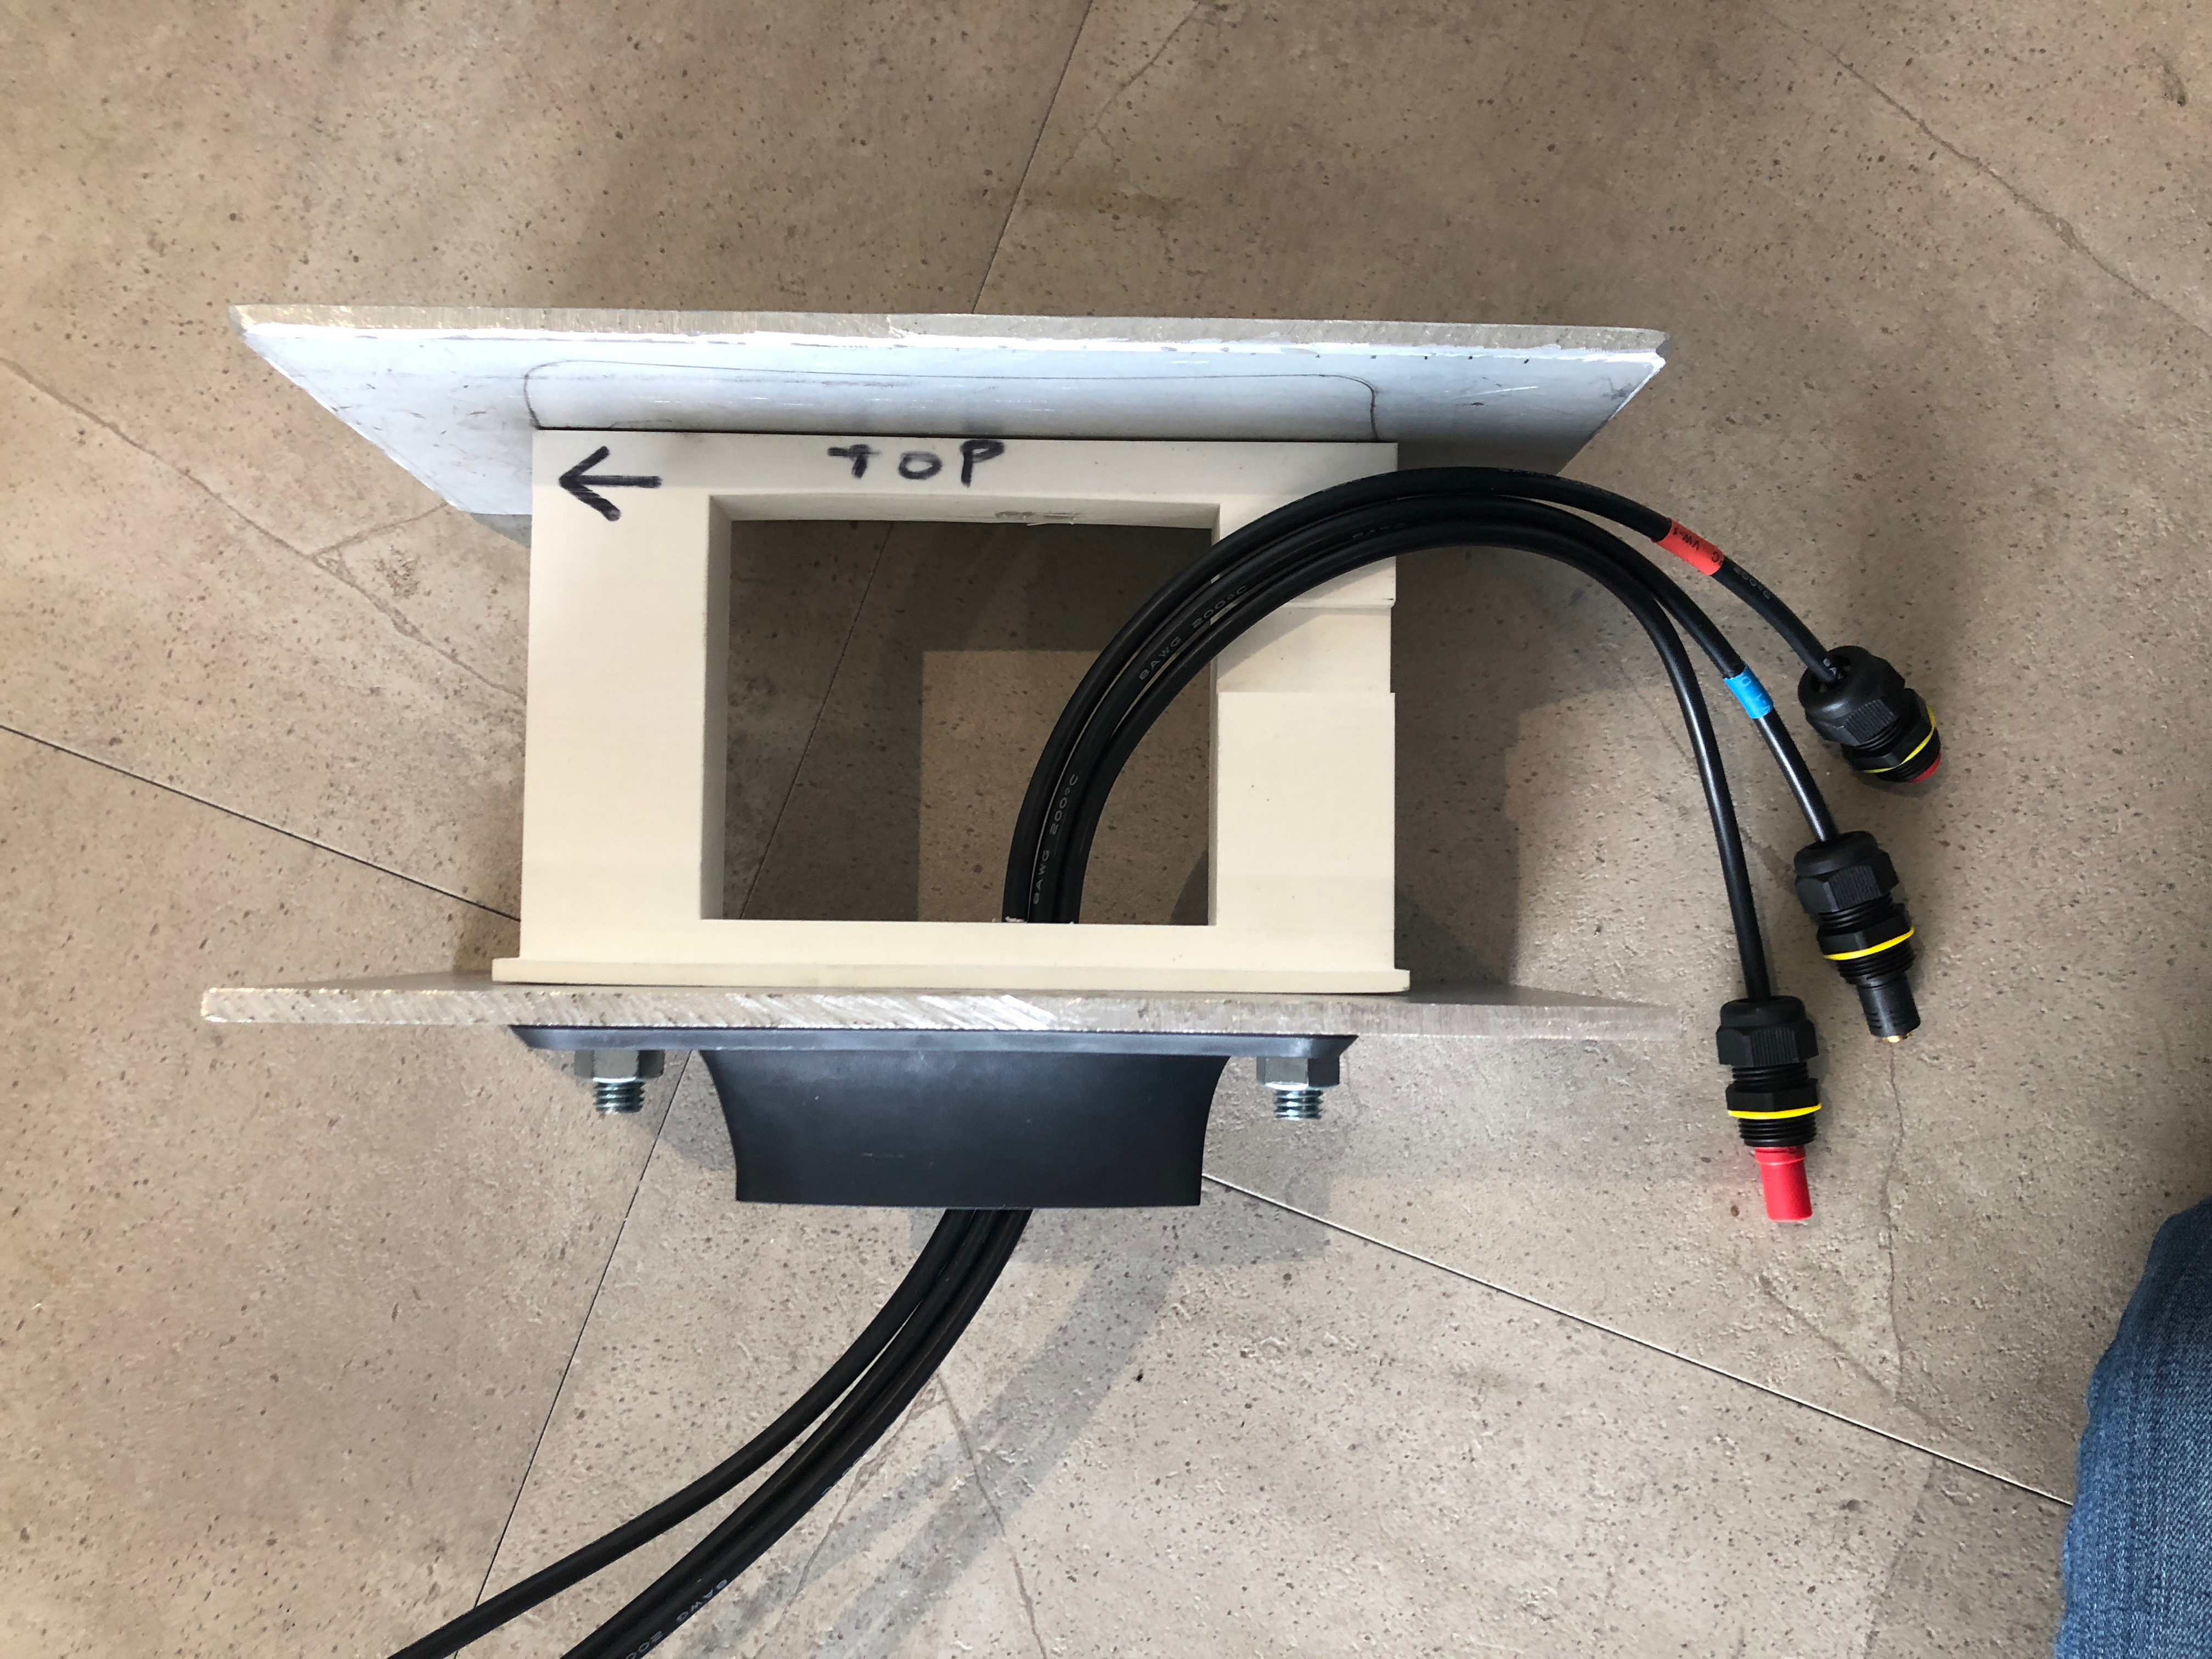
Yup!  Top and bottom plates are 1/8" aluminum with a PLA-printed spacer in between to keep the bolts aligned.
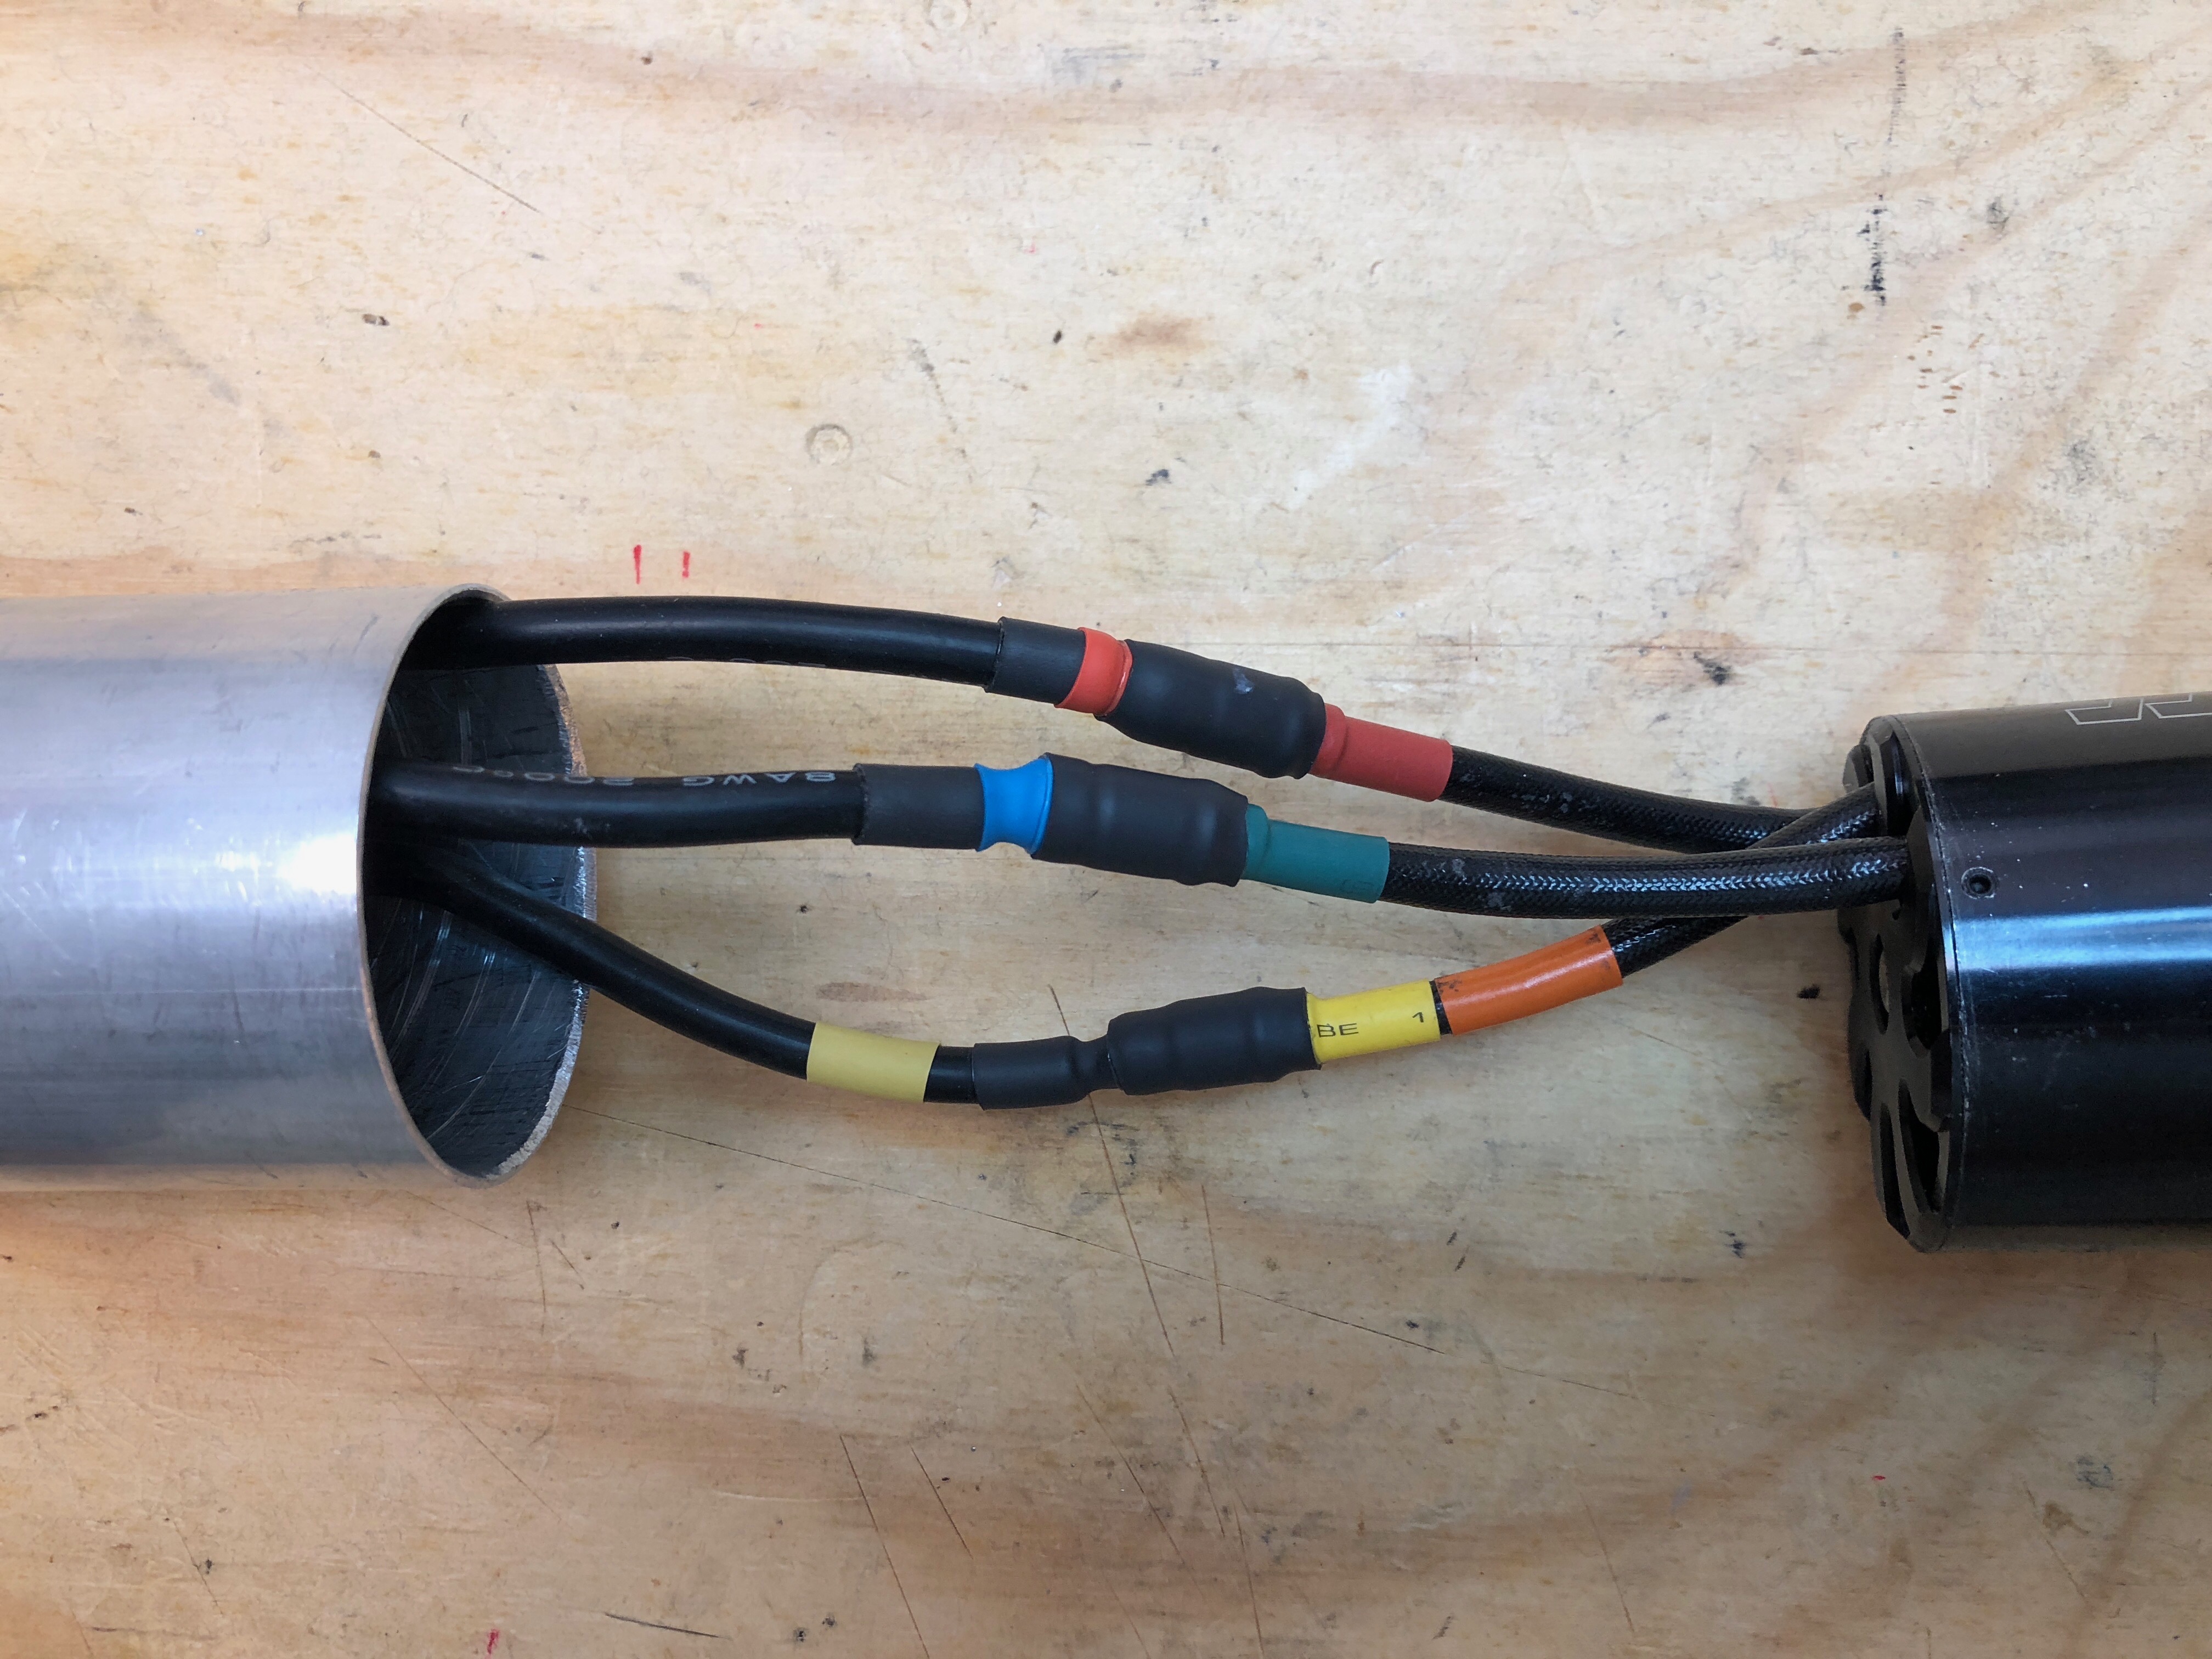
I used a standard crimping like THIS on wires 10 gauge or smaller. On my 8 gauge wires I used this heavier crimp tool recommended by PacificMeister. But many of the connectors are simply thoroughly soldered. On the larger soldered connections I pre-heated them with a small blowtorch before soldering. We’ll see if they hold up.
I would try to get hold of some fiber reinforced foam plates (made for marine enviroment). Or just use marine plywood (perhaps with fiberglass on top/bottom). That would make your setup a lot lighter
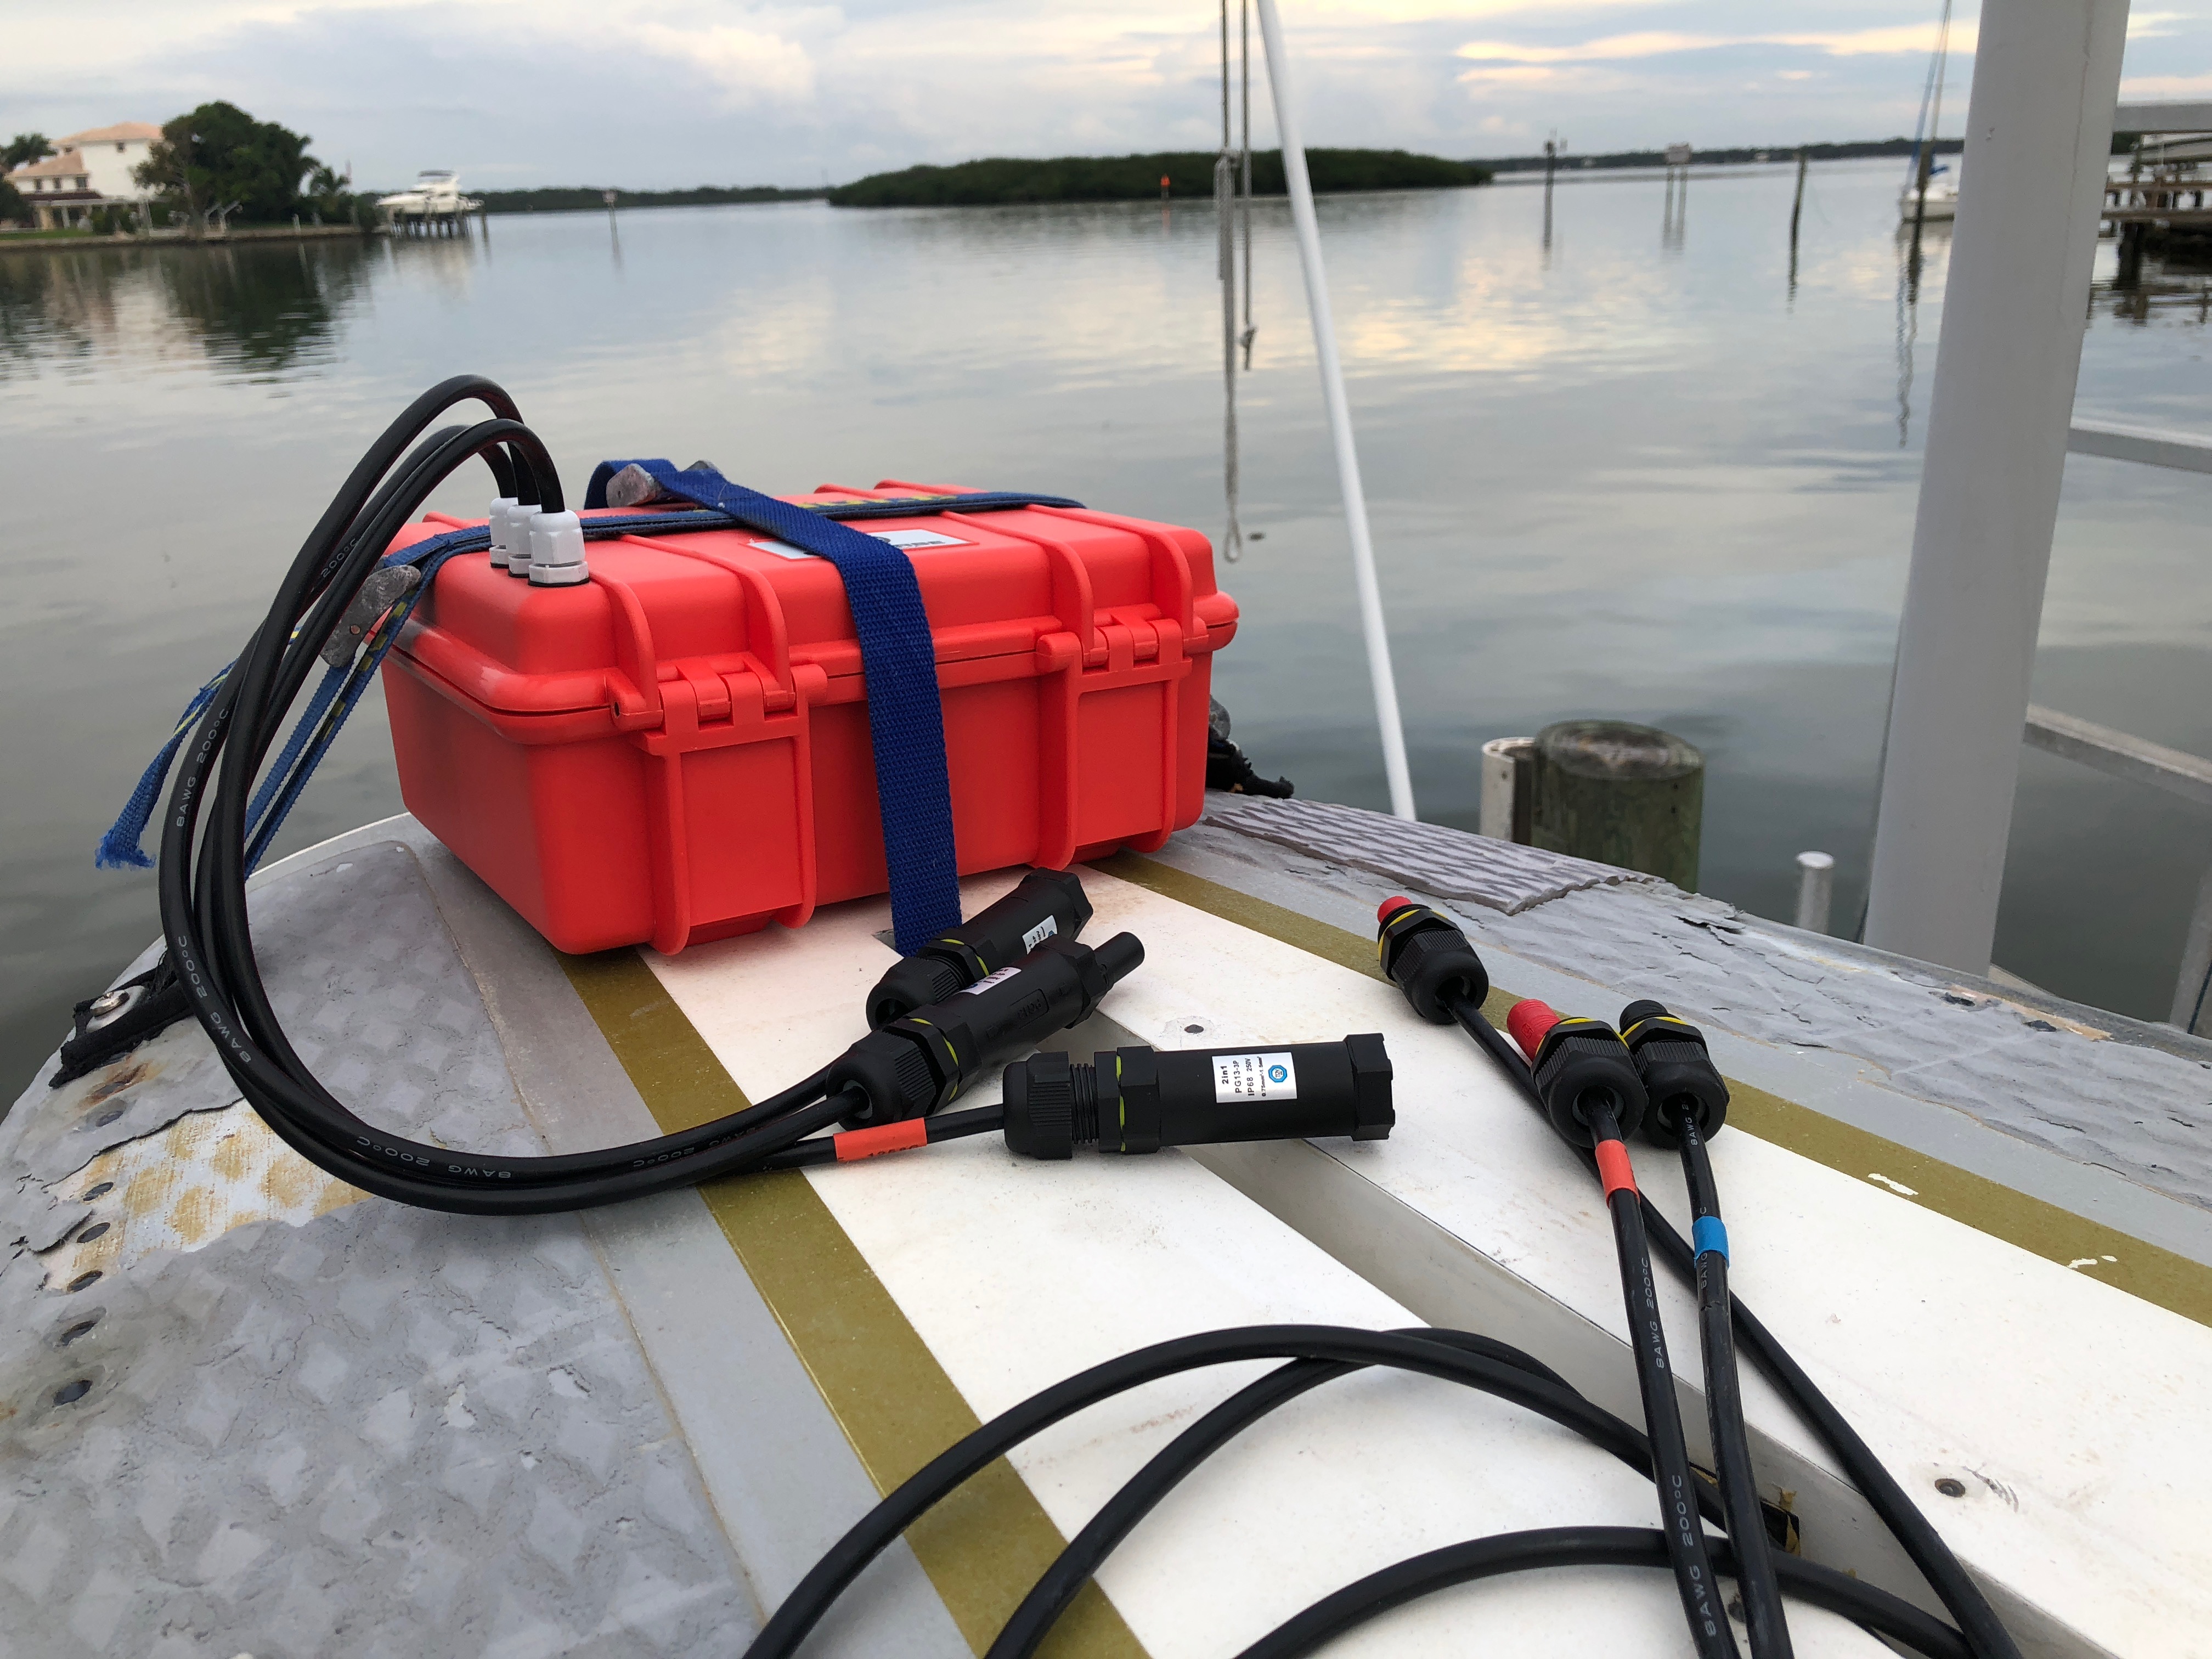
Final assembly before first run. So far these easy-to-make waterproof box connectors have performed flawlessly. I have a PWC lift that was put to good use since this puppy weighs 67 lbs before I cut the board down - exactly the same as a lift foil (30kg in riding mode).