Hi everybody!
I’m sharing with you my build. It is not finished yet … I started this project around 9 months ago, most of the work was the designs, simulations, testing and optimization (building one is quite easy and fast).
Summary
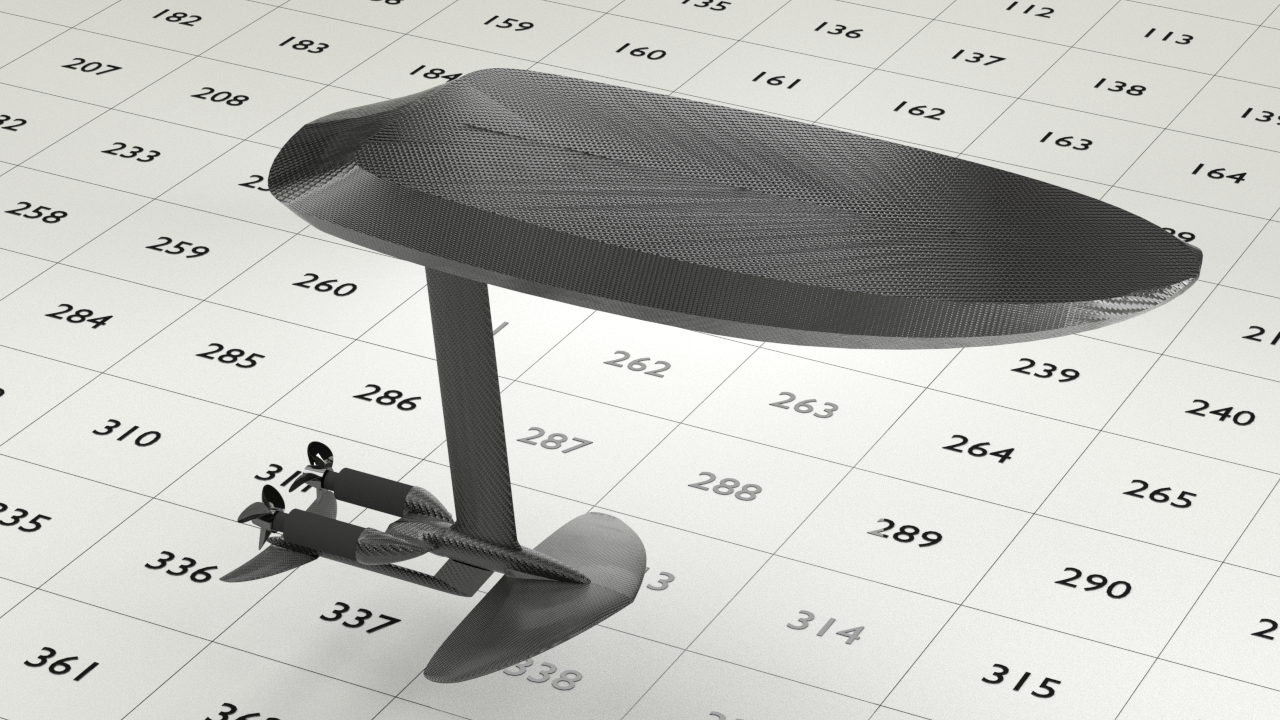
3D printed mold for wings, mast and fuselage
3d printed molds
Wings
Mast and fuselage
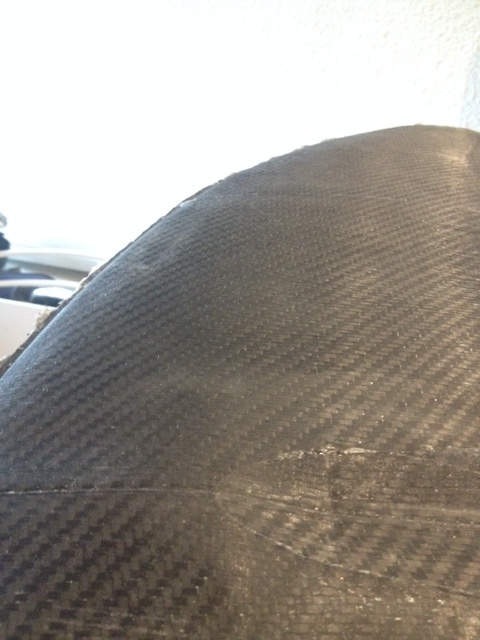
Board
Electronics
Conclusion
3D printed mold for wings, mast and fuselage

Those part are full carbon fiber and fiberglass and very inexpensive! There is no 3d printed part inside, the front wing is actually hollow. The parts also require the use of vacuum bagging for the outer layer (nothing crazy… easy to use and cheap vacuum bagging for less than a 100$).
3D printed molds
The molds have to be design in a very specific way in order to avoid any kind of distortion, bending, warping but also strong enough for vacuum bagging. When the plastic cools down, it retracts. And if the mold is not designed properly, it bends and have the wrong shape (which is bad when you spend month optimizing parts with CFD analysis, mechanical analysis, etc.).
The gcode have to be optimize, because you want a mold that has a great surface finish so that there is no need for post processing (also easier for demolding and sanding the part after demolding). So, each layer has to be printed smoothly at the right speed. You don’t want crazy acceleration/deceleration when printing especially at the top, when the part so tall and thin.
I’m using the cheapest PLA from amazon, nothing special… the molds are super inexpensive and can be used once (2 - 3 times if you are lucky).
Wings, mast and fuselage
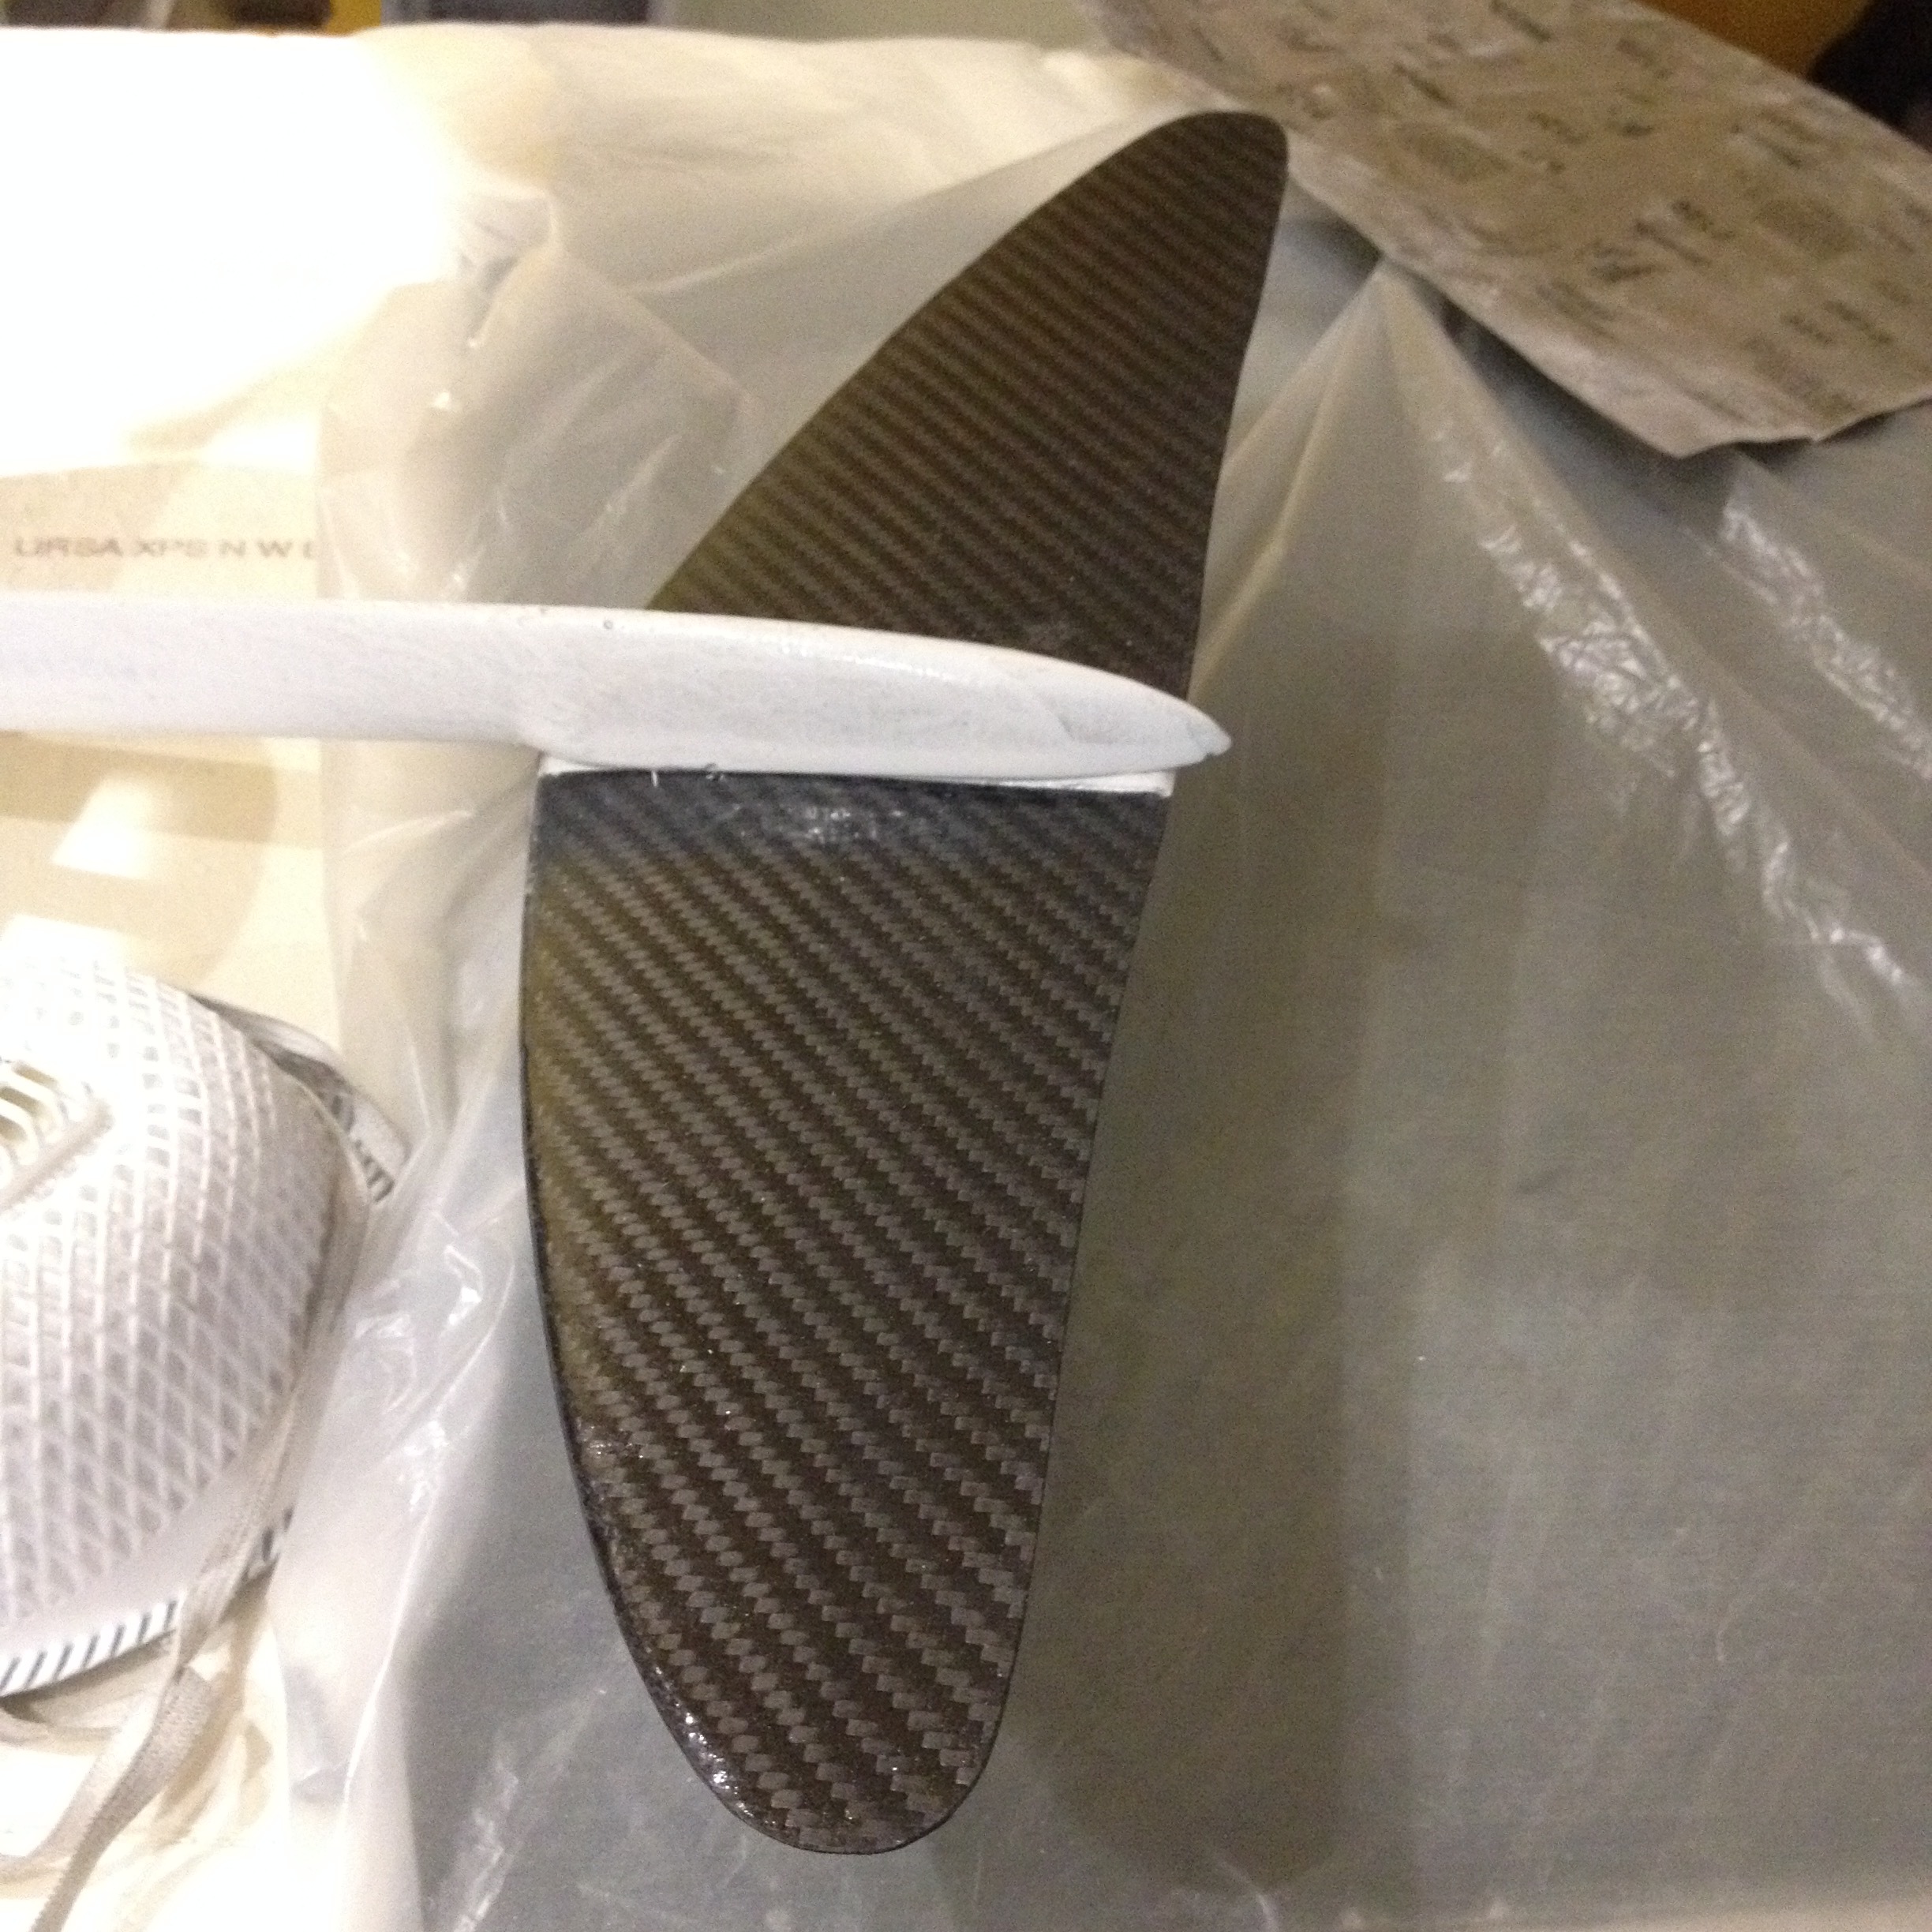
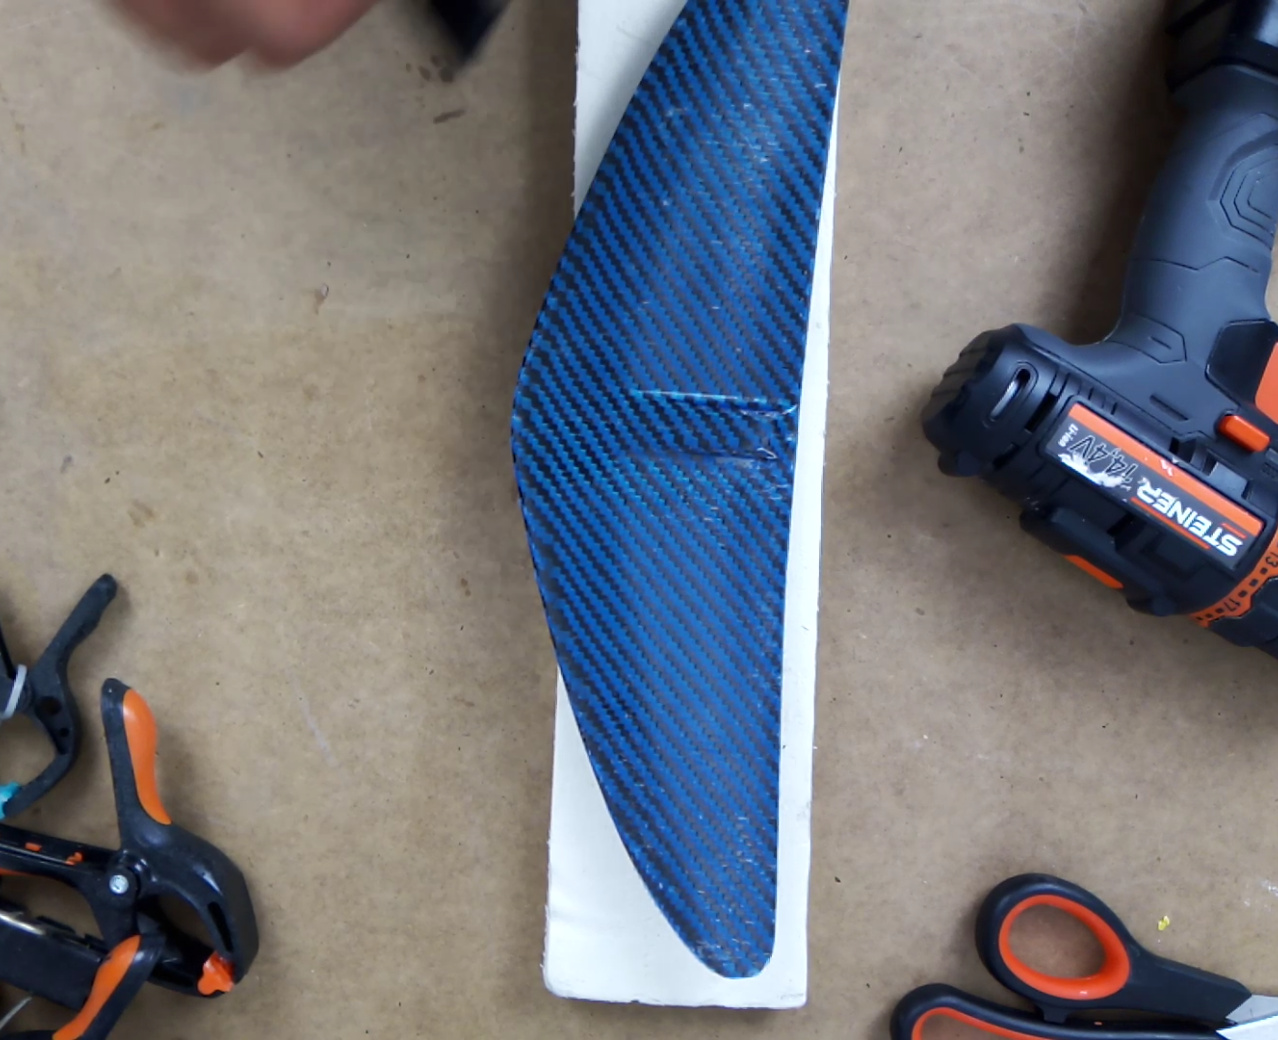
The rear wing is made of carbon fiber, super easy to make and very light and strong. Also, it’s not expensive at all. I’m planning to make a YouTube video to show you how I build the rear wing. If first need to solve the problem of making better molds for the front wings.
The front wing is hollow and only the 1st outer layer is carbon fiber; the rest is made of fiberglass. It’s extremely stiff and strong! I can stand up on the wing tips, it doesn’t bend and I weight 85kg. I’m designing a new mold for the front wing. It will look much better, be cheaper, faster and easier to 3D print.
Same thing for the mast, I can stand in the middle of the mast and no bending at all! The mast is fully made of carbon fiber. It can be made of fiberglass, but for only 50 to 60 more dollars I could make it in carbon fiber so I decided to make it in carbon fiber. The mast has 4 tubes inside, 3 to pass electric cables and one for water-cooling. The fuselage is optimized so that is has low drag at different angle of attack.
Board
I designed and shaped the board myself. The board is also not finished, I will post more picture later.
This is the 1st time I shaped a board. The only power you need to make it is a drill… It’s very easy to shape. I used XPS as a core, big mistake! It delaminates way too much. Plus, I failed with the vacuum bagging process (it’s different than the vacuum bagging for the wings and mast). Because of that I had to grind it, fill it, sand it over and over again… Next time no vacuum bagging and no XPS!
The board has a nice design, it has volume were needed, nice shape and only need a few cut and little bit of sanding to shape it.
The battery box is under the board for more safety and because I knew I won’t change the battery pack. To charge the battery, I connect it to the charger via a connection box at the top side of the board. I believe it’s more secure this way.
Electronics
Because I knew new and better electronics system will be made, I decided to finish the efoil before buying any electronics. I’m still doing some research to understand why there is some much problems with the electronics.
The original prototype was supposed to use a reducer. Now I’m planning to use a direct drive system. I’m also planning to use a twin propeller system to make a high thrust to weight ratio efoil. Having a high thrust to weight will allow to do nice maneuvers in the water. You can also go at much higher speed but I guess it would be super scary and quite dangerous.
Conclusion
This is a cheap, easy to build efoil (once you have the right molds and processes). But it is very strong and optimized for our need. The new molds for the front wings need to be tested. I still have to choose the electronics I need. While I’m doing the research for the electronic, I will finish the sanding (to a mirror finish) of the board, the wings and the mast & fuselage. Once the coating and sanding is done, I will post more pictures!
I’m planning to make a YouTube video where I explain a little bit how I make the rear wing first, and other part later. I’m also planning to make an online course where I explain in details (in videos) how to make each part, with all the STL files needed to make the molds, how to print it, prepare it and all the links to buy materials. I cannot give all my work and knowledge for free (for obvious reason), but I believe that an online course like this will help a lot of people! I will post more details about it later.
I hope this post was not too long to read haha. Tell me what you think about this build! If you are interested by the STL files for the molds and the easy and cheap process to make those parts, you can send me a message or write something below.