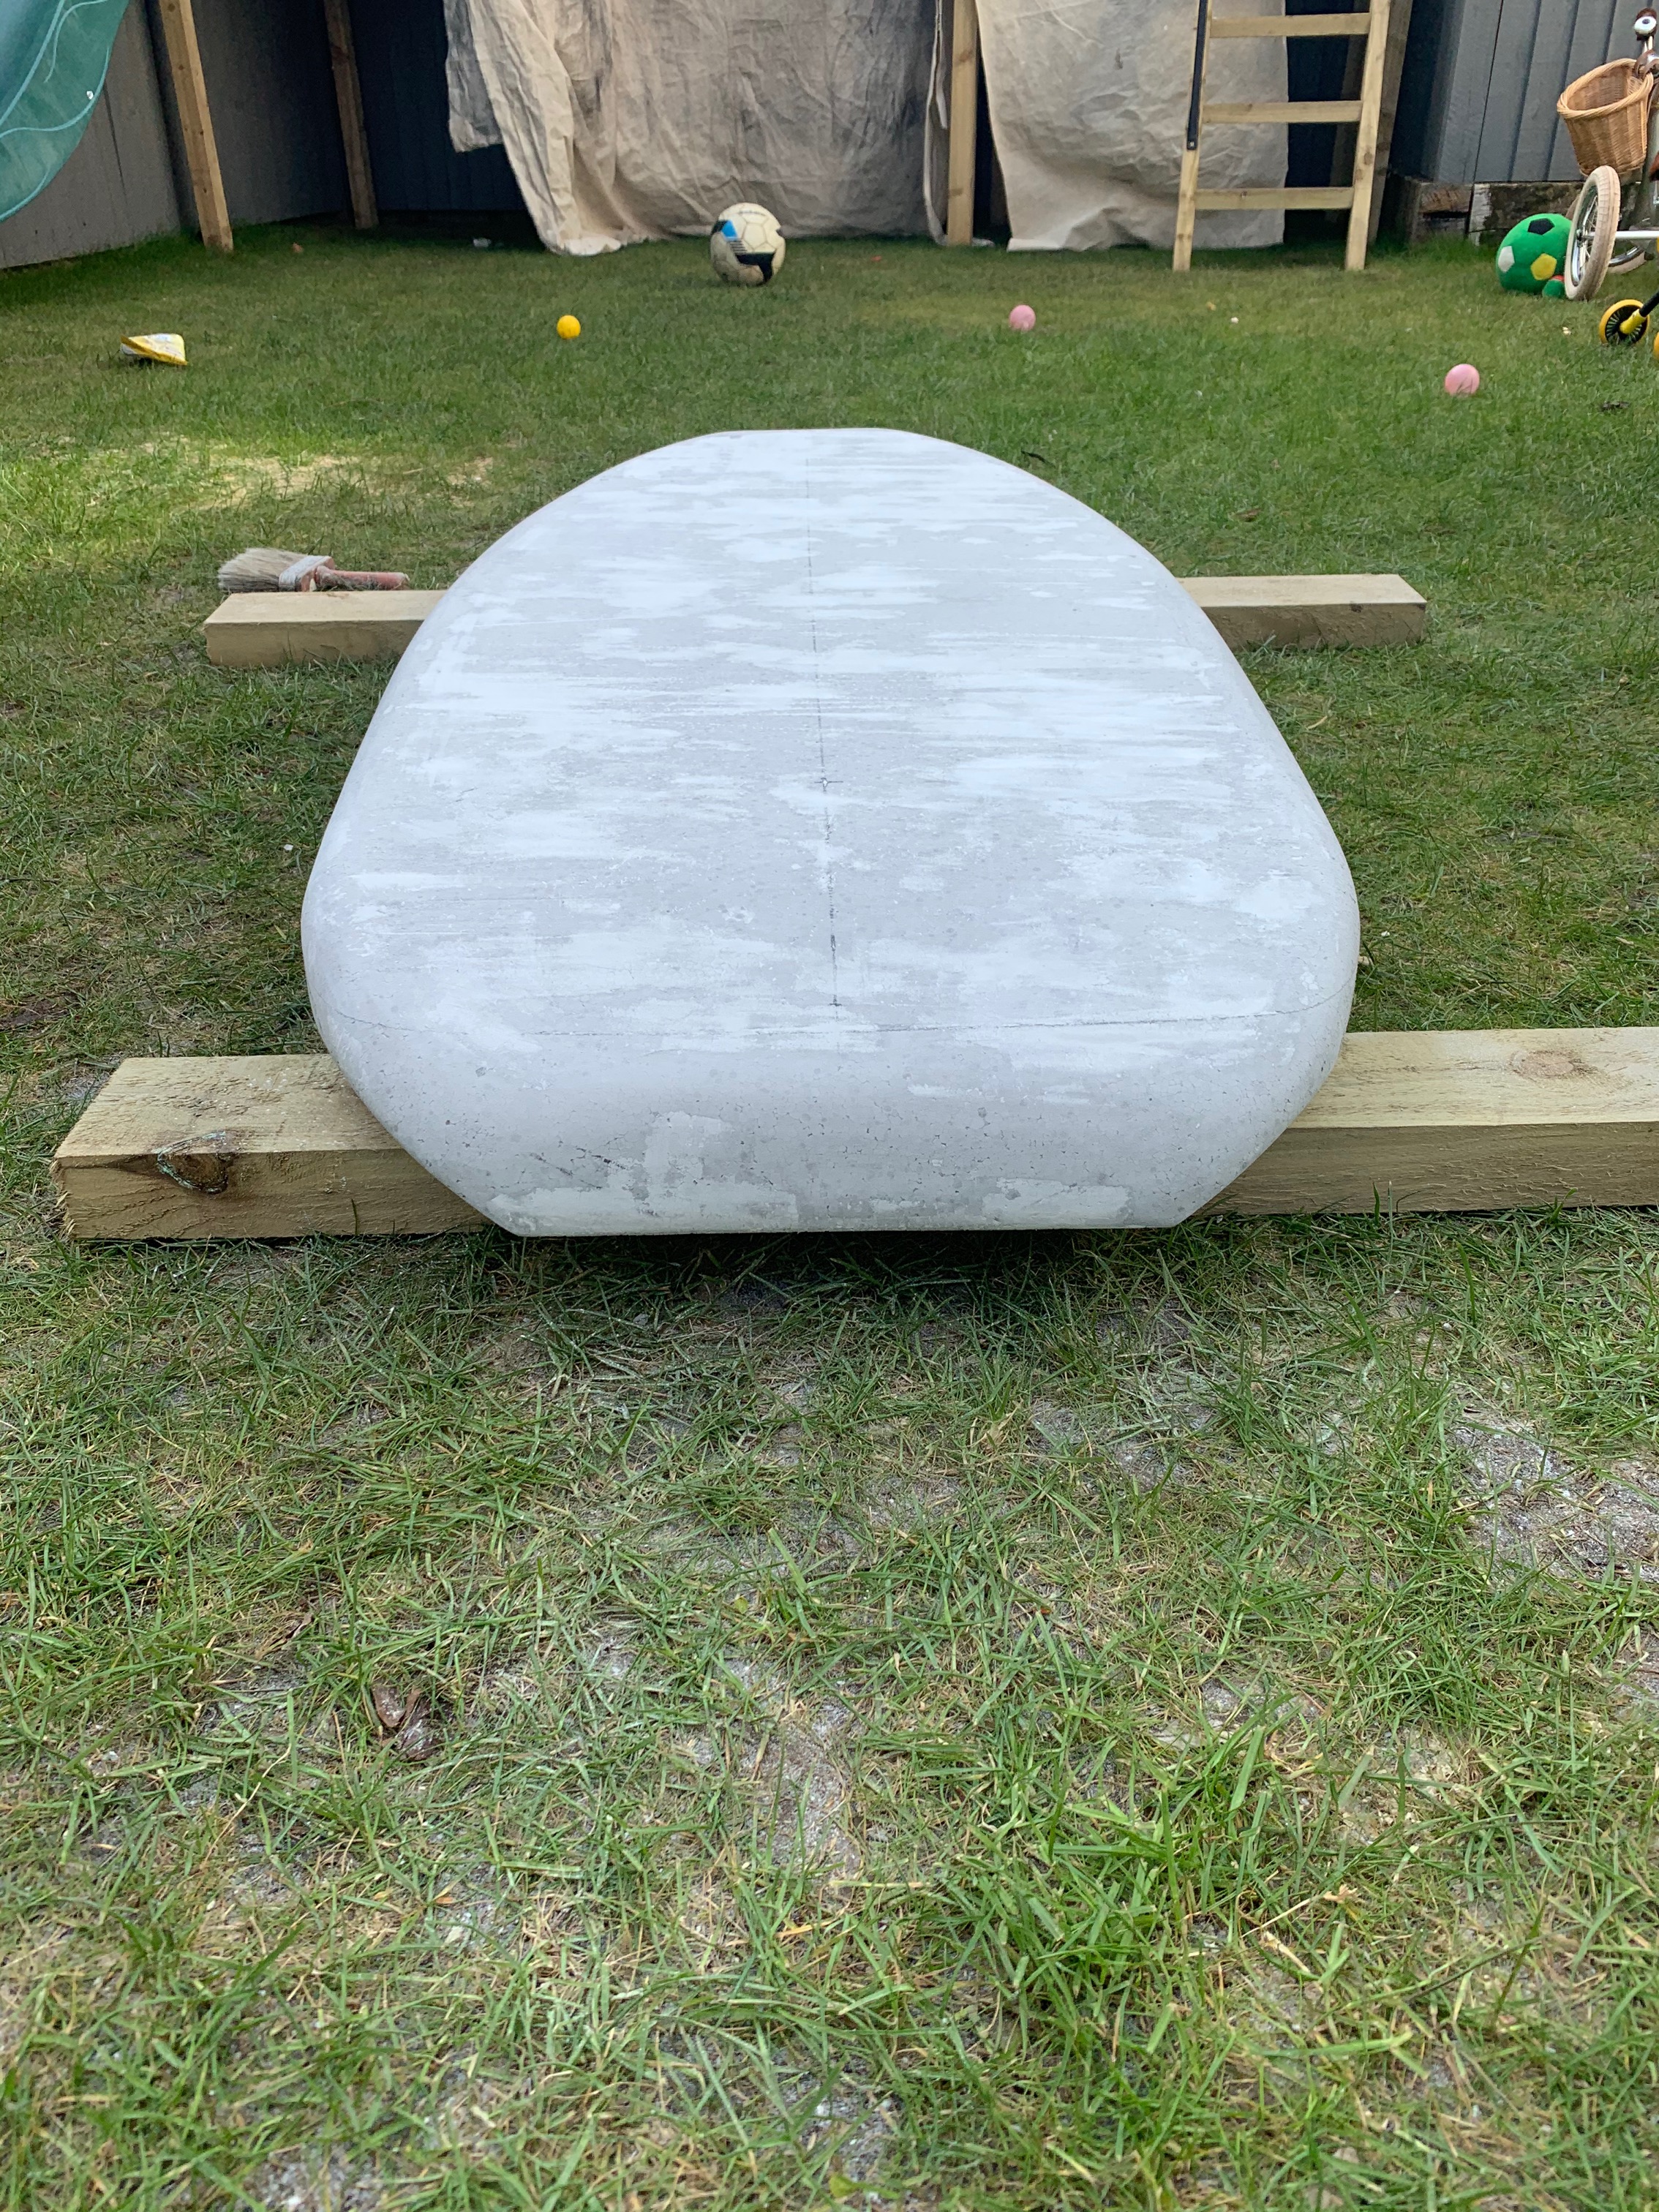
Just before lockdown I started buying a few parts for my build so luckily for me when Boris told us to all stay at home I had something to craic on with. With all the free time I managed to get stuck into my build. Here’s how I got on.


27 Likes
Superb ! You even found time to mow the lawn perfectly. 
Which motor is it ? Is your battery case 3D printed ? Did you manage to get it waterproof ?
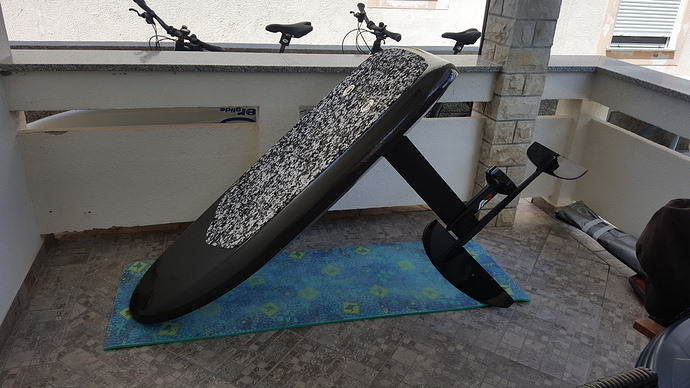
Ha, thanks. just need to go test it now and so how it performs. I dunked it in my mates hot tub earlier to test the the hatch for leaks. Hatch seal seems ok but water was getting in through the latch, but that was only after 30 seconds of holding it 50 cm under water. I’ve got a couple of mods in mind that I could try to stop it seeping in.
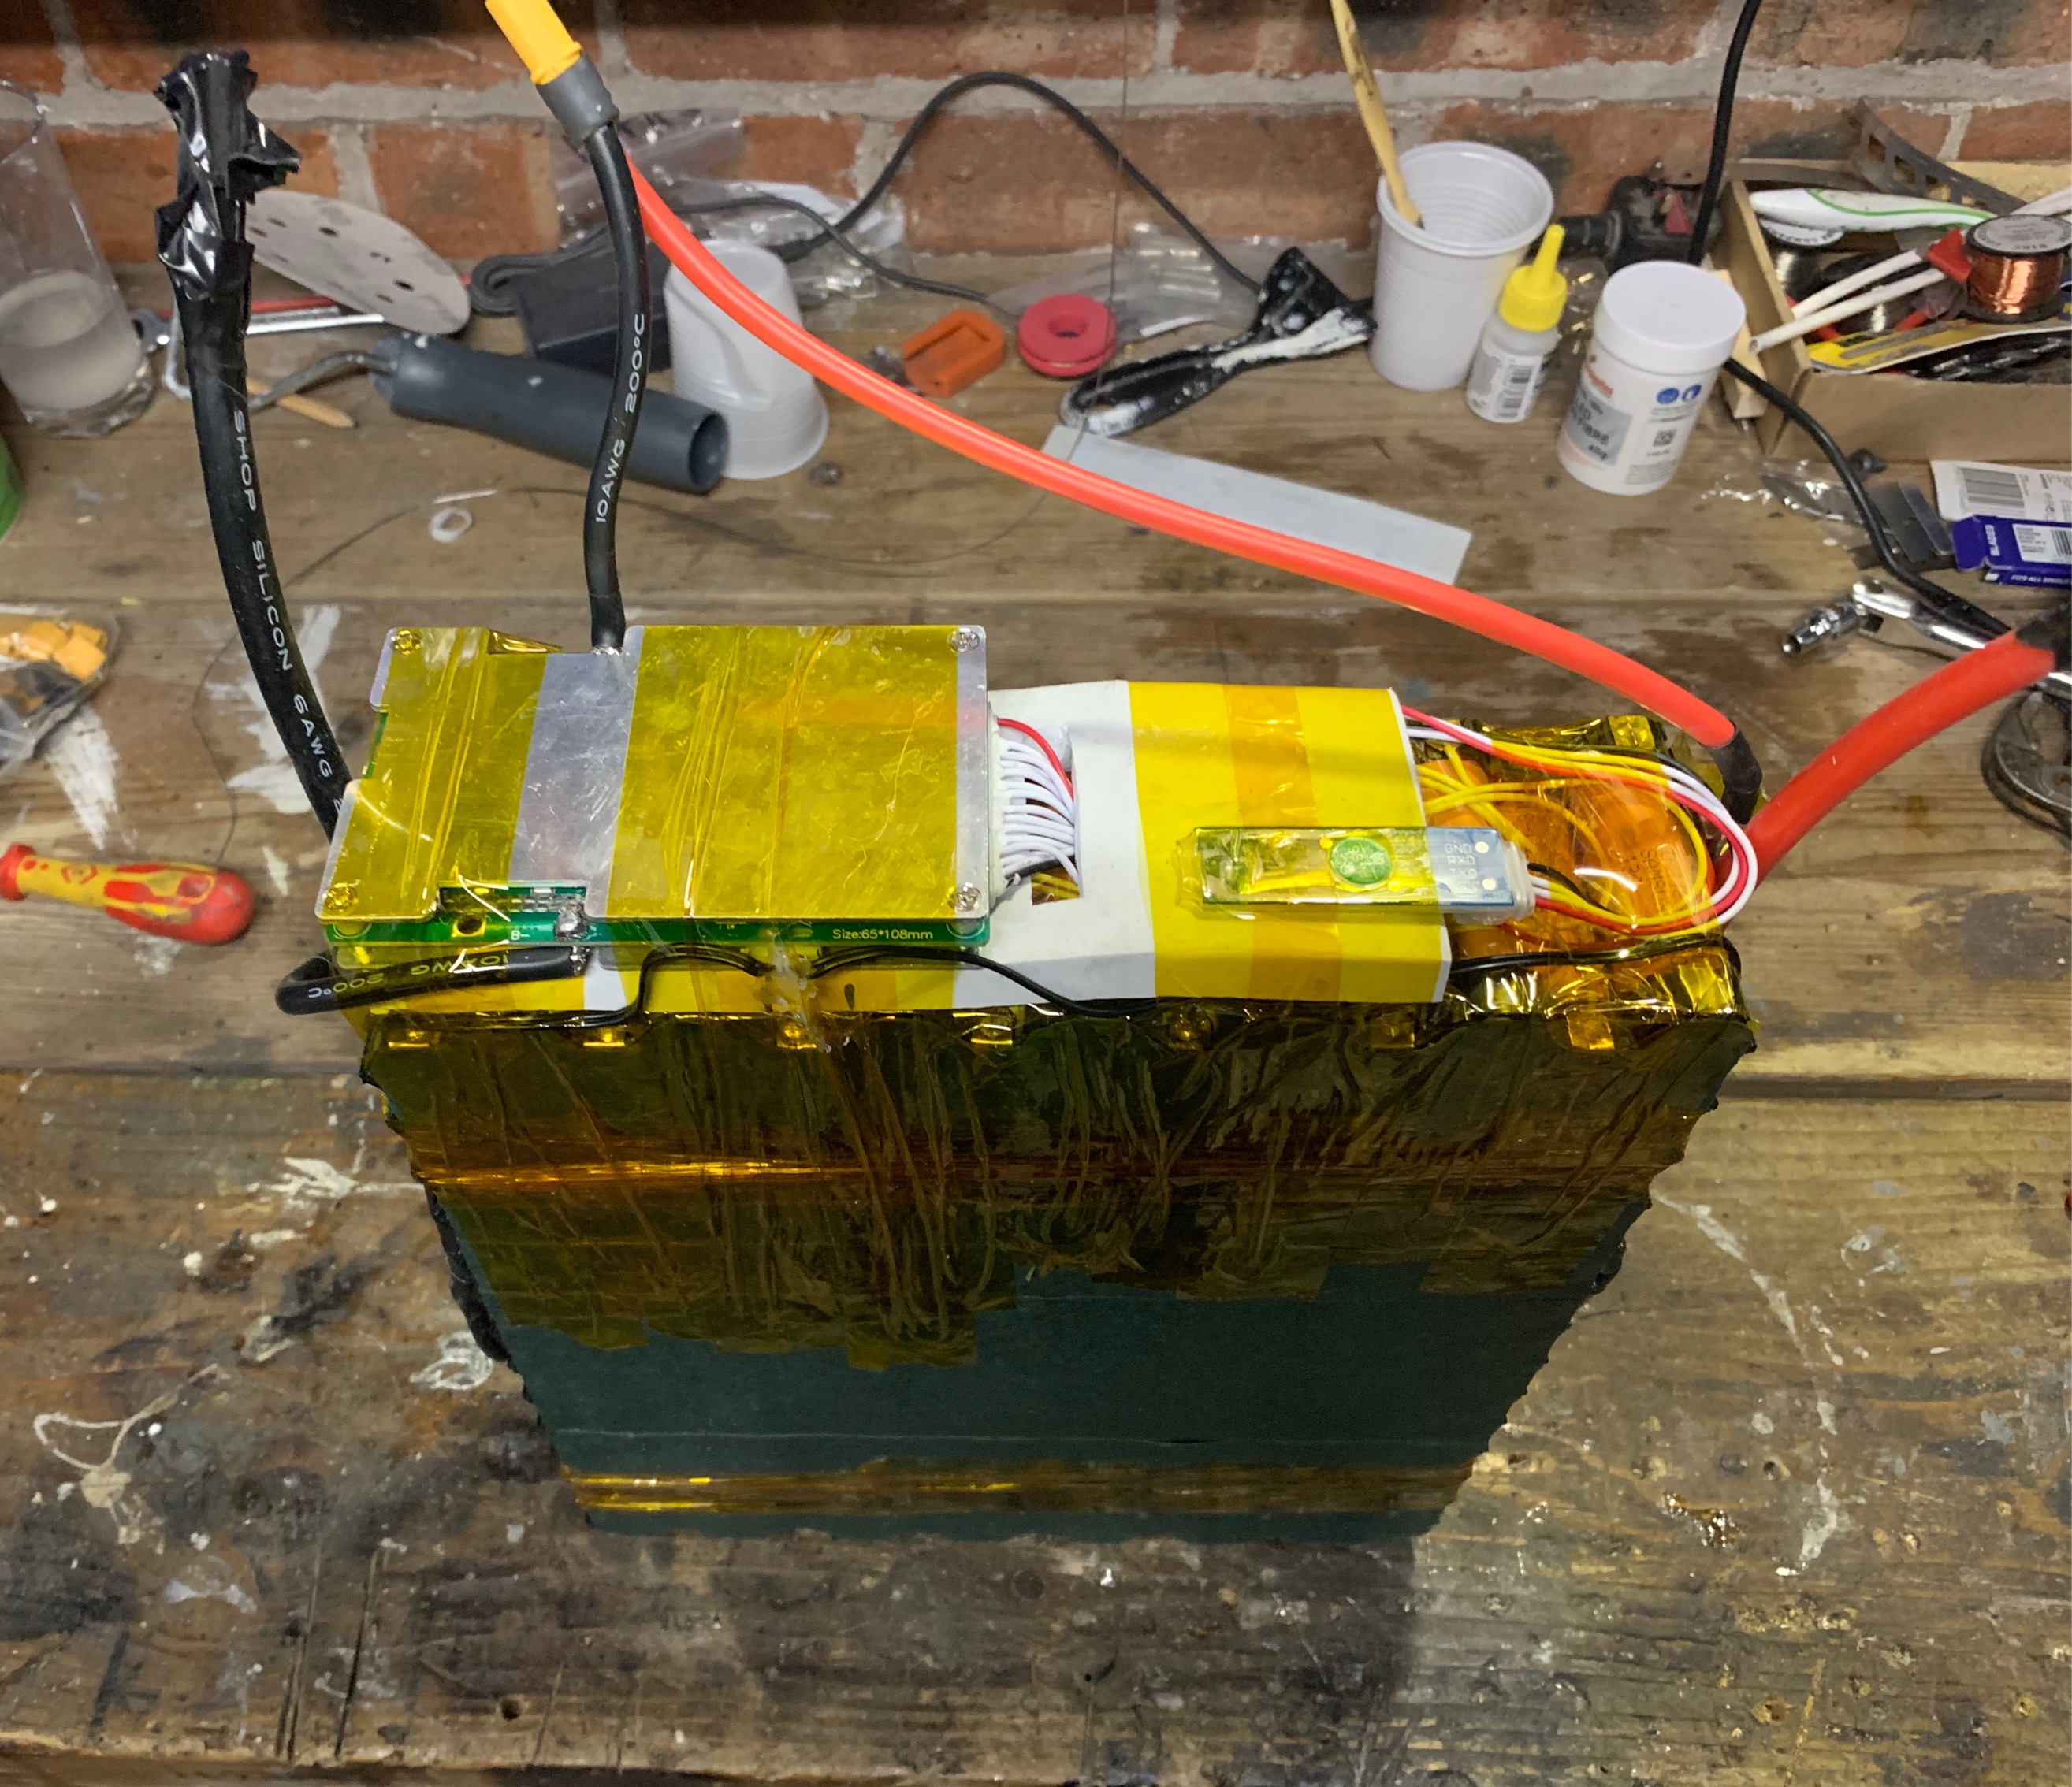
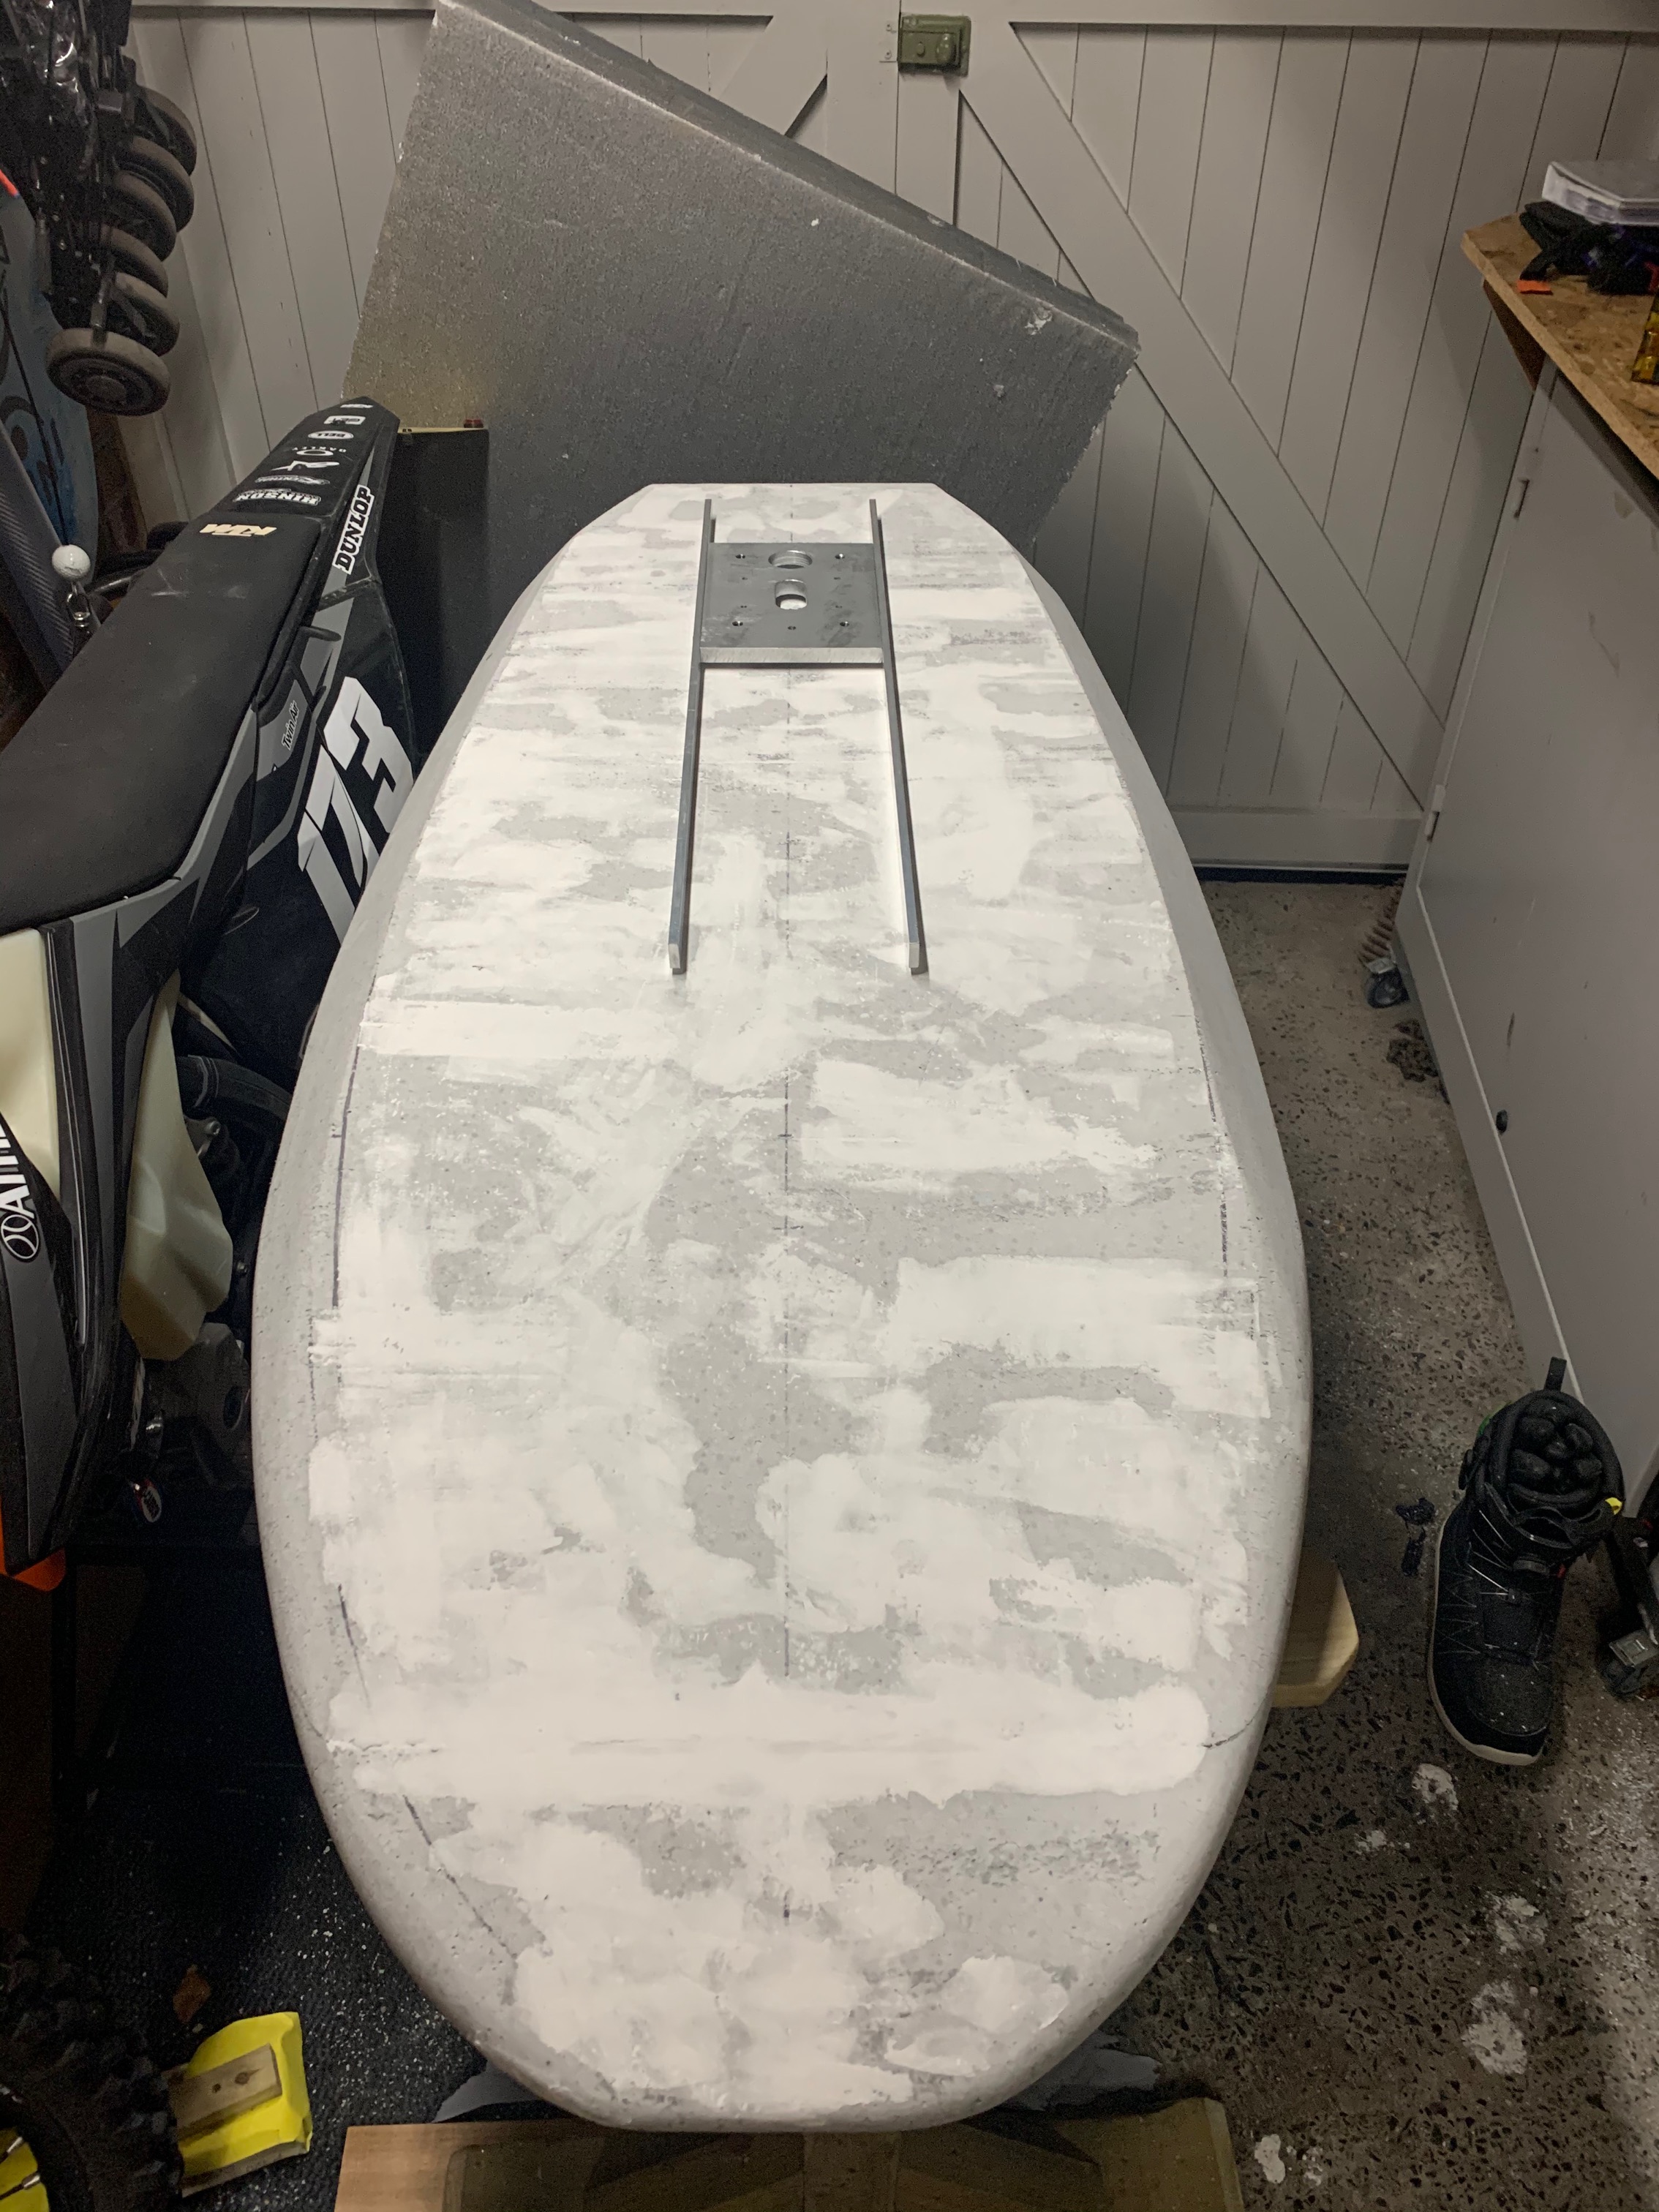
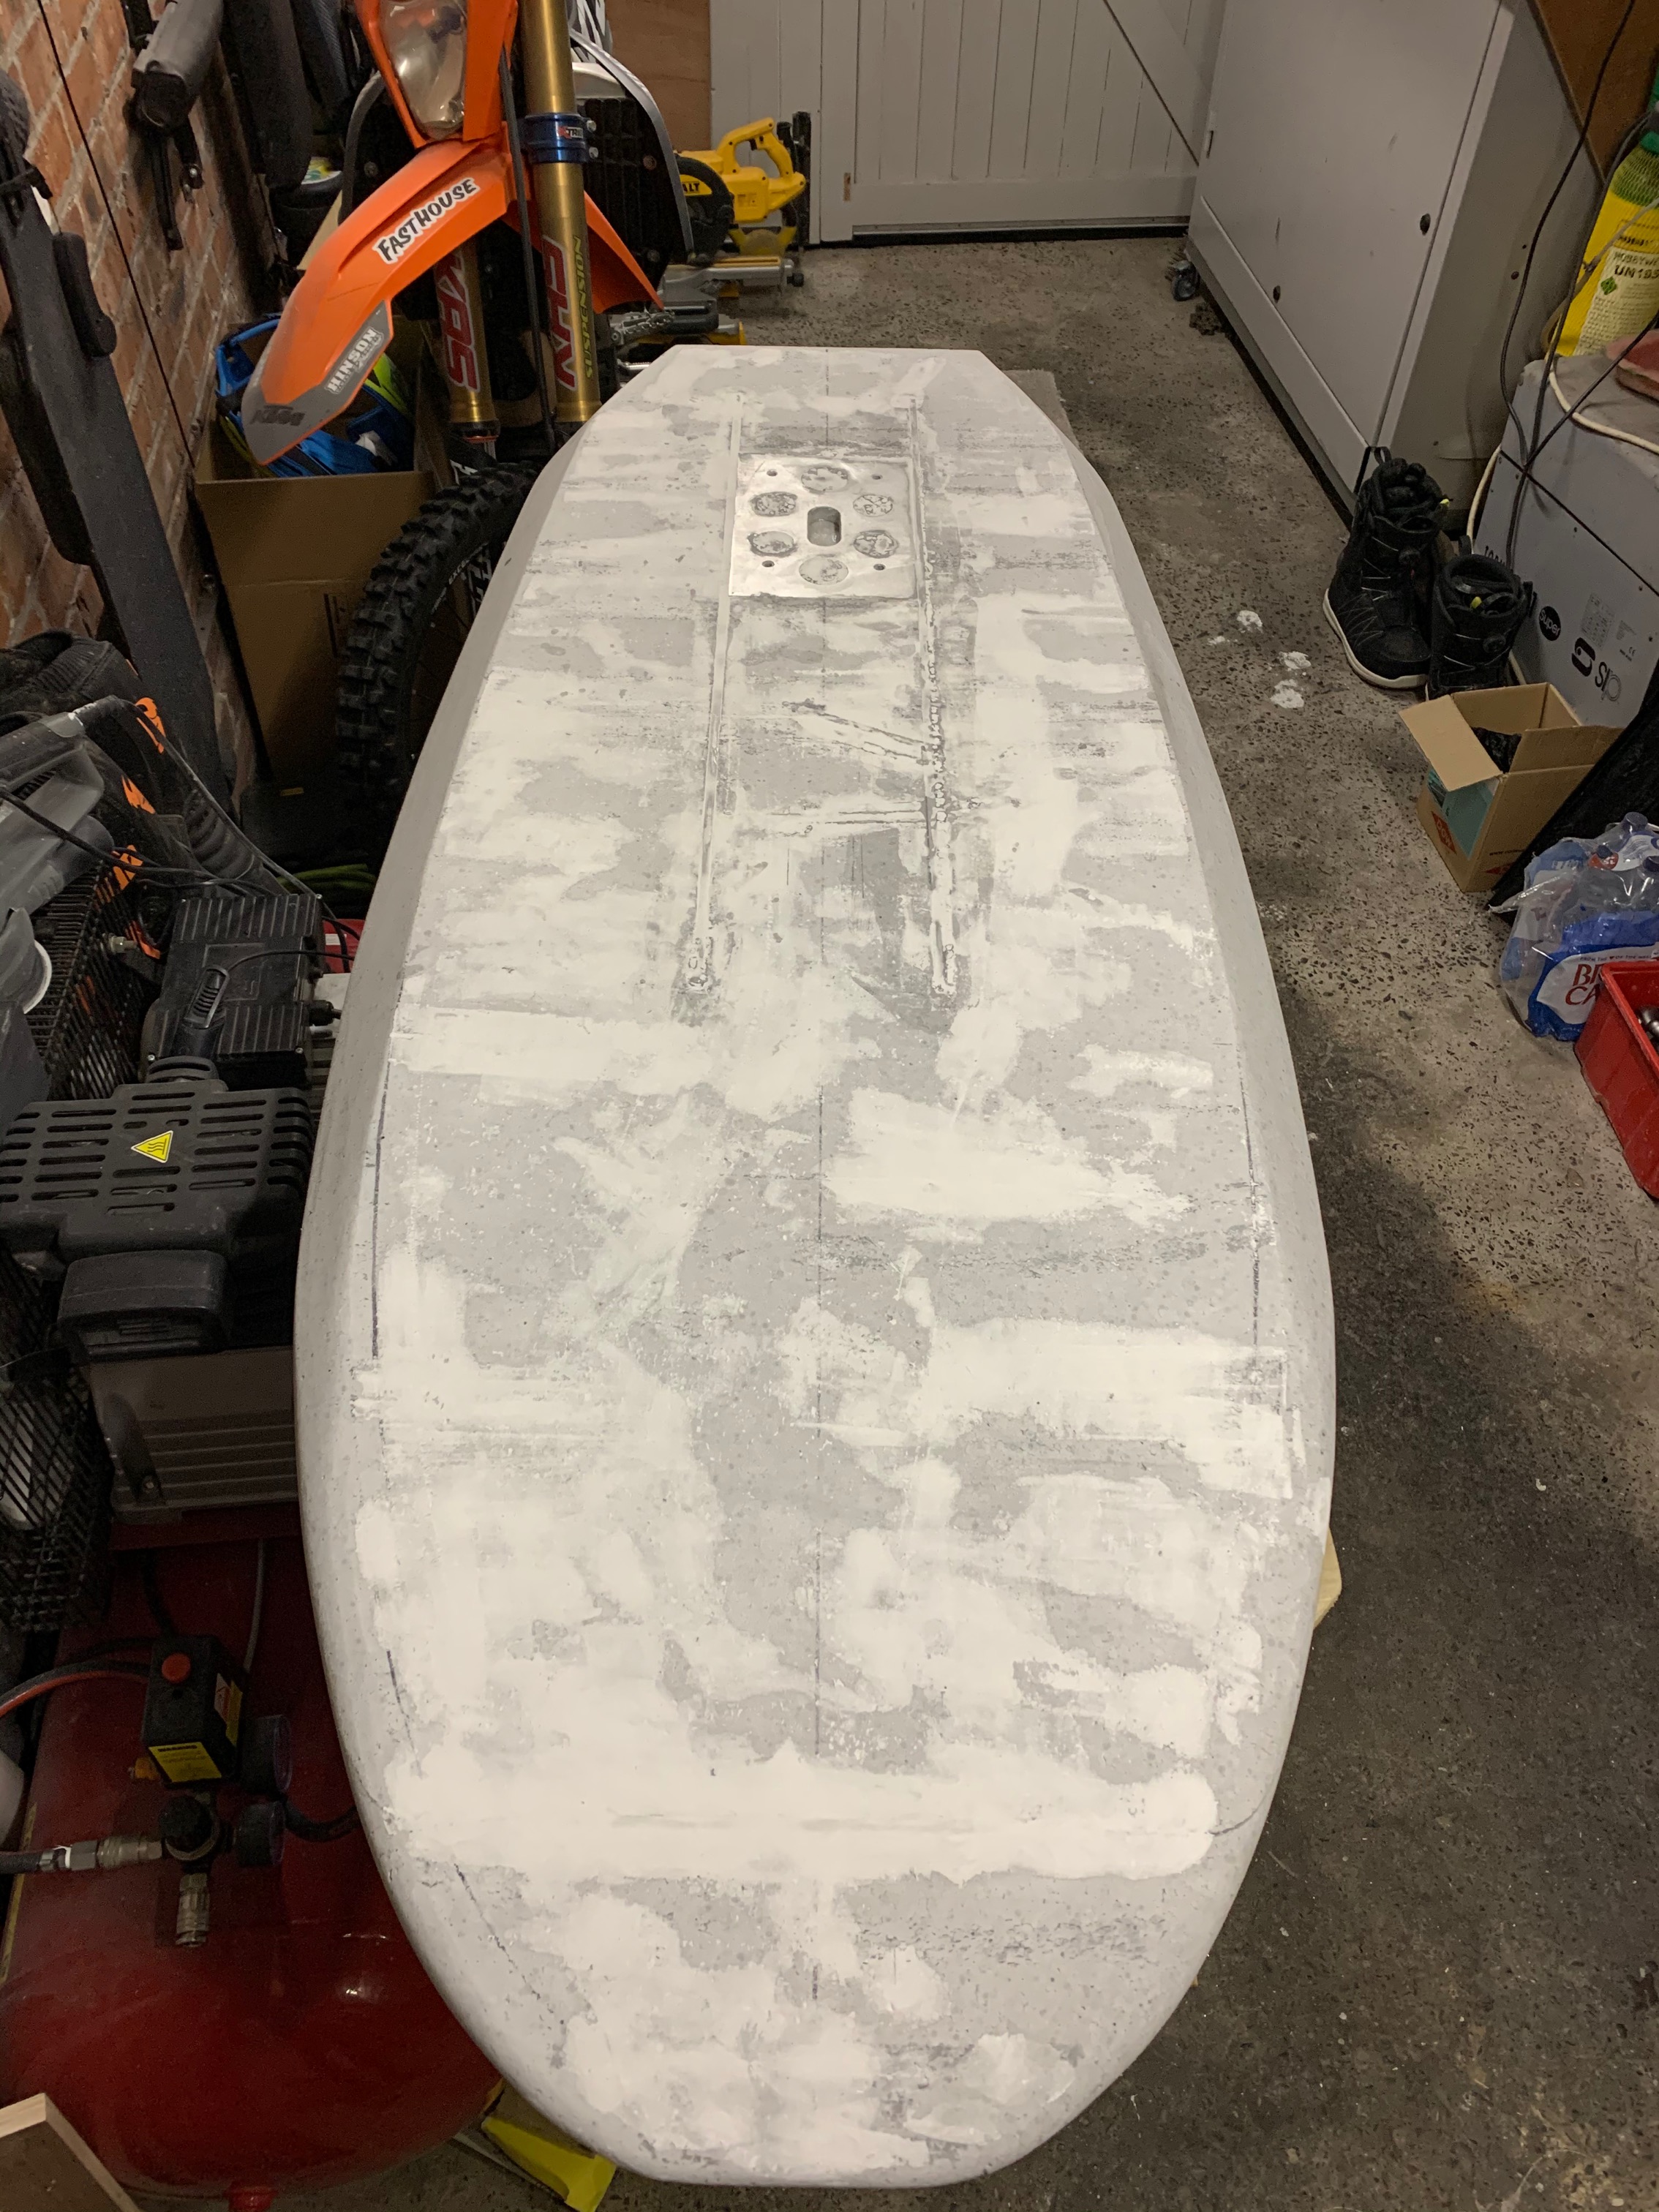
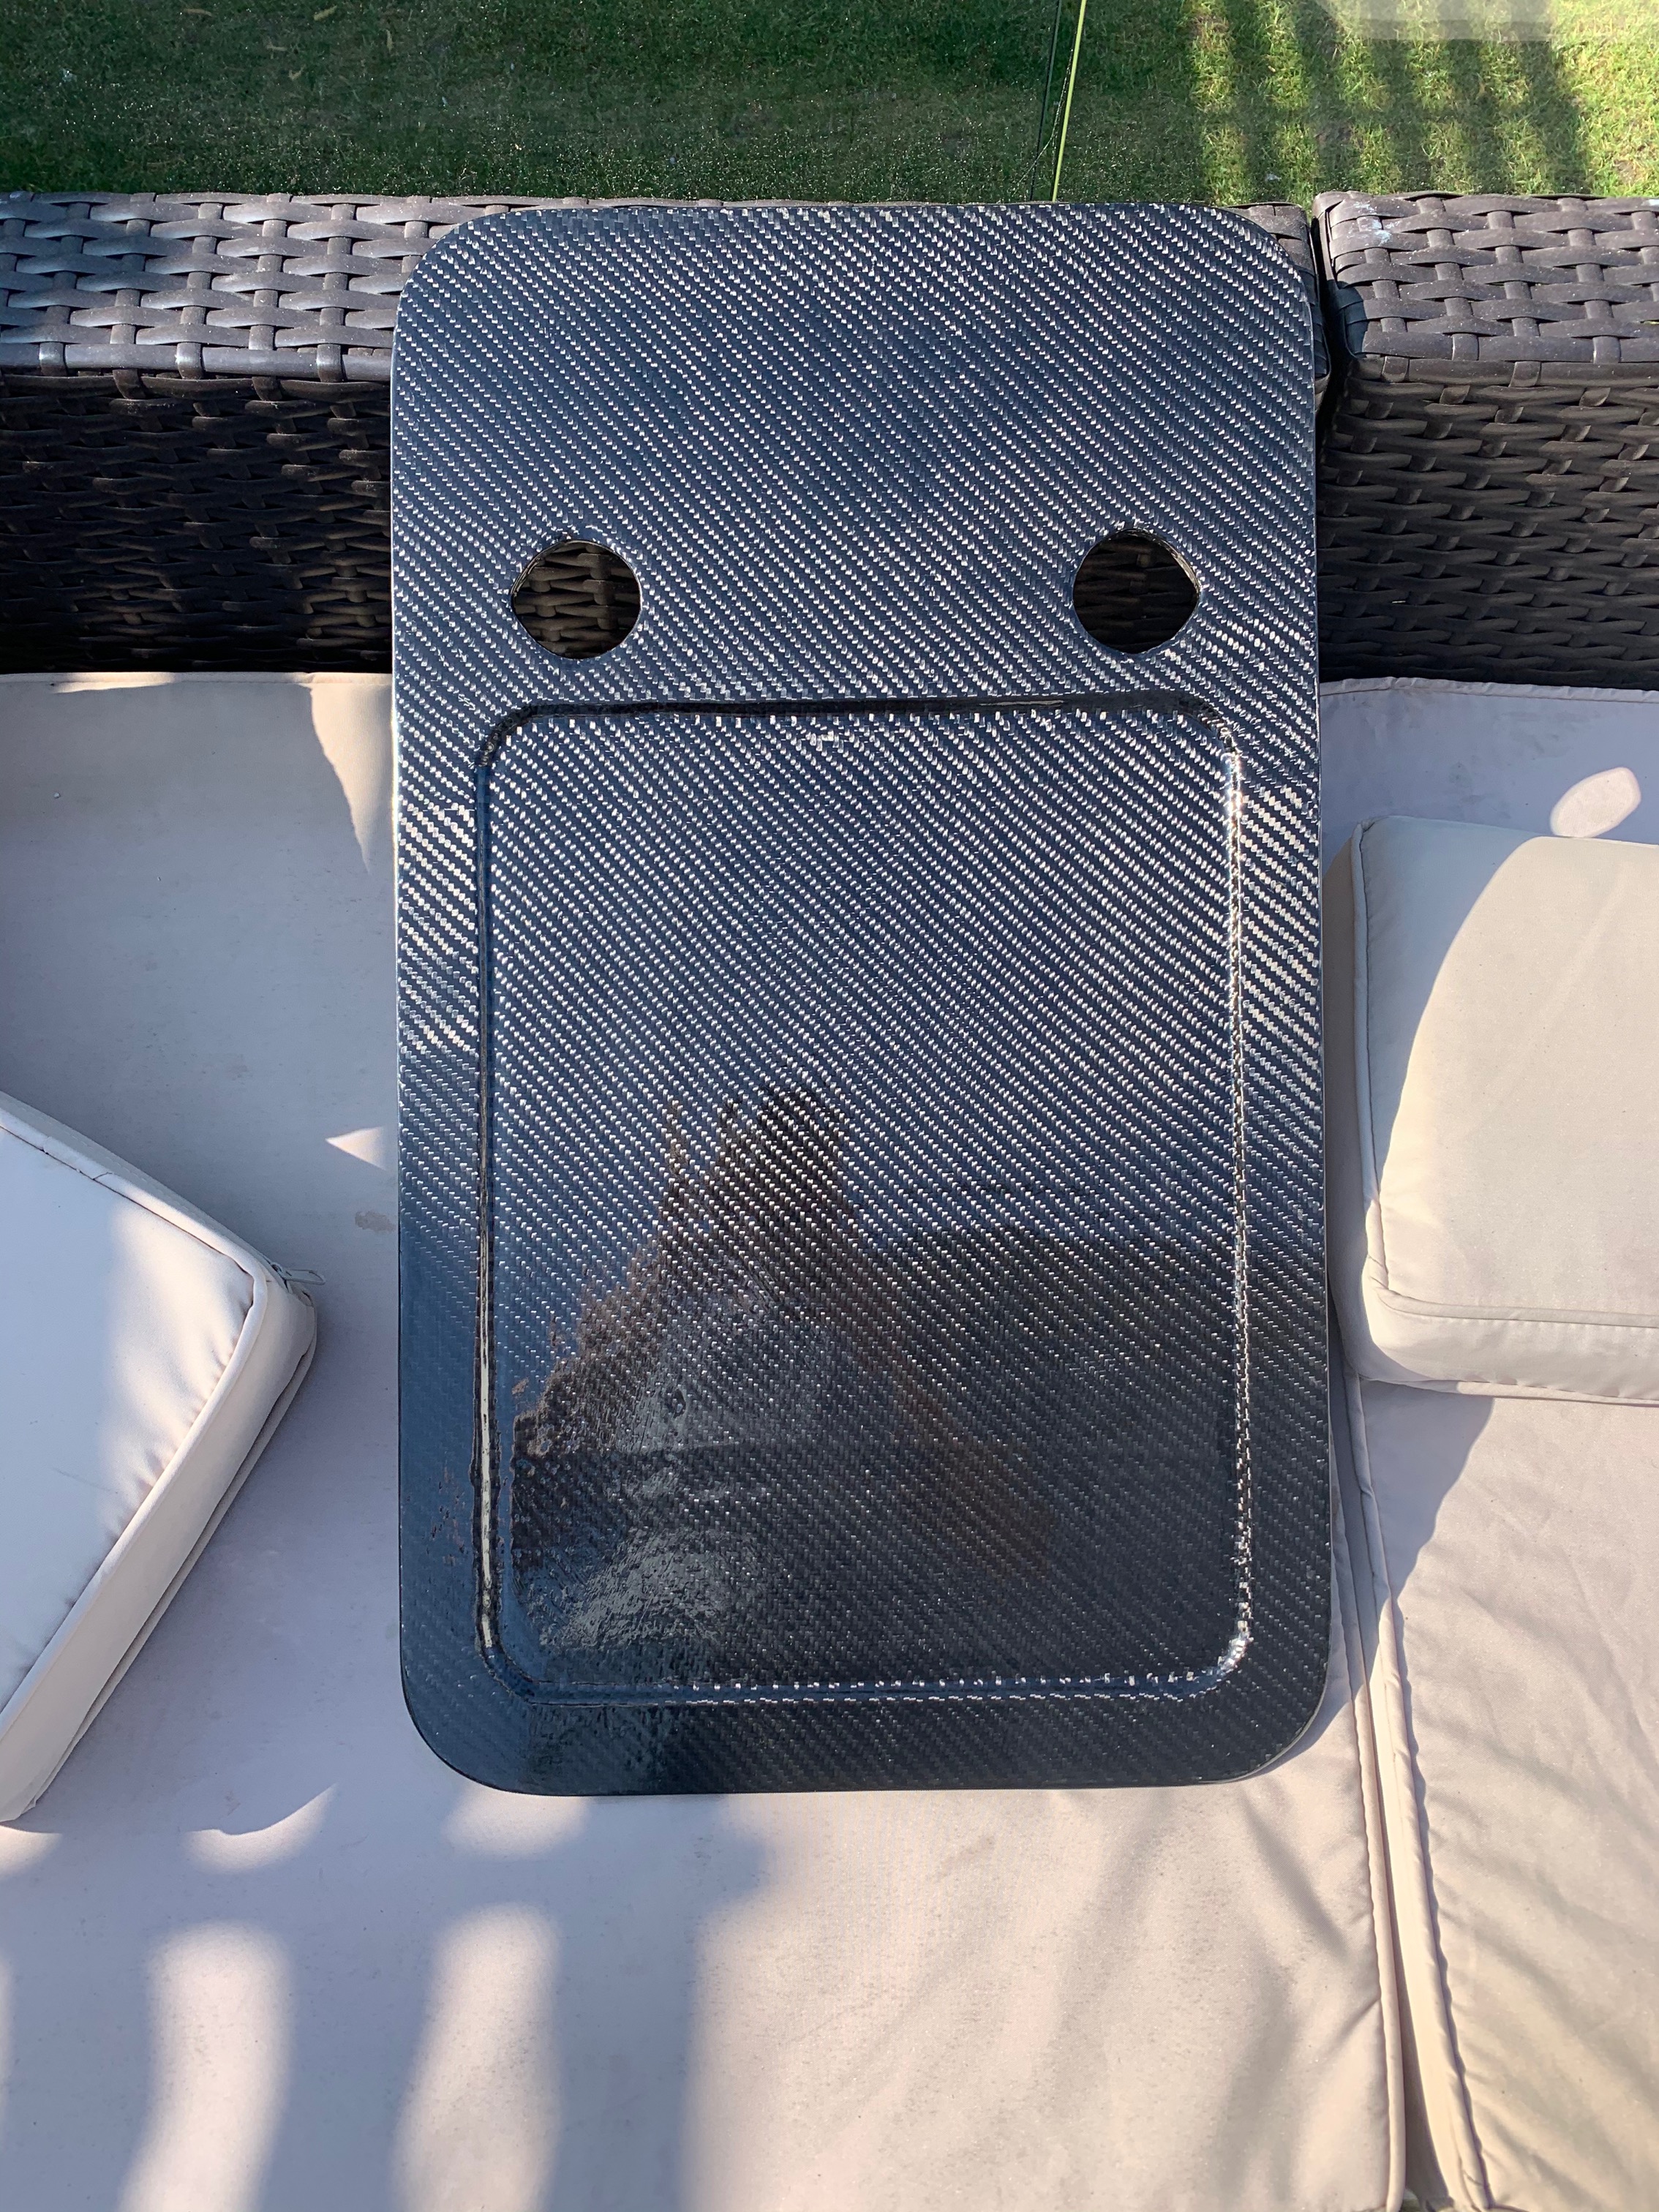
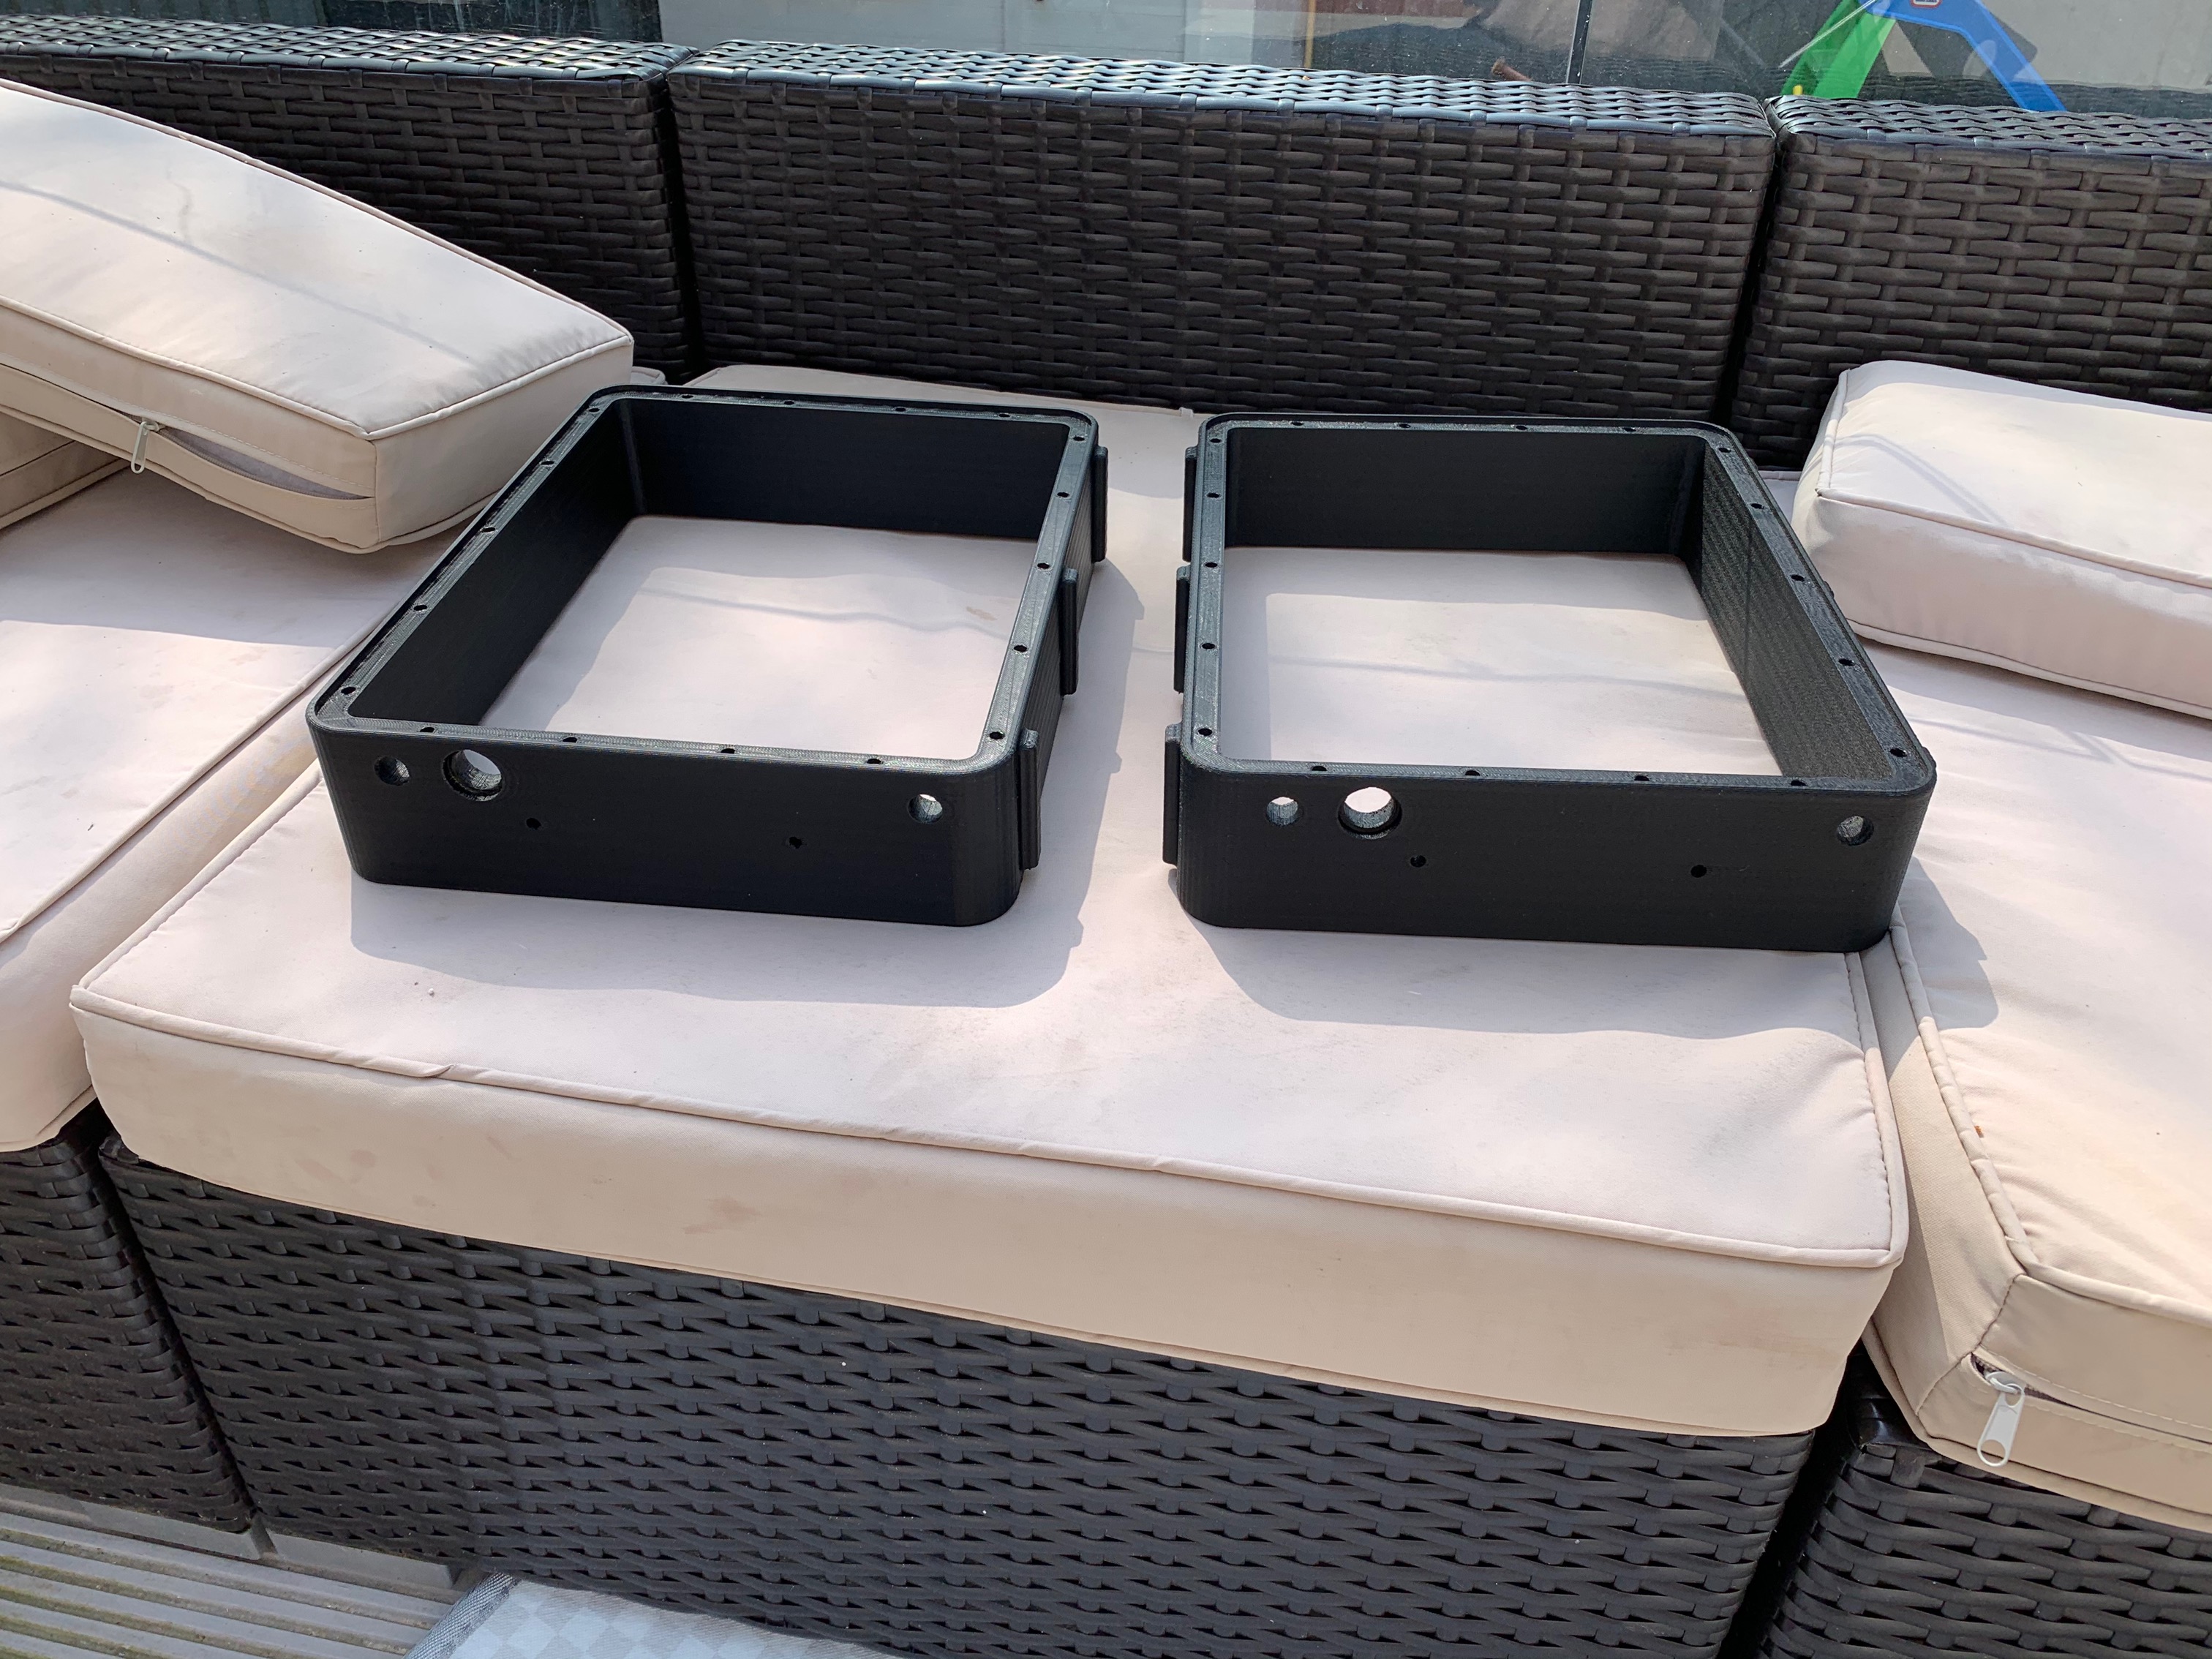
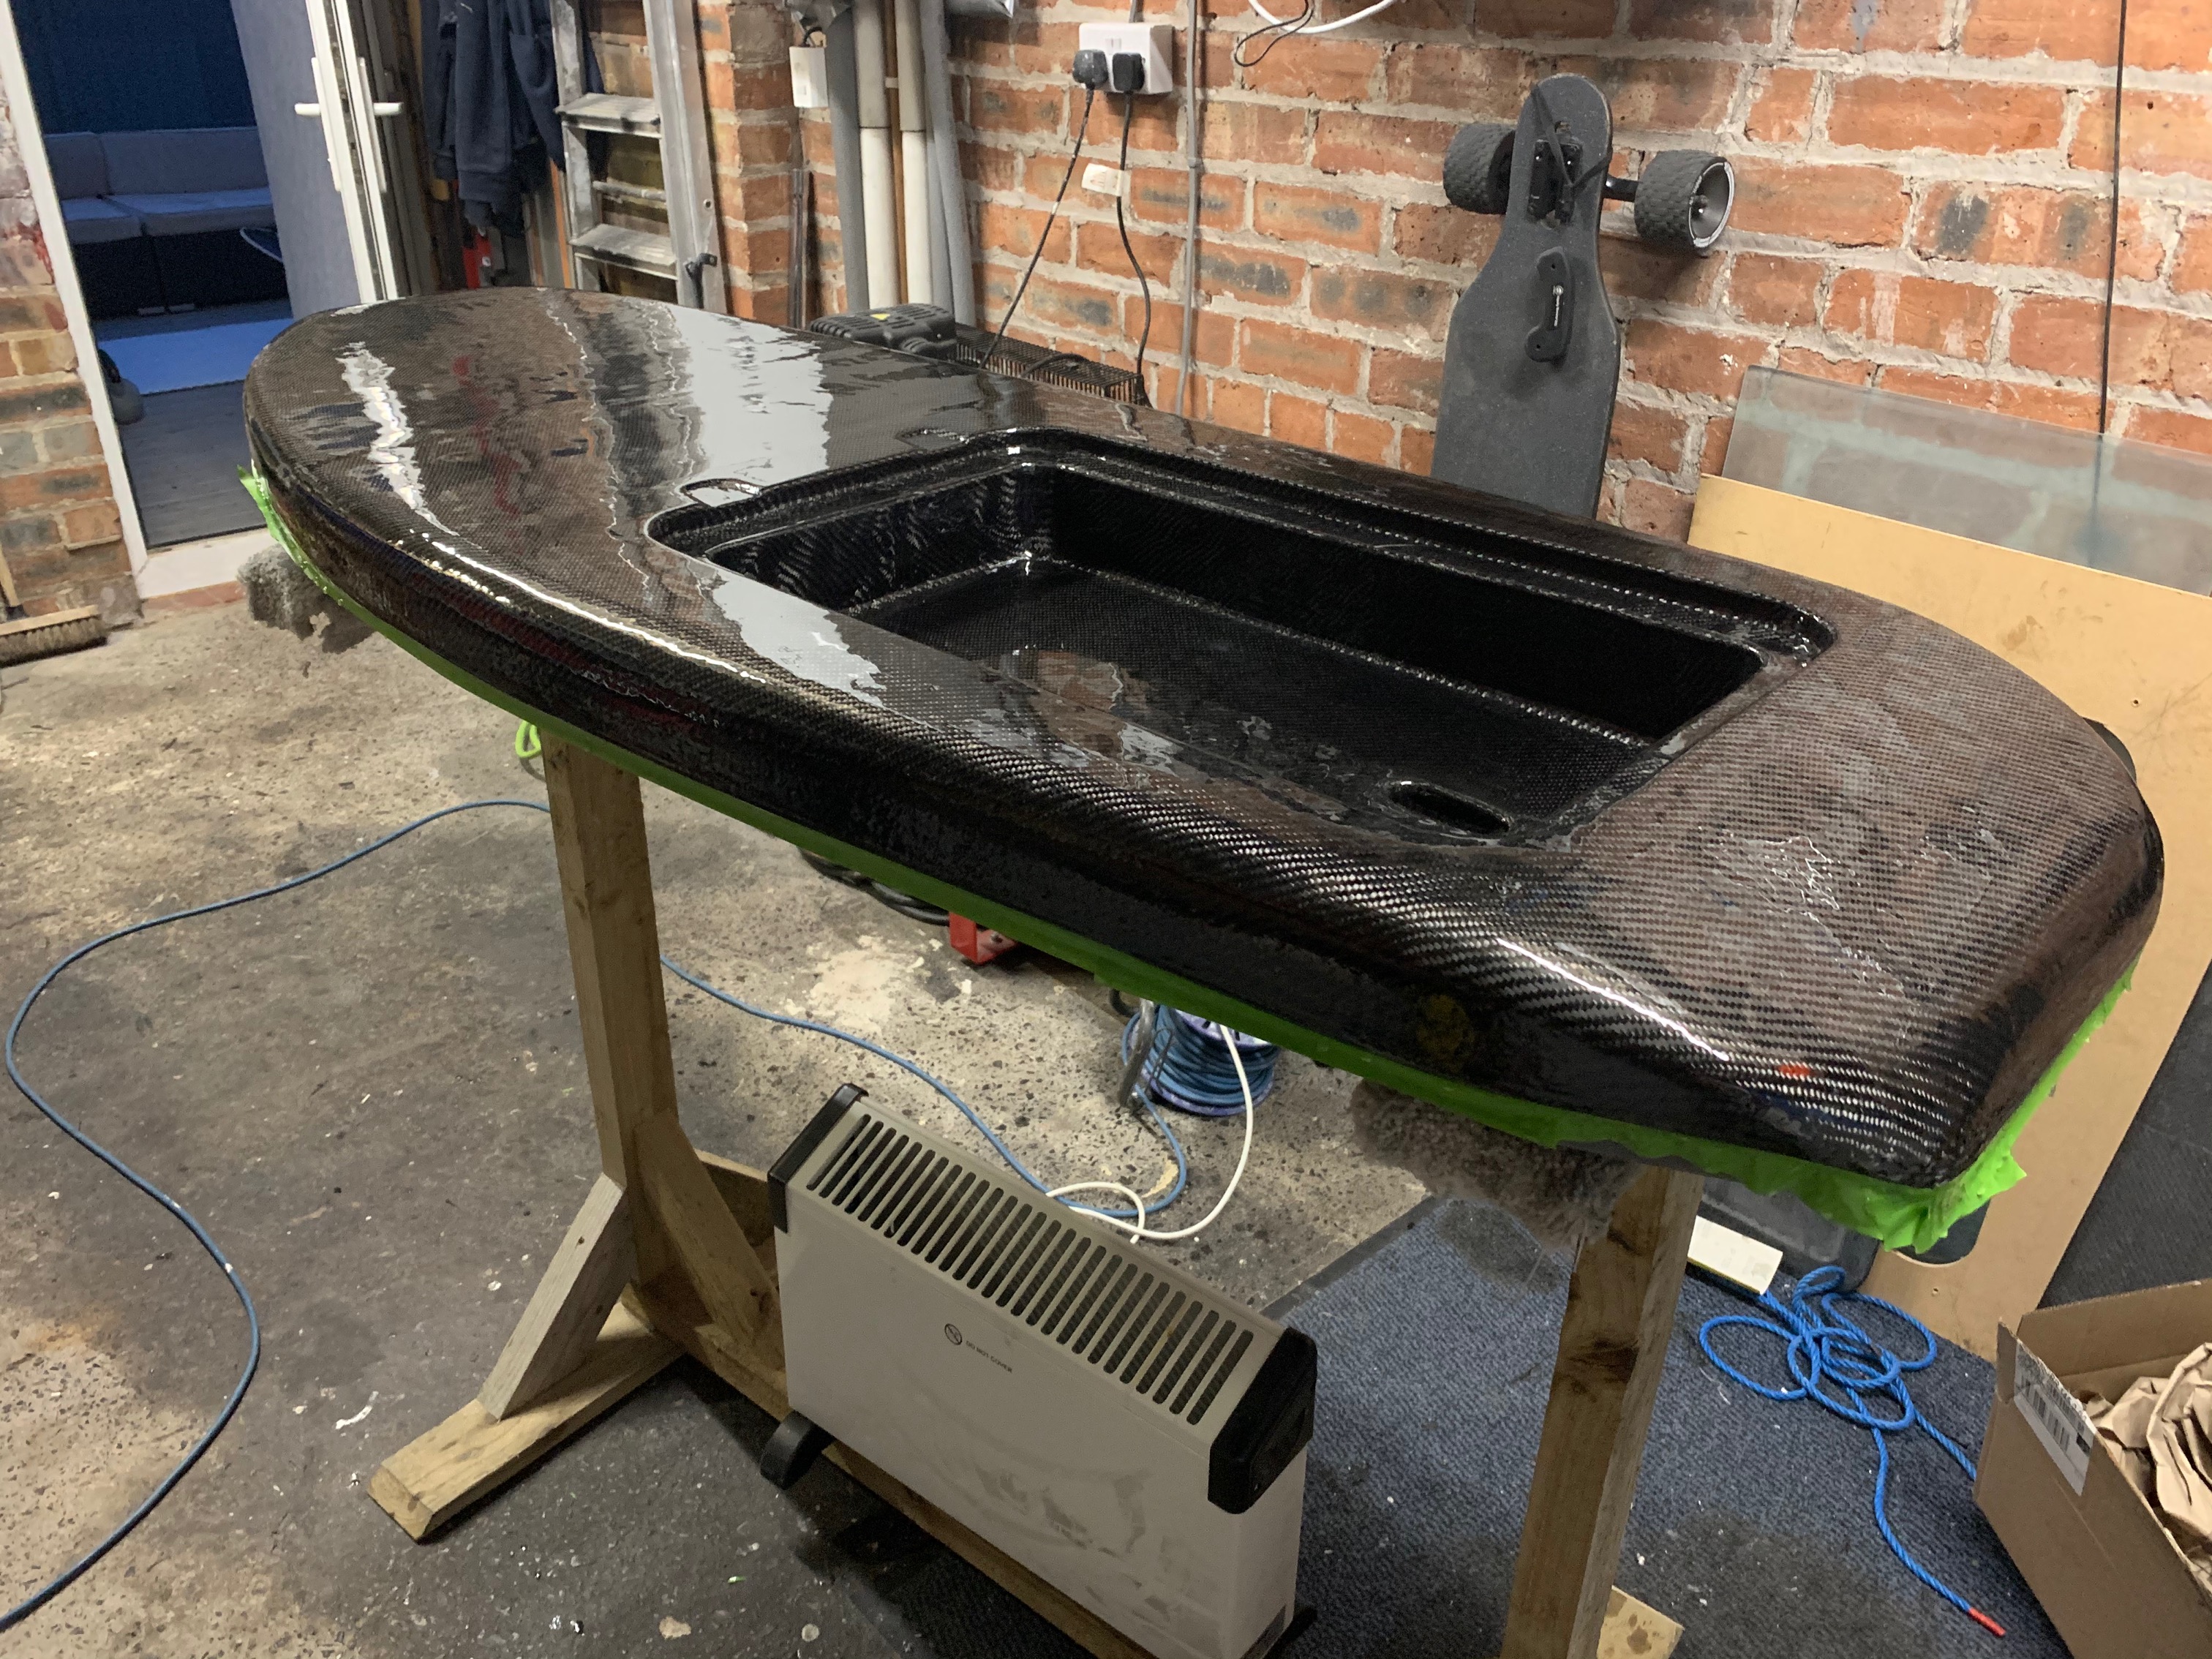
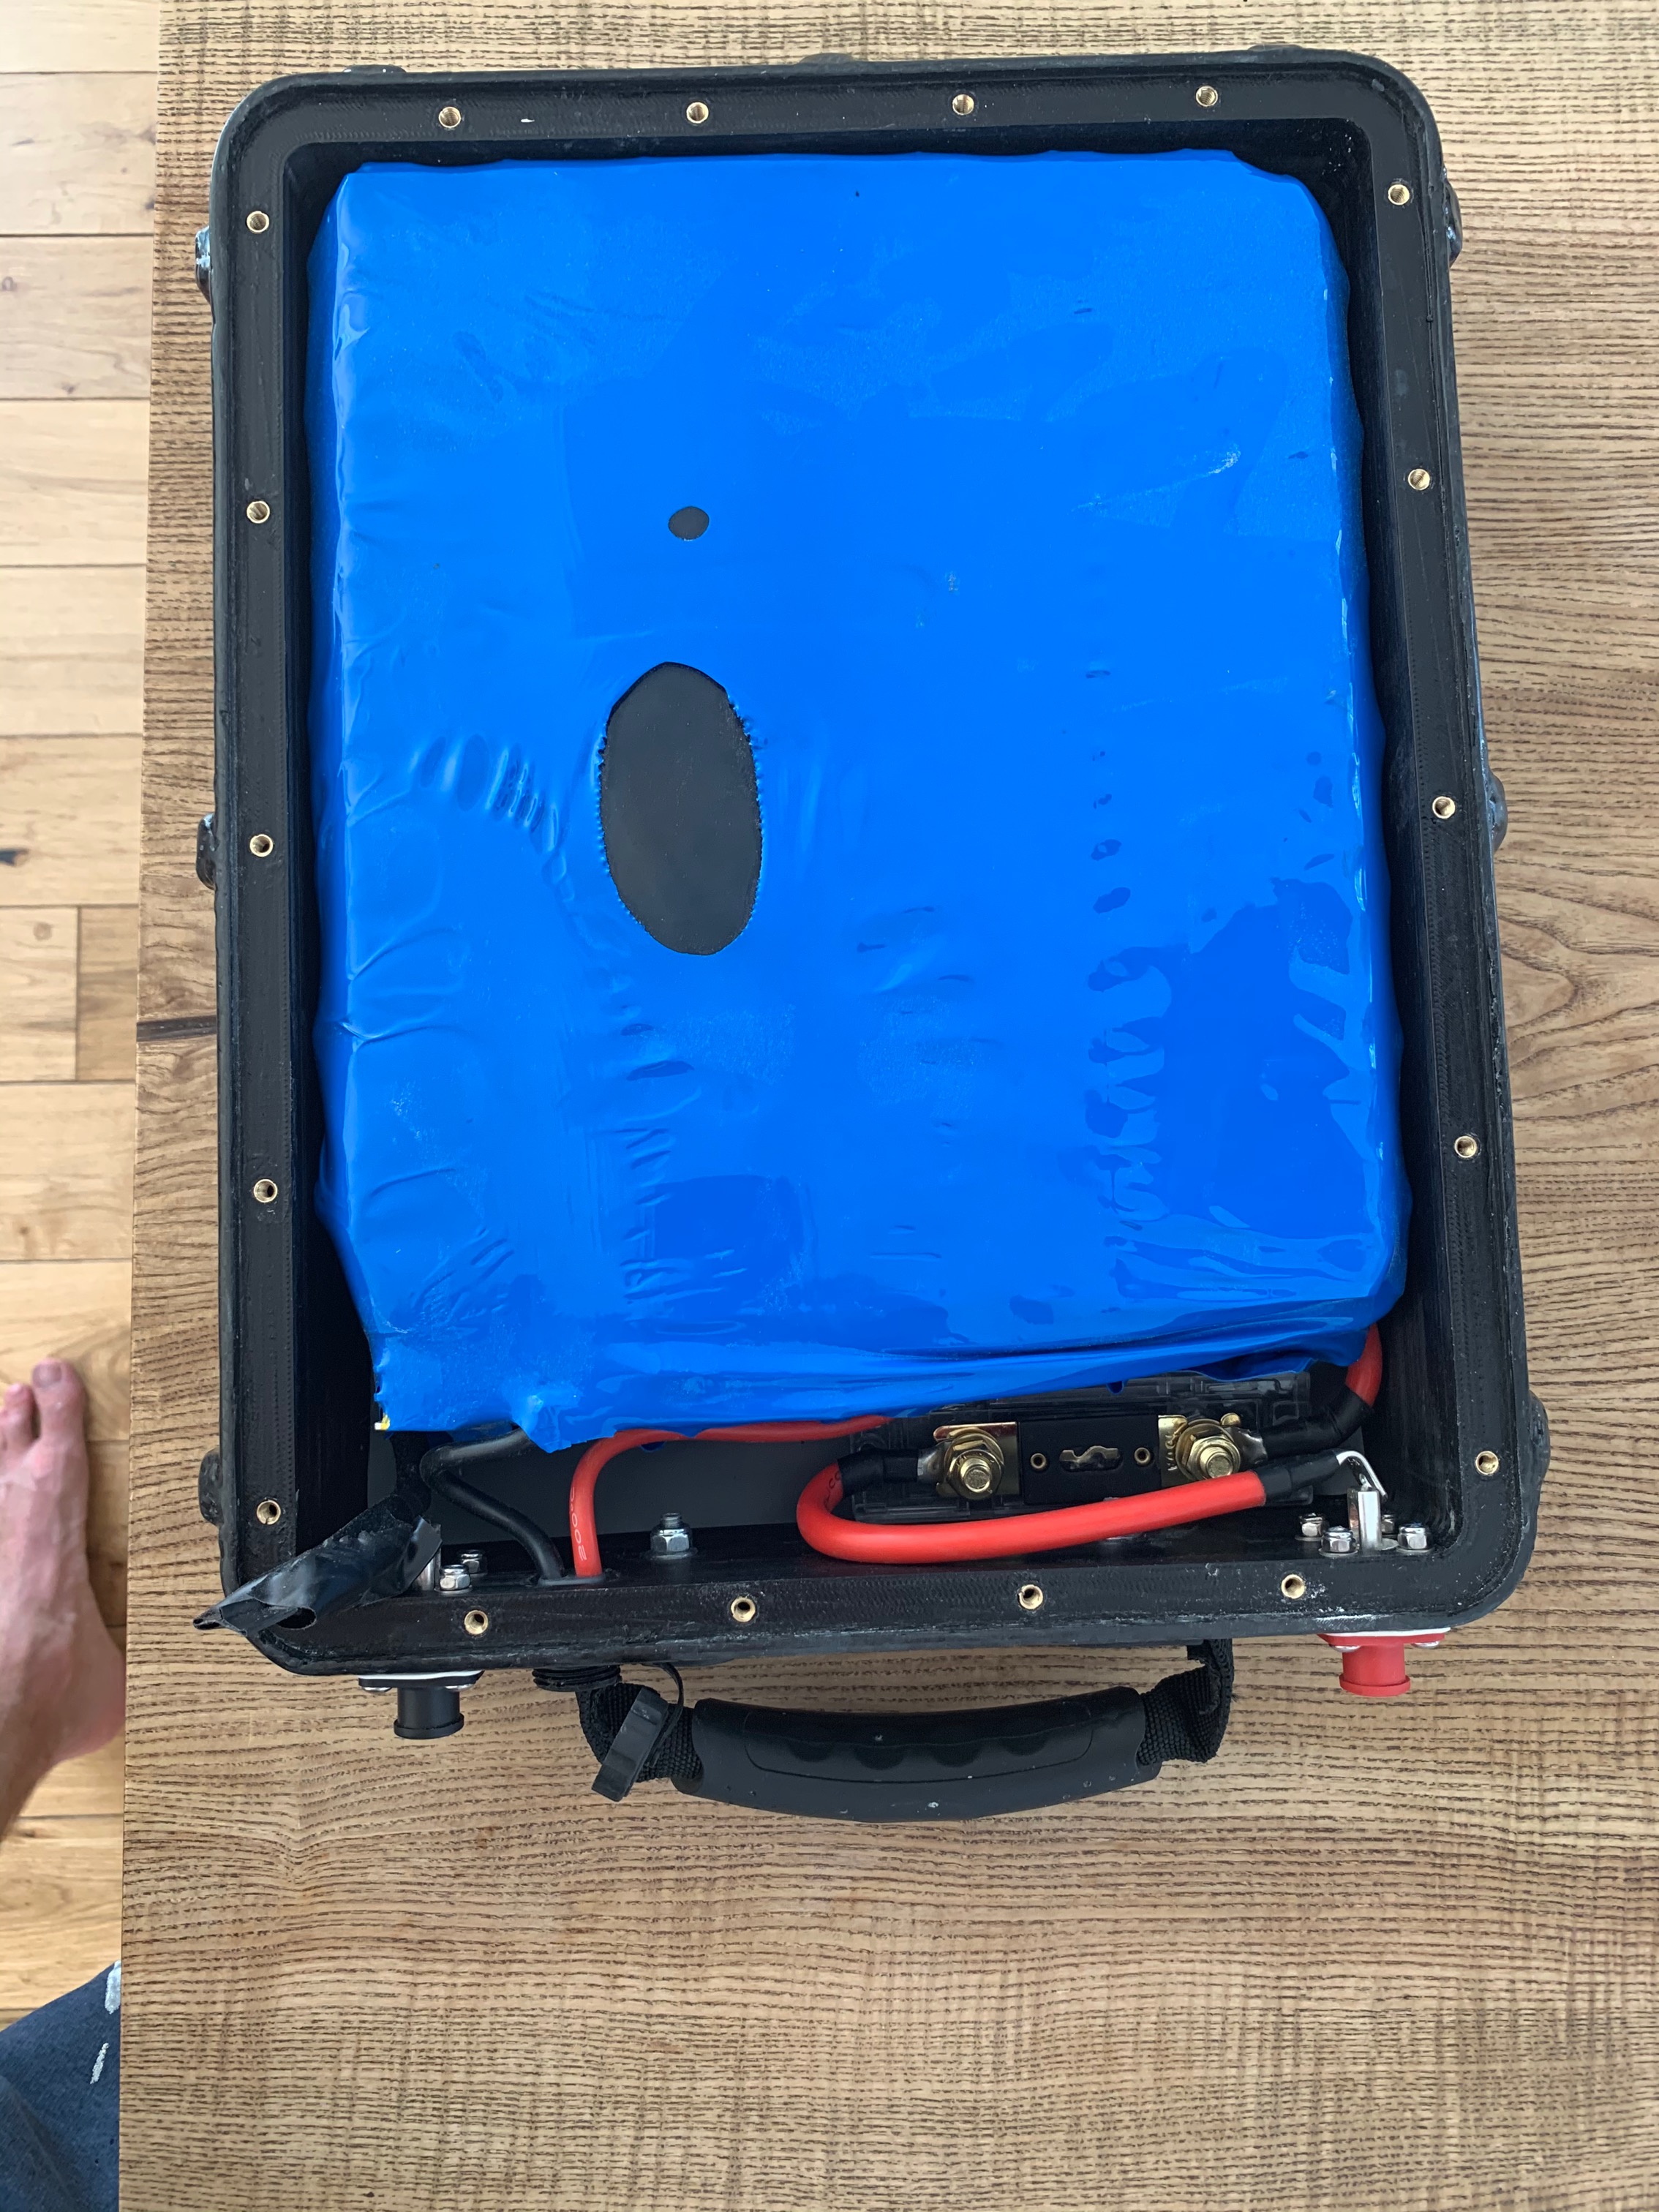
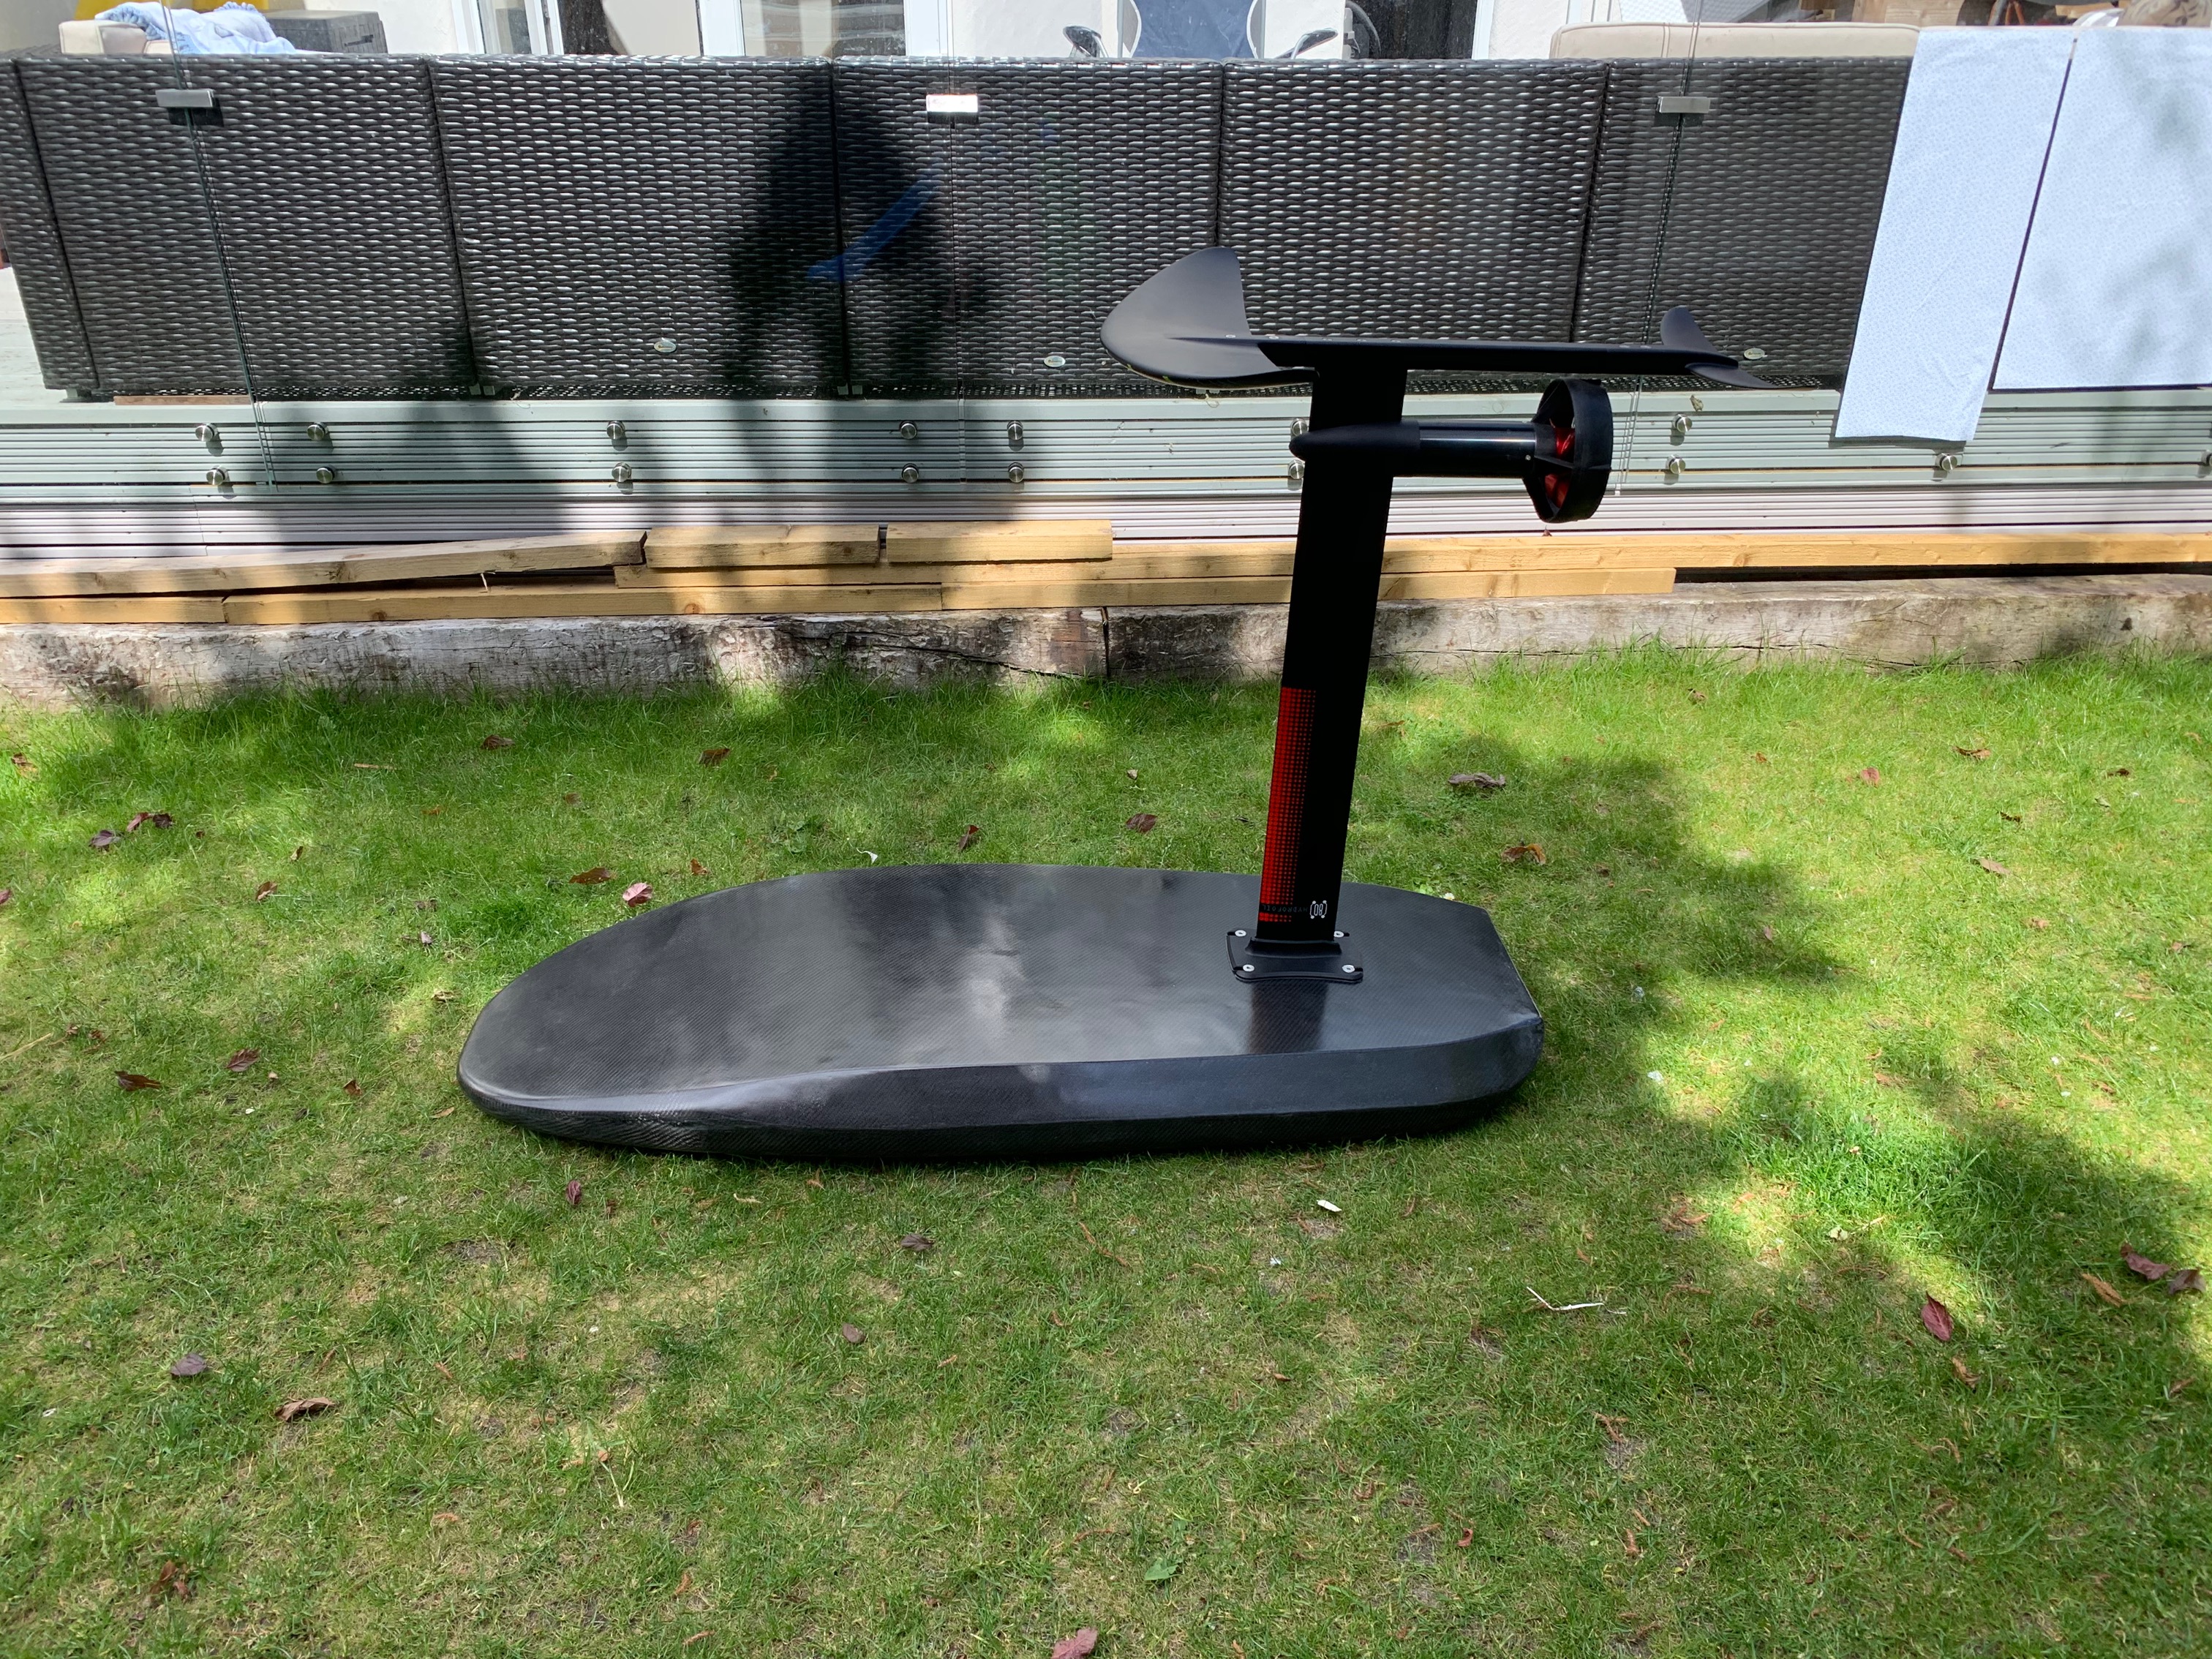
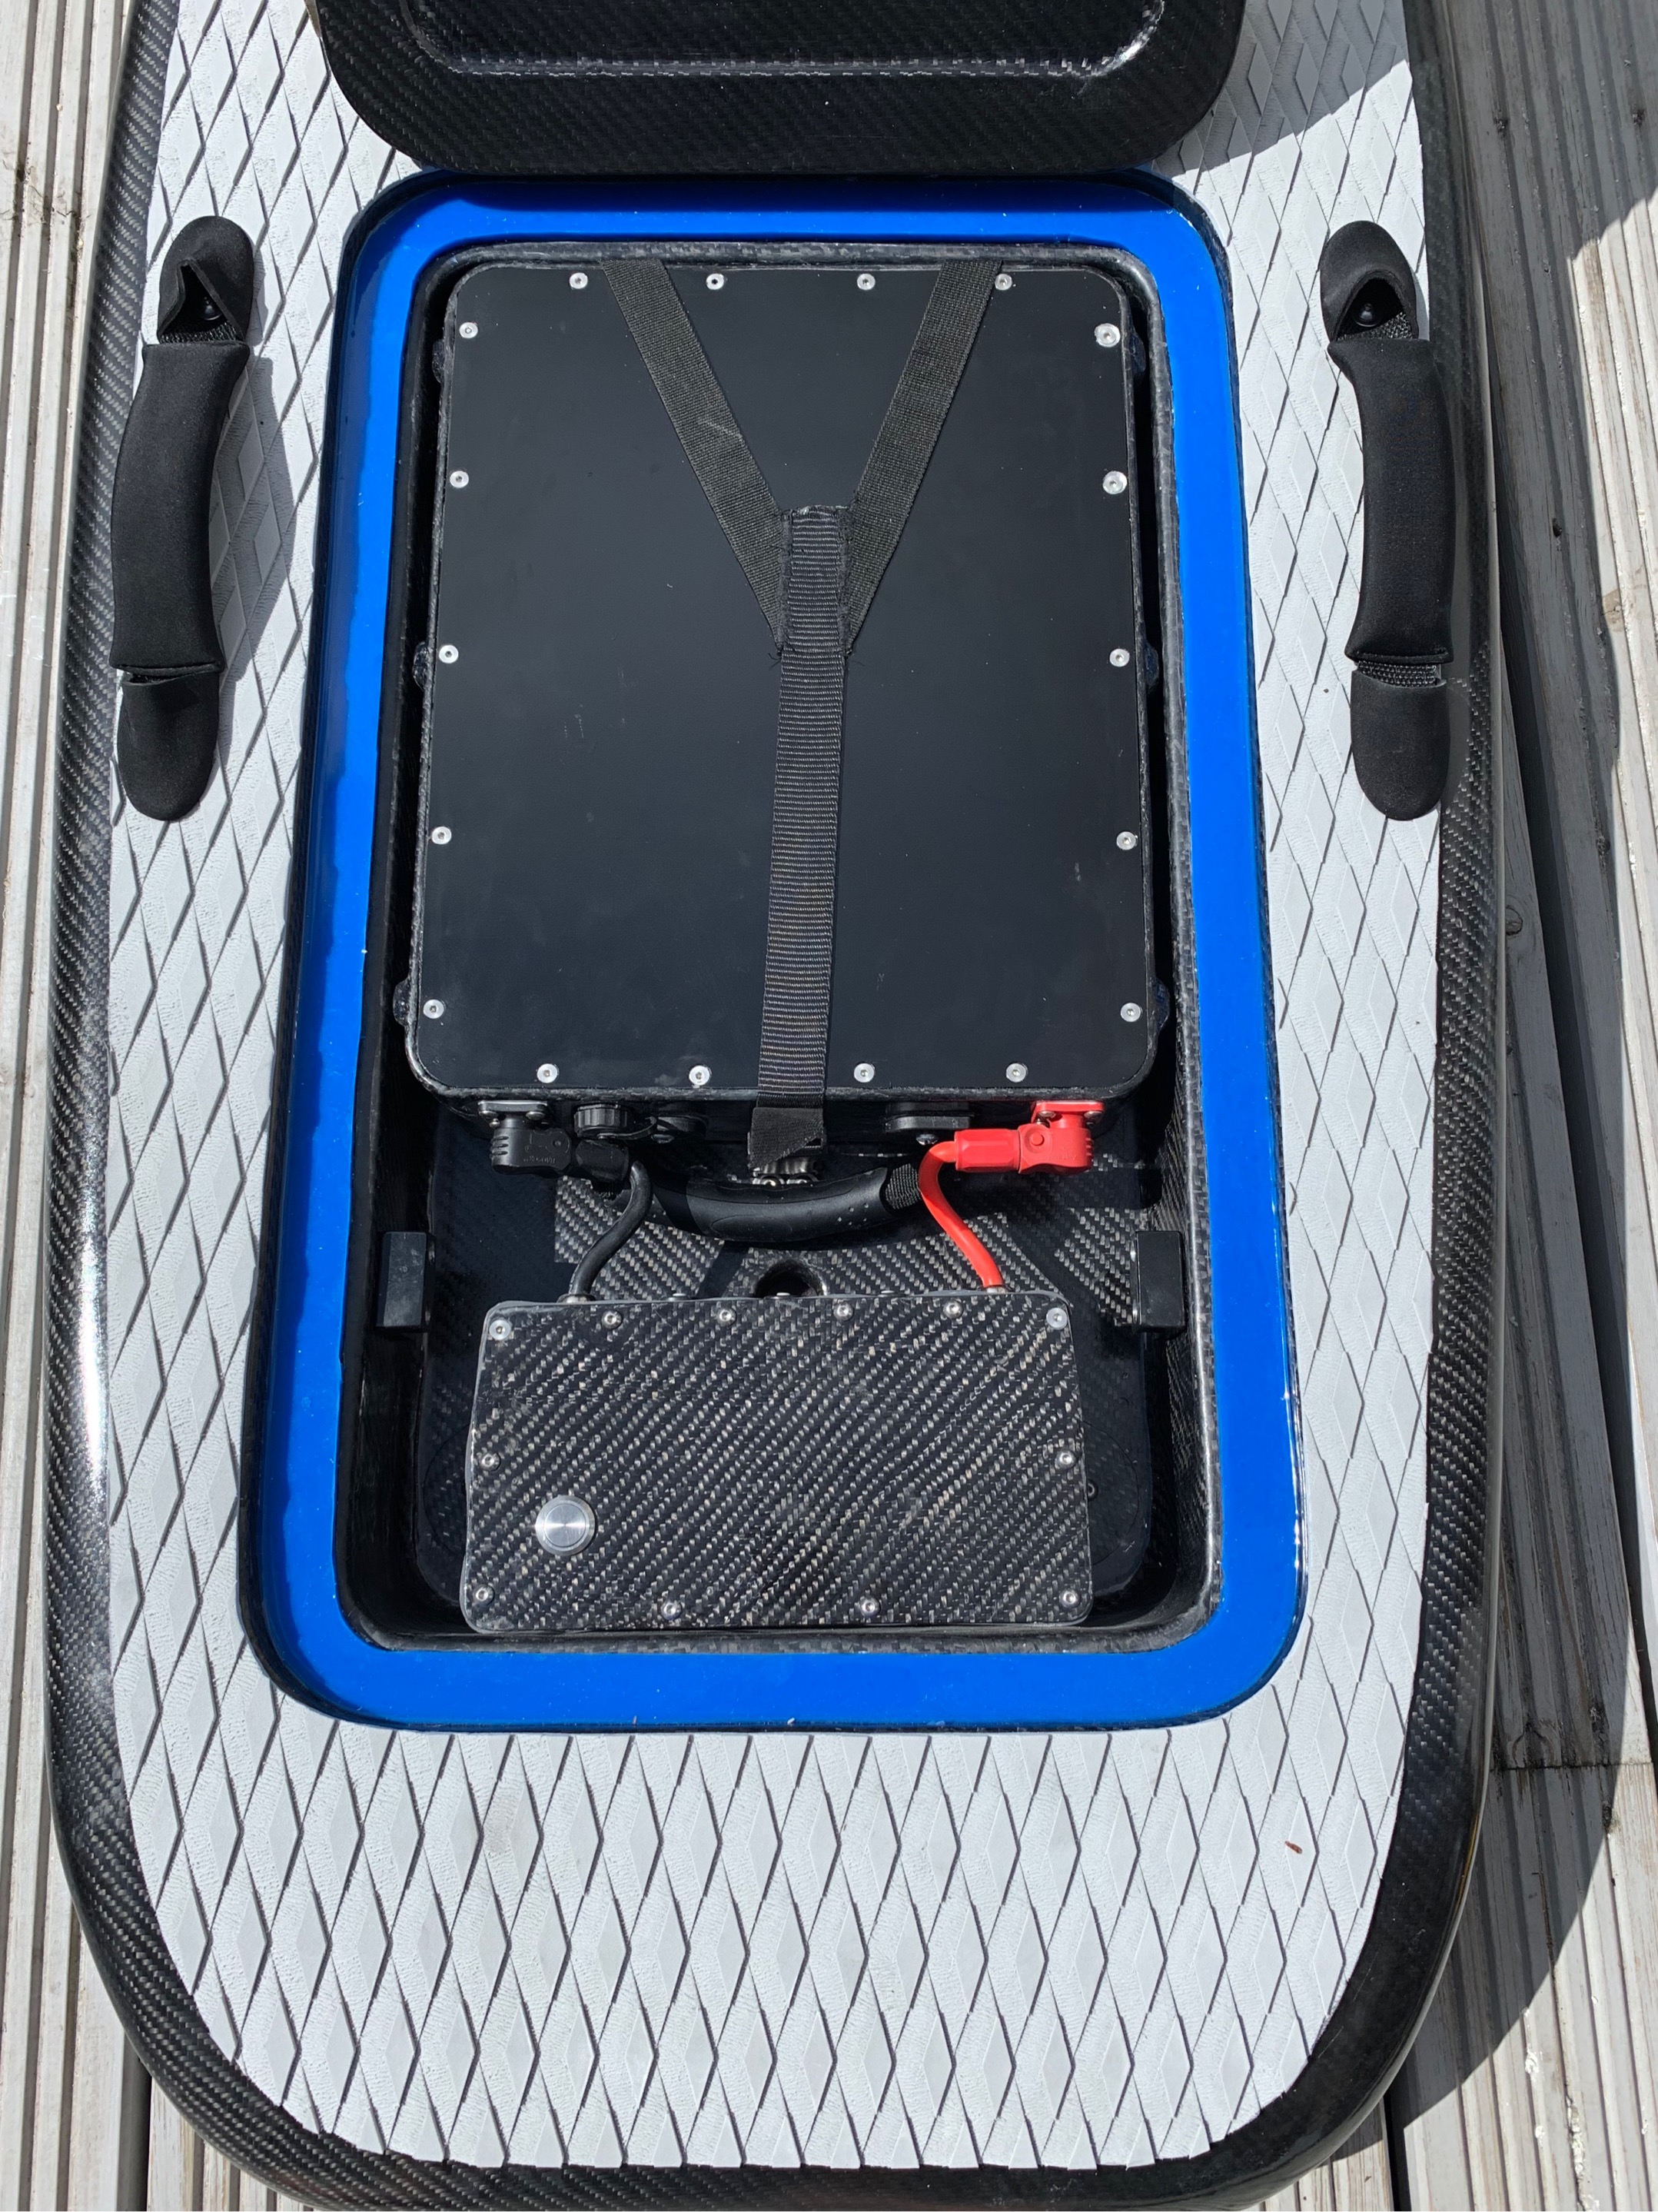
It’s a FR motor. The battery case is 3D printed, I tried 2 other cases first with no joy so I had to learn the basics on fusion 360 and had a company print it. I warped a layer of CF around it and filled it with resin for strength. I opted for sparse in full so the resin would flow through. Although I wish I had gone for 30% or 40% infill instead as the resin just added weight and was a waste/expense in resin as the CF and Aluminium top and bottom is strong enough.
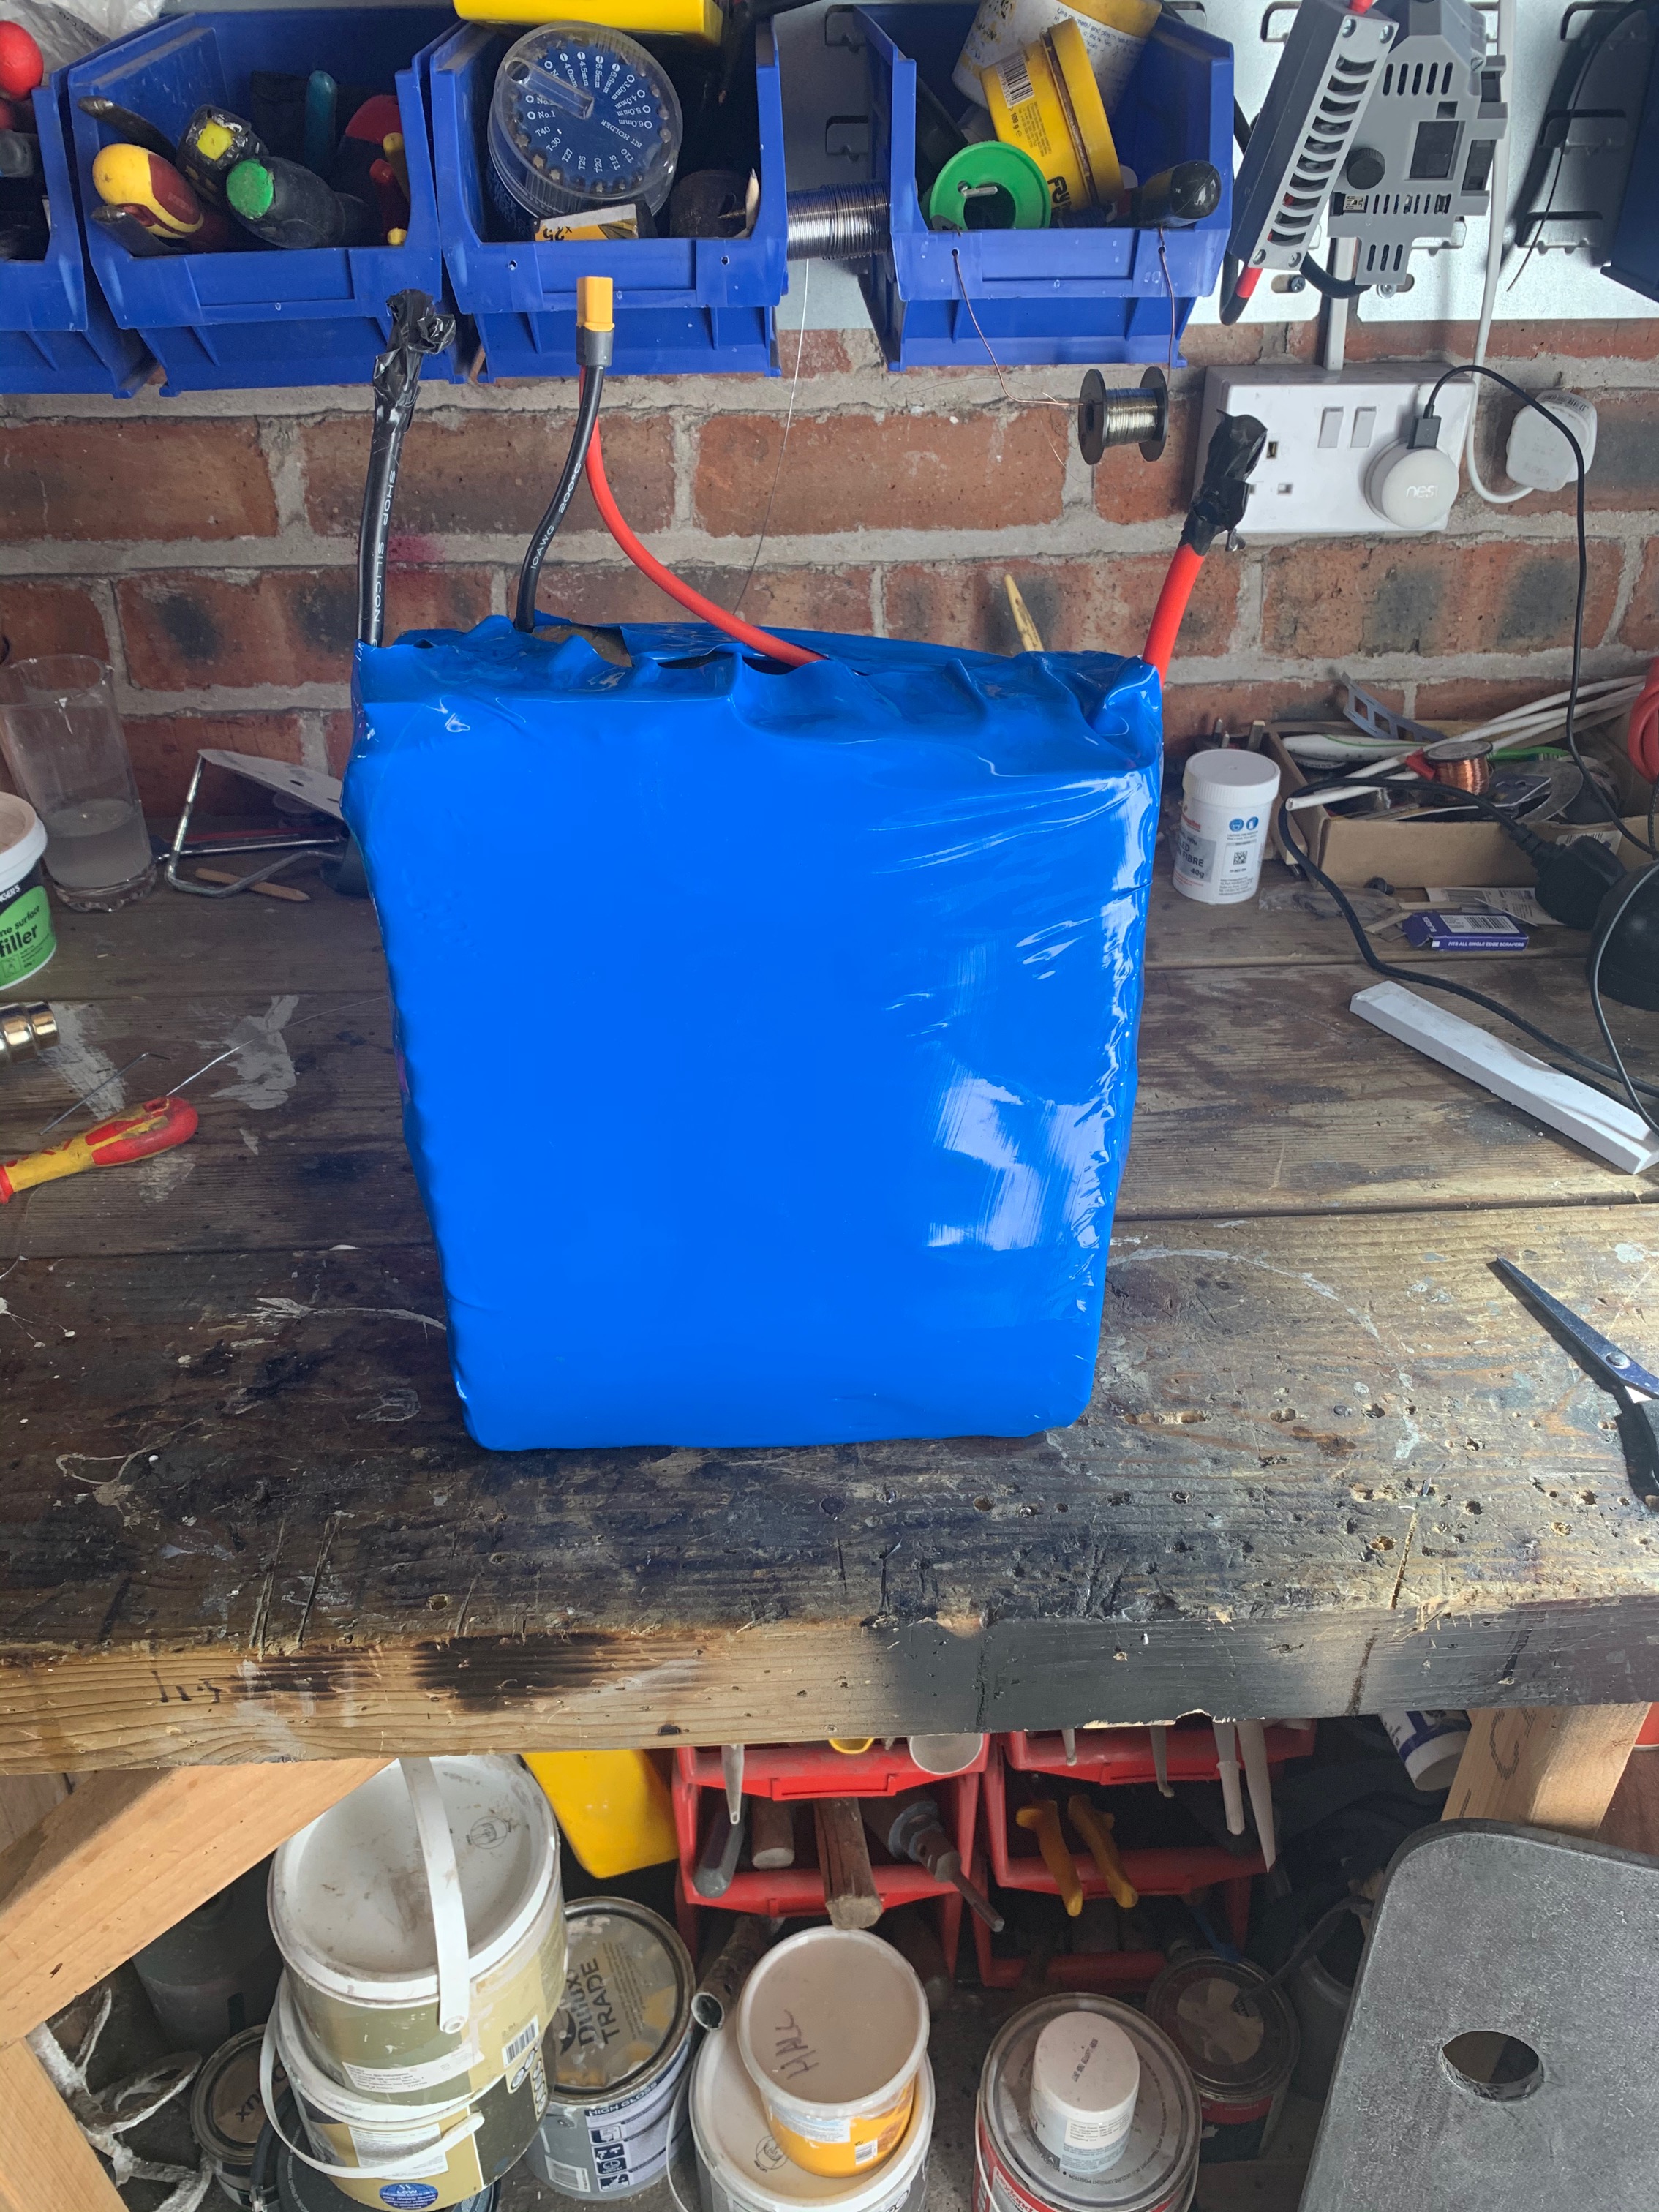
As for waterproof I’m yet to fully submerge it, I sealed the bottom plate on with all connectors and handle on and held it down in water to the lip of the box for a couple hours and nothing made its way in, that was good enough for me.
1 Like
My favorite build I’ve seen so far on here. Amazing work! Does the VESC stay cool?
1 Like
Thanks you for the big compliment. I would be the first to admit that my CF work isn’t the best as there are many imperfections here and there. As it’s my first time working with CF I’m happy with the results all the same.
I’m yet to take it for a ride as I only finished it yesterday, hopefully I can have a go after work today.
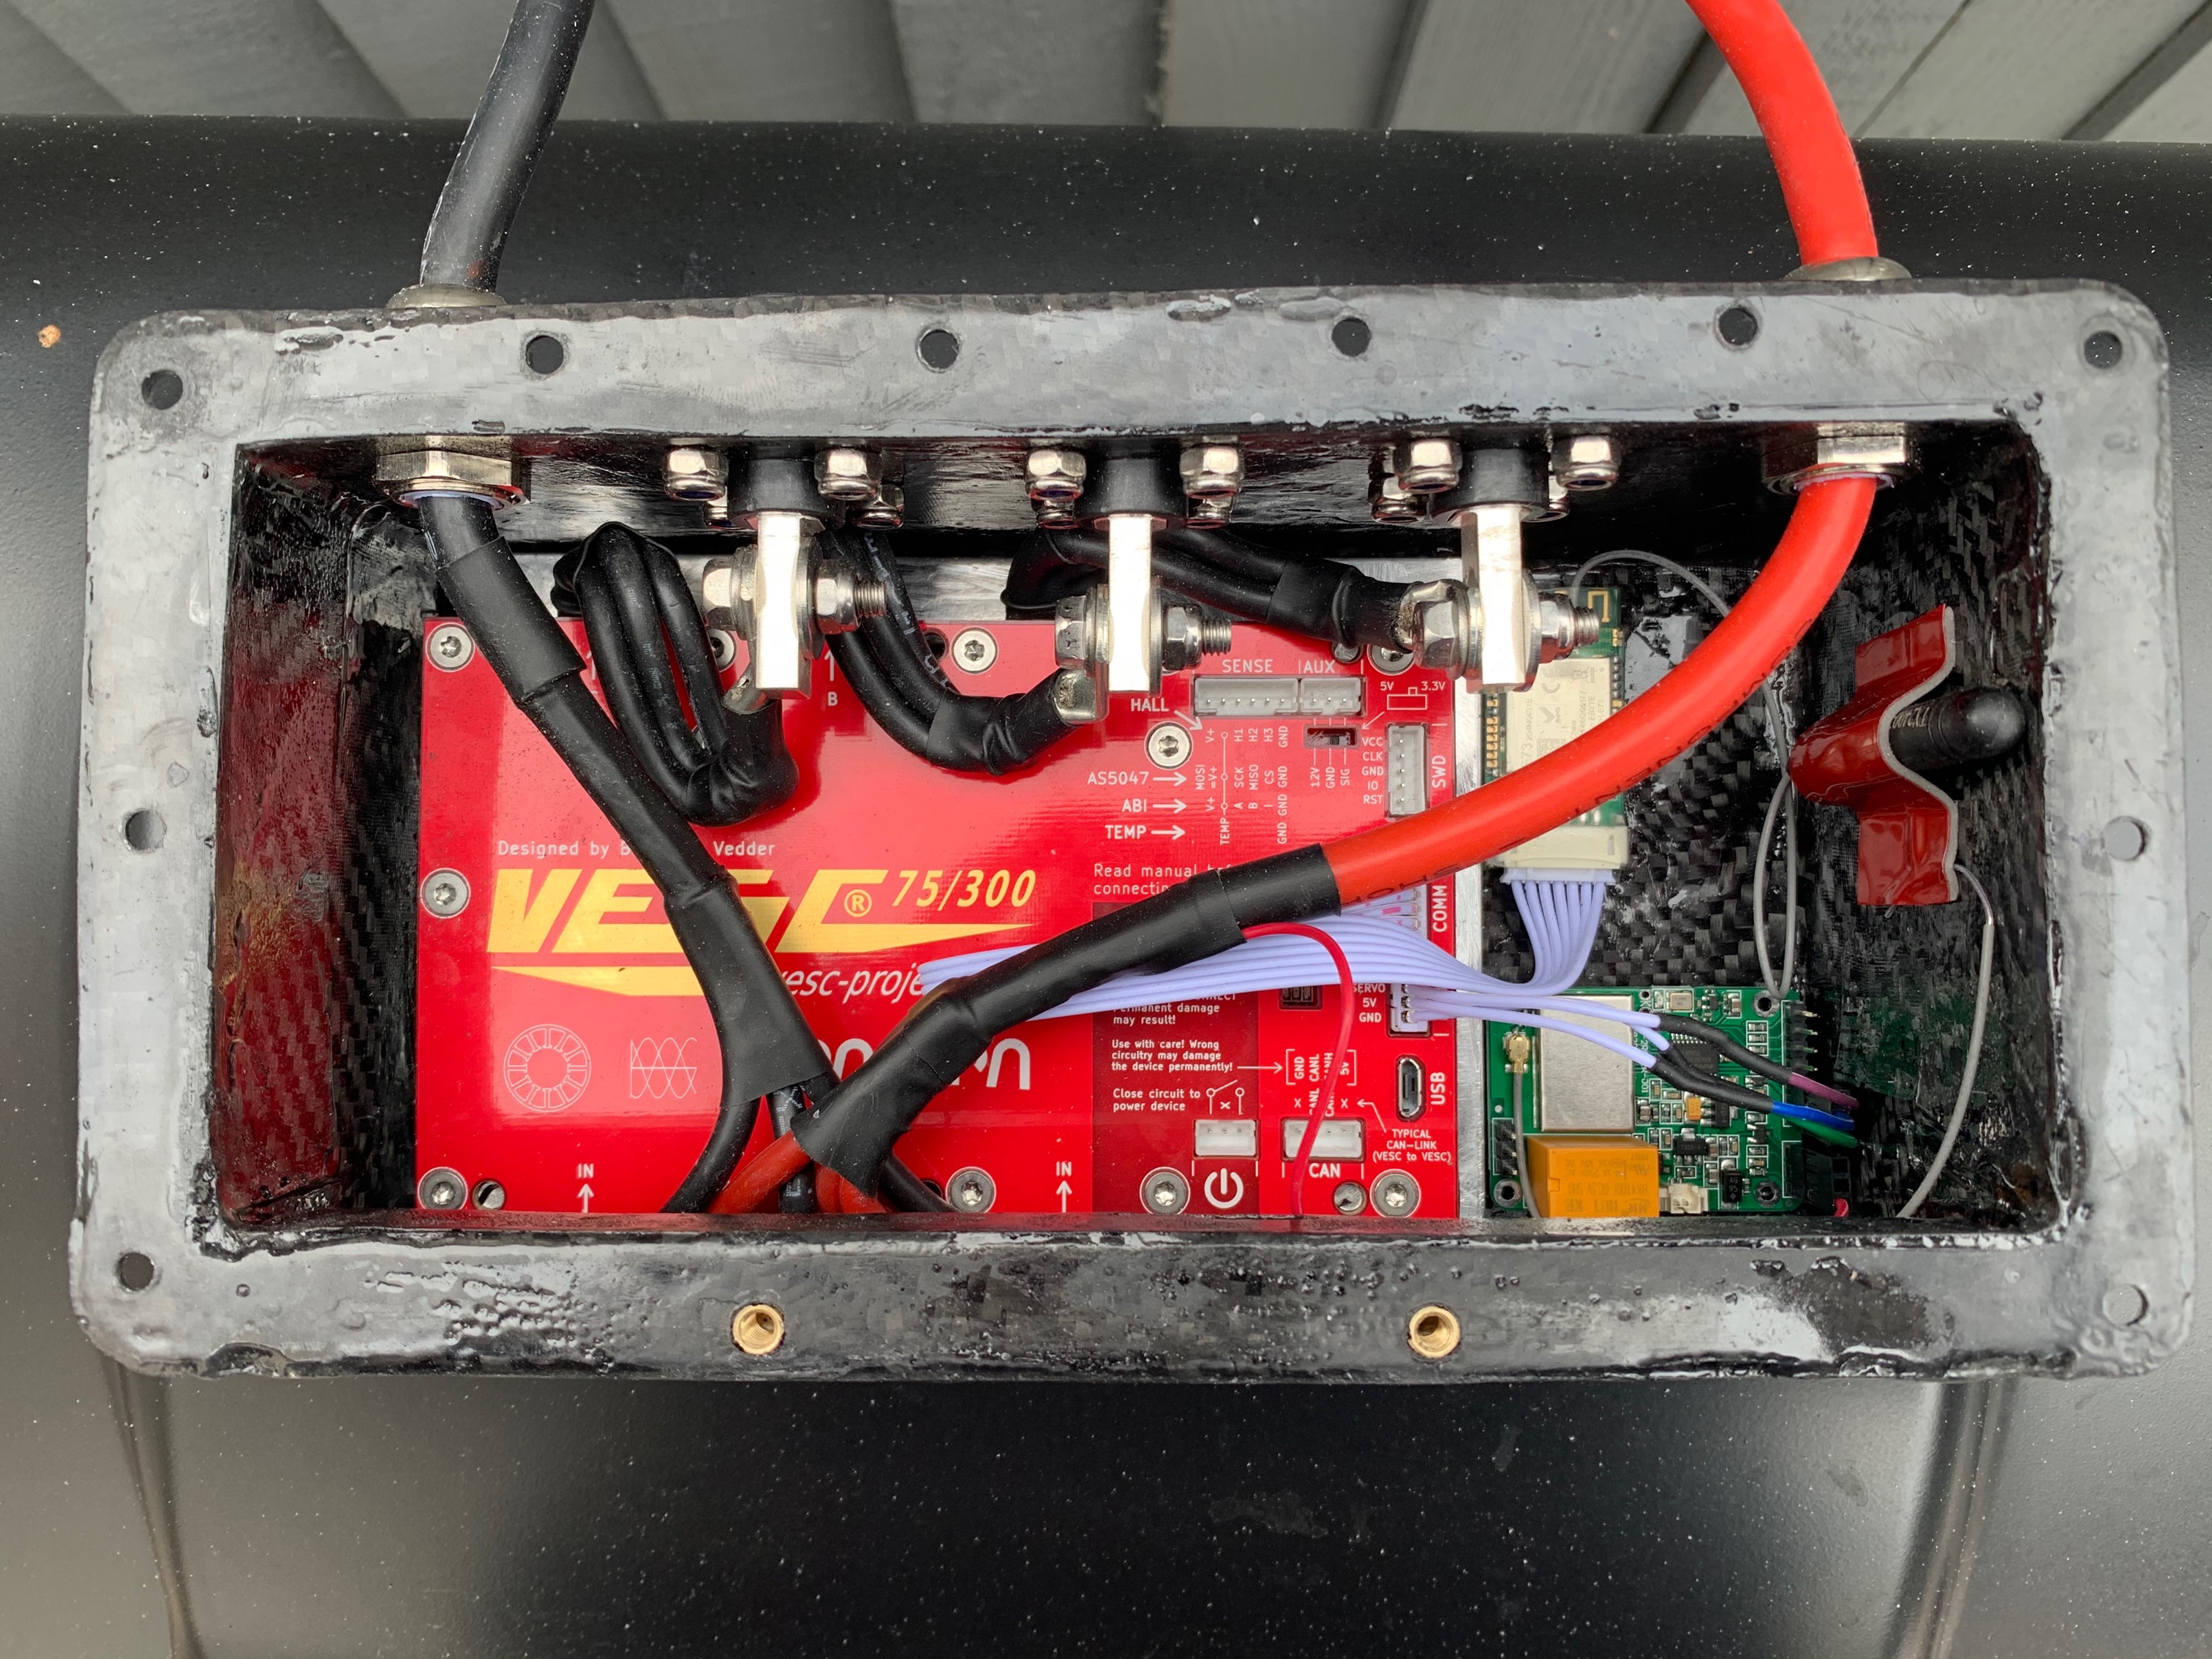
I’ve got a metr pro connected so I’ll share the stats on here afterwards. There’s a 4mm aluminium plate bolted to the Vesc also, so I’m hoping it will be fine with out the need to add water cooling.
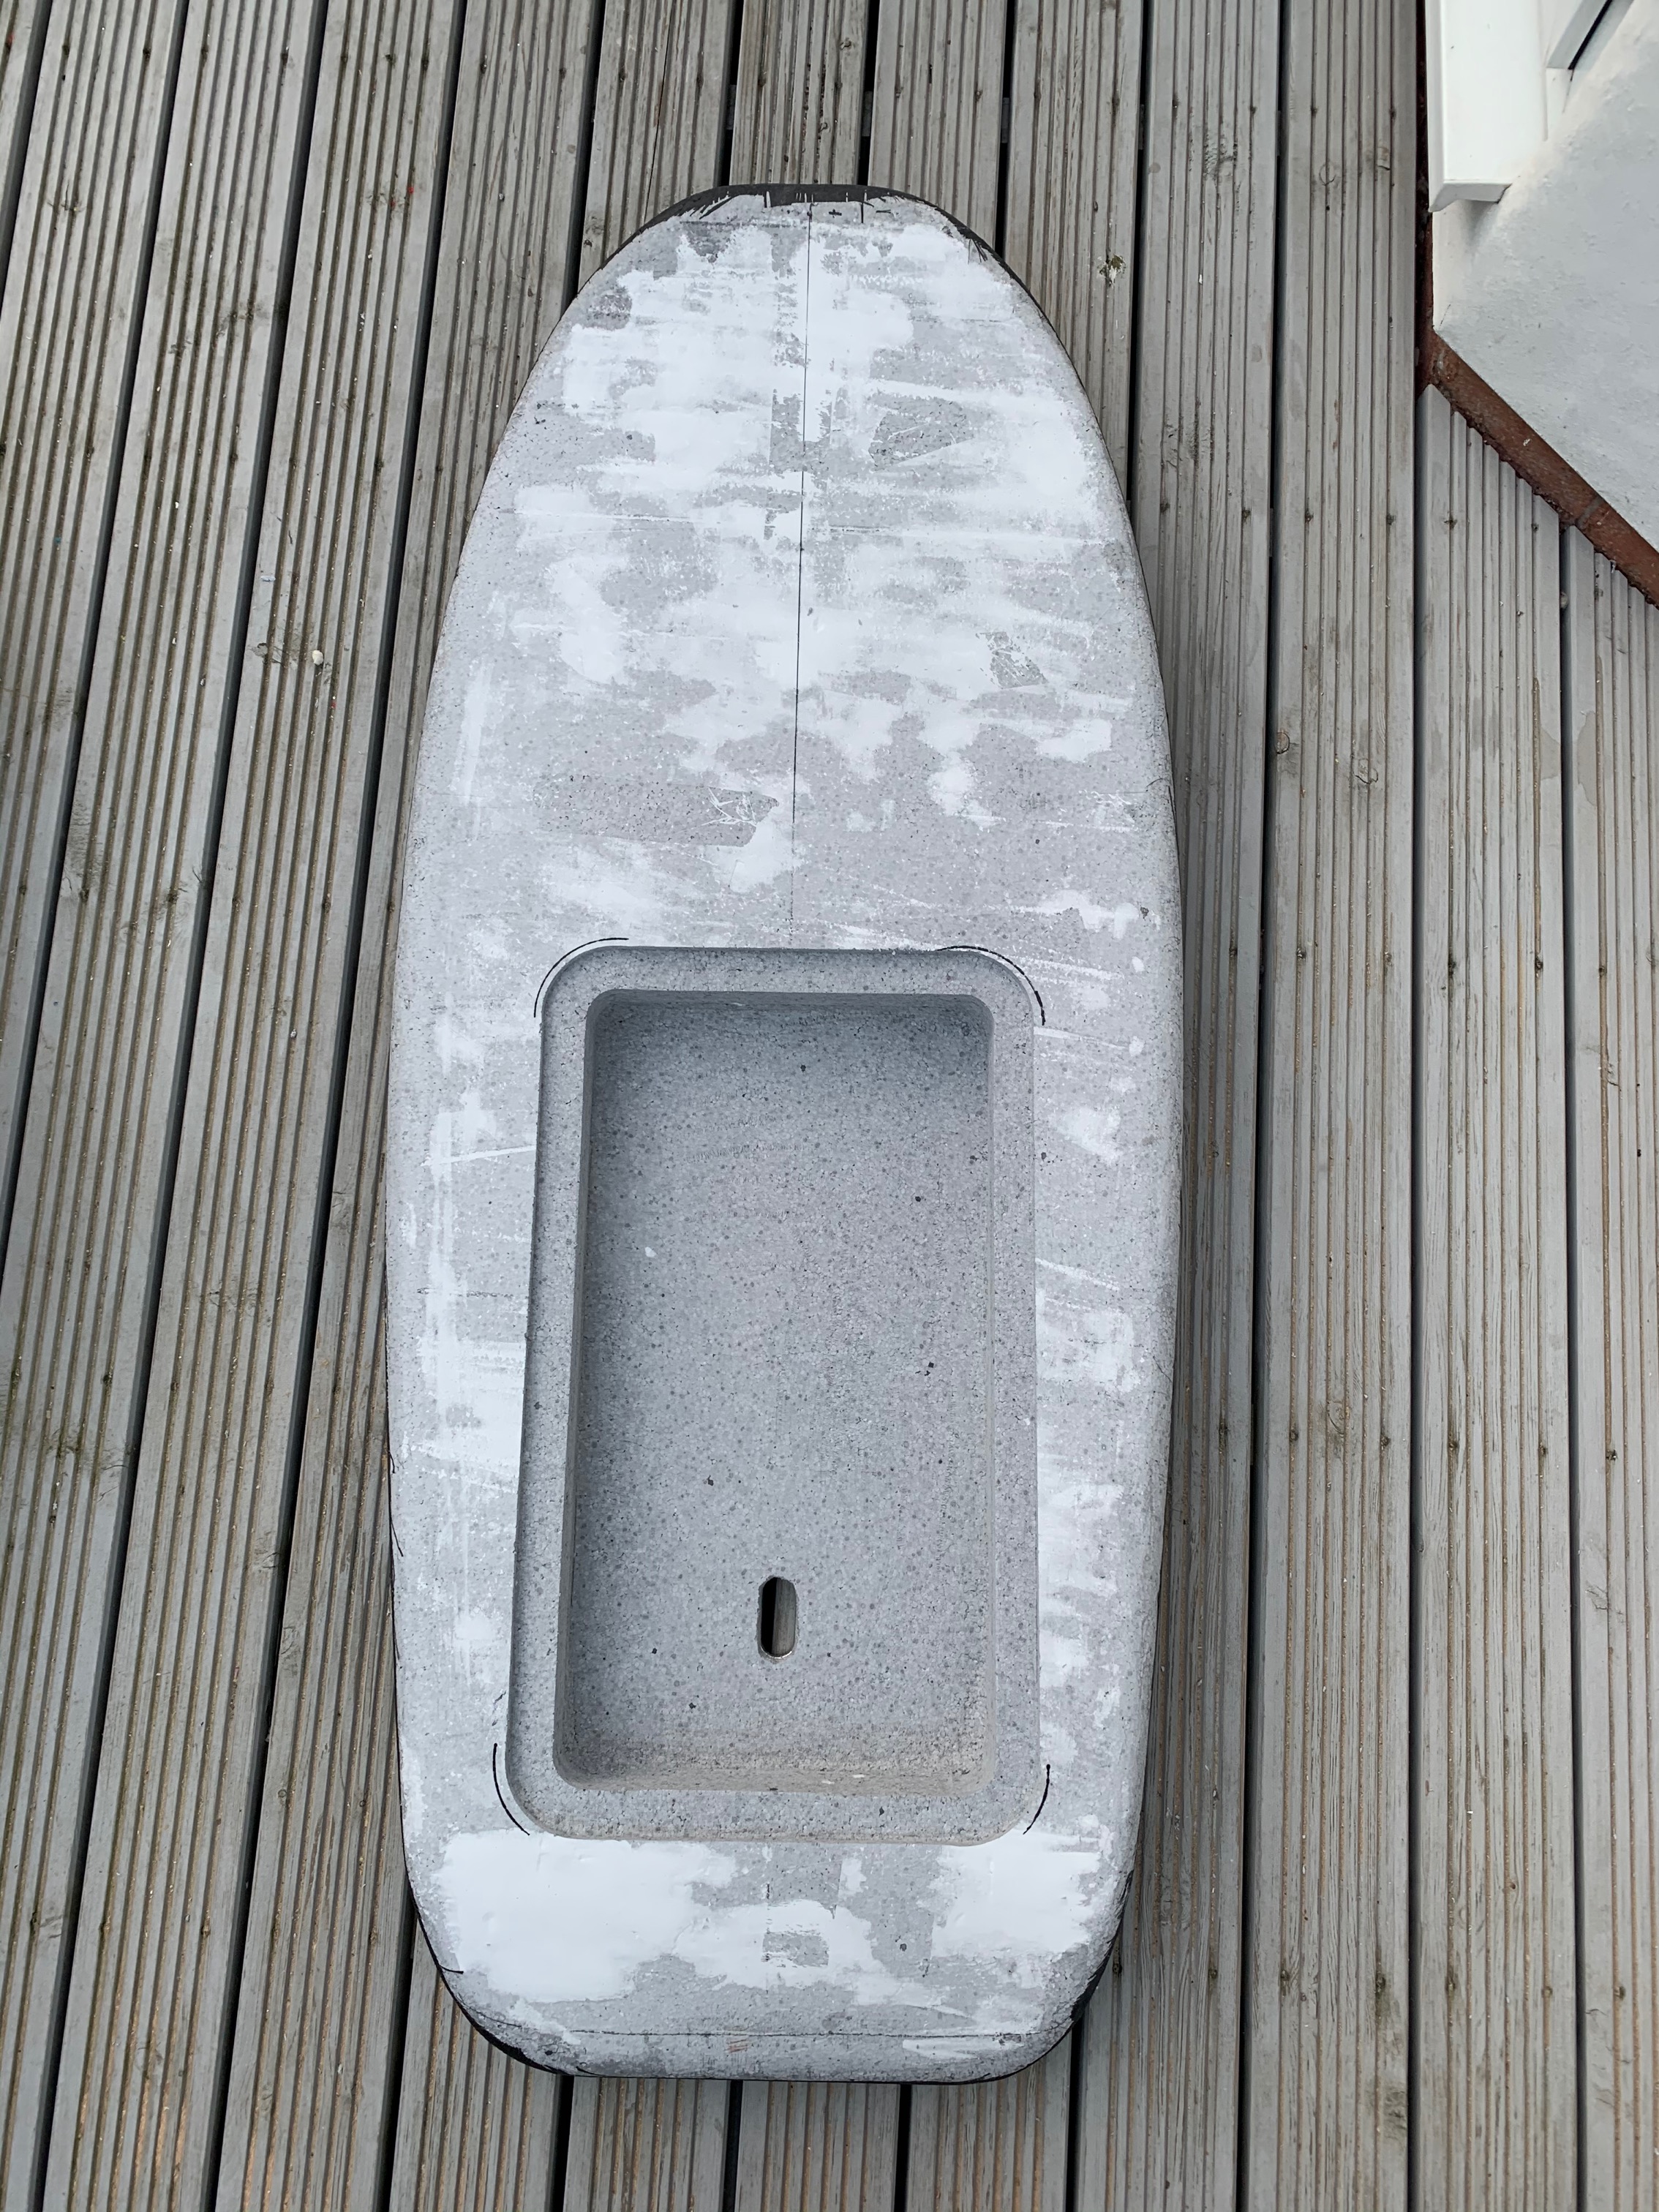
Great looking build! Did you pre-mould the hatch compartment?
Very nice build! What’s the spec of your battery? Also, do you still get strong signal to your remote despite those carbon fiber lids?
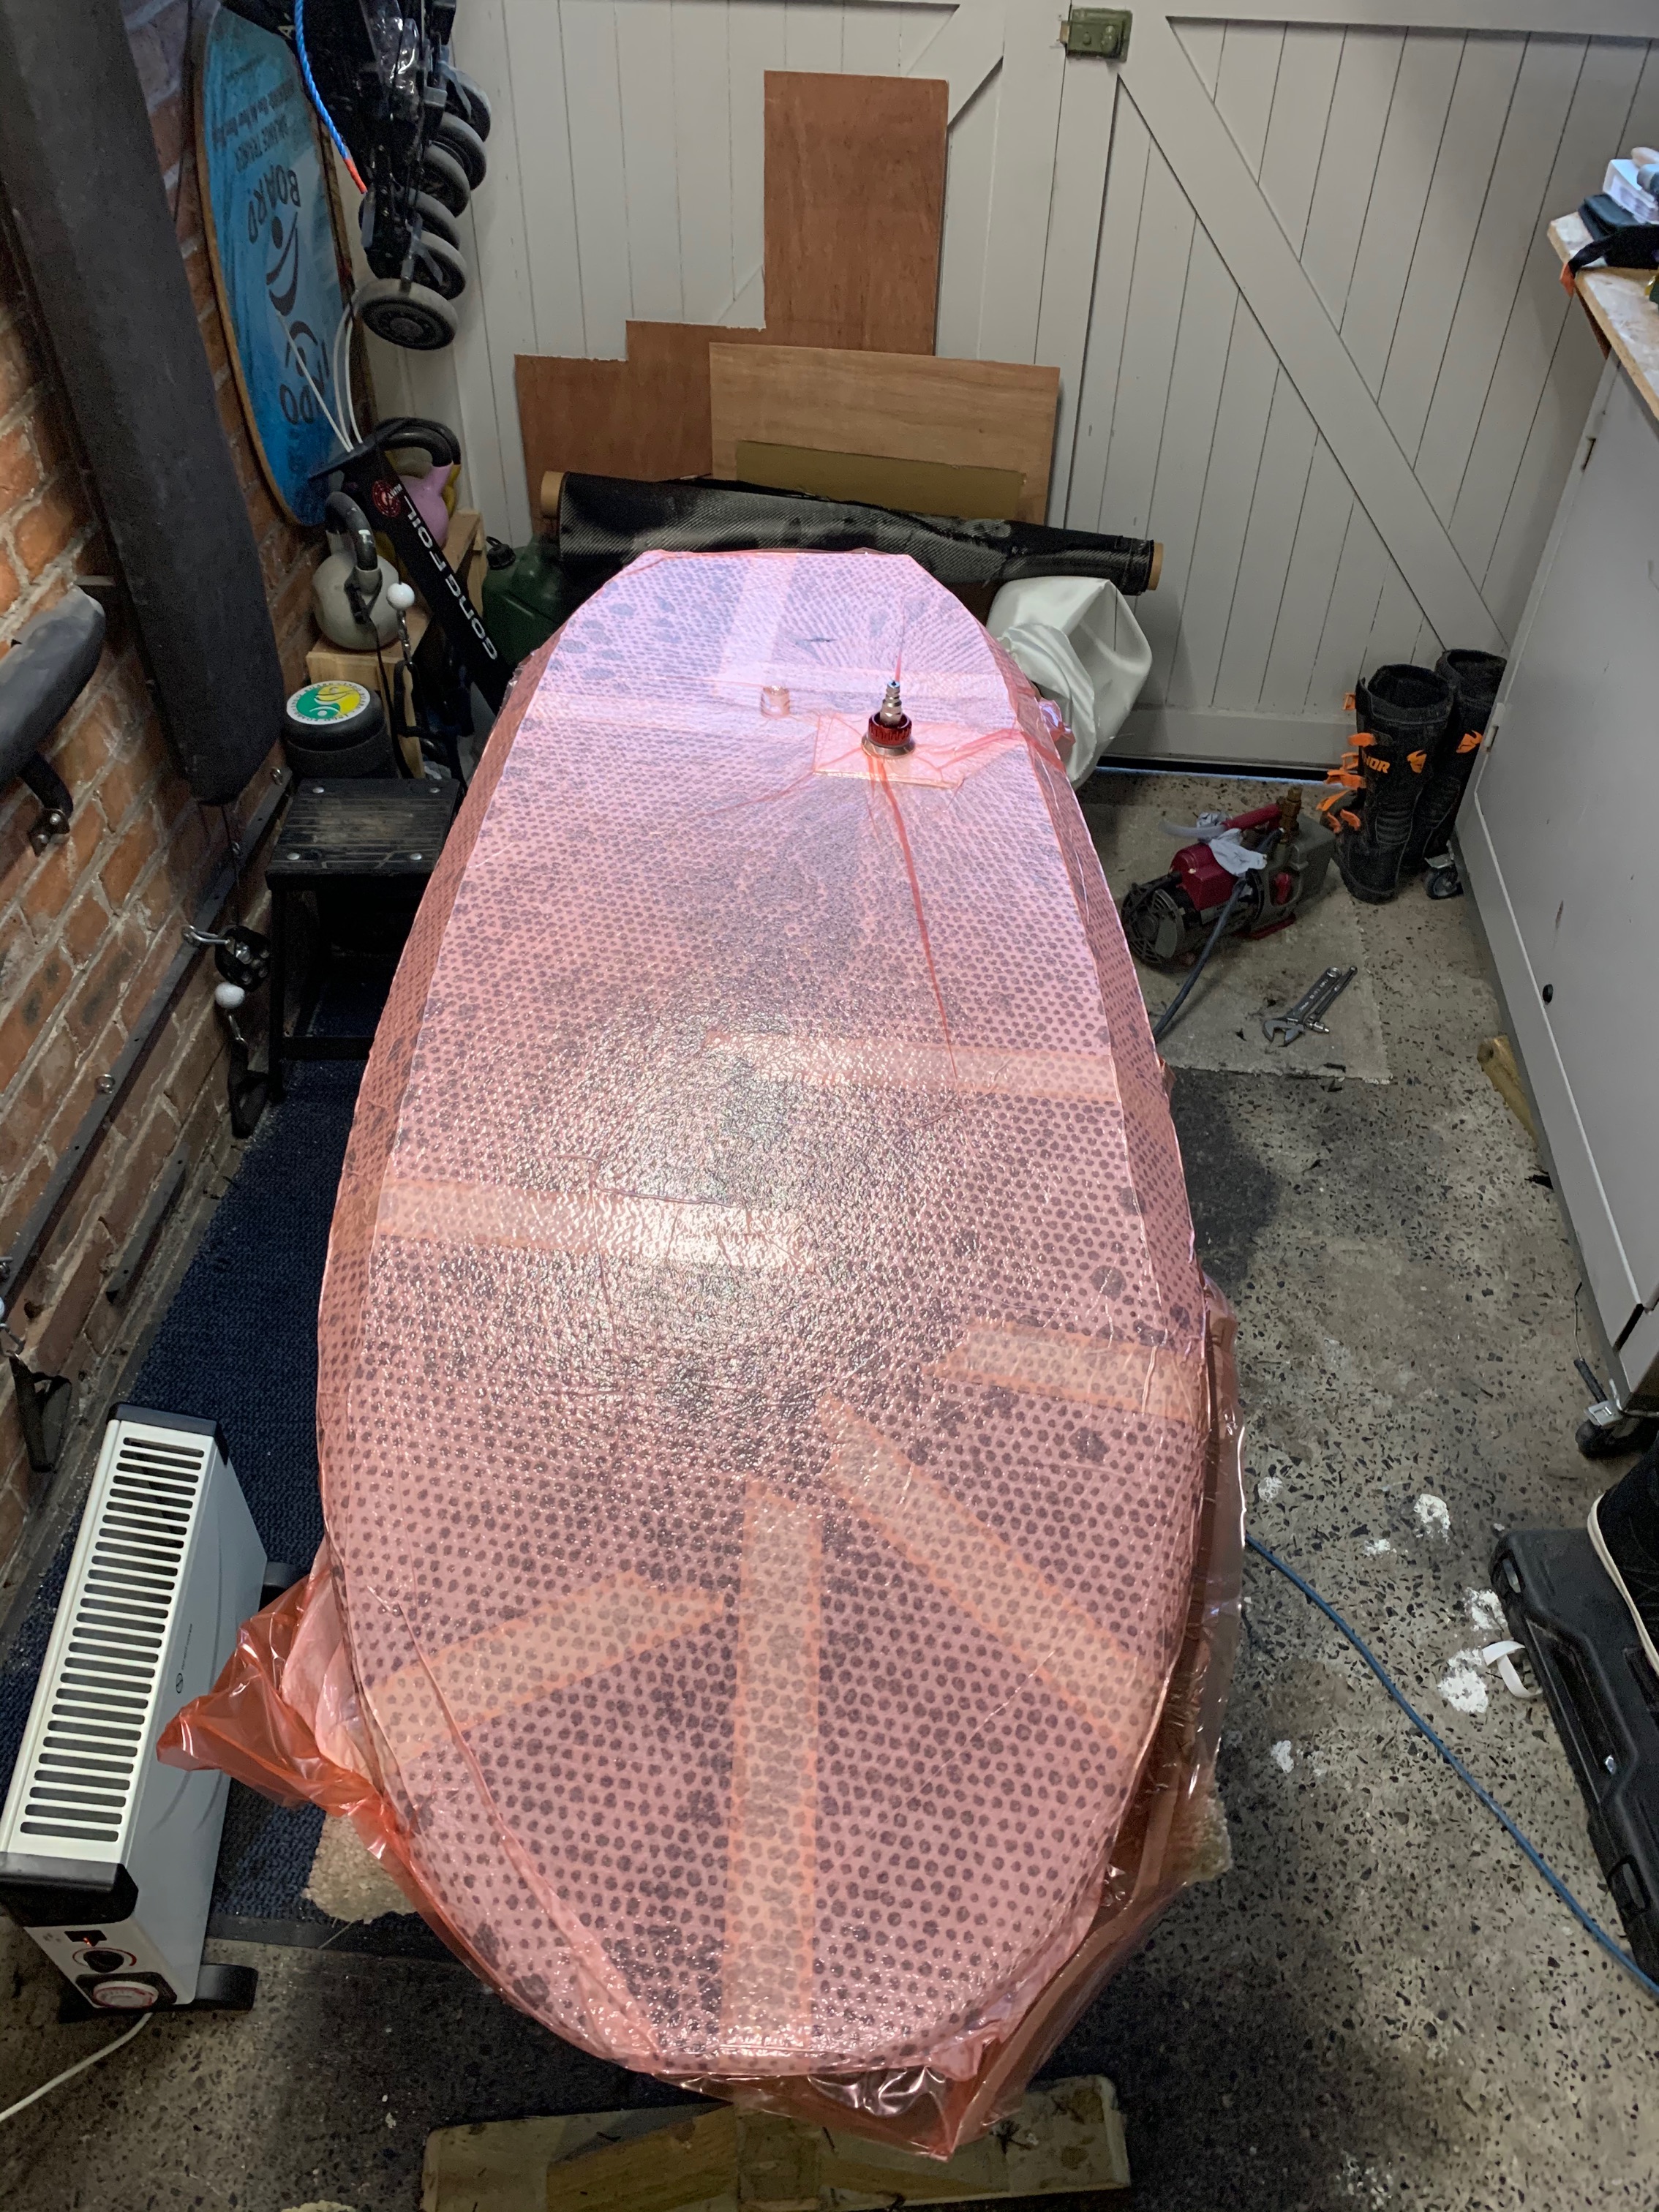
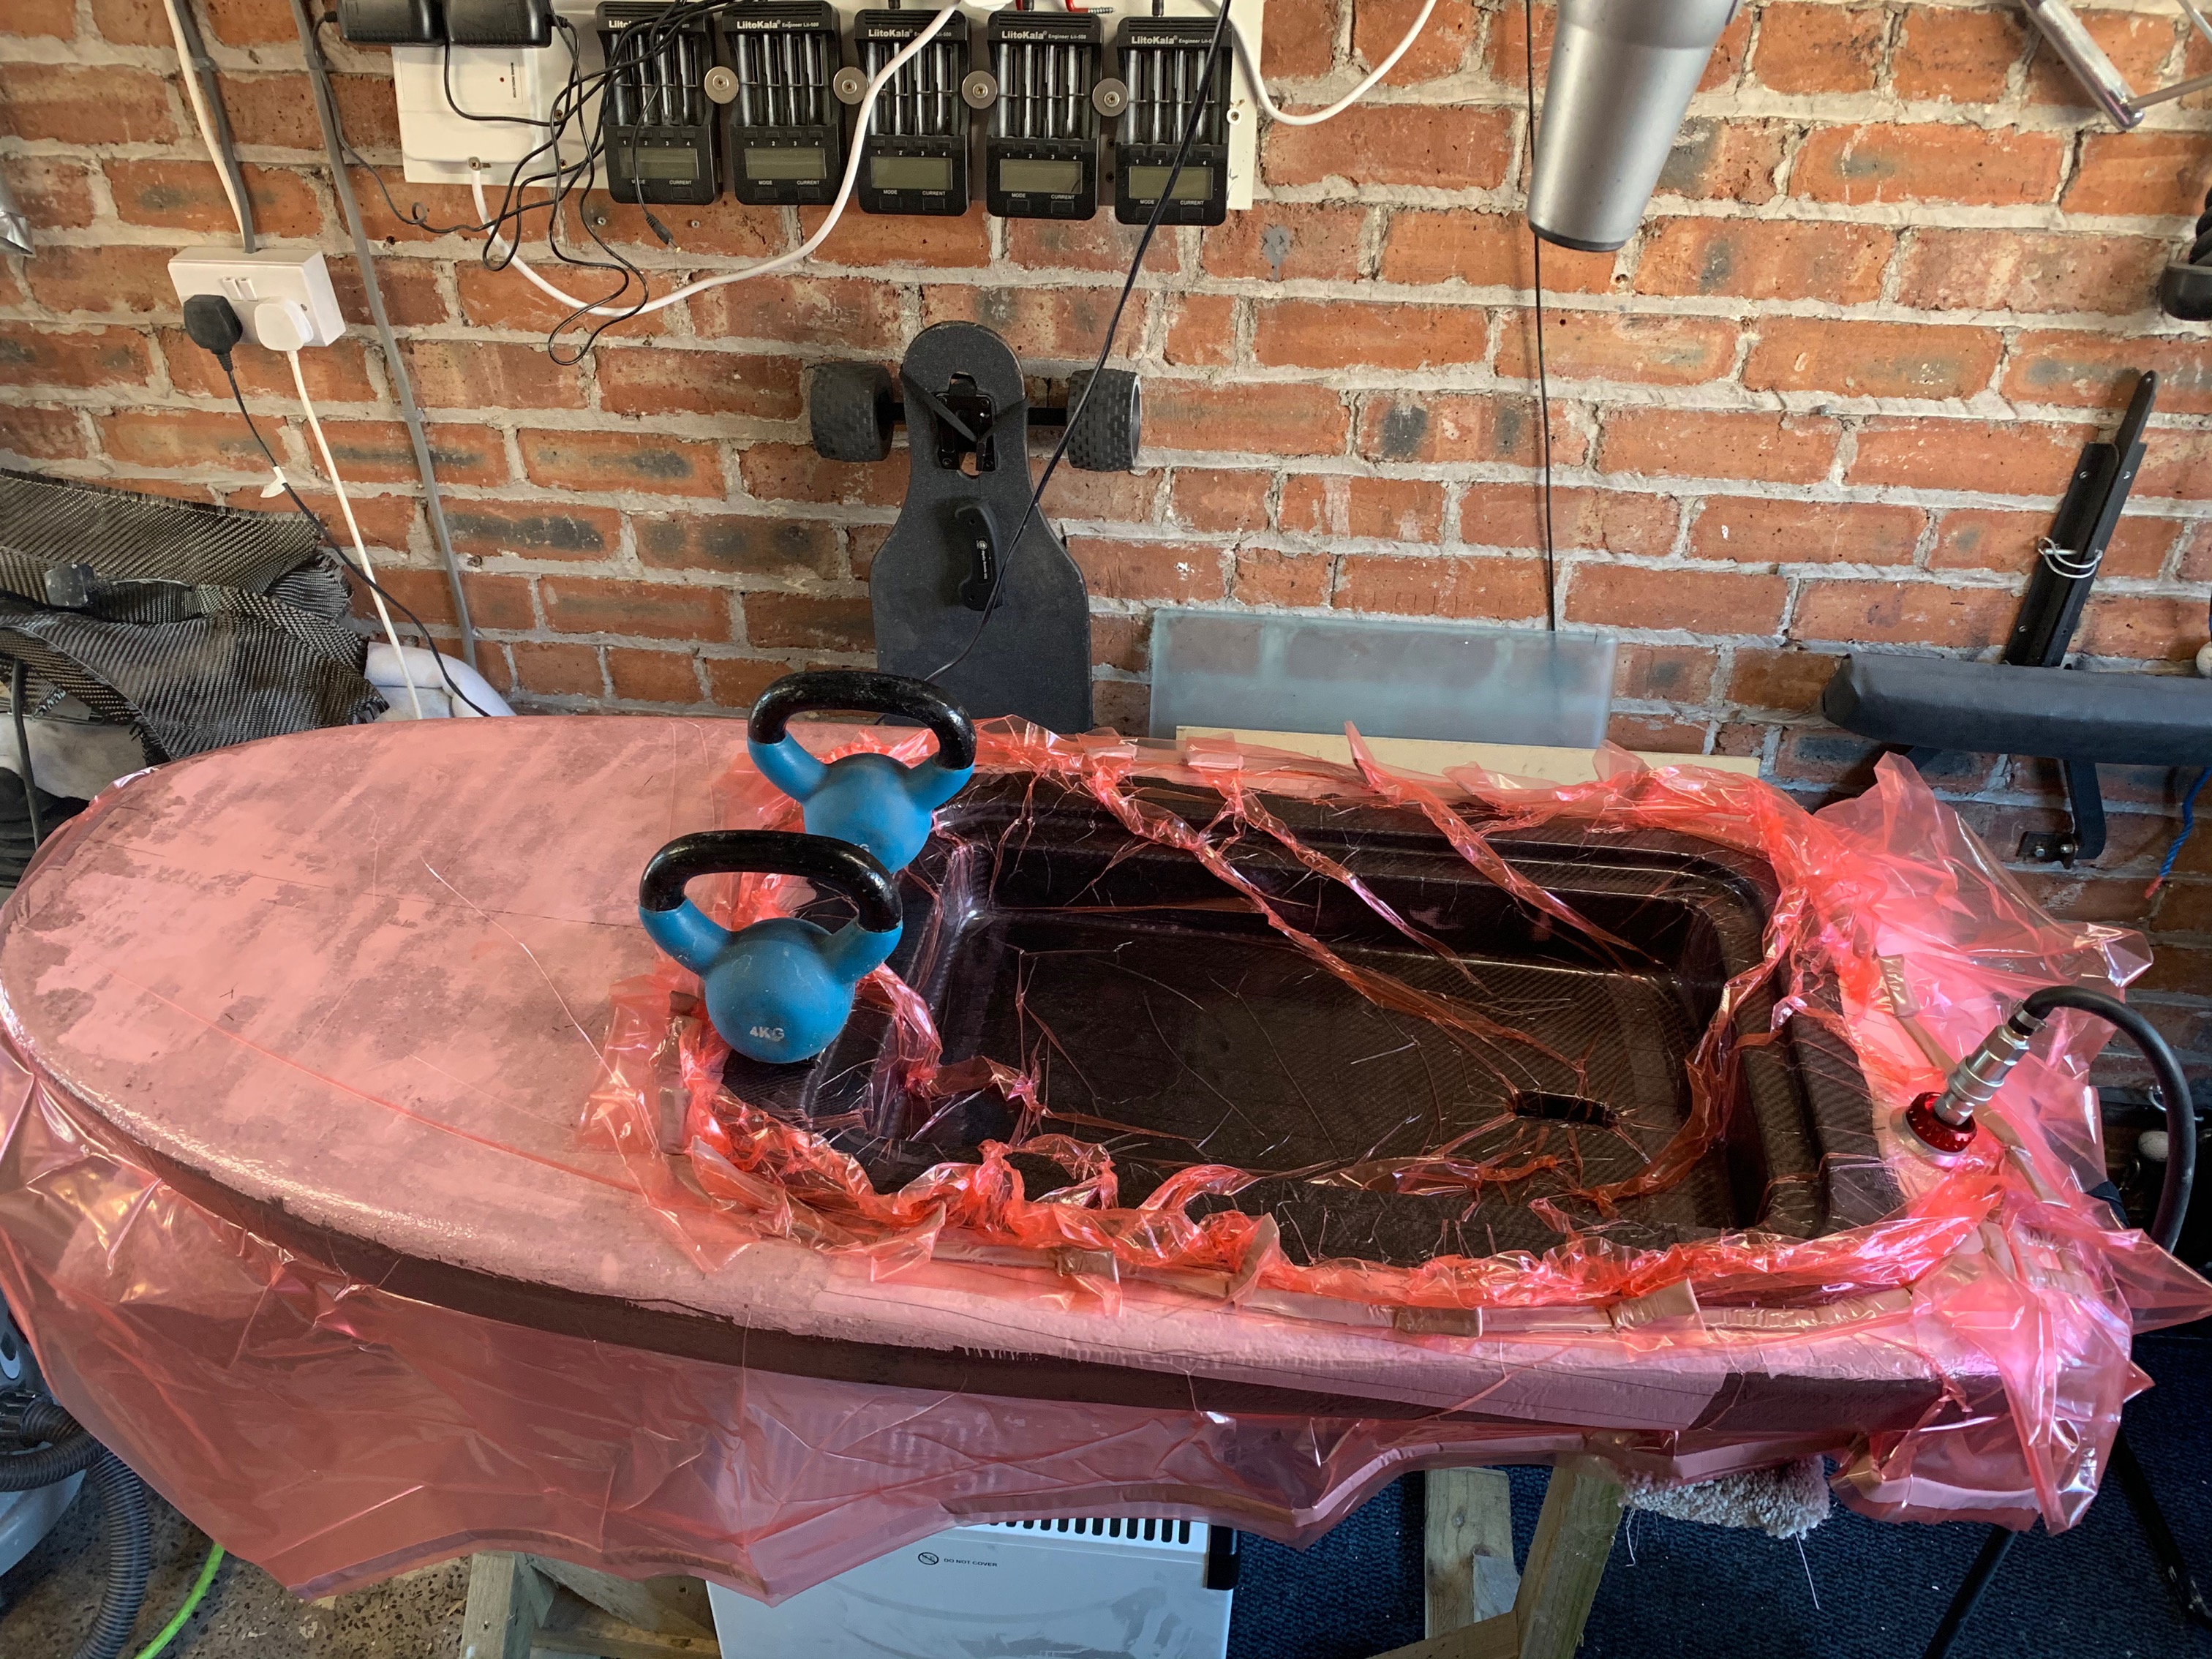
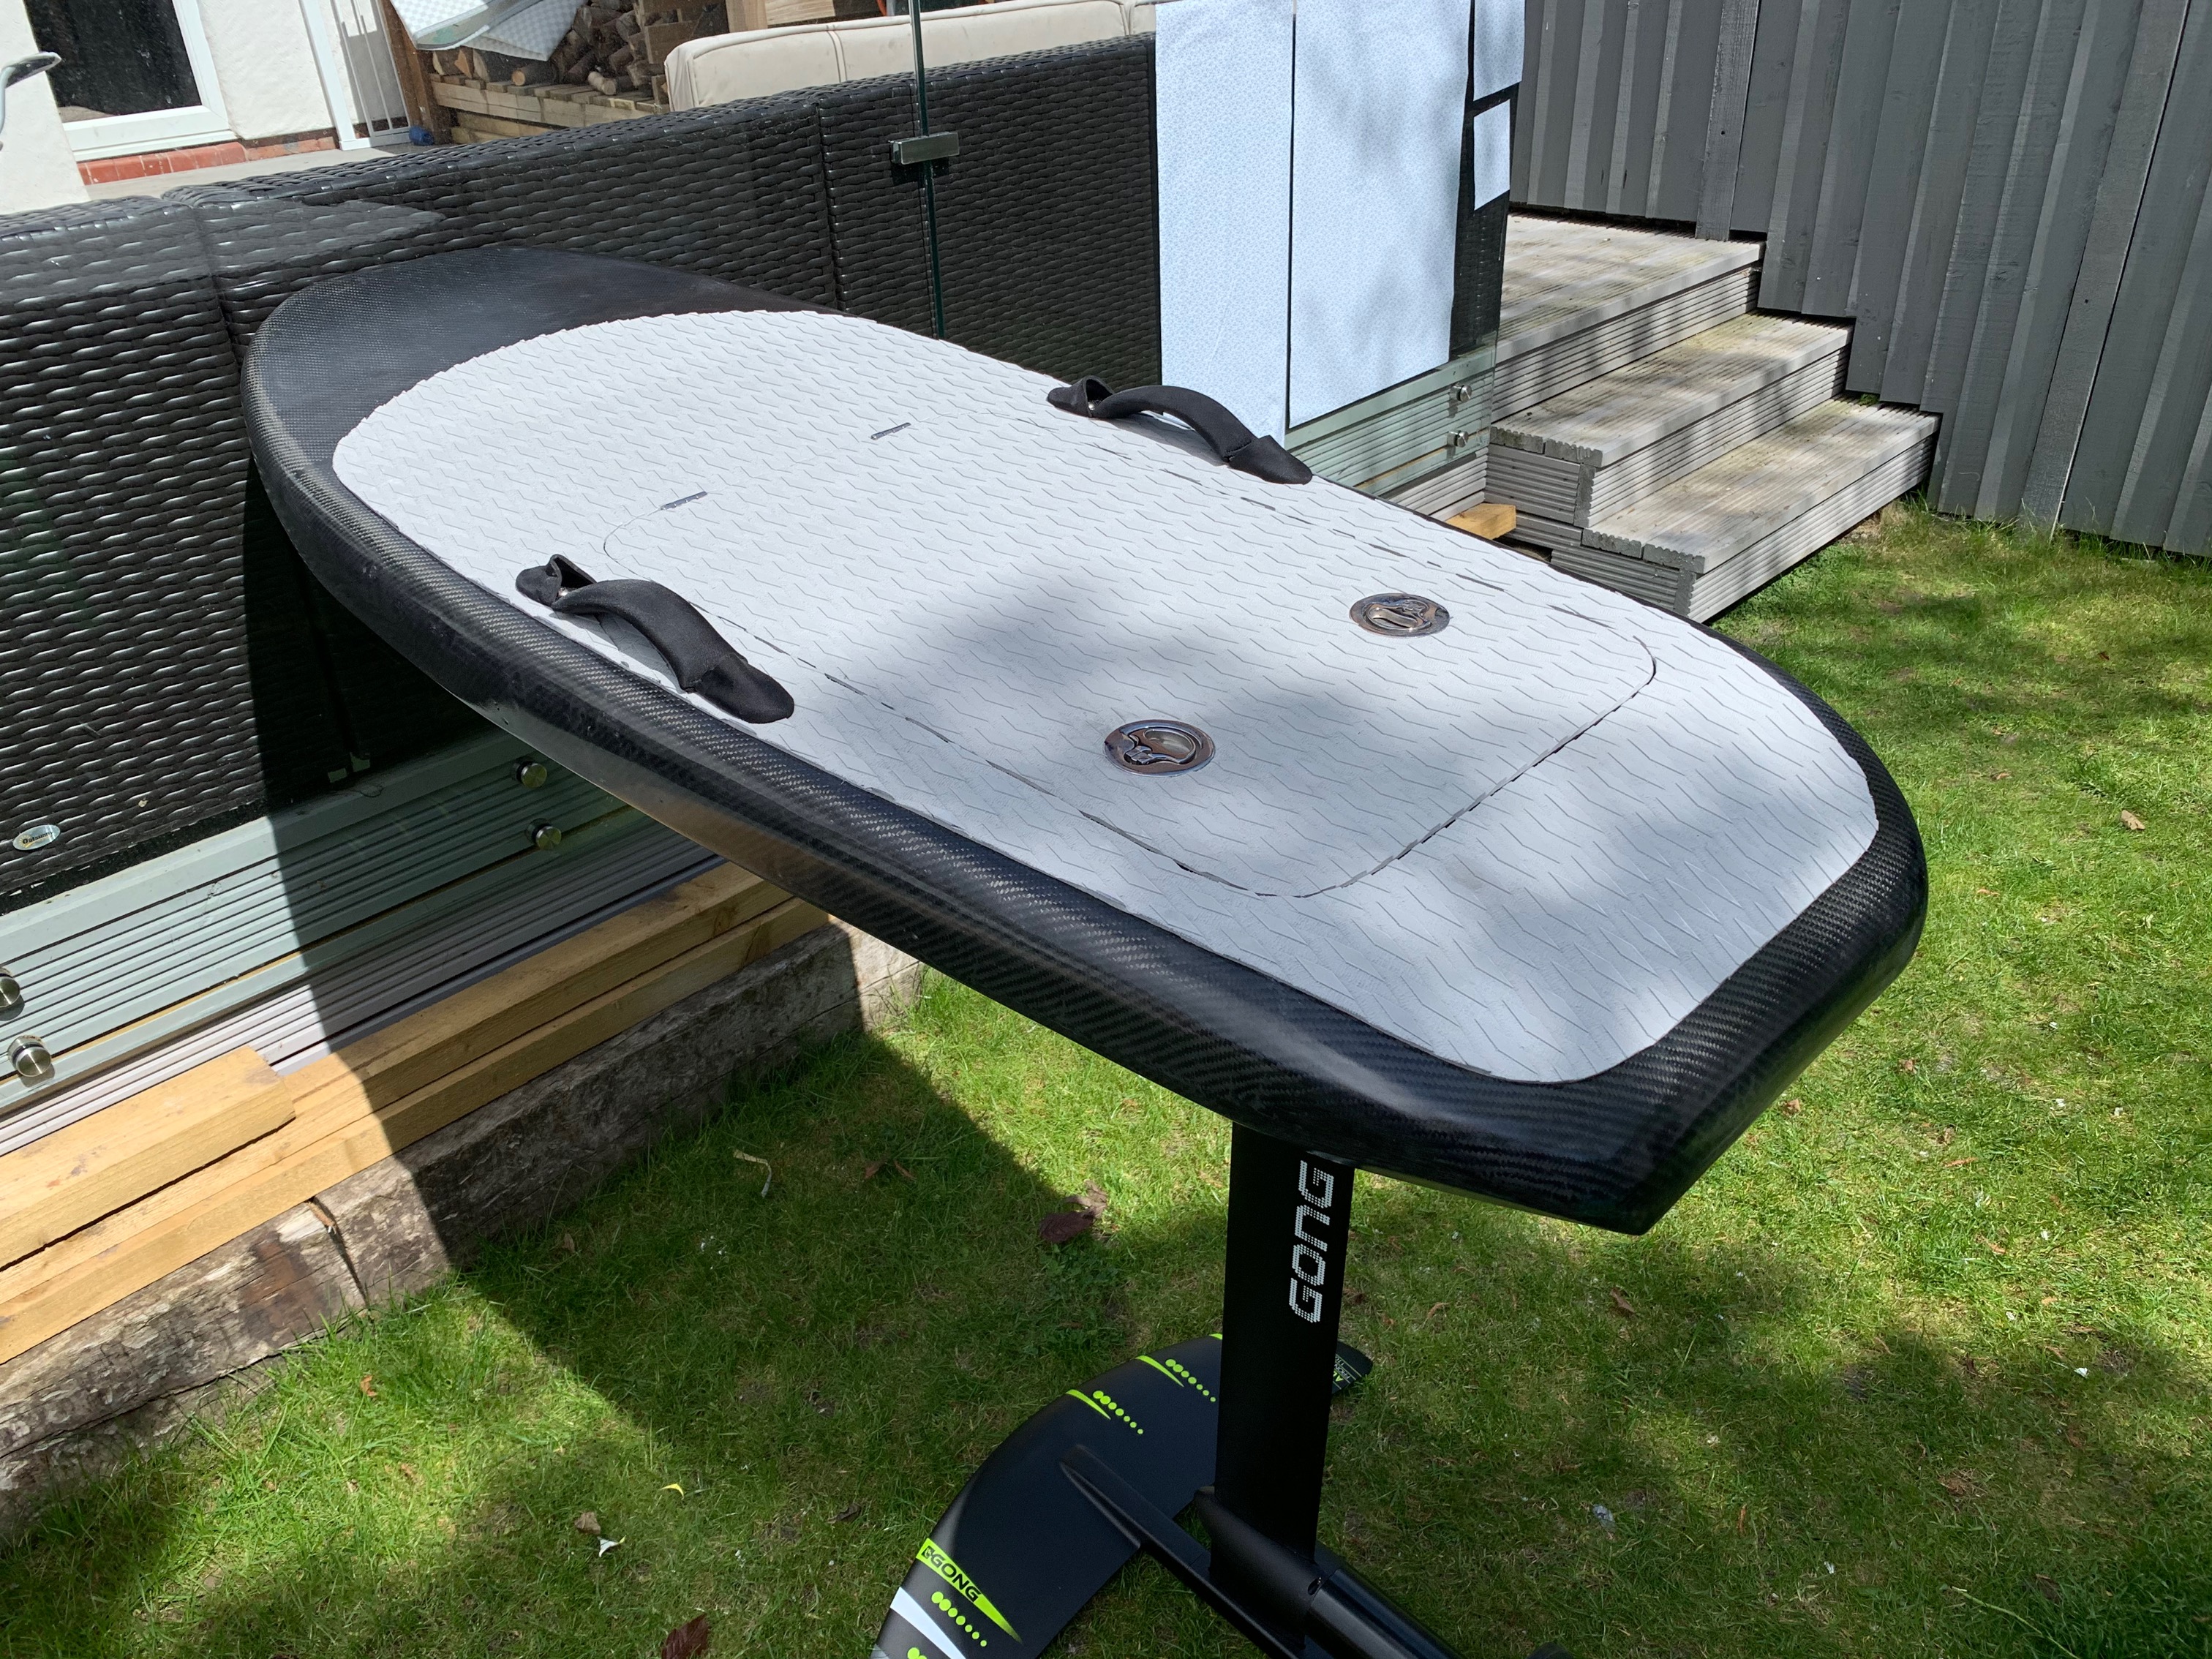
Thanks Jezza, no I used a router to get the shape of the cut out and fine tuned the rest by hand. I lay the carbon in the hatch and vacuum bagged it to the shape of the cut out.
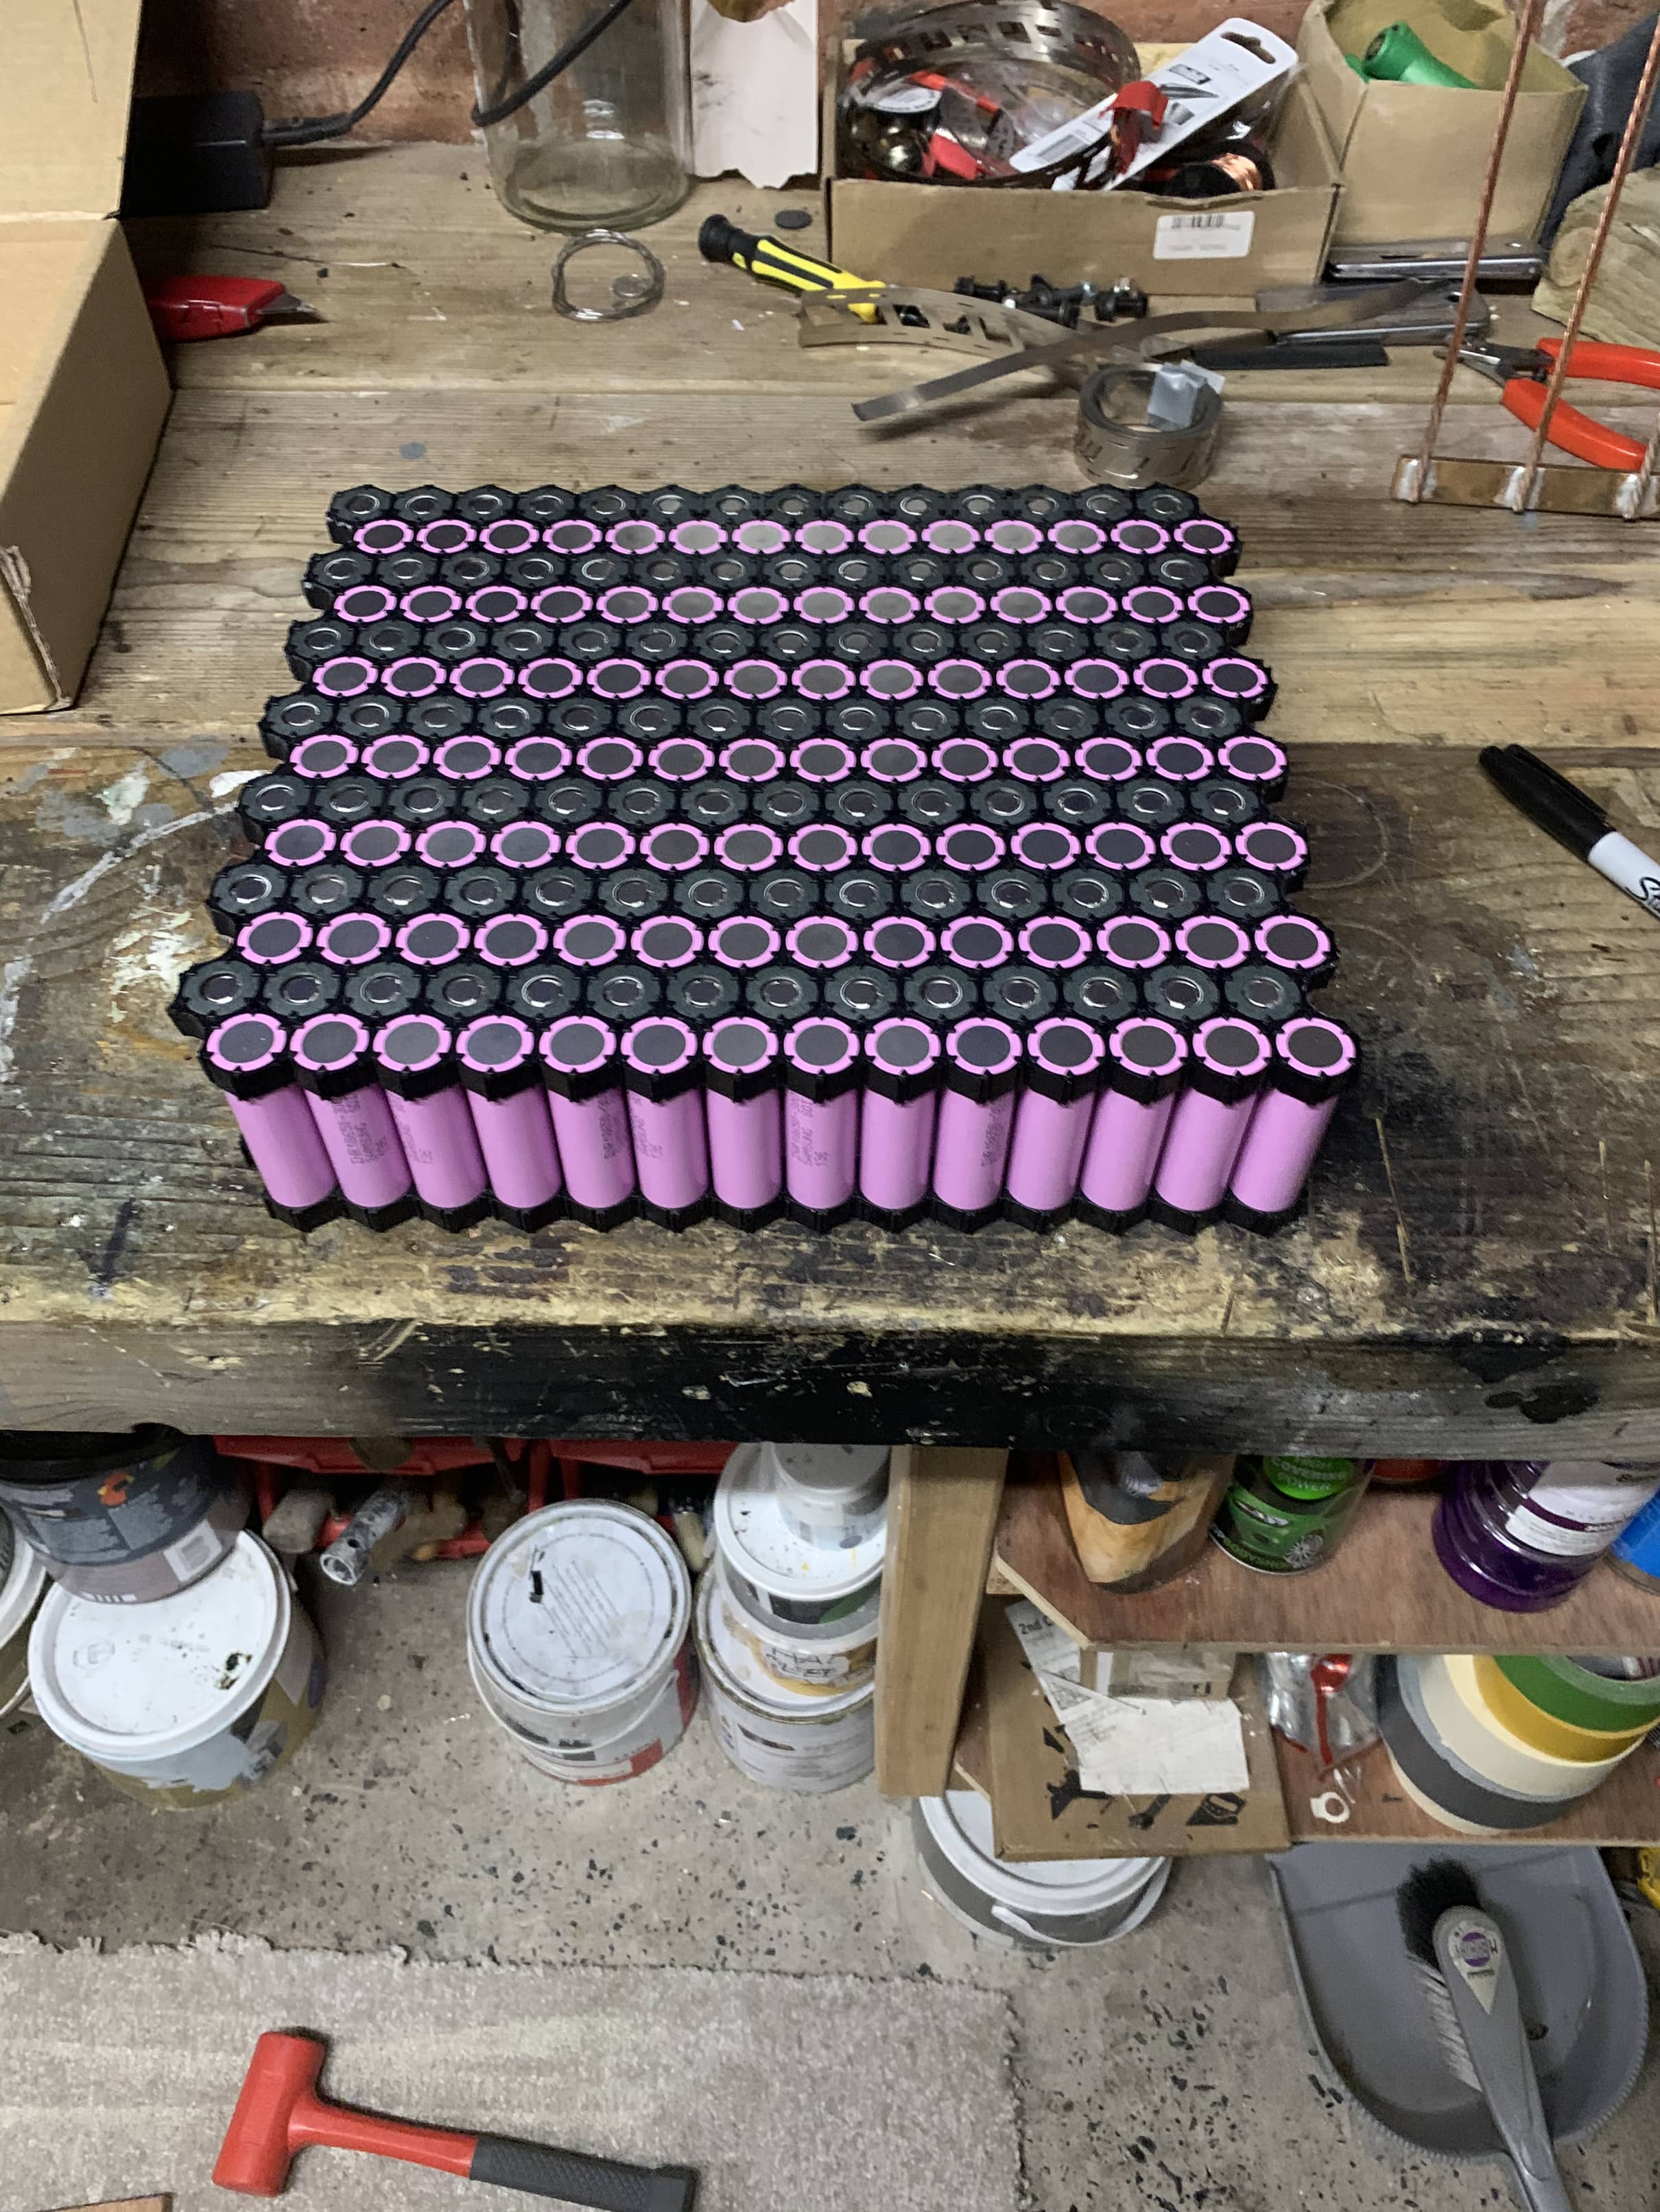
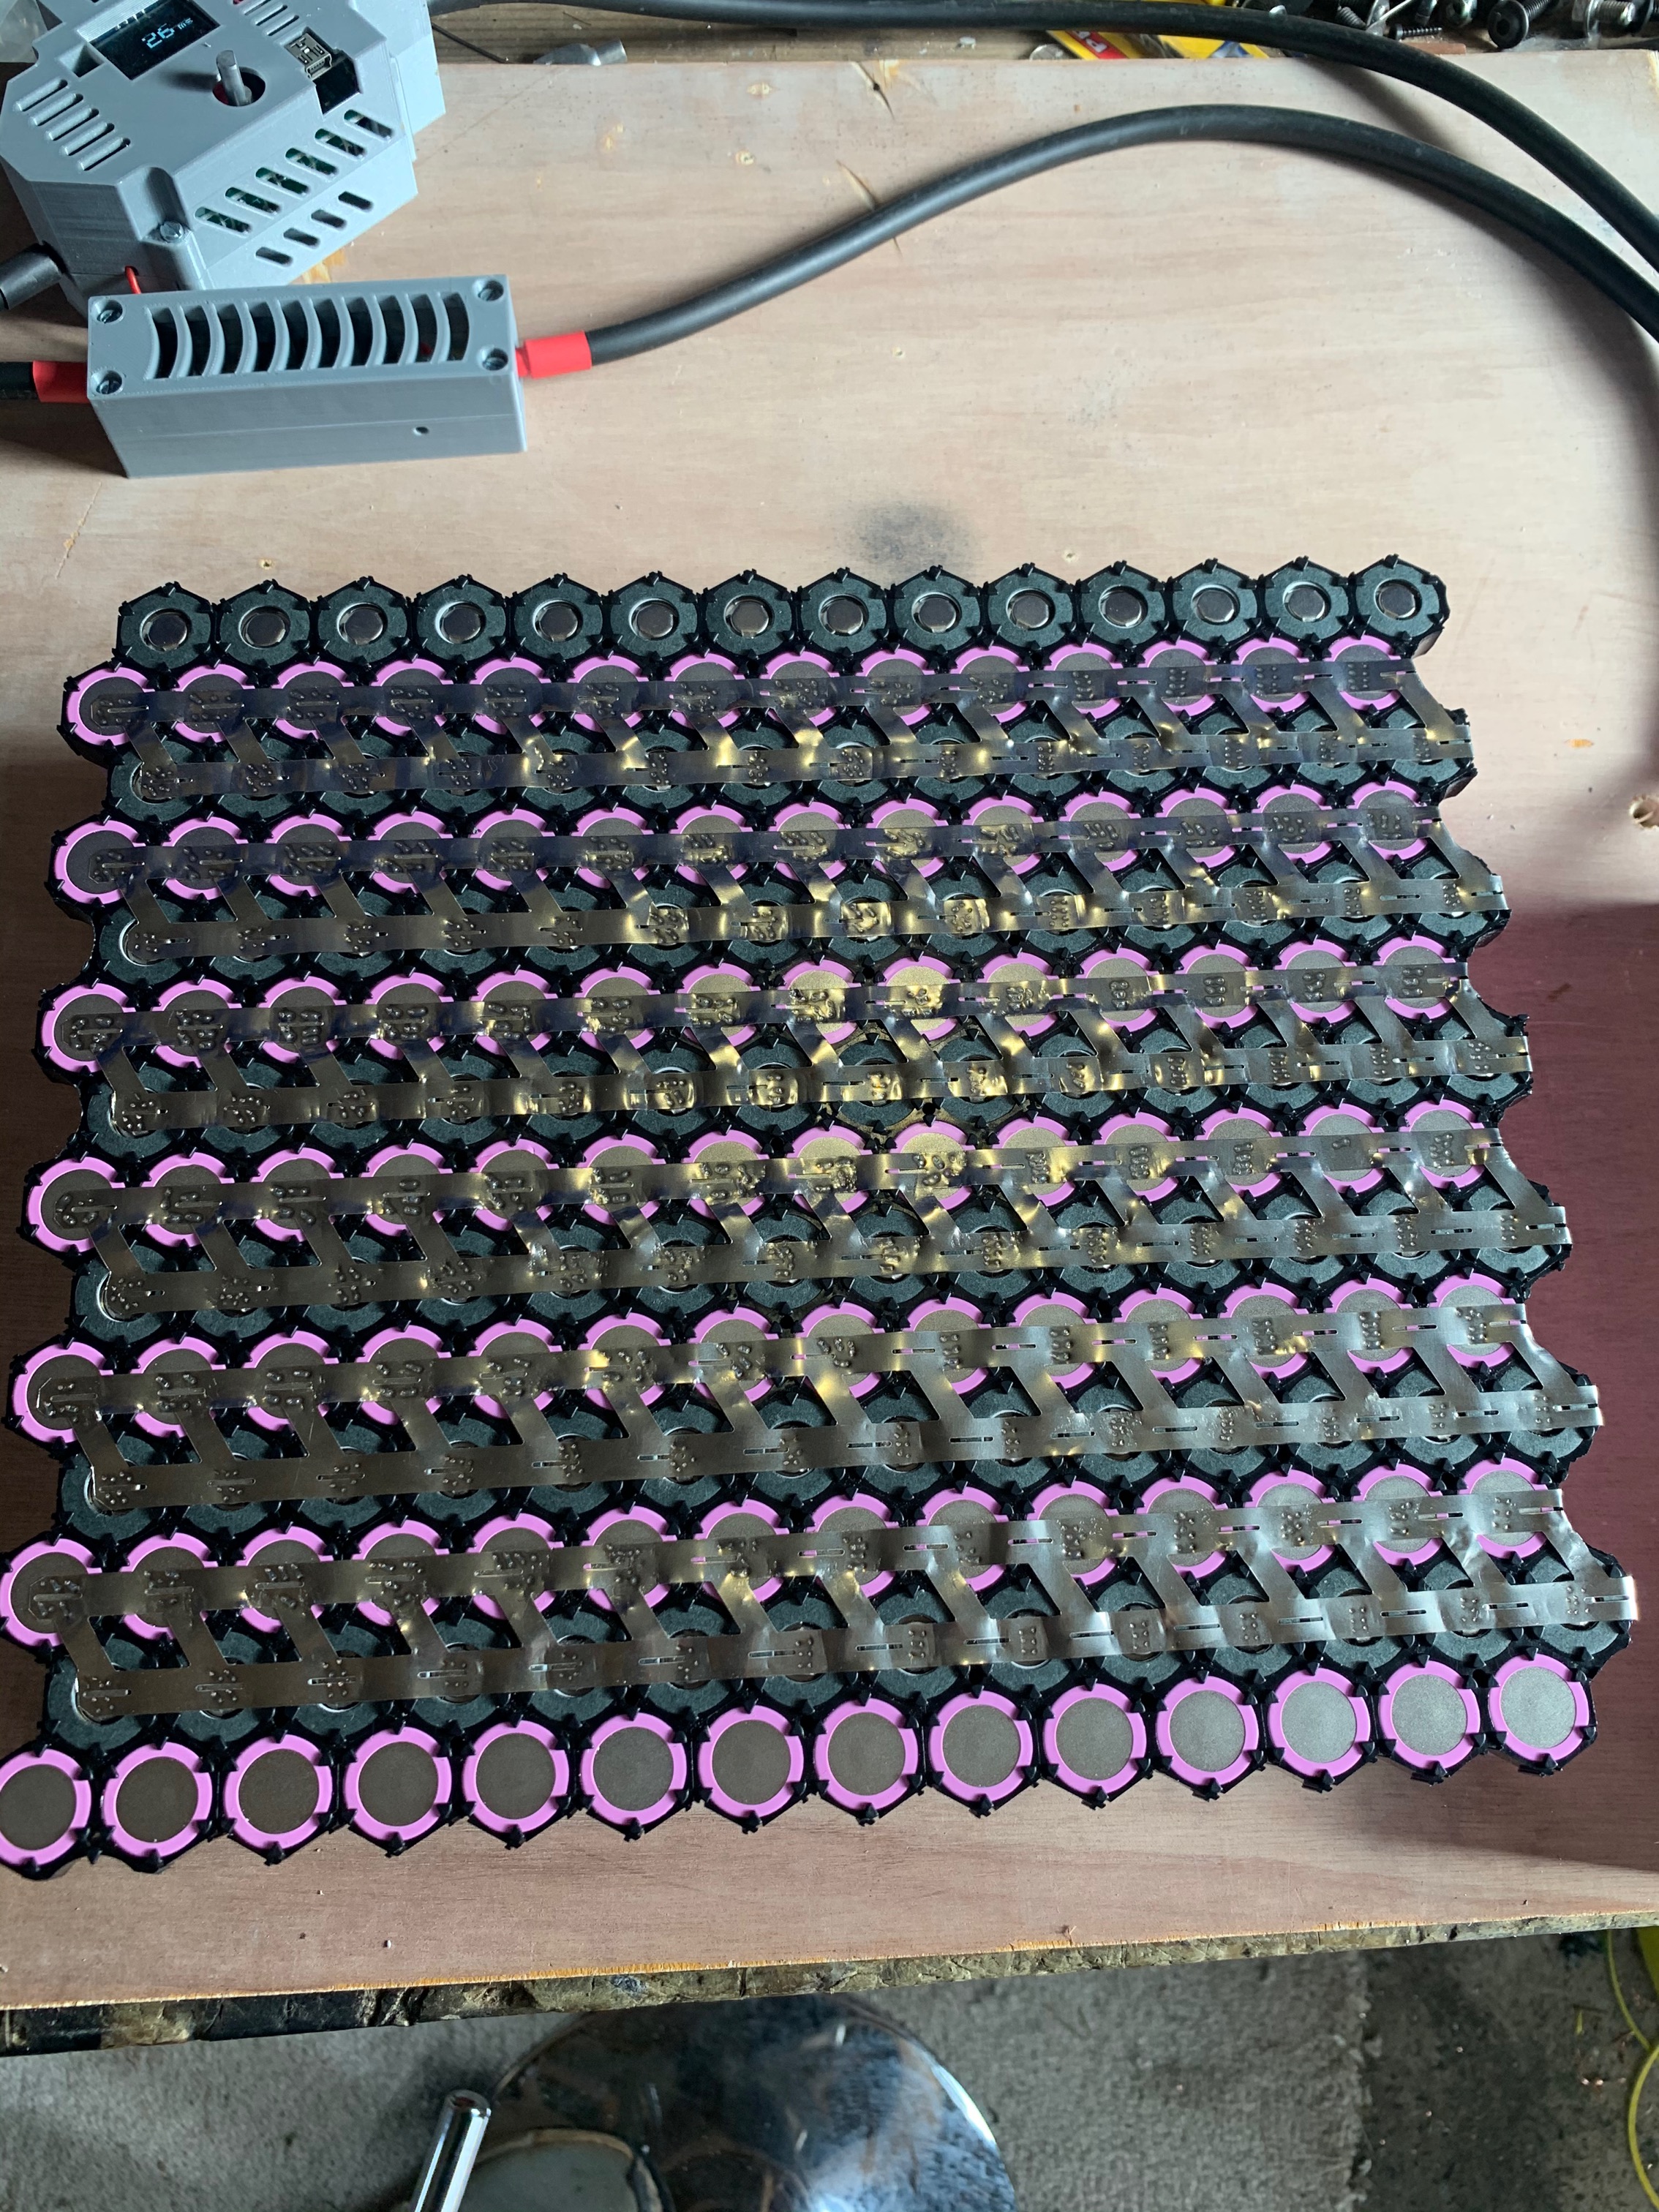
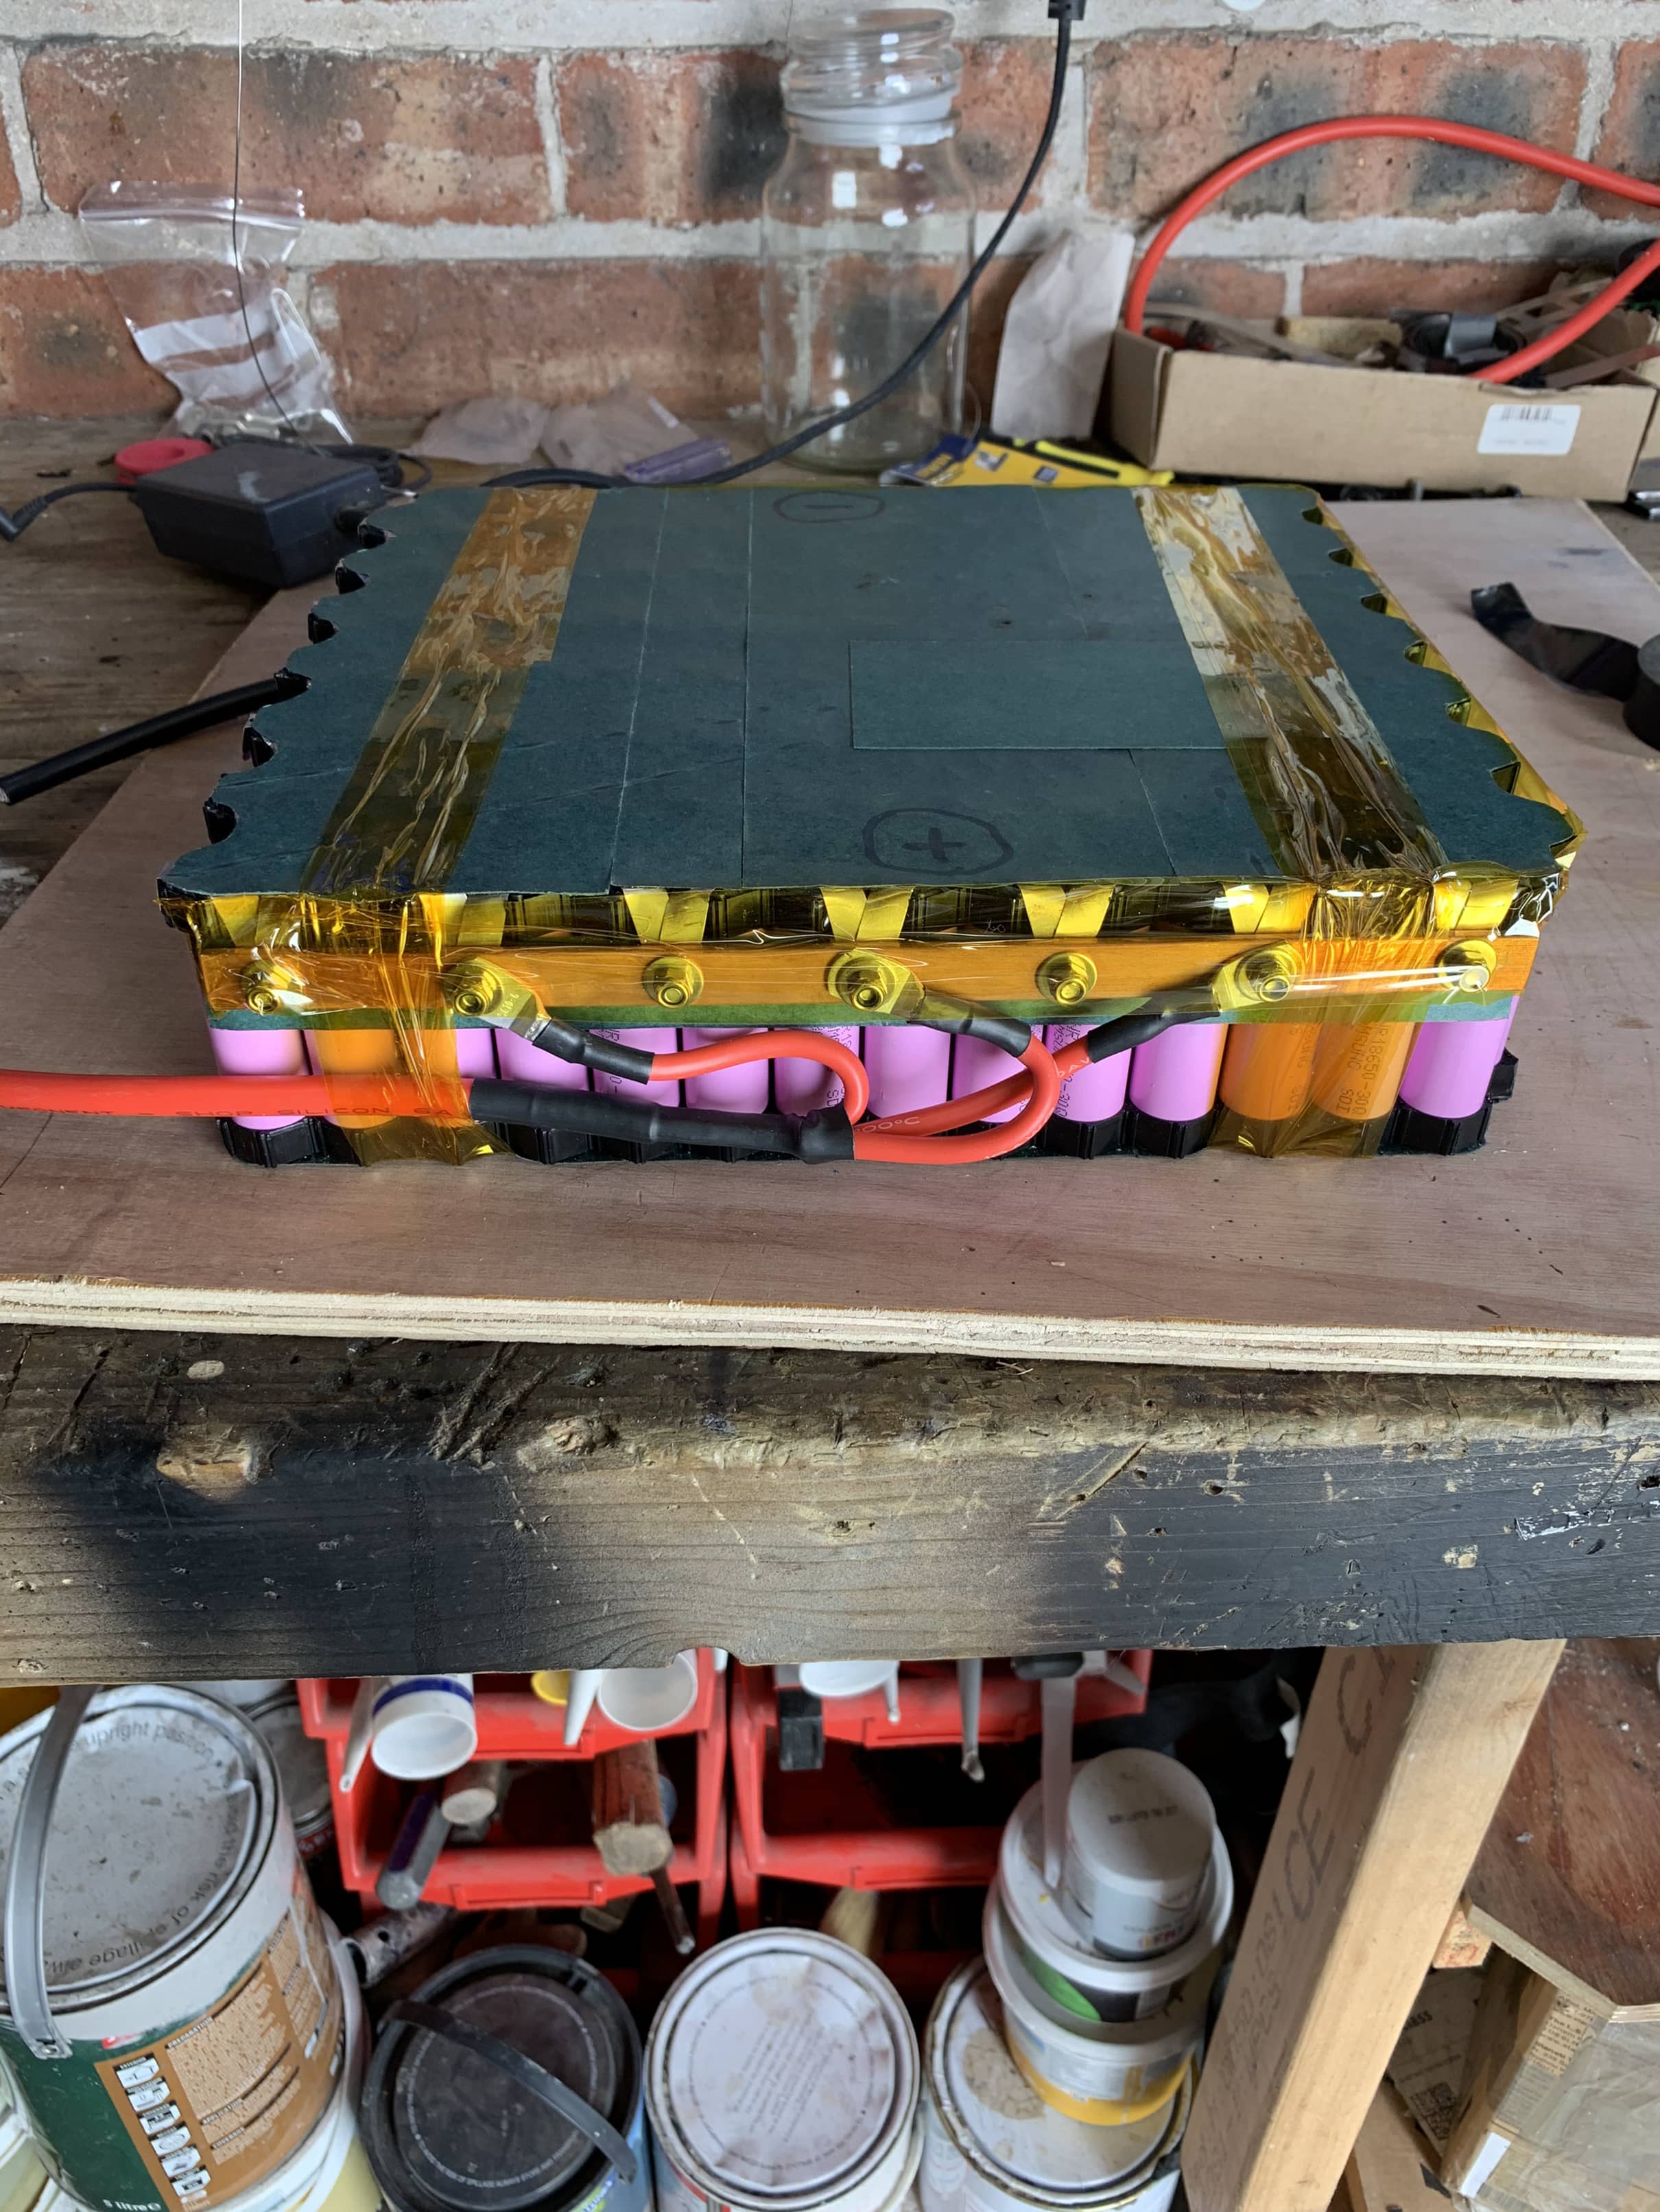
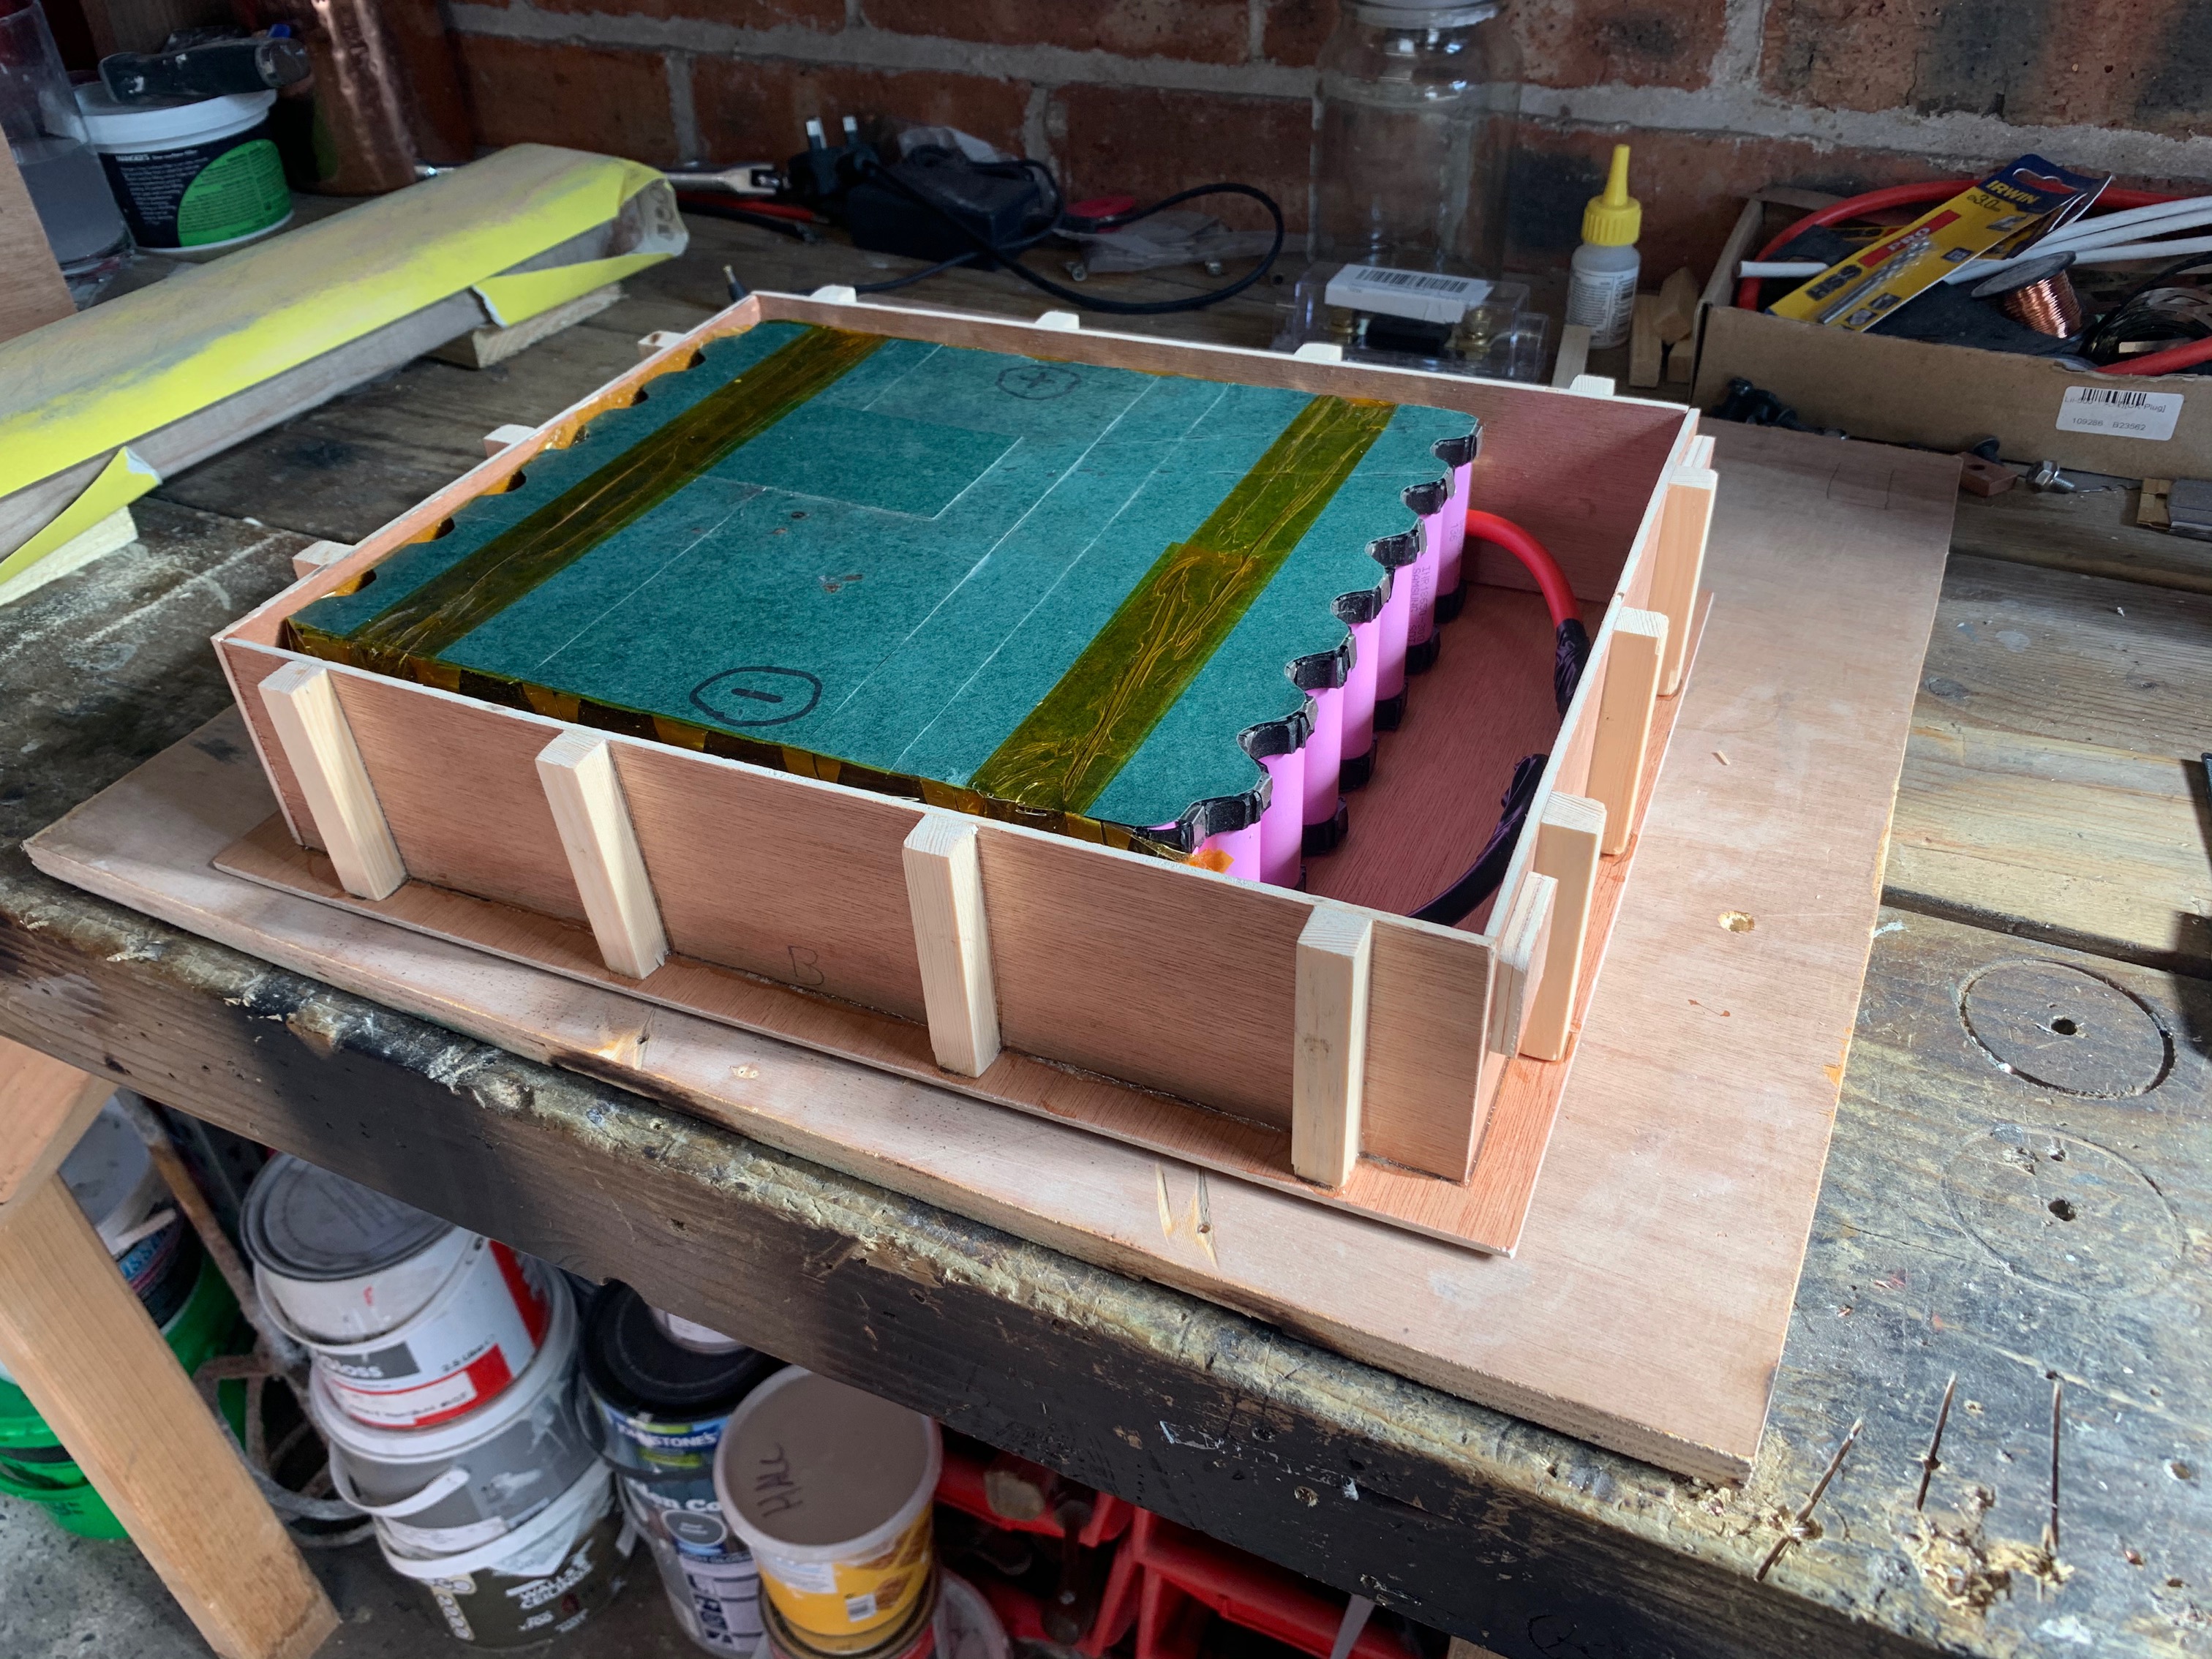
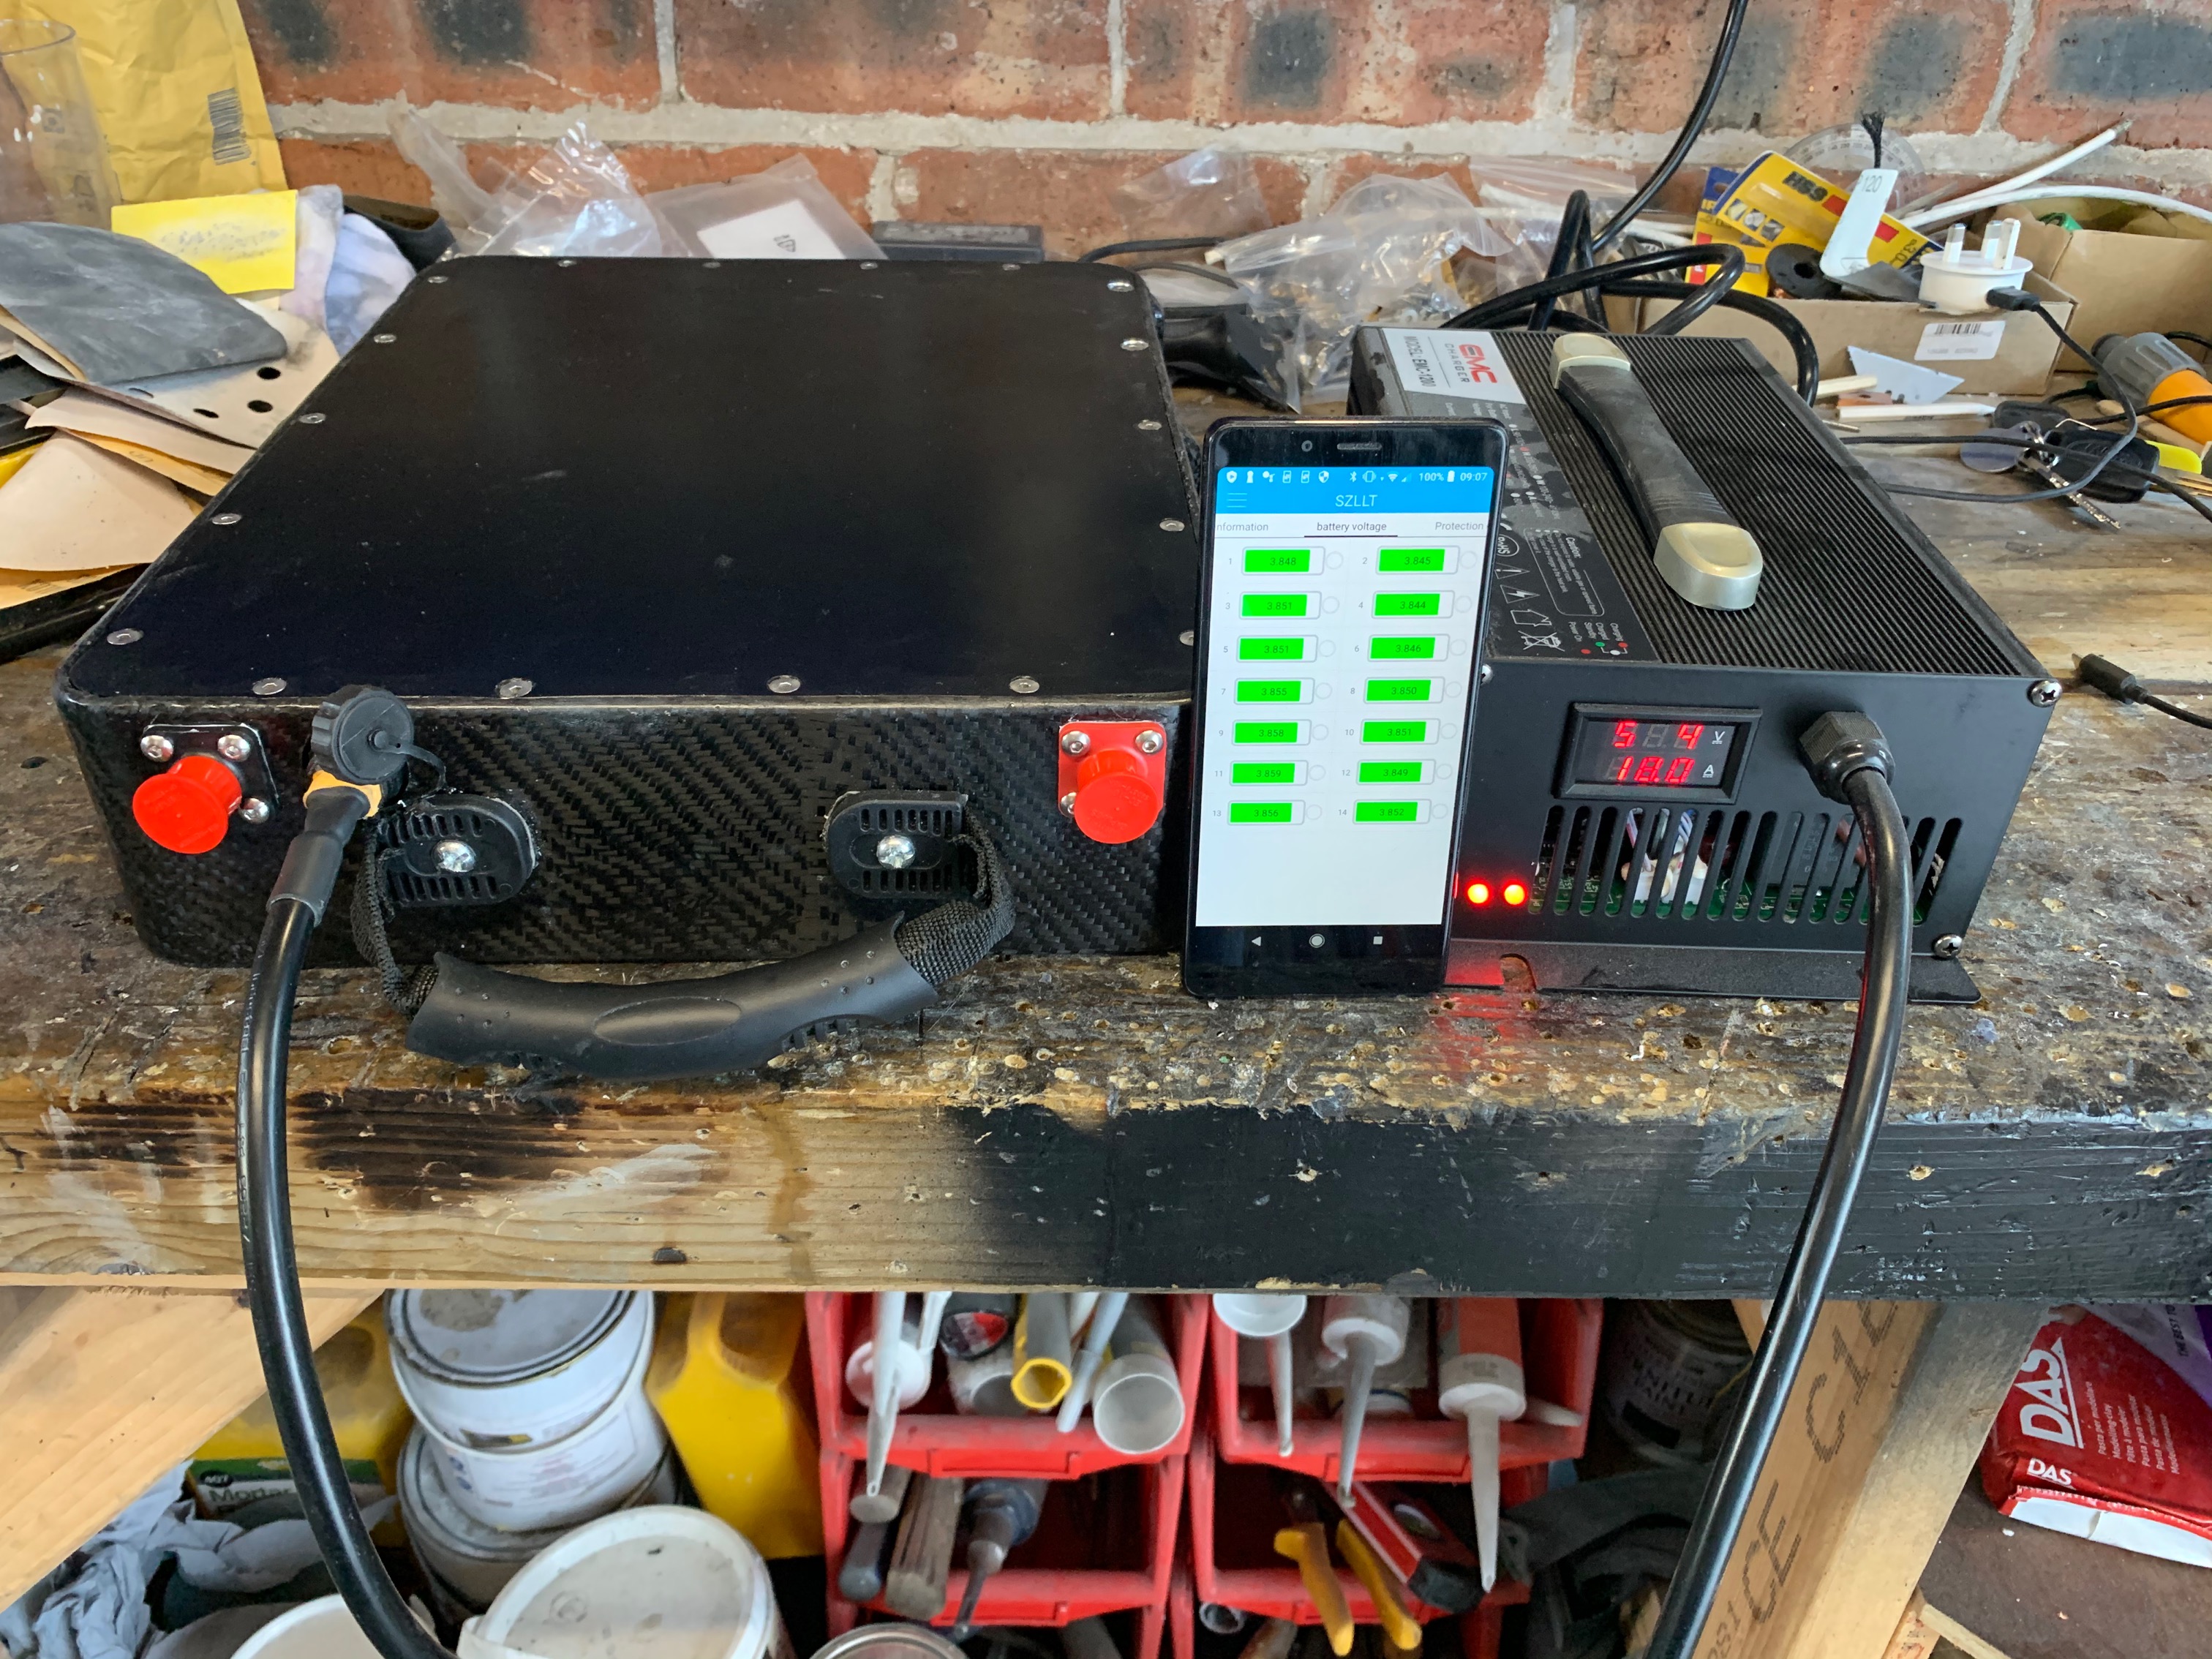
Thanks Vic, it’s a 14s 14p made of Samsung 30Q cells with 150A fuse. It has a 60A Smart BMS to, but it’s only there for charging so I can keep an eye on cell voltages.
To charge it I have a 18A charger with its own XT60 in a waterproof connector. So charge time should only be around 2 1/2 - 3 hrs.
I’ll build another battery eventually, once I’ve sold the 1400 18650’s I’ve got in my garage left over from the power wall I built.
That is a beauty! Great work Wardy.
Thanks Marc, appreciate that 
Your board is very similar to Eduard’s @edivory board: high quality due to vaccuum bagging technique, board outline, electric hatch with same separate box for the ESC, Flying Rodeo motor, … Eduard made a separate carbon electric box though…
Yeah it’s not too dissimilar, a part from the battery I guess. I basically tried to copy the shape/layout/style of lift and fliteboard to be honest, figured I couldn’t go wrong if I did that.
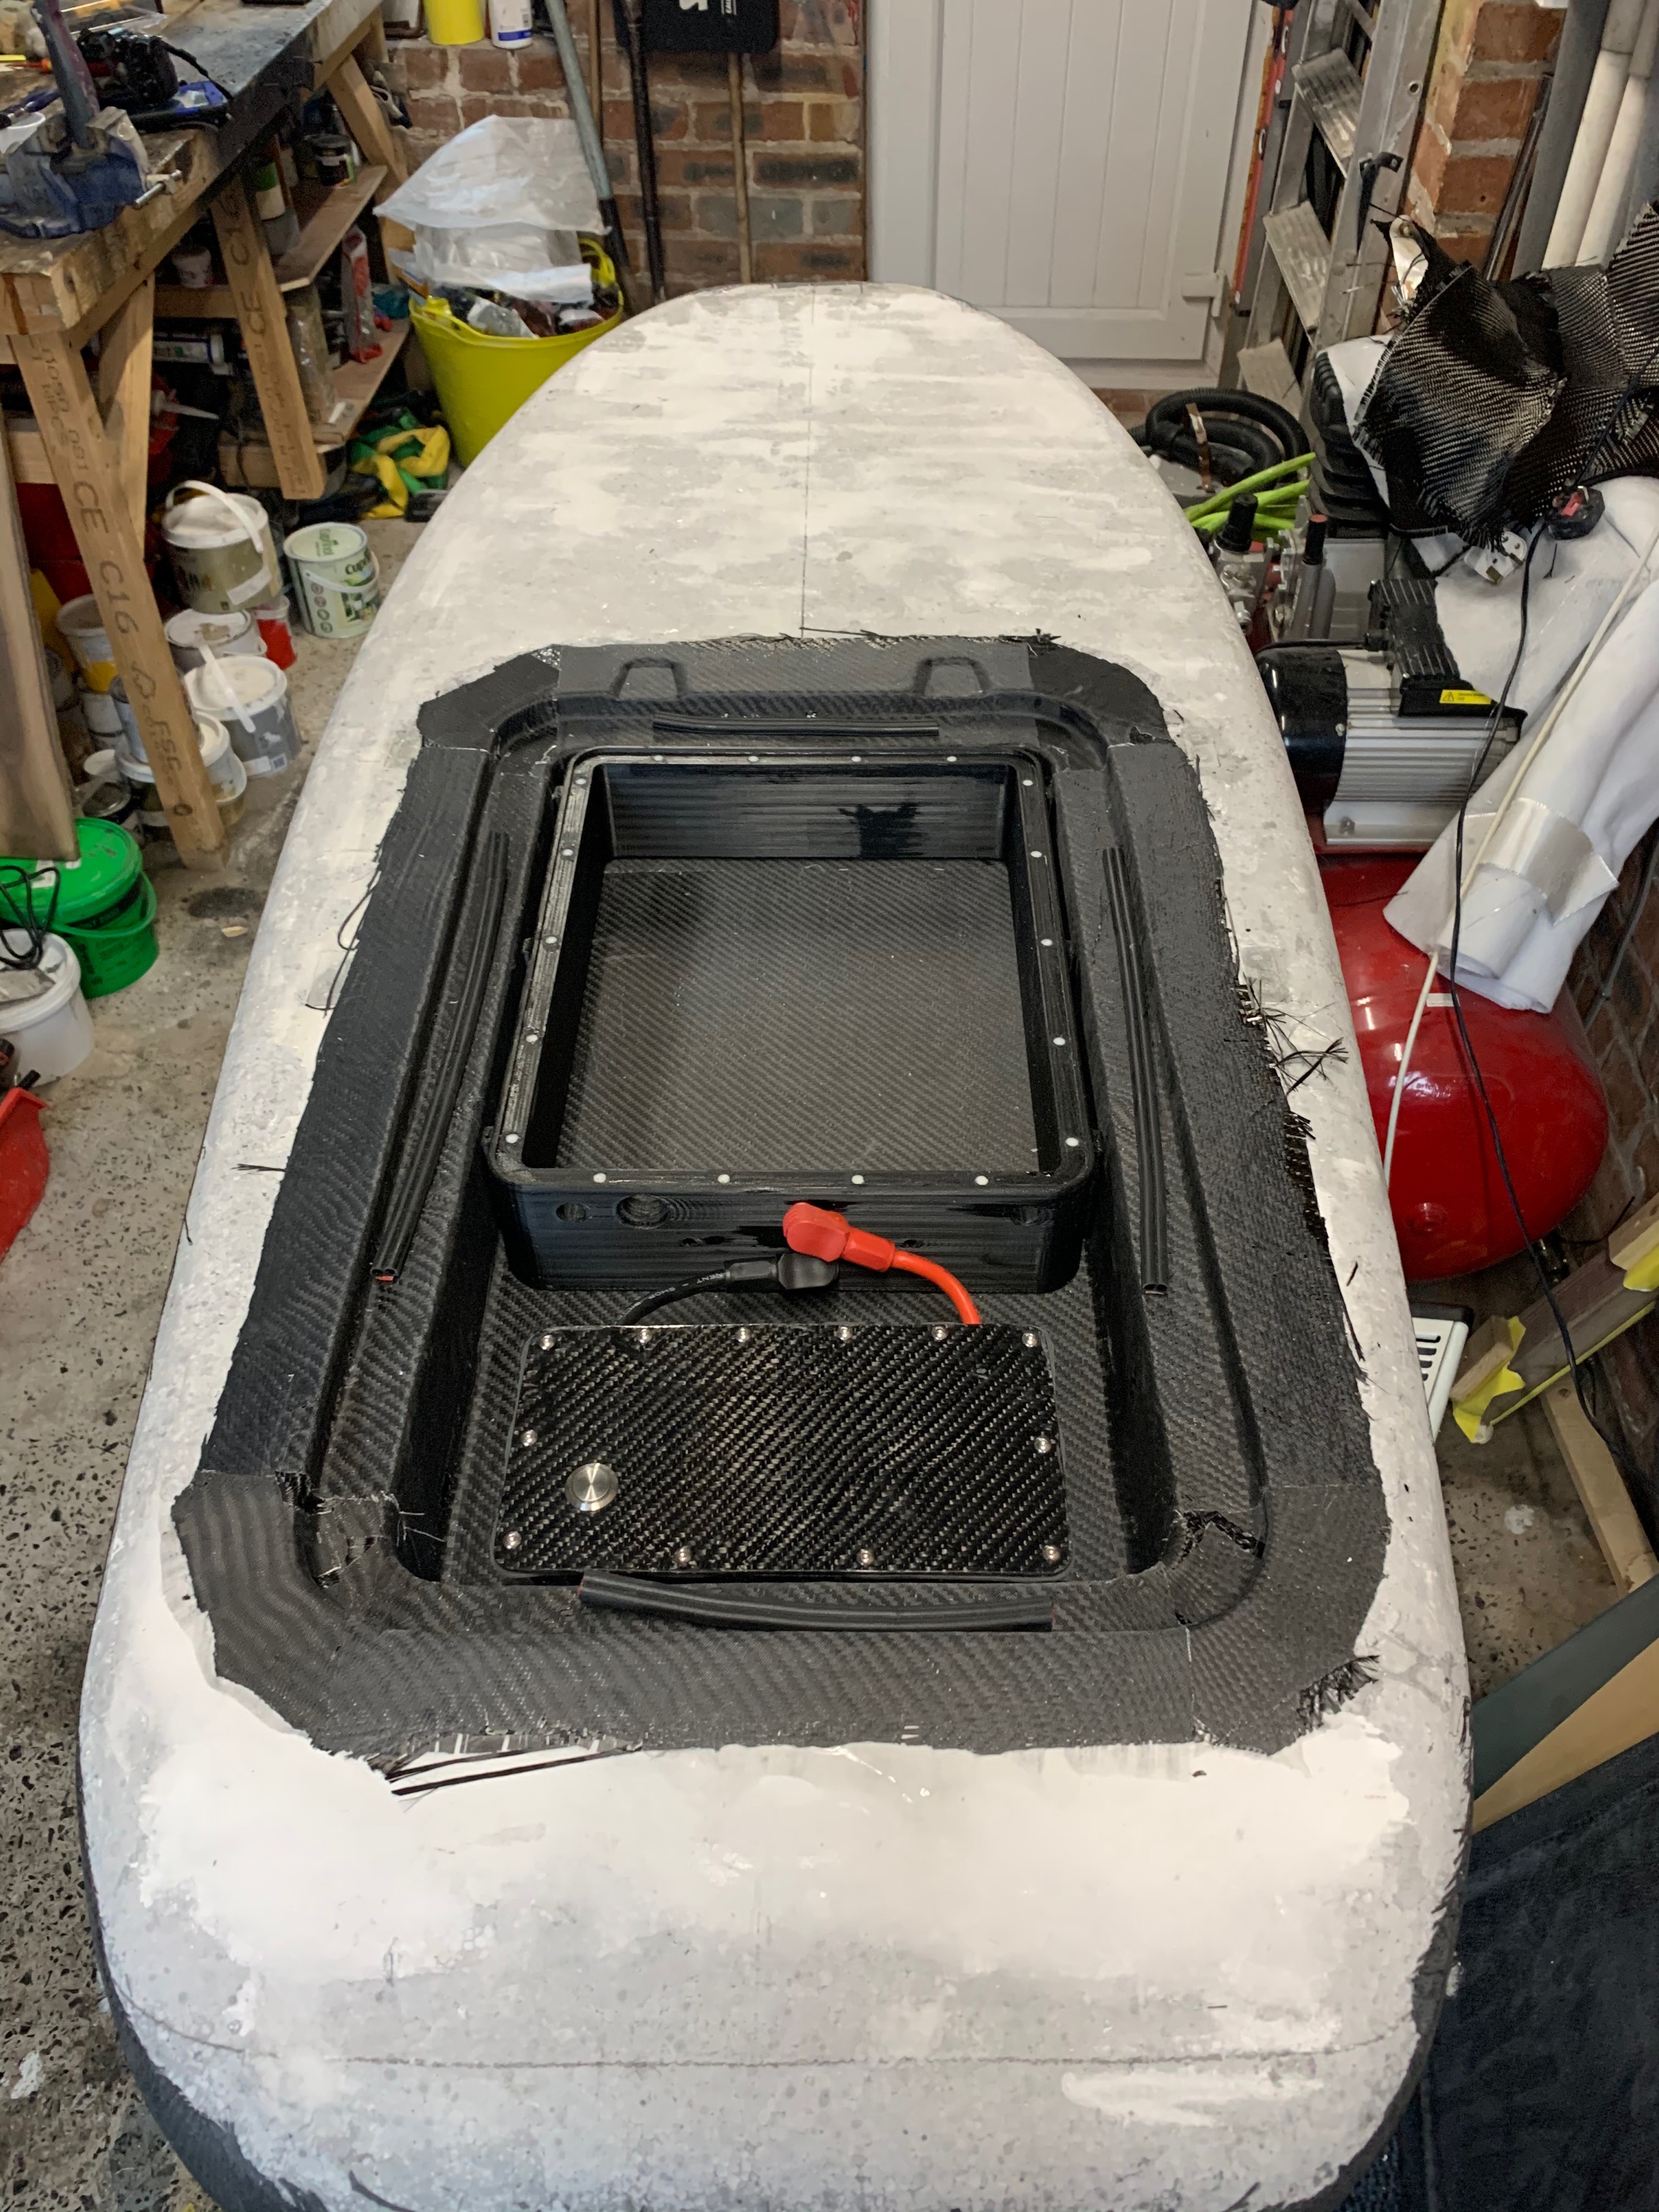
I’ll be honest, it didn’t always come out the vacuum bag looking good. took a lot of sanding and epoxy to straighten it out sometimes. I made 3 hatch lids before I got that right 
Very cool and very nice work! Can you give us an rough estimate of the costs and time?
Thanks DK , it took around 7/8 weeks to build. I started mid March, that includes working away for a week and waiting on parts for a week so call it 6 weeks.
Cost… god knows, I doubt I would have any change left of £3.5k if not slightly over that. You probably know yourself, once you commit to buying parts you’ve no choice but to keep ploughing cash into it.
But if the Miss’s asks it cost £1200 all in…
I must of spent around £60 on brushes and rollers, use them once and straight in the bin .
4 Likes
£1200 all in sounds about right 
3.5k is not to bad for a build of that quality. I’m still deciding on the electronics before I start my build. I like the use of the spare 18650’s but which cells would you rather have used?
I tried to keep it simple with electronics hence the 75/300 and no water cooling.
I made an electric skateboard last year and spent a fortune on it due to buying cheaper parts that were no good and then end up buying all decent parts in the end anyway.
I wanted to avoid that this time so bit the bullet and bought the top end gear first
The spare cells I was on about are from old used laptop batteries, spare from a power wall I built. I will sell them on eBay and they will pay for another 196 New 30Q’s to build another 14s/14p eFoil battery.
A smart decision and nice works !!
I think should add a simple water cooling part to the VESC aluminum MOSFET face because of no airflow inside the ESC box.
like this one:

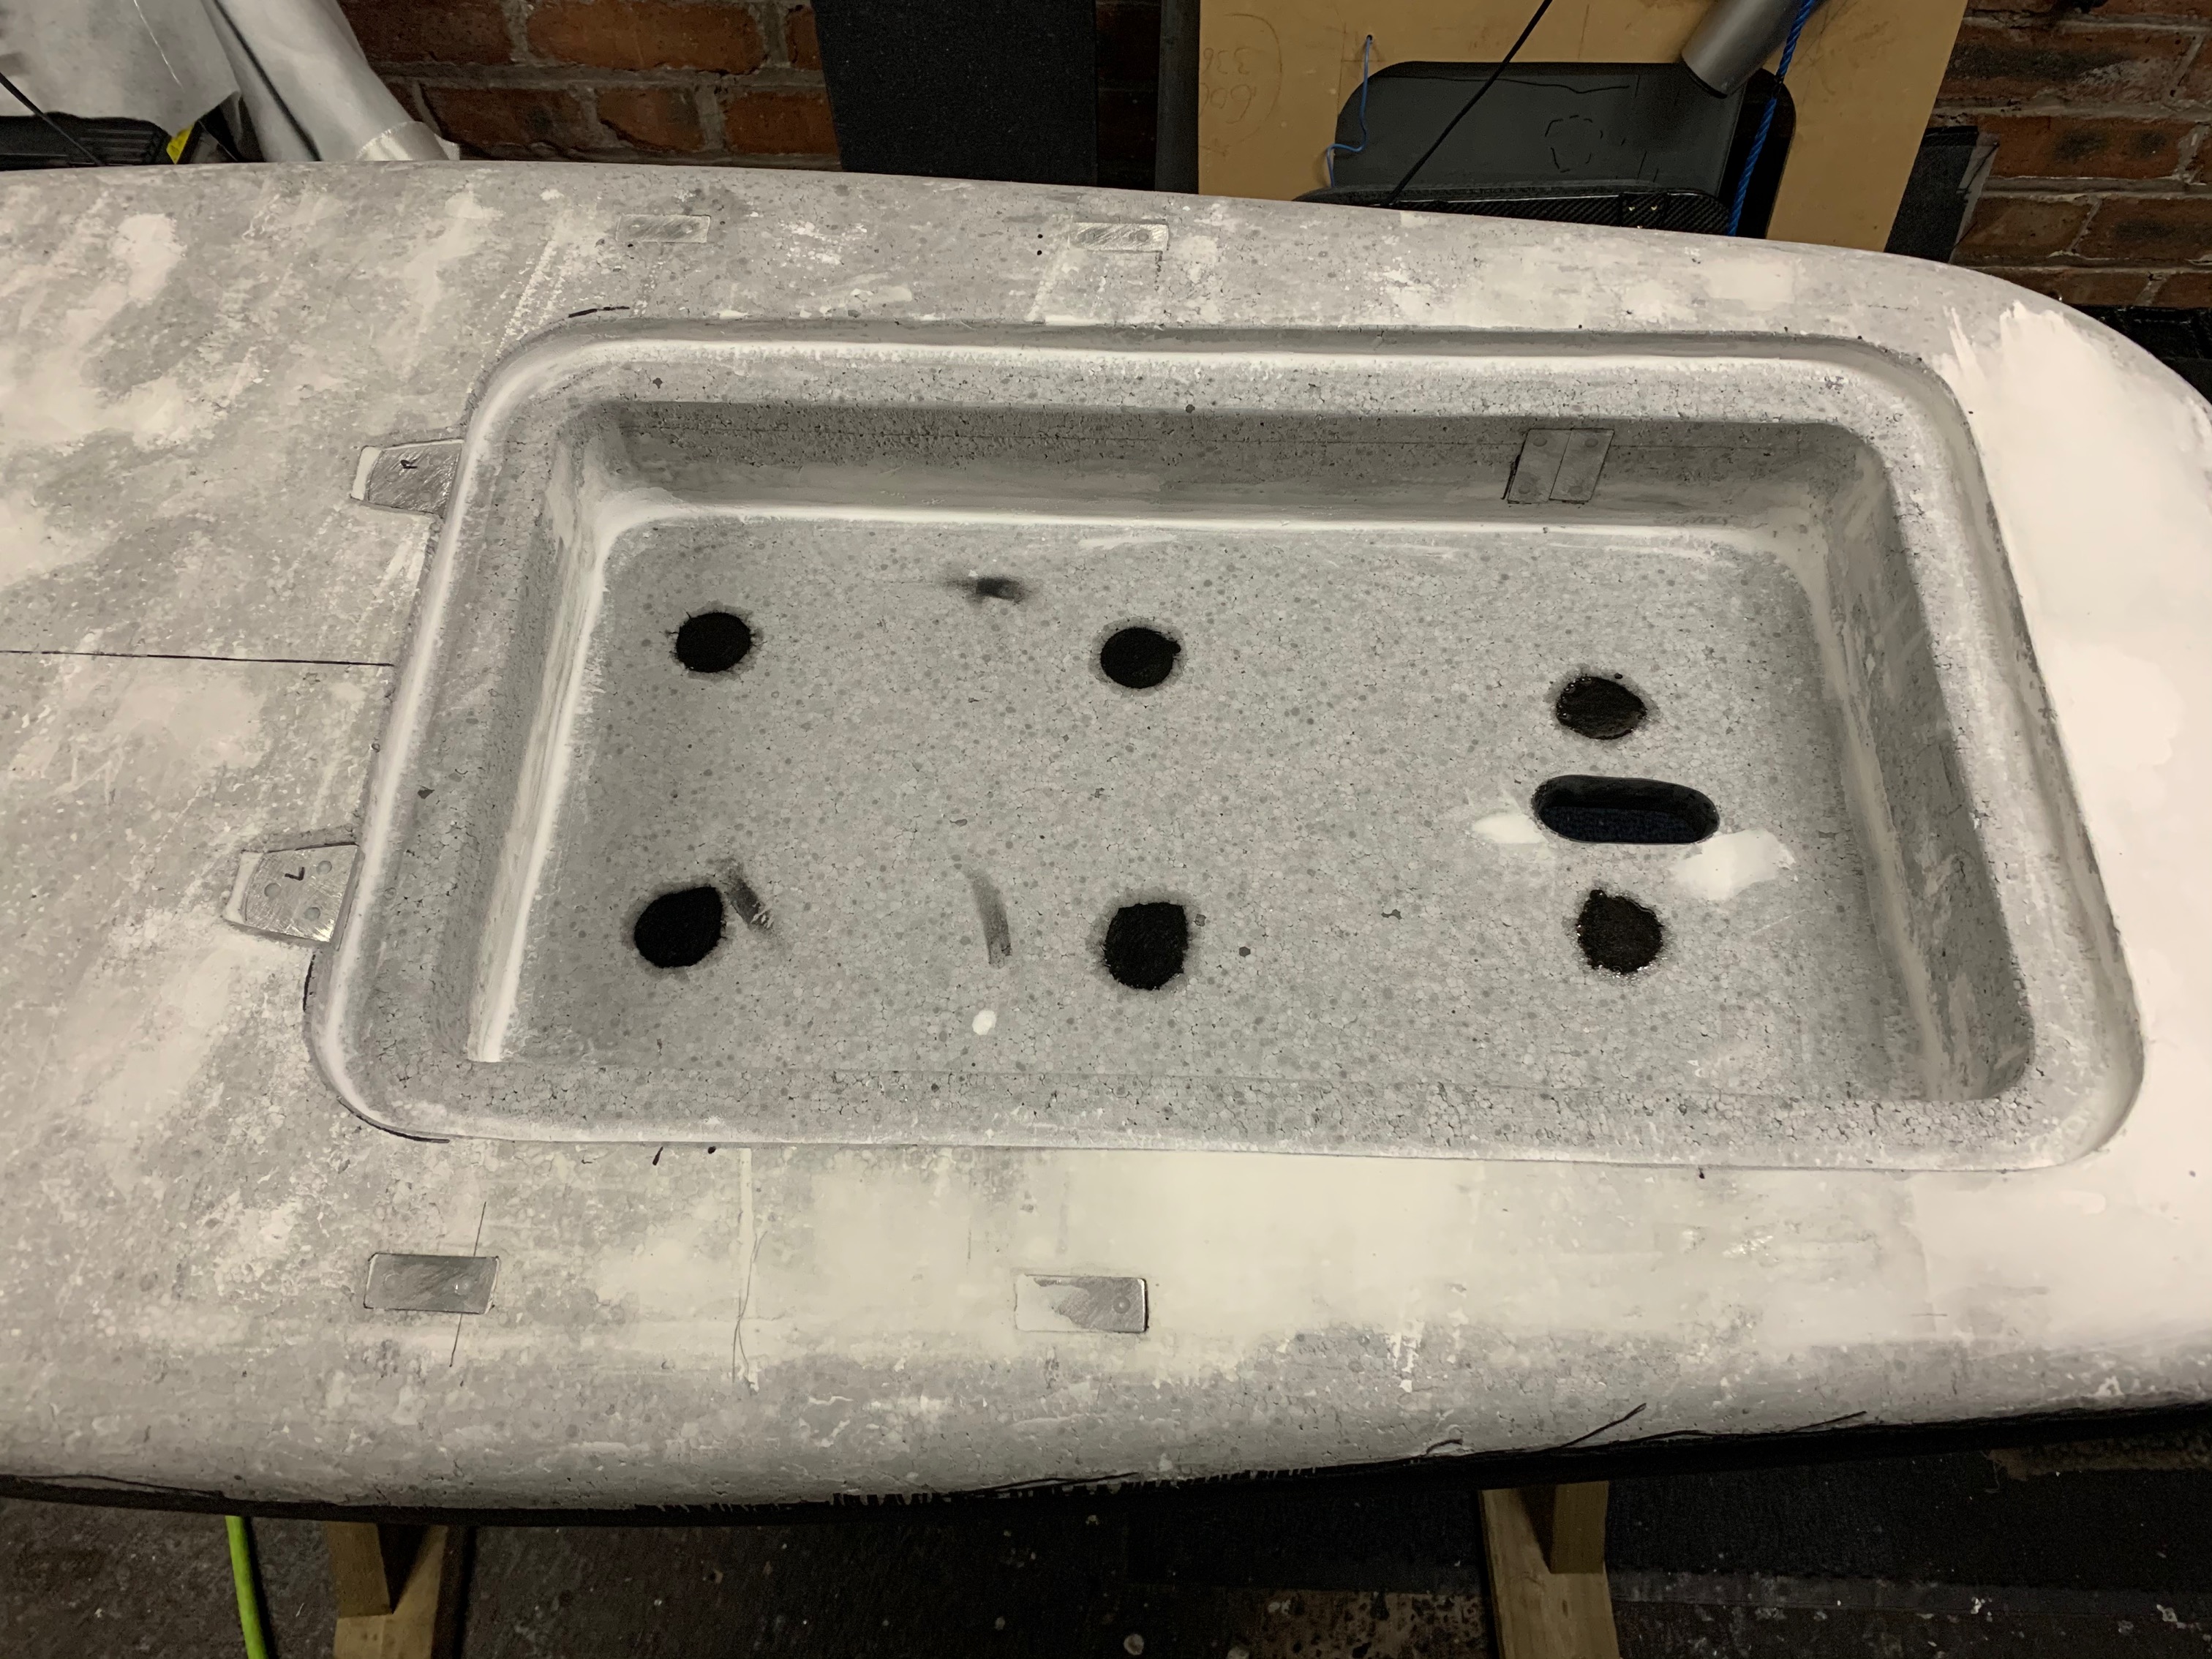
Wardy, a question. You have the holes for the mast connection straight into the box. I saw on another thread that you were considering the sealing. How did you do this in the end? I am working on a new board too, with similar holes for the mast connection, but the sealing is still an open topic. I am afraid water will leak along the bolts.