DougM's Puget Sound Build

Wow, it’s like an entire year later. Hmmm.

A couple of other projects took precedence (I rebuilt the sand runner!)

… And epoxying in the cold of winter without some kind of oven didn’t seem like a good idea.

Additionally I completely gave up on the idea of modifying an existing board, because it was too limiting in terms of what I could do with the cutouts.

And in the end I decided that I just wasn’t that good at laying up fiberglass.

The solution? obviously build a board from scratch. If I’m not good at fiberglassing then clearly I should do 3 times as much fiberglassing.

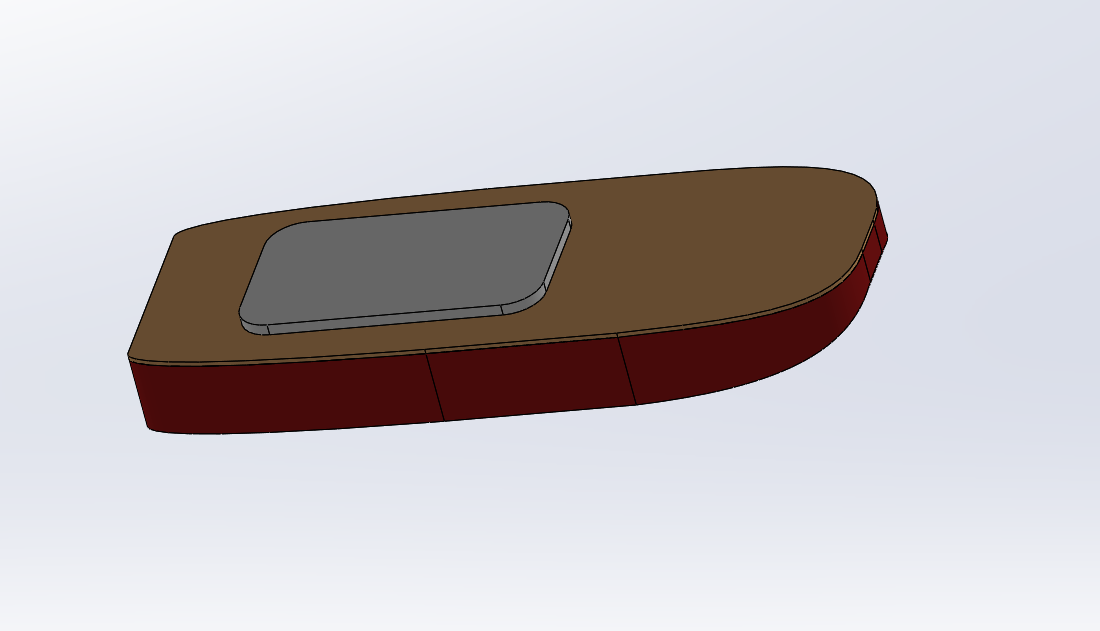
So there are 3 areas that I want to improve. The first is to double-down on a waterproofing strategy, the second is to make a custom board where I have control of the shape and size of the cutouts and I can put a standard boat hatch on it, and 3 the feedback on electrical system information just wasn’t good enough.

I know what you’re saying, “Boring! show us some pictures!!!”

Ok,

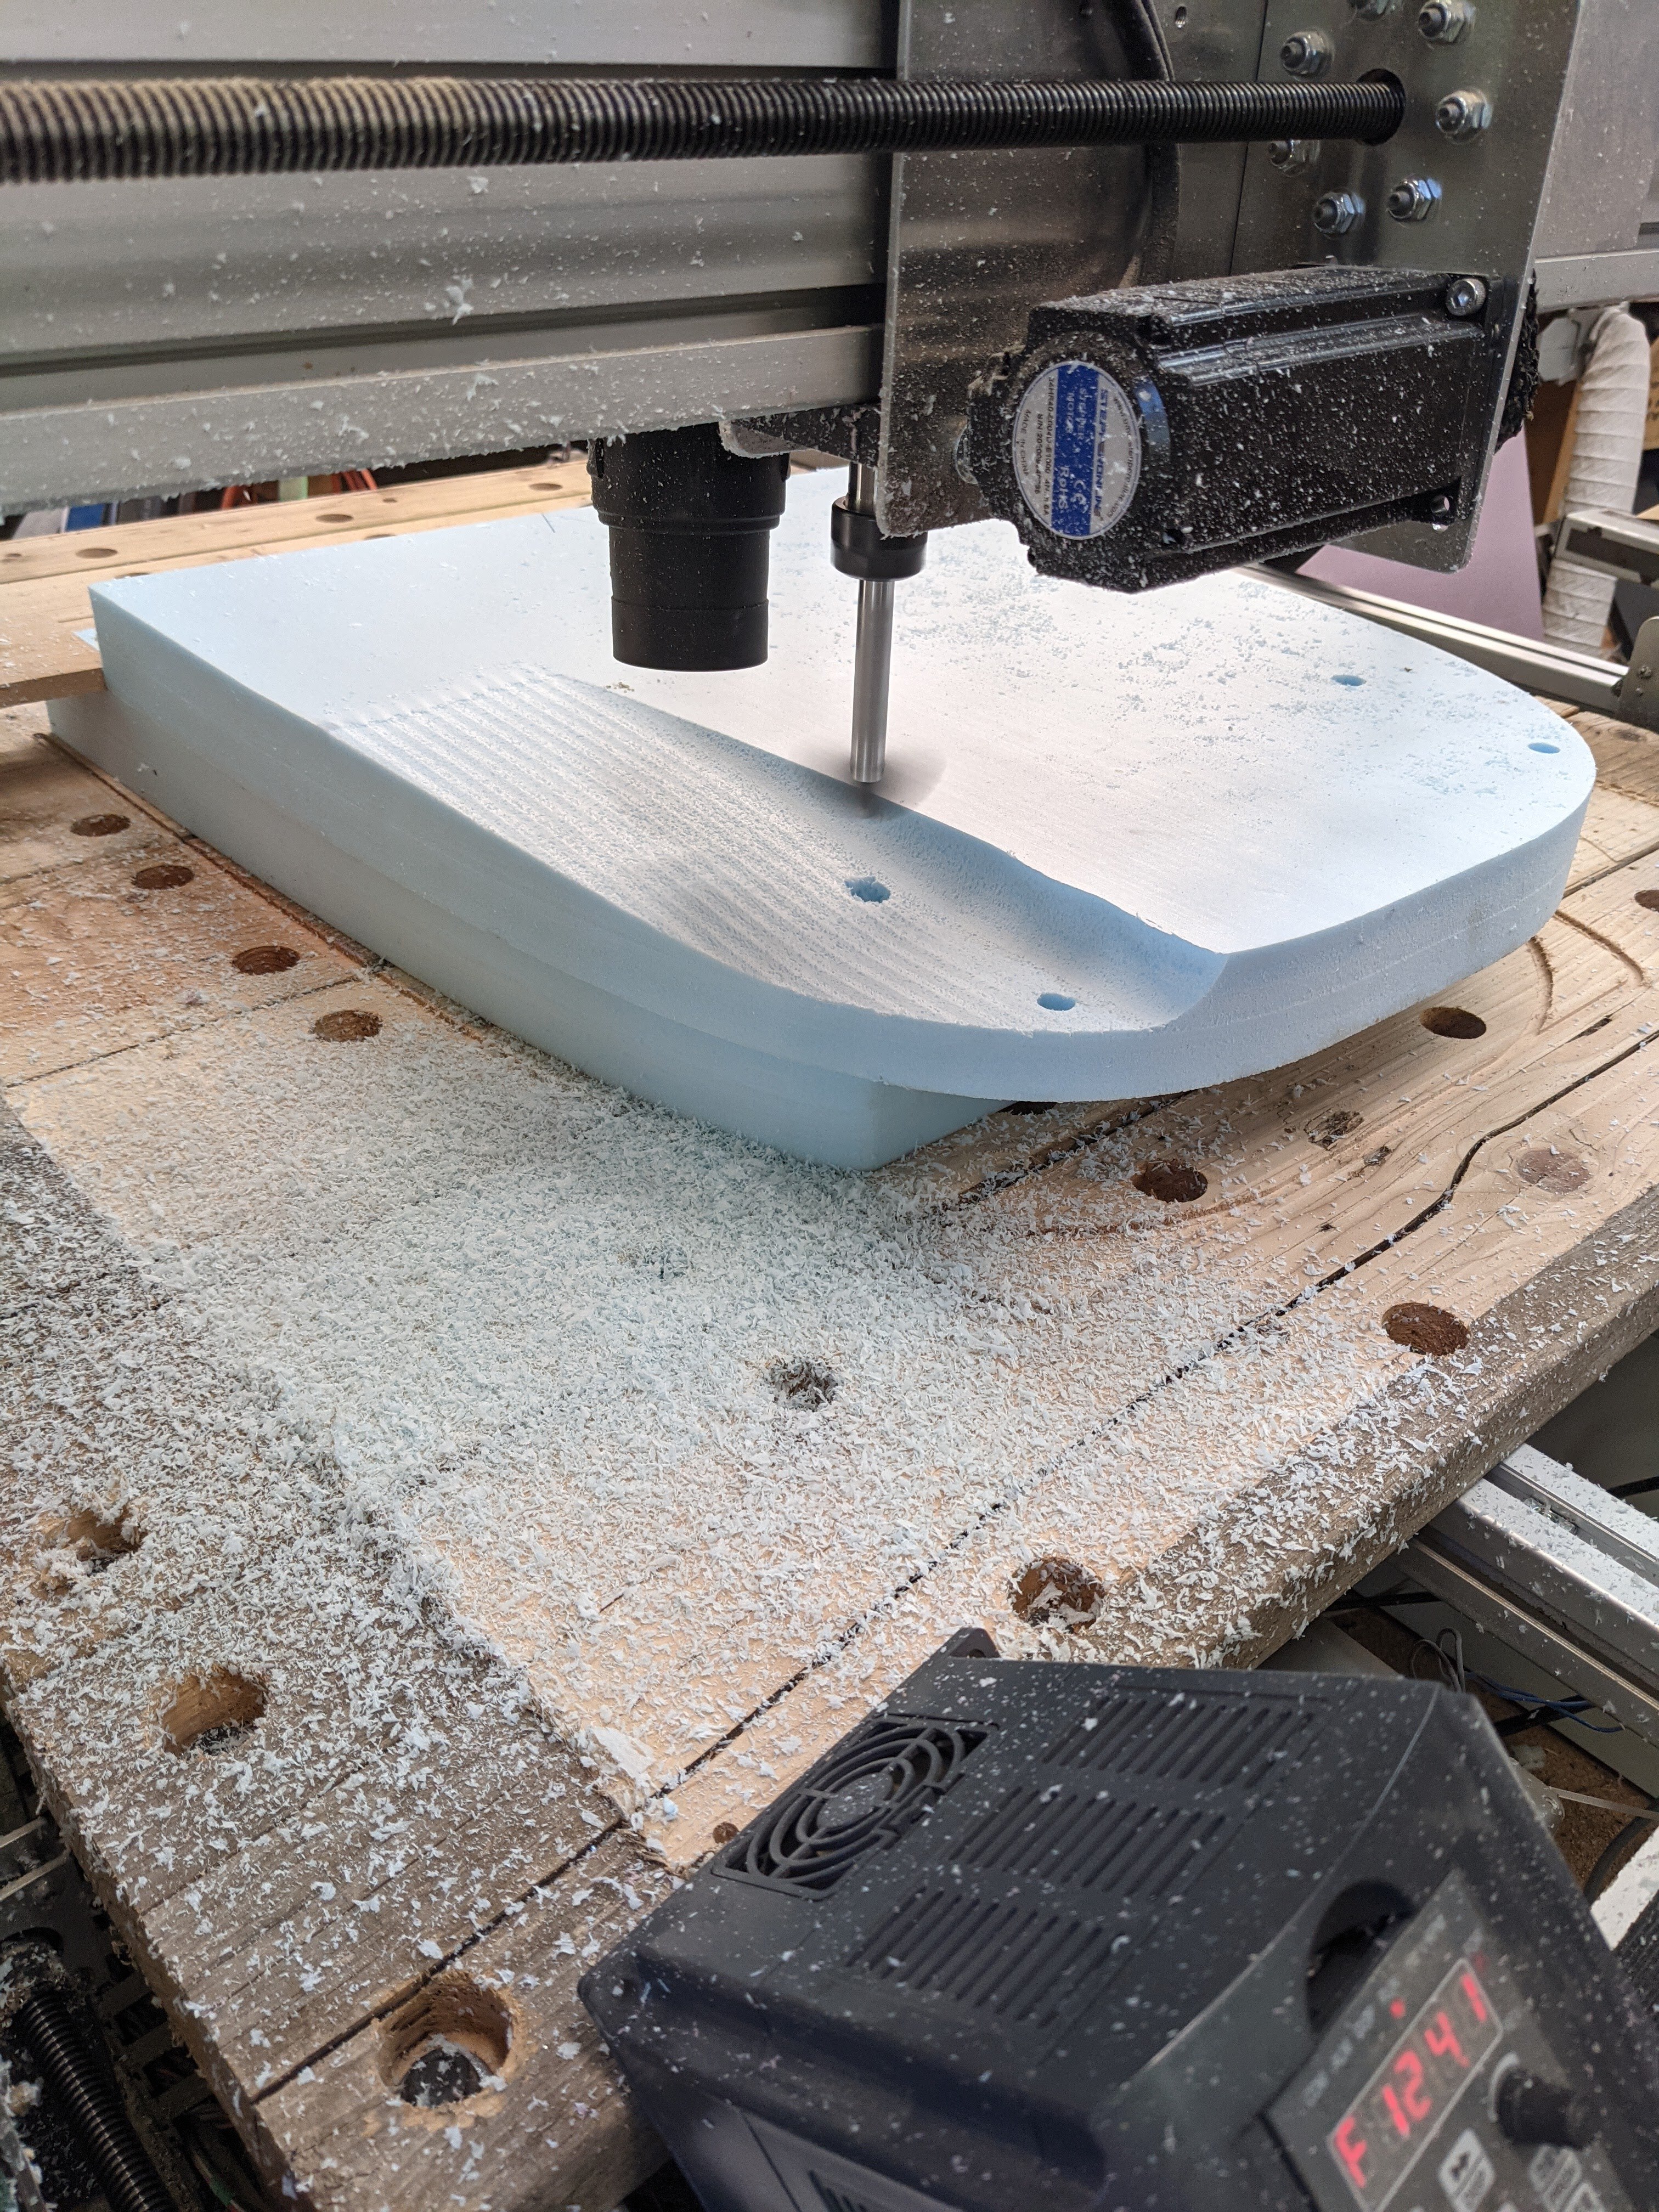
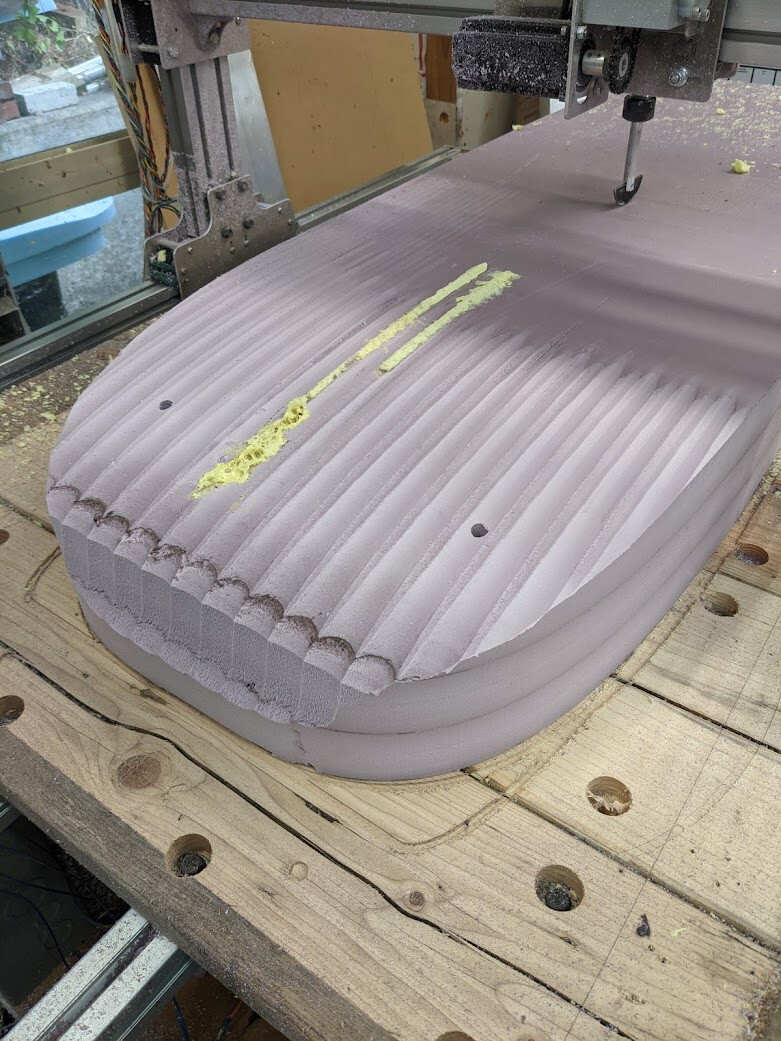
The board is actually longer than my CNC machine, so I had to figure out a way to set it up so I could perform operations on the nose, then the tail in separate machining ops. The CNC machine is just barely big enough to allow me to drill a set of registration holes at each end.

Then I installed 2 pins on the machine so I could maintain registration through the whole project (so long as I never move XYZ home for another project).

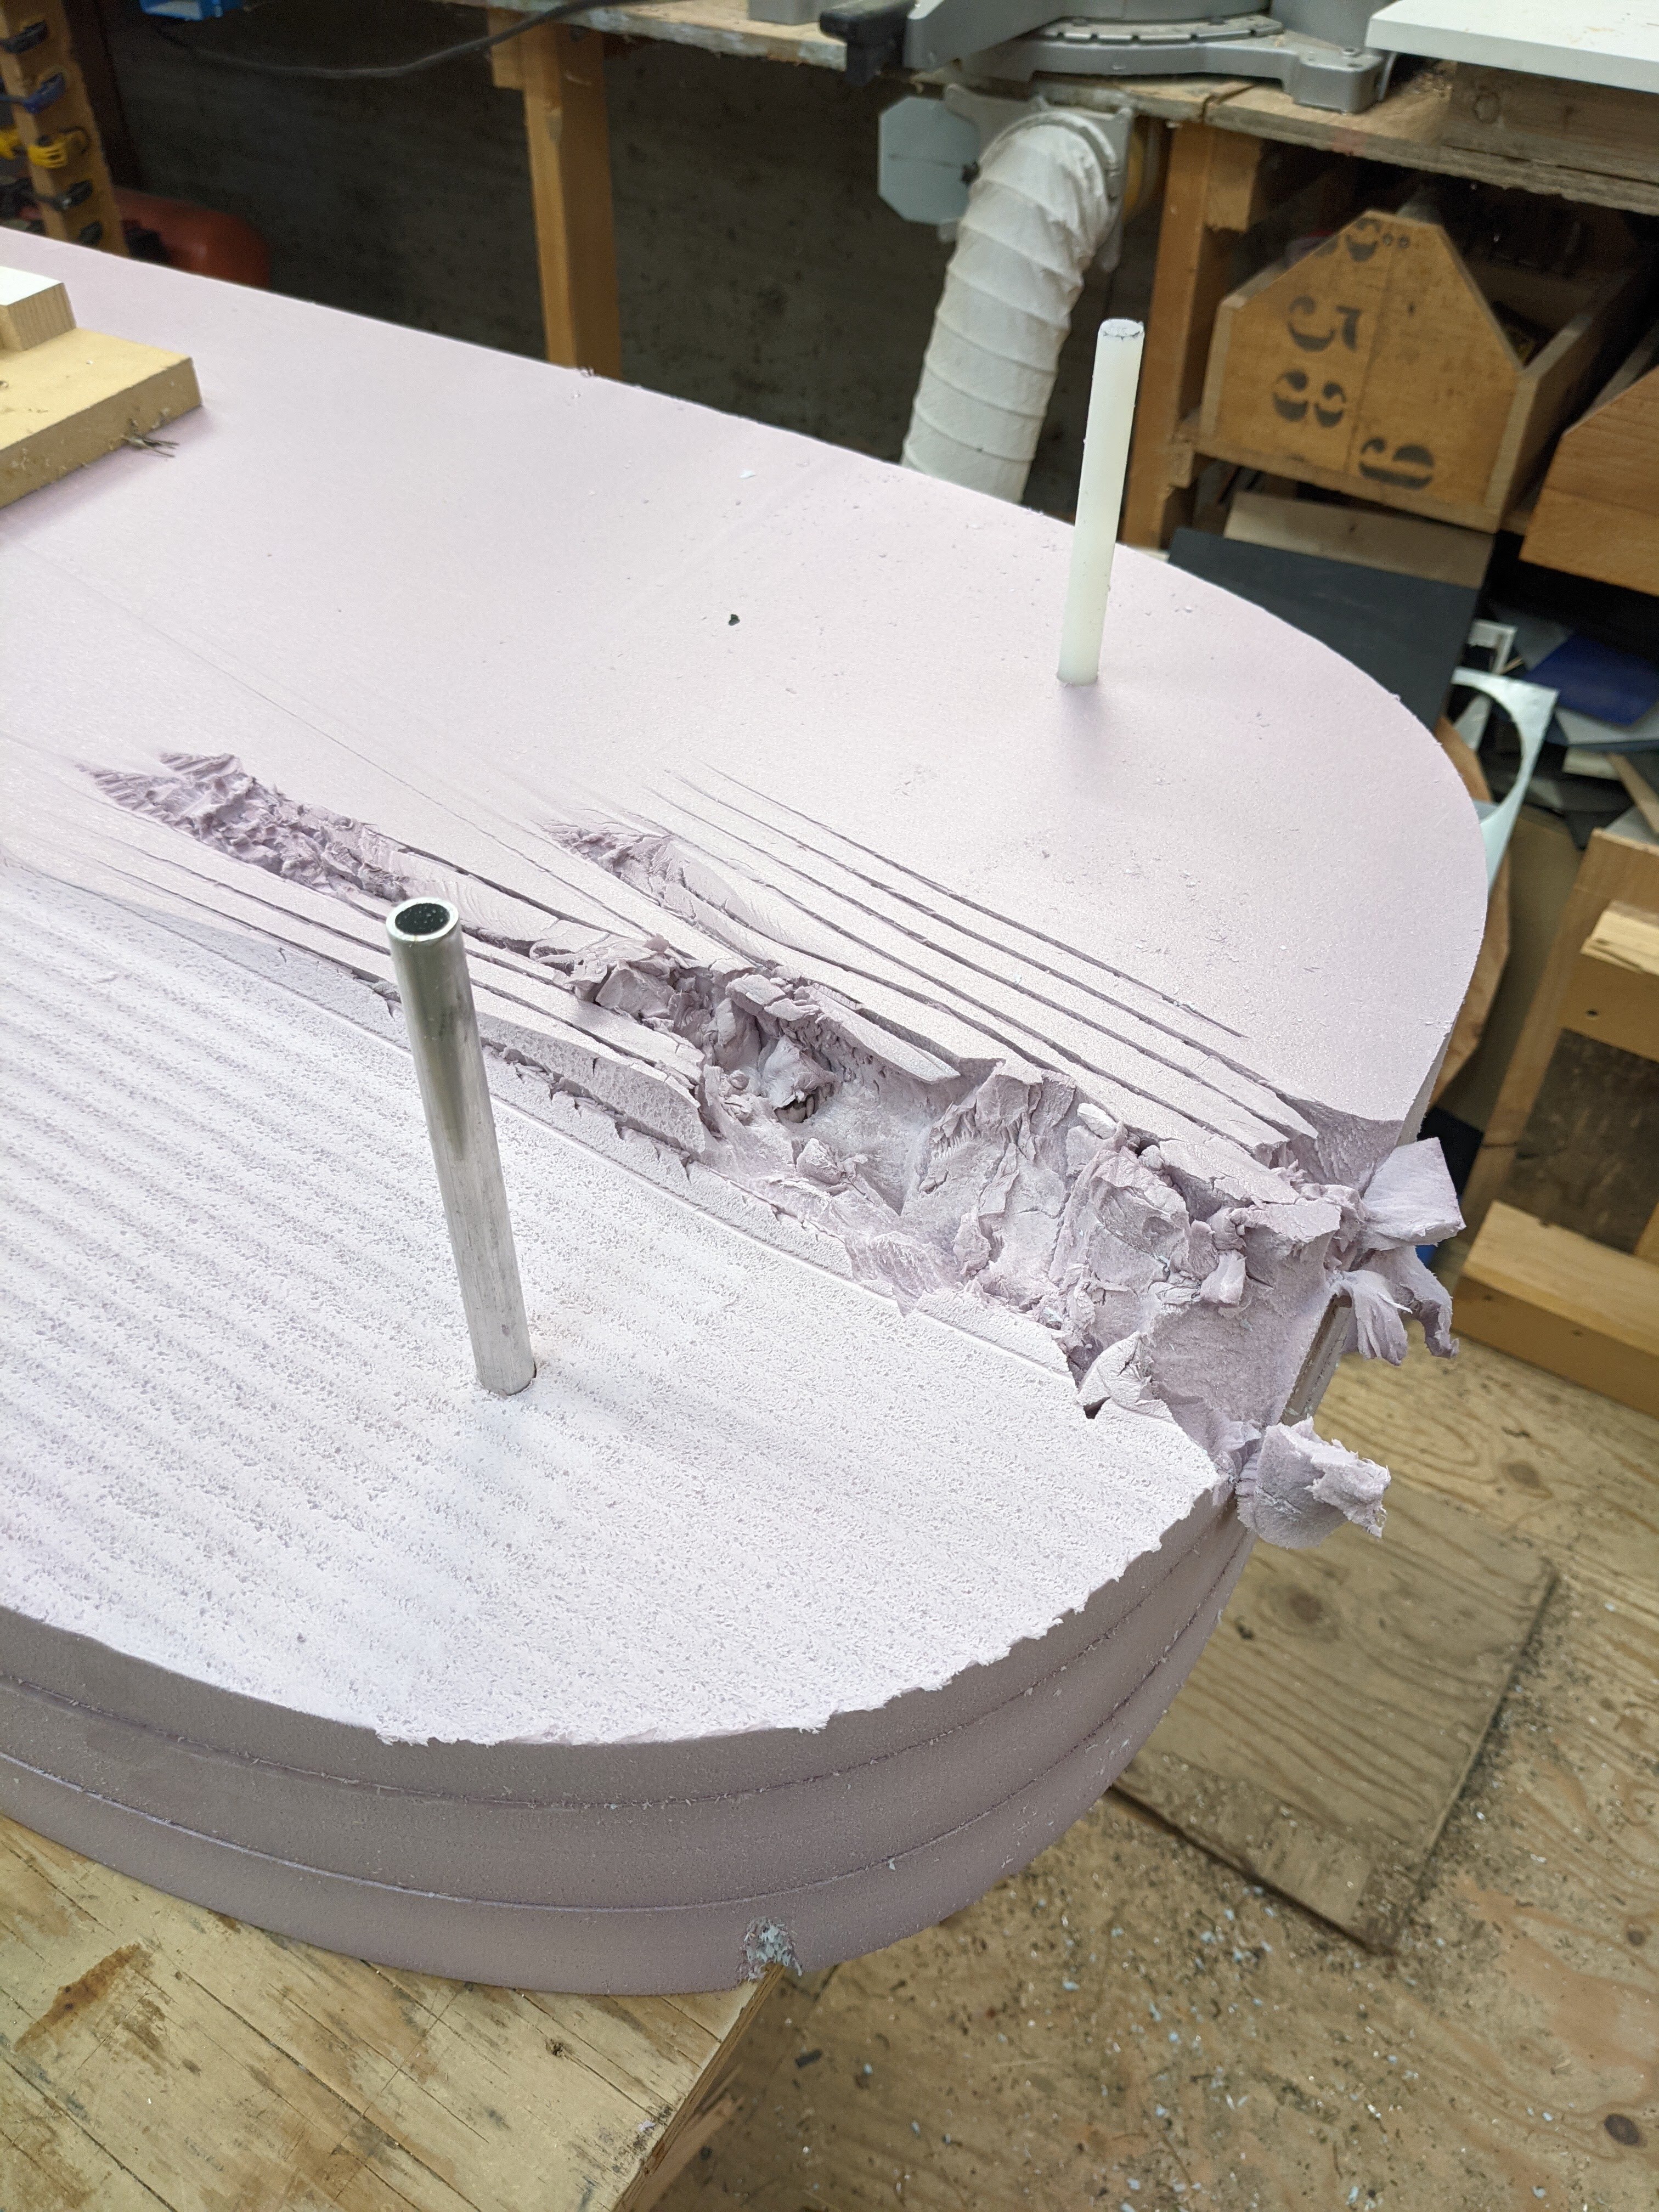
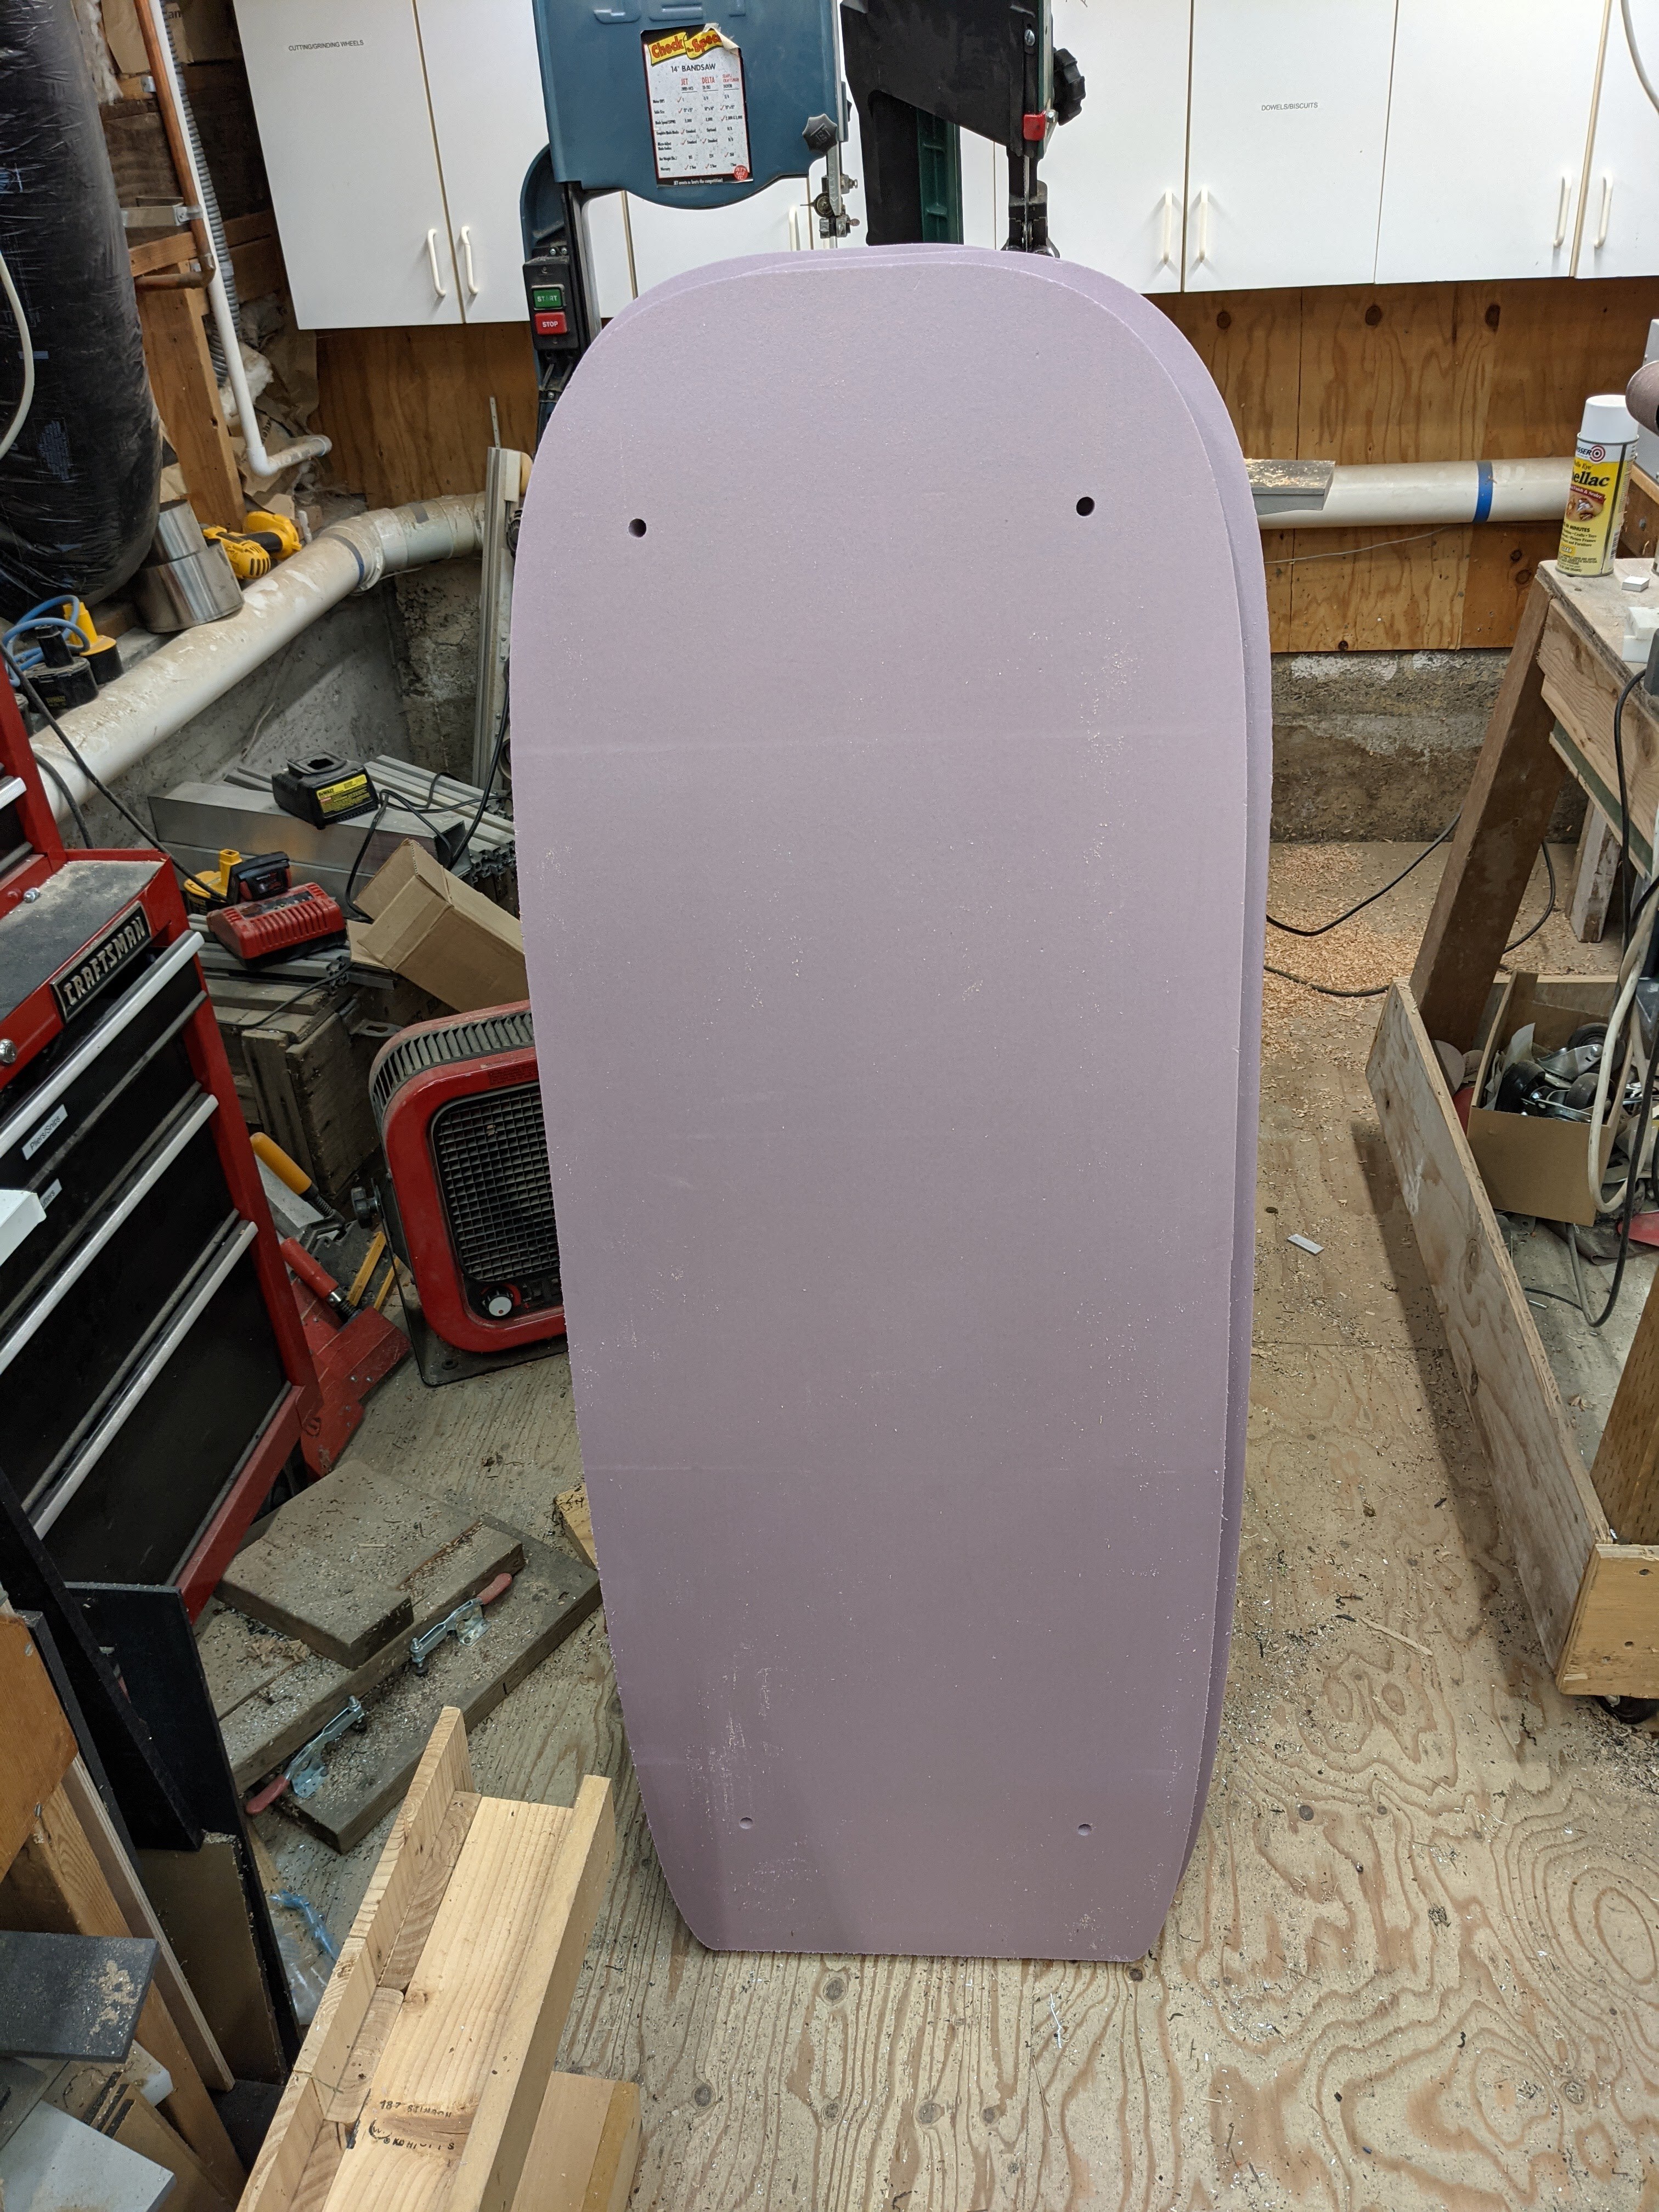
The outline is pretty good, but I might just narrow up the nose a little bit. It seems a bit blunt. As you can see in the second board I had some melting of the foam during the cutting process, so I have to go back and replace those sections and re-cut the outline.

I also think I’m going to top the board in Baltic Birch for 3 reasons - 1) I’ve got a bunch in stock from the Sand Runner project, 2) it’ll give it that classic wood surfboard look, and 3) it gives me a solid base to attach the boat hatch to.

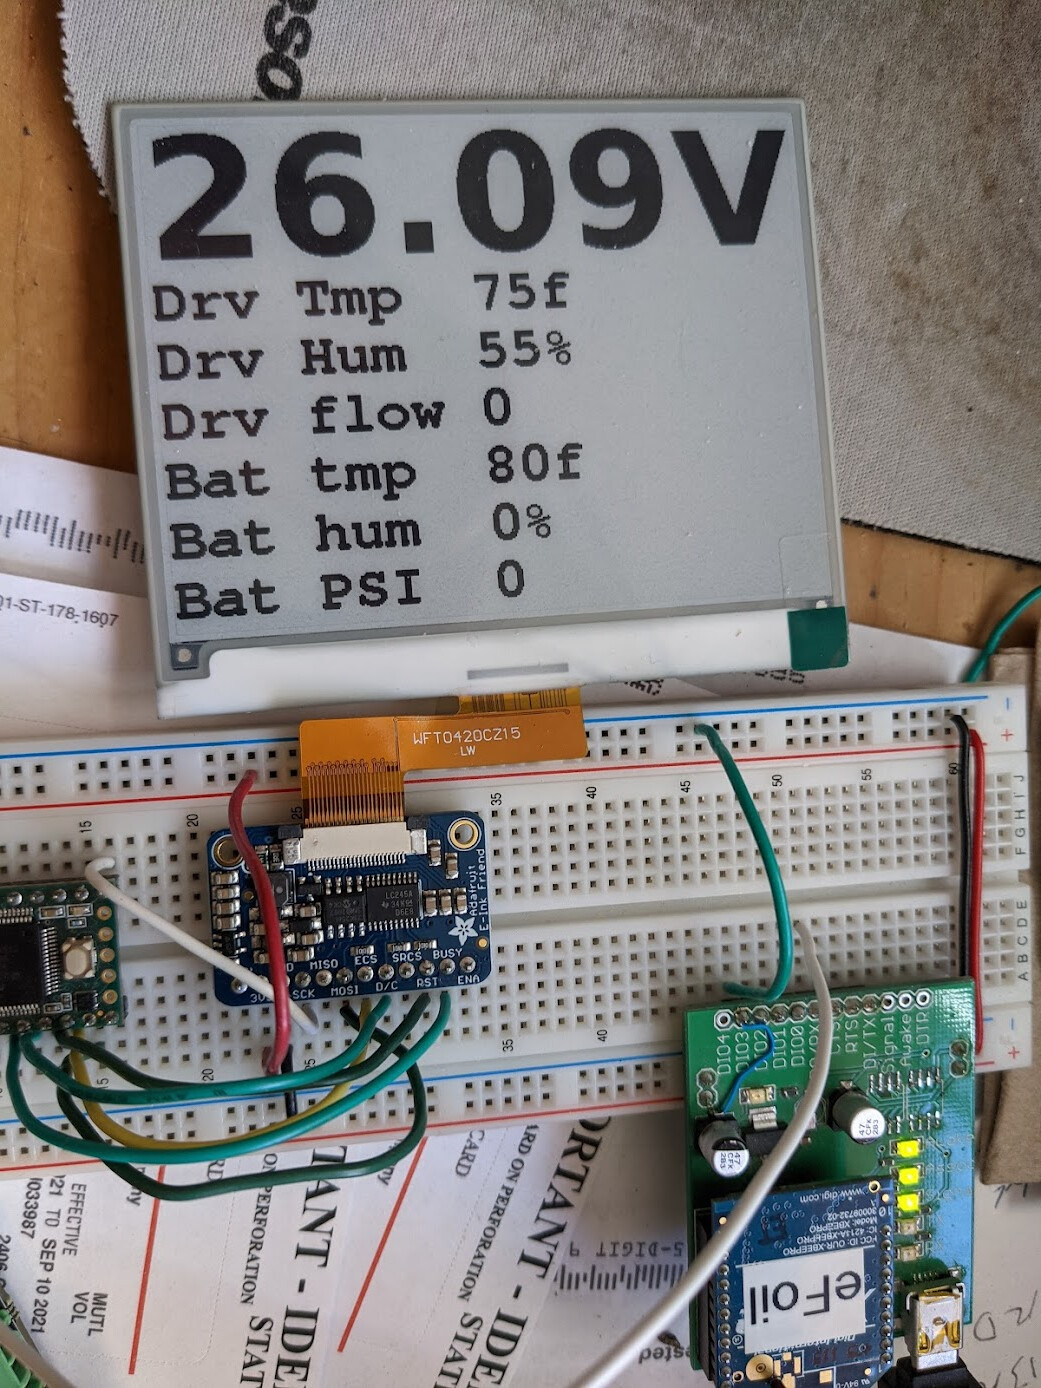
As for the electronics feedback my biggest problem was lack of information. I originally used a series of high-brightness LEDs to indicate the state of the system:

but then when I fired the whole thing up to see where it stood the remote didn’t register (the remote OK light didn’t come on) and that wasn’t helpful at all.

Status and error messages on a screen are way more hlepful… But there’s only 1 screen that really works in direct sunlight - e-ink. So I got one of those Waveshare 4.2" displays. Now the learning curve for these things is pretty steep and you all know that coding is the part of the project I like the least, so don’t expect much here aside from really basic stuff.

Anyway, the other problem is the hatch. The biggest (reasonable) hatch I could get was 24x14 and that’s too small to fit my giant battery pack in. So I’m going to have to split the battery pack into 2 separate packs to fit them in. I’m looking at 2 of these waterproof boxes for the battery packs but I haven’t actually measured everything carefully to see if I can get the batteries into them and get them through the hatch.

Anyway, at least I’m working on it again.

5 Likes

When this forum first started I read just about everything. Its too big to catch up now. Glad to see your back, I remembered your build. But I had to re-read a few things.

2 Likes

@MAC I skimmed through a lot of your 3rd build log, will have to go back through it more carefully for lessons learned :slight_smile:

Wow I like it ! Even if it’s out topic it’s still your thread so I’m asking. What type of wires you using ? Any link ? Currently have Trampa superstar rims with yellow mbs wires.

How does it compare to pneumatic? And how do you Mount the gear drives as well ?

Curious to know if it rides on dry sand as well ?

Thx

@Sliman_O wires like the electrical wires? I used 10AWG I got off Amazon.

The wheels are actually a bit better than Pneumatics because the ones I was using weren’t flat on the bottom like car tires but were curved more like bike tires, so the contact patch was quite small and cut a groove in the sand. These tires since they are flat edge to edge don’t cut a groove. I think they are more efficient.

No on dry sand - it would take giant balloon tires and 4WD and the accompanying huge battery bank to get through dry sand. Even in moist sand it has trouble. It’s happiest when the sand is wet and really heavy and solid.

So good news and really bad news.

I did a test cut of the 3D forming of the nose and it went pretty well:

so I glued the 3 pieces together


and started the job for real.

Here is a shot of the never-ending problem - no matter how big your tools are they just aren’t big enough.

Anyway, that job is running right now. Unfortunately the machine just isn’t that fast, so the job is going to take most of the day.

So the bad news is really bad. I killed my battery pack. I have a small circuit board in the pack that monitors temperature, moisture and battery voltage and when it runs it doesn’t take much power, but when I mothballed the project last year I didn’t notice that I had left the battery pack powered on, and because I hadn’t coded any sort of low-voltage sleep it just kept running and drew my Li Ion cells all the way down to zero.

So that’s a lot of $$$ down the drain. and honestly I am considering just dumping the whole project. I really didn’t expect an additional $500 in costs, but on the other hand it might be better because now I can get away from the Li Ion cylindrical cells and go to LiPo packs, which makes more sense in every way.

If you have any recommendations for good LiPo packs please let me know.

After the nose is cut I will do some sanding and round-over the edges to get the overall shape ready for glassing. But I need to lock down the waterproof boxes that I’ll put the battery packs and drive electronics in so I can get a final depth on the board (6 inches seems like a bit much), then I need to figure out the infrastructure necessary to attach the mast.

Of course the job failed. From the department of “if it’s not one thing it’s another” the problem with my particular spindle is that if you run it too slow it stalls unexpectedly, and if you run it too fast it melts the foam and melty foamy bits stick to the cutter which melts more and eventually your entire project is one big melted disaster.

In this case it stalled. Of course I wasn’t there, and I never got around to wiring the status wire on the spindle driver back to the controller so it just kept going.

But no big deal, I made a few changes to the job (it was too high res for what I needed anyway and was going to take forever) and re-started it at a higher speed and made sure to clean the melty bits off occasionally.

and I’ll go back and clean up the gouges once the spray-foam sets.

Here’s what I’ve got so far in terms of overview


the red is the foam part, the brown is the Baltic Birch deck and the grey is the hatch.

On the bottom you’ve got the aluminum mount strips and the mount plate. The plan is to glass over the strips and then mount the plate over the glass. There is a mating plate that holds the mast, and screws into this plate.

1 Like

Geez, I ment “tires” and wrote “wires” :man_facepalming:

You got a link for those tires ? I’d like to swipe my 8”pneumatics like easy and ride my board on wet sand as well.

Got your point on dry sand, definitely would need a beefy spec board to ride on it haha. AWD board is not on the table right now if you see what I mean :joy::rofl::rofl:

1 Like

@Sliman_O ah, that makes far more sense. Yes, I got them off AliExpress

You’ll need access to a lathe and a 3D printer (at the least) to convert these wheels to something you can mount to mountainboard trucks. There’s a bit of information in the original build log about it. Let me know if you have any questions

Be diligent about sealing up your electricals - saltwater infused sand is very conductive.

2 Likes

I agree,I know I’ll build a battery out of Li-ion cells in the future but in the meantime I need something quick and efficient so why not just use lipo, just treat them with respect and you’ll be fine, I consider buying two of these Tattu 22Ah

https://a.aliexpress.com/_vWvOAV

@e-Jetter you’re confident that these are good batteries and actually have the rated capacity and won’t explode unexpectedly? Thanks for the recommendation!

Yes!!! After a lot of frustration and more money than I wanted to spend (who knew there was more than 1 kind of e-paper display?) I finally got the display working and was able to add a font large enough to be read from a distance.

Now, after the hard part comes the hard part. I need to make a PCB to get it and the driver board and the controller and the XBee module all together, then install it in the waterproof housing. Then code all the messages. Which means I need to get all the other modules (remote, battery box board, control box board, etc.) back up and running. Which means a lot of code.

Sigh.

On the upside I think I have secured a couple of 18650 battery banks from a friend that I can use for testing. So while I’ll still need to invest in all new batteries I don’t need to do it right away.

2 Likes

They are used in 9000w agricultural spraying drones carrying >20kg of fertilizer, these drones total weight can get to 50kg , they should be very reliable, just search Tattu on the forum, they work, but after all it’s up to you

1 Like

Hi, that must be an amazing ride, maybe in the fall at sunrise/sunset when the water is cold for e-foil.

@e-Jetter thanks for the endorsement - just what I was looking for. I’ll pick up a coulple of packs.

October delivery is kind of a bummer, but I tried to find a US distributor and the markup is more than 100%

@Dynamik it’s pretty fun, the bushings are too stiff so it doesn’t turn as well as it should (easily fixable) and sand is surprisingly unpredictable in terms of when it breaks loose which makes carving (slaloming anyway) an adventure :slight_smile:

I am master of e-ink! The actual values are a little wonky, but that’s different subsystems.

I took the display out in the sunshine and the voltage is easily readable from distance and no problems with direct sunlight.

I also got the rough shaping done on the nose. The rest I’ll do by hand.

and, not shown here, I cut the insets for the strengthening bats. I need to cut the slots for the wires to come in from the mast, then I need to clean up some of the gouges that my cutter made when it melted the foam and got all gooey.

After that I have several other problems I need to work through before I can actually glass the thing.