Hello Philippe,
Yes you will have access to the STL files. For the efoil you need a minimum printer height of 20 cm and a minimum plate of 20 cm x 20 cm.
thanks!
Hello Philippe,
Yes you will have access to the STL files. For the efoil you need a minimum printer height of 20 cm and a minimum plate of 20 cm x 20 cm.
thanks!
thank you for your answer, I just bought it :sourire:, a small question how you made to fix the engine on your Mat
Thanks!
I will attach the motor to the mast with a small connection box (3d printed most likely). I don’t think I will seal this box. I will simply open it, clean it and let it dry after each use.
Worth reading:
Fusion360 wing design tips by CharlieUK :
Based on Moses Onda 633 front wing using a H105 profile:
Hello
what do you stick the different parts of the mold with?
I use 5min epoxy glue
Just curious, I’ve printed some of the molds, but haven’t started the build yet. Did you do anything to protect against galvanic corrosion where metal parts come in contact with the carbon?
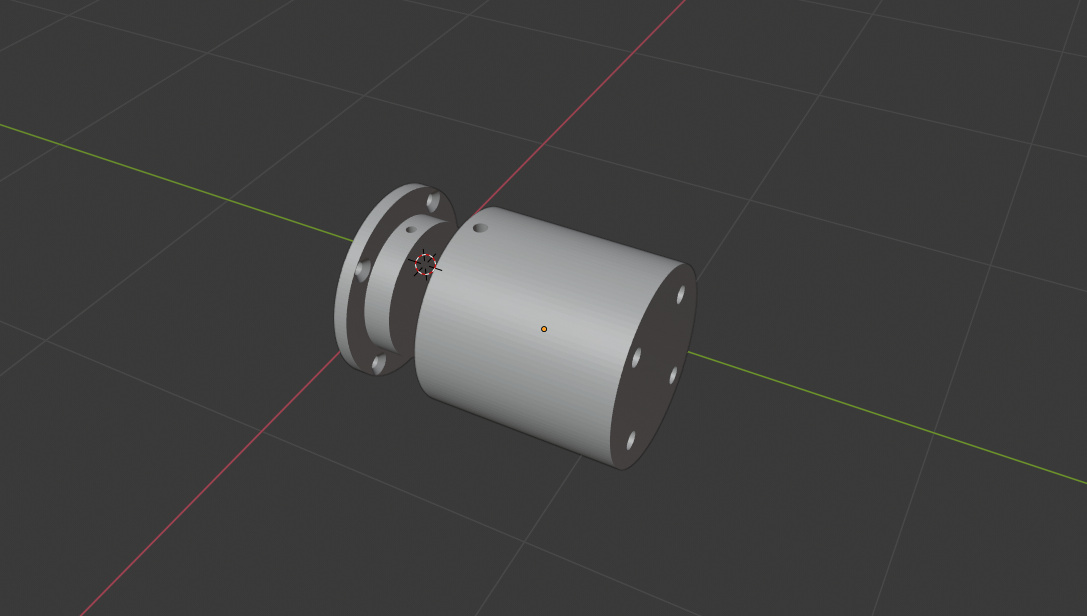
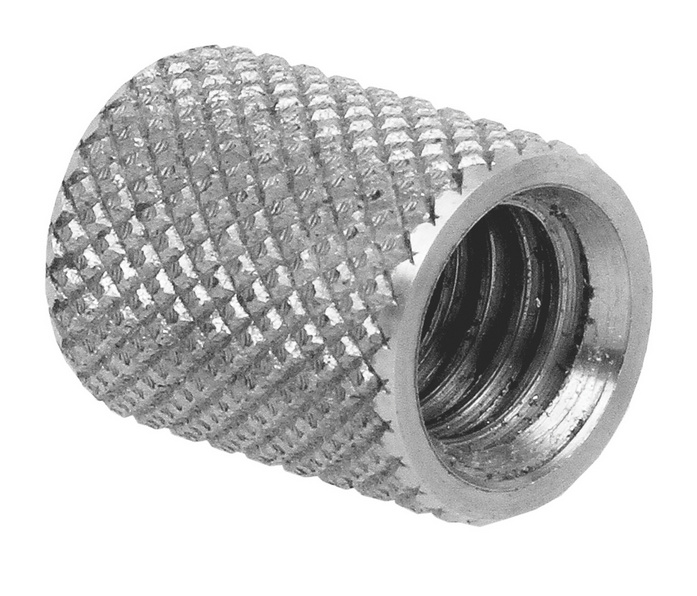
There isn’t much you can do to the insert, you can only choose the right material : marine grade stainless steel, aluminium (a strong one), or titanium is the best. You could add a sacrificial anode next to the holes if you want. Then it’s just maintenance (loosen the bolts, cleaning with fresh water, use tef gel or other anti corrosive lubricant). If you don’t feel comfortable adding insert the way I did, you should use standard insert like this :
Simply fill the fuselage with the filler you want and you can drill holes to add the insert (it easier this way)
Where exactly are these inserts located?
Why don’t you use helicoils?
There is a pdf file with the holes position in the downloadable files. You can make threads in 3 different way when it comes to composites. The worst solution is to do the threads directly in the carbon fiber or fiberglass, it’s not possible for us but in some situation it’s ok to do threads in the composite part. The second solution is to make a hole in the composite part and then add the threaded insert (or helicoils). The final solution which is the best if done properly is to add a metallic parts when you laminate the composite part. Then you can make the threaded holes yourself (it will be much stronger this way).
What about rivet nut inserts?
I don’t think it would work here, because usually rivets have to be a little longer than the part itself (or both parts if you want to attach 2 parts). It’s a good way to add threads on composite plates, etc.
Hello
Why did you make a mast tilted forward, could you turn it into a right?
It’s because when I first designed the mast & fuselage it was like other foils (mast & fuselage perpendicular), then I decided to move the rear wing below and blend the nose of the fuselage with the motor section. And to make the nose section smaller (and keep everything else at the same position) I had to add an angle to the mast.
I didn’t change it because I liked the more agressive and different look! But yeah I guess I can change it. I will try to upload the file this week end (I have other things I have to finish first so it may take a little longer).
I would also like to test the file for nose / mast bracket.
I like it very much.
I also believe in advantages if the rear wing does not run in the drag vortices of the front wing.
Greetings Frank
Hello Visor360
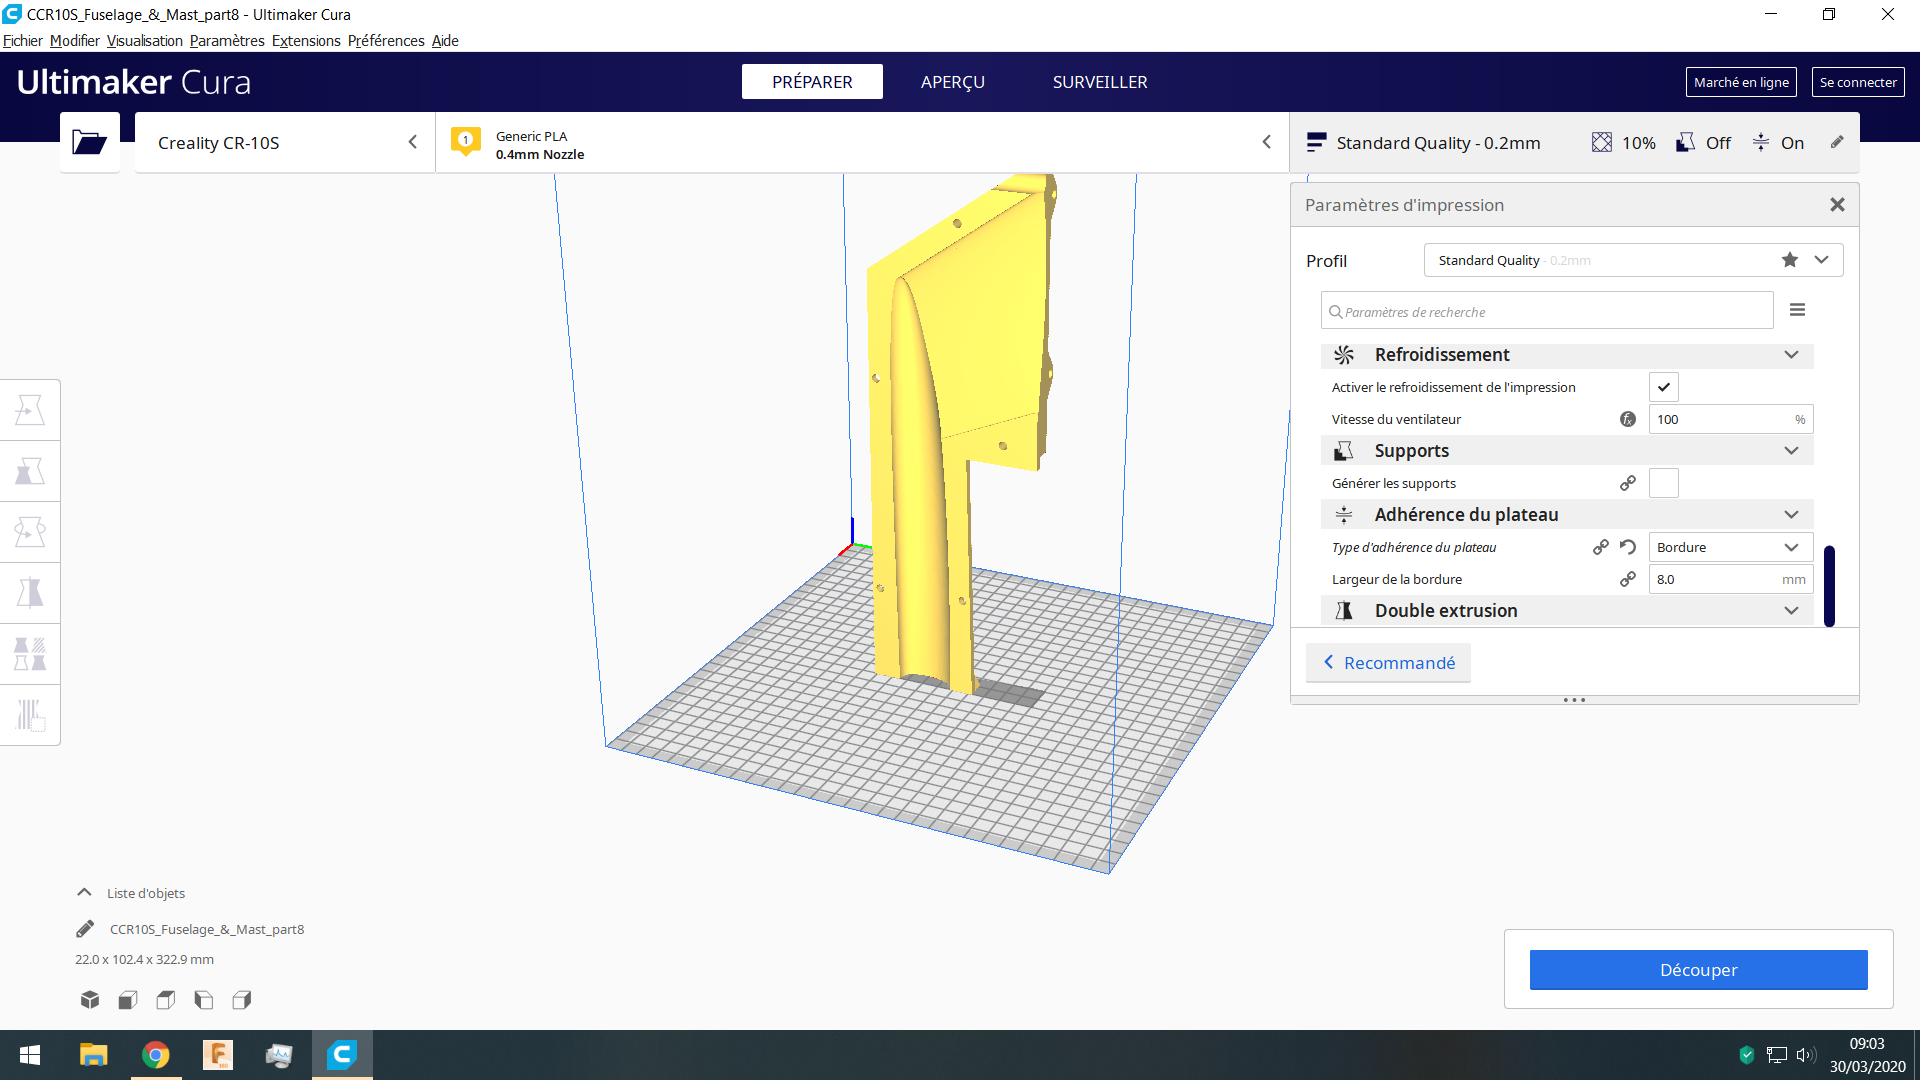
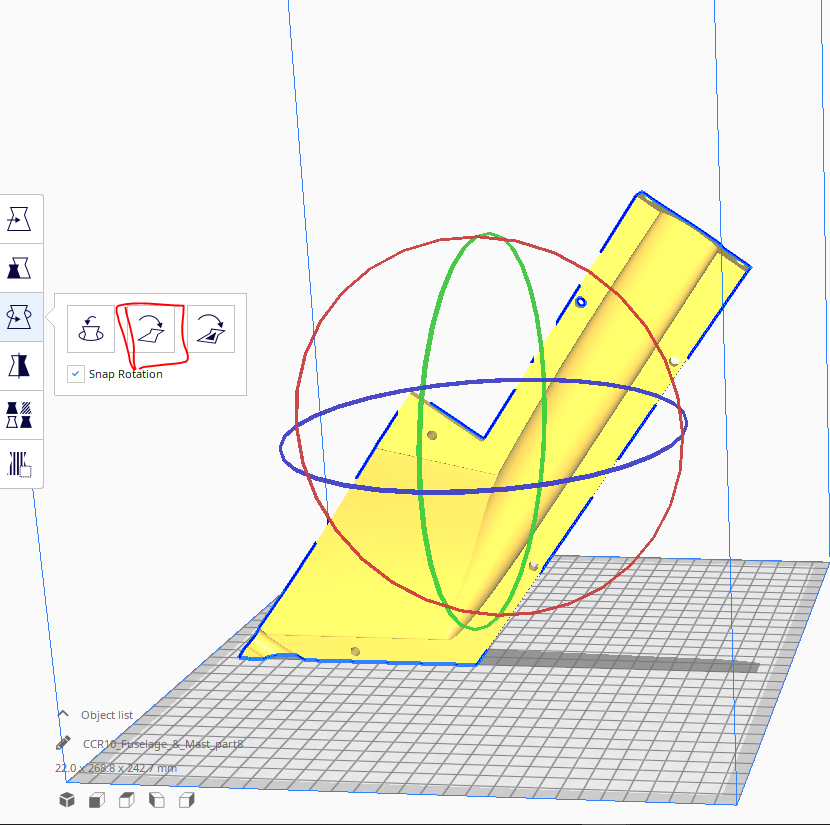
I am currently on the footprints of the parts, can you tell me how to place part No. 8 of the fuselage for printing and if i need supports when printing , thank you
Hi !
I always design the parts to never use supports (for better results)
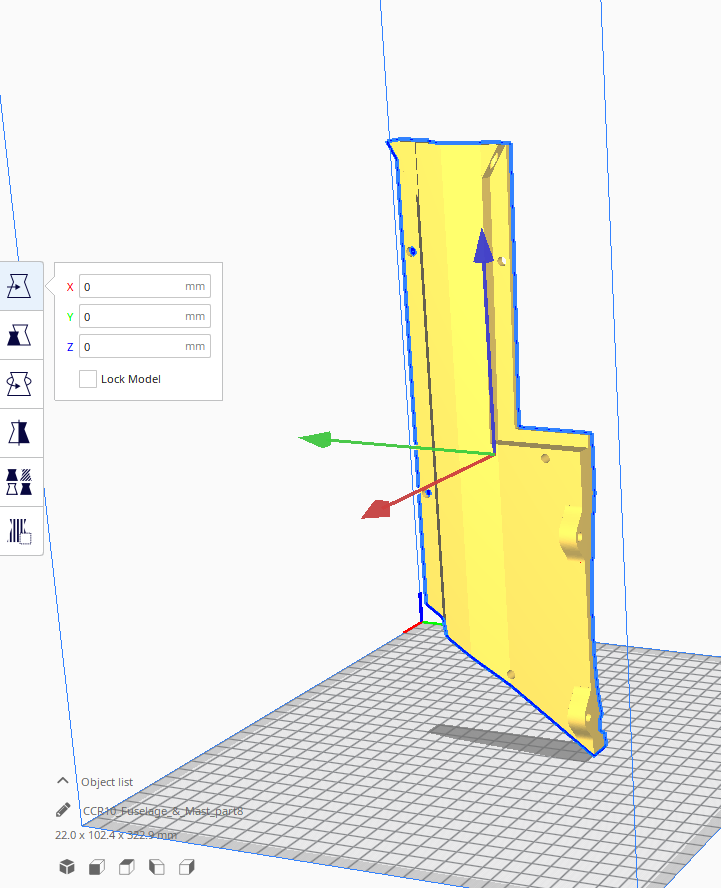
First position the part like this :
Then click on “lay flat”:
You should always print each side of the mold parts together for better accuracy (and it’s faster) :
Right click on the part and click on “multiply selected model”
Number of copies : 1
Use the mirror feature
super thank you for your answer
Hello. Sorry but I only saw your offer now. Is your offer still available?
Yes it’s fine, it’s still available!