I would like some tips and hints on how to disassemble outrunners like my APS 80100, especially regarding the separation of rotor and stator.
How do you do it, what is important to pay attention to or what to do and not to do.
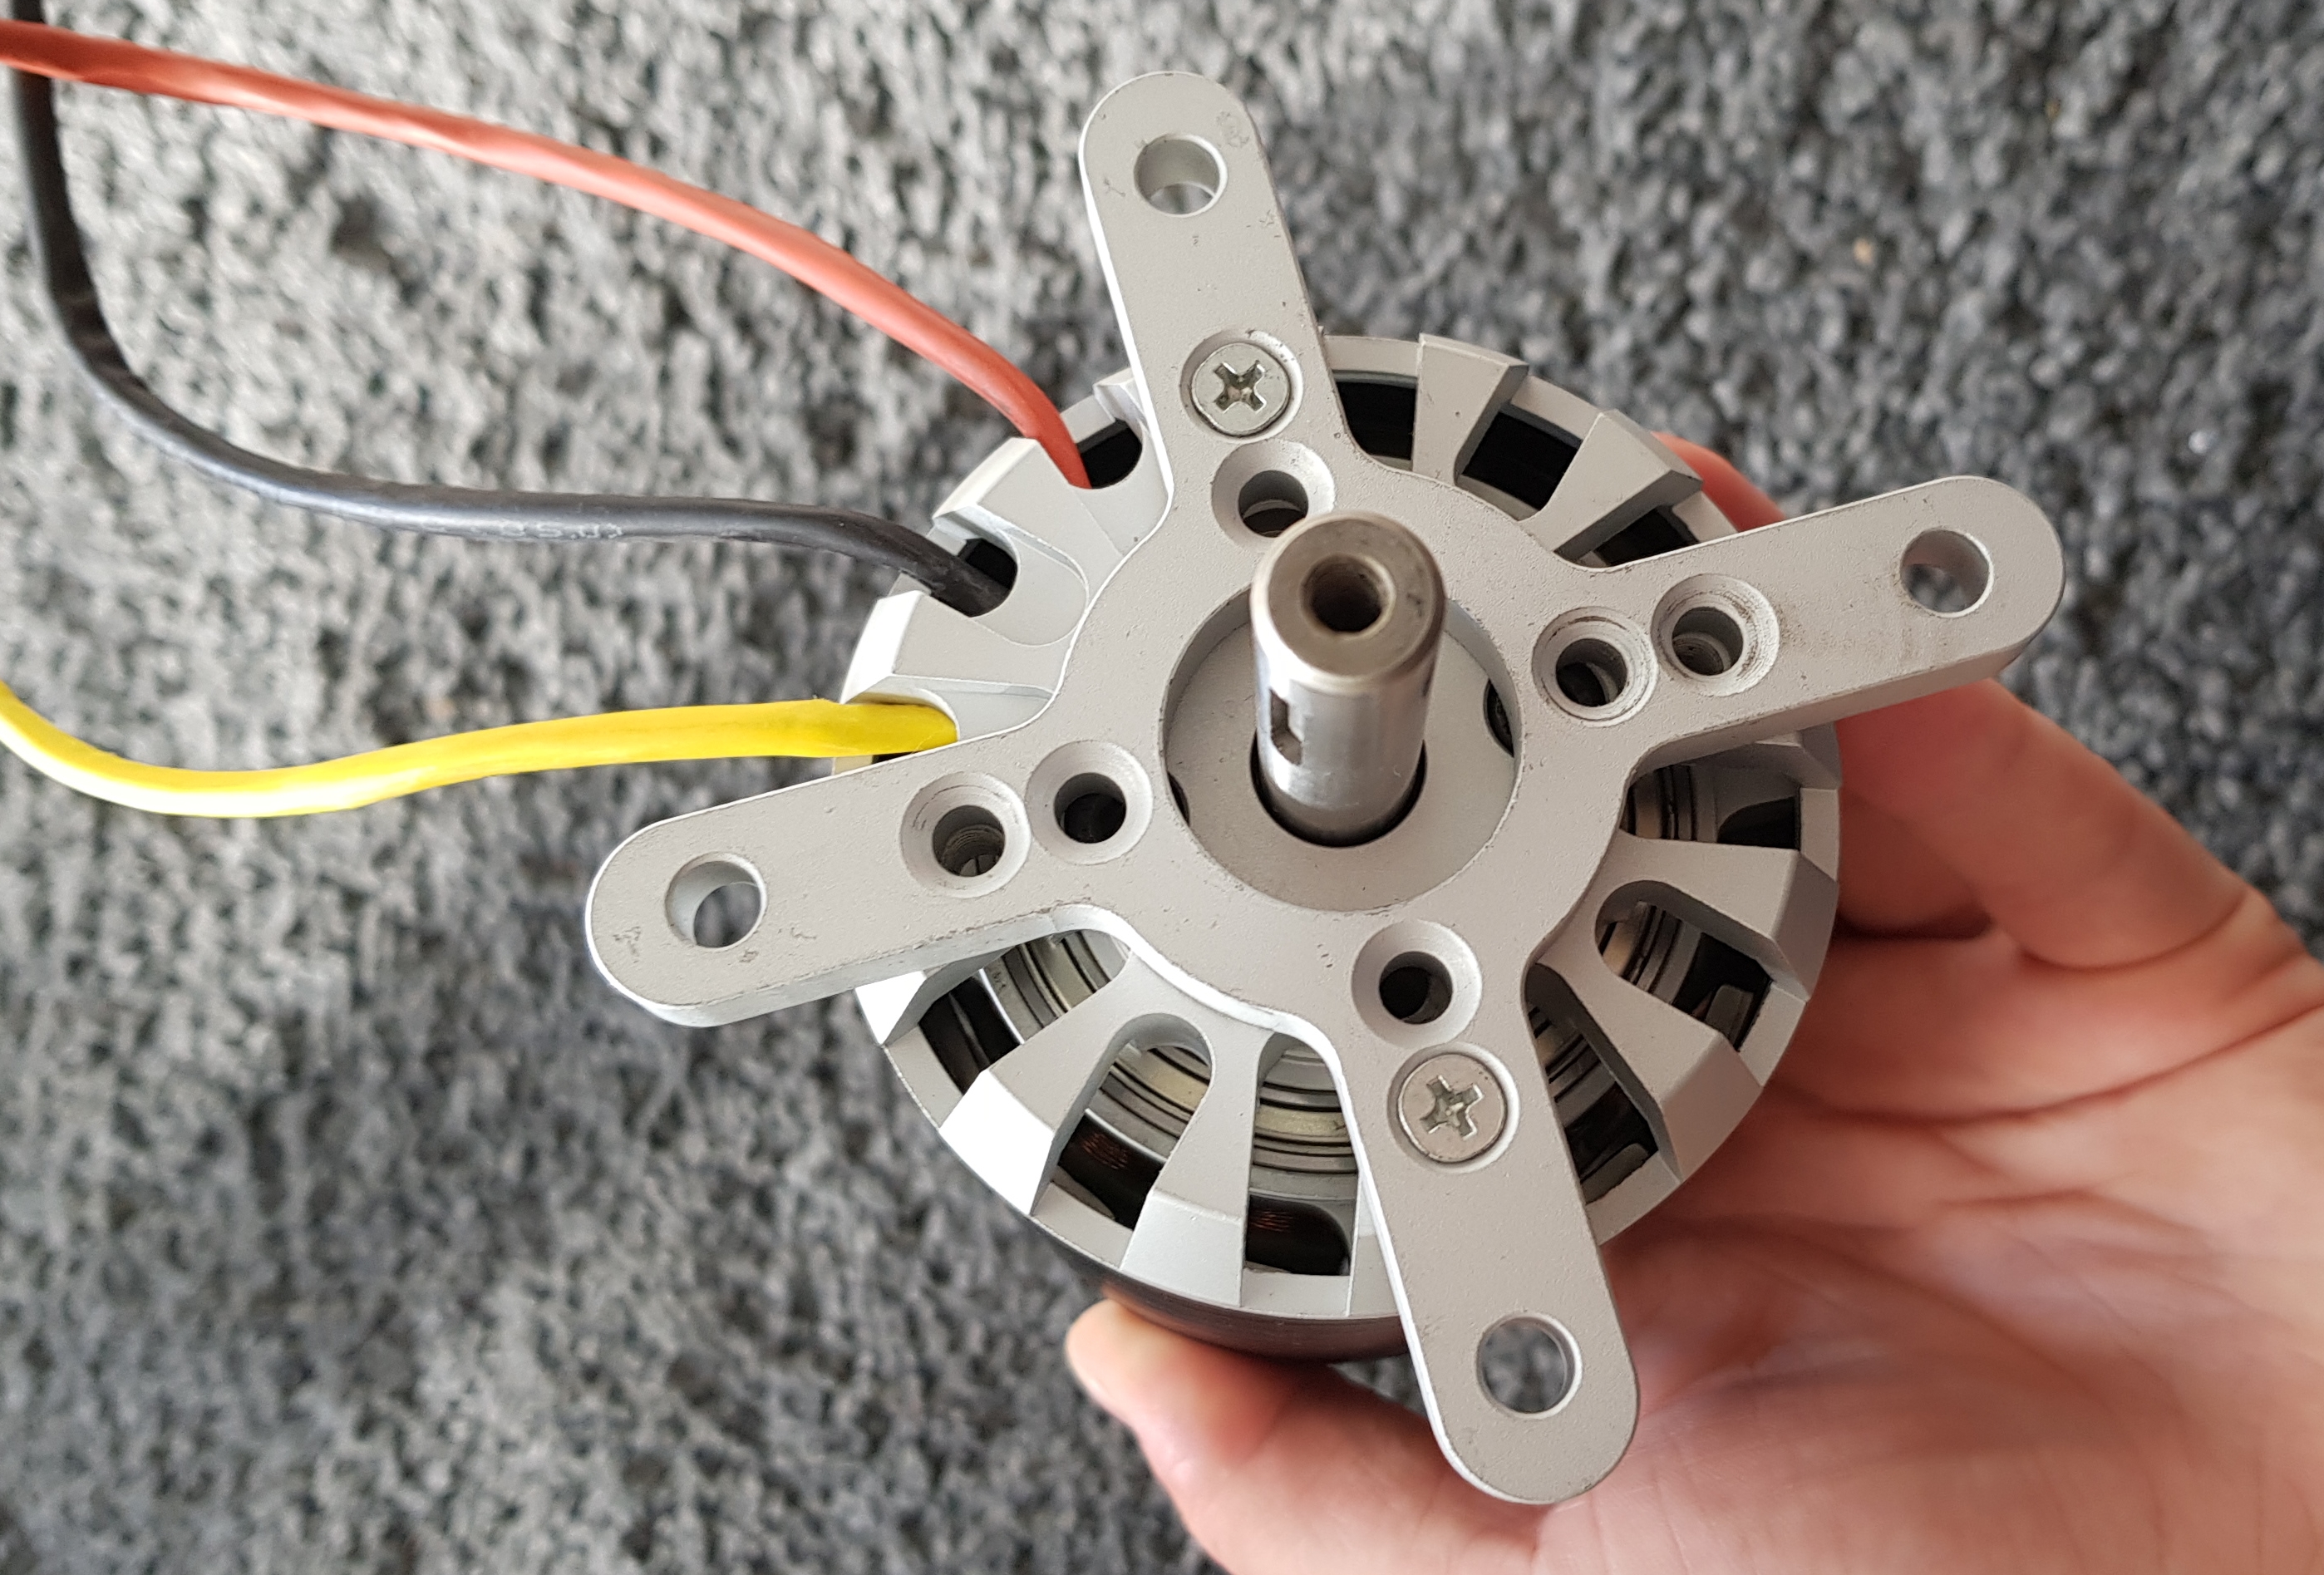
Currently I only managed to take of the back cover and to remove the circlip with a plier. Is the next step to fix the stator to something and pull on the rotor (if possible)?
1 Like
Once I remove the Circlip and washer, I remount the base plate, and attach the motor mount accessory to the base plate, this enables you to easily grip the base and push down hard on it to separate the two pieces. Remove the bottom 4 screws on the rotor, these are the screws closest to the mounting plate of the motor not the other end, and once you have done this the motor will easily separate. Just make sure there are no metal shavings are near the magnets or you will have an annoying job of removing them from the magnets piece by piece.
2 Likes
When you remount the rotor onto the stator, use some rubber to damp the smash, when the magnetic force accelerates the parts, otherwise you bearings might be harmed. In the beginning i used a push-off tool, but that takes long time to handle.
1 Like
Thanks for the tips. I already was at the point where I mounted the accessory to have a better grip to the whole thing, but nothing moved, pushing the the shaft against the ground did the trick.
I made photos along the way to make the whole process more straight forward for others and for those who are interested in the internals of the motor:
Step 1: Remove base plate
Unscrew the 4 black hex screws on the back of the motor and pull off the base plate.
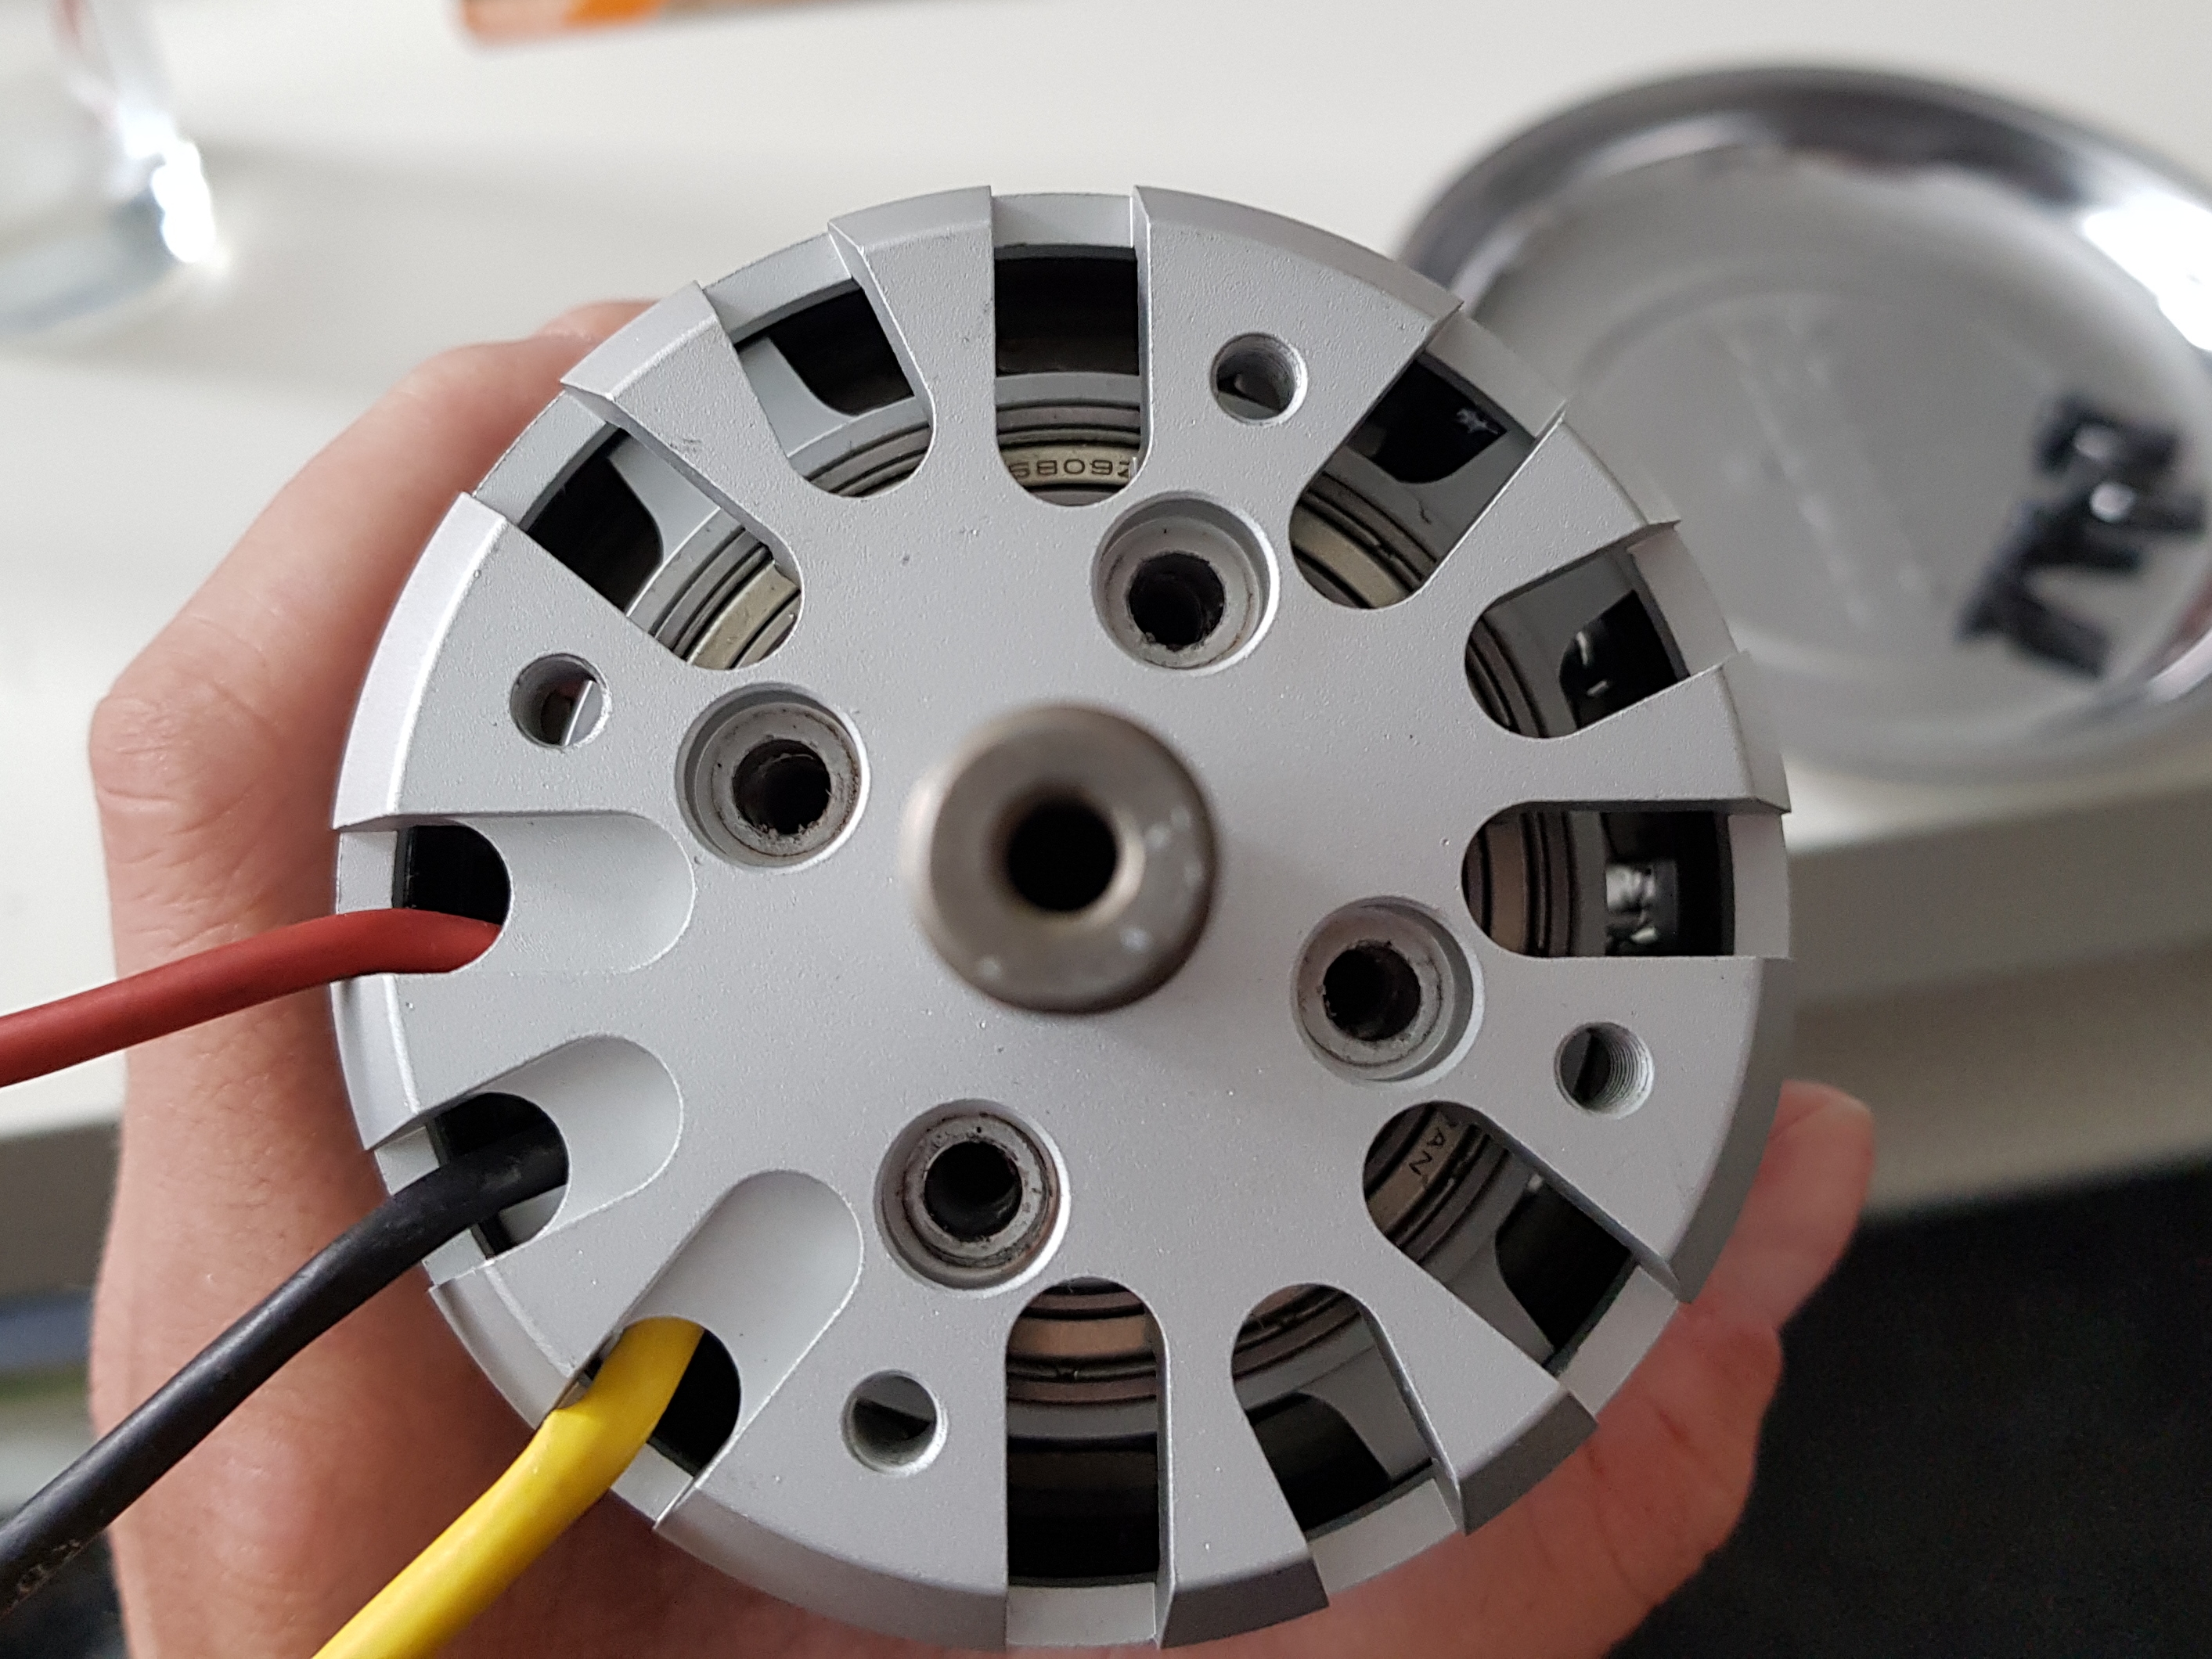
Step 2: Remove circlip and washer
Use a special circlip plier (other tools didn’t work for me, so I spent the 18€ for a good quality circlip plier) to remove the circlip and pull off the washer.
Step 3: Unscrew hex screws on the back of the can
Remove the 4 small hex screws on the back side of the rotor can.
Step 4: Remount base plate and motor accessory
Remount the base plate and screw on the motor mount accessory (I used only 2 screws each).
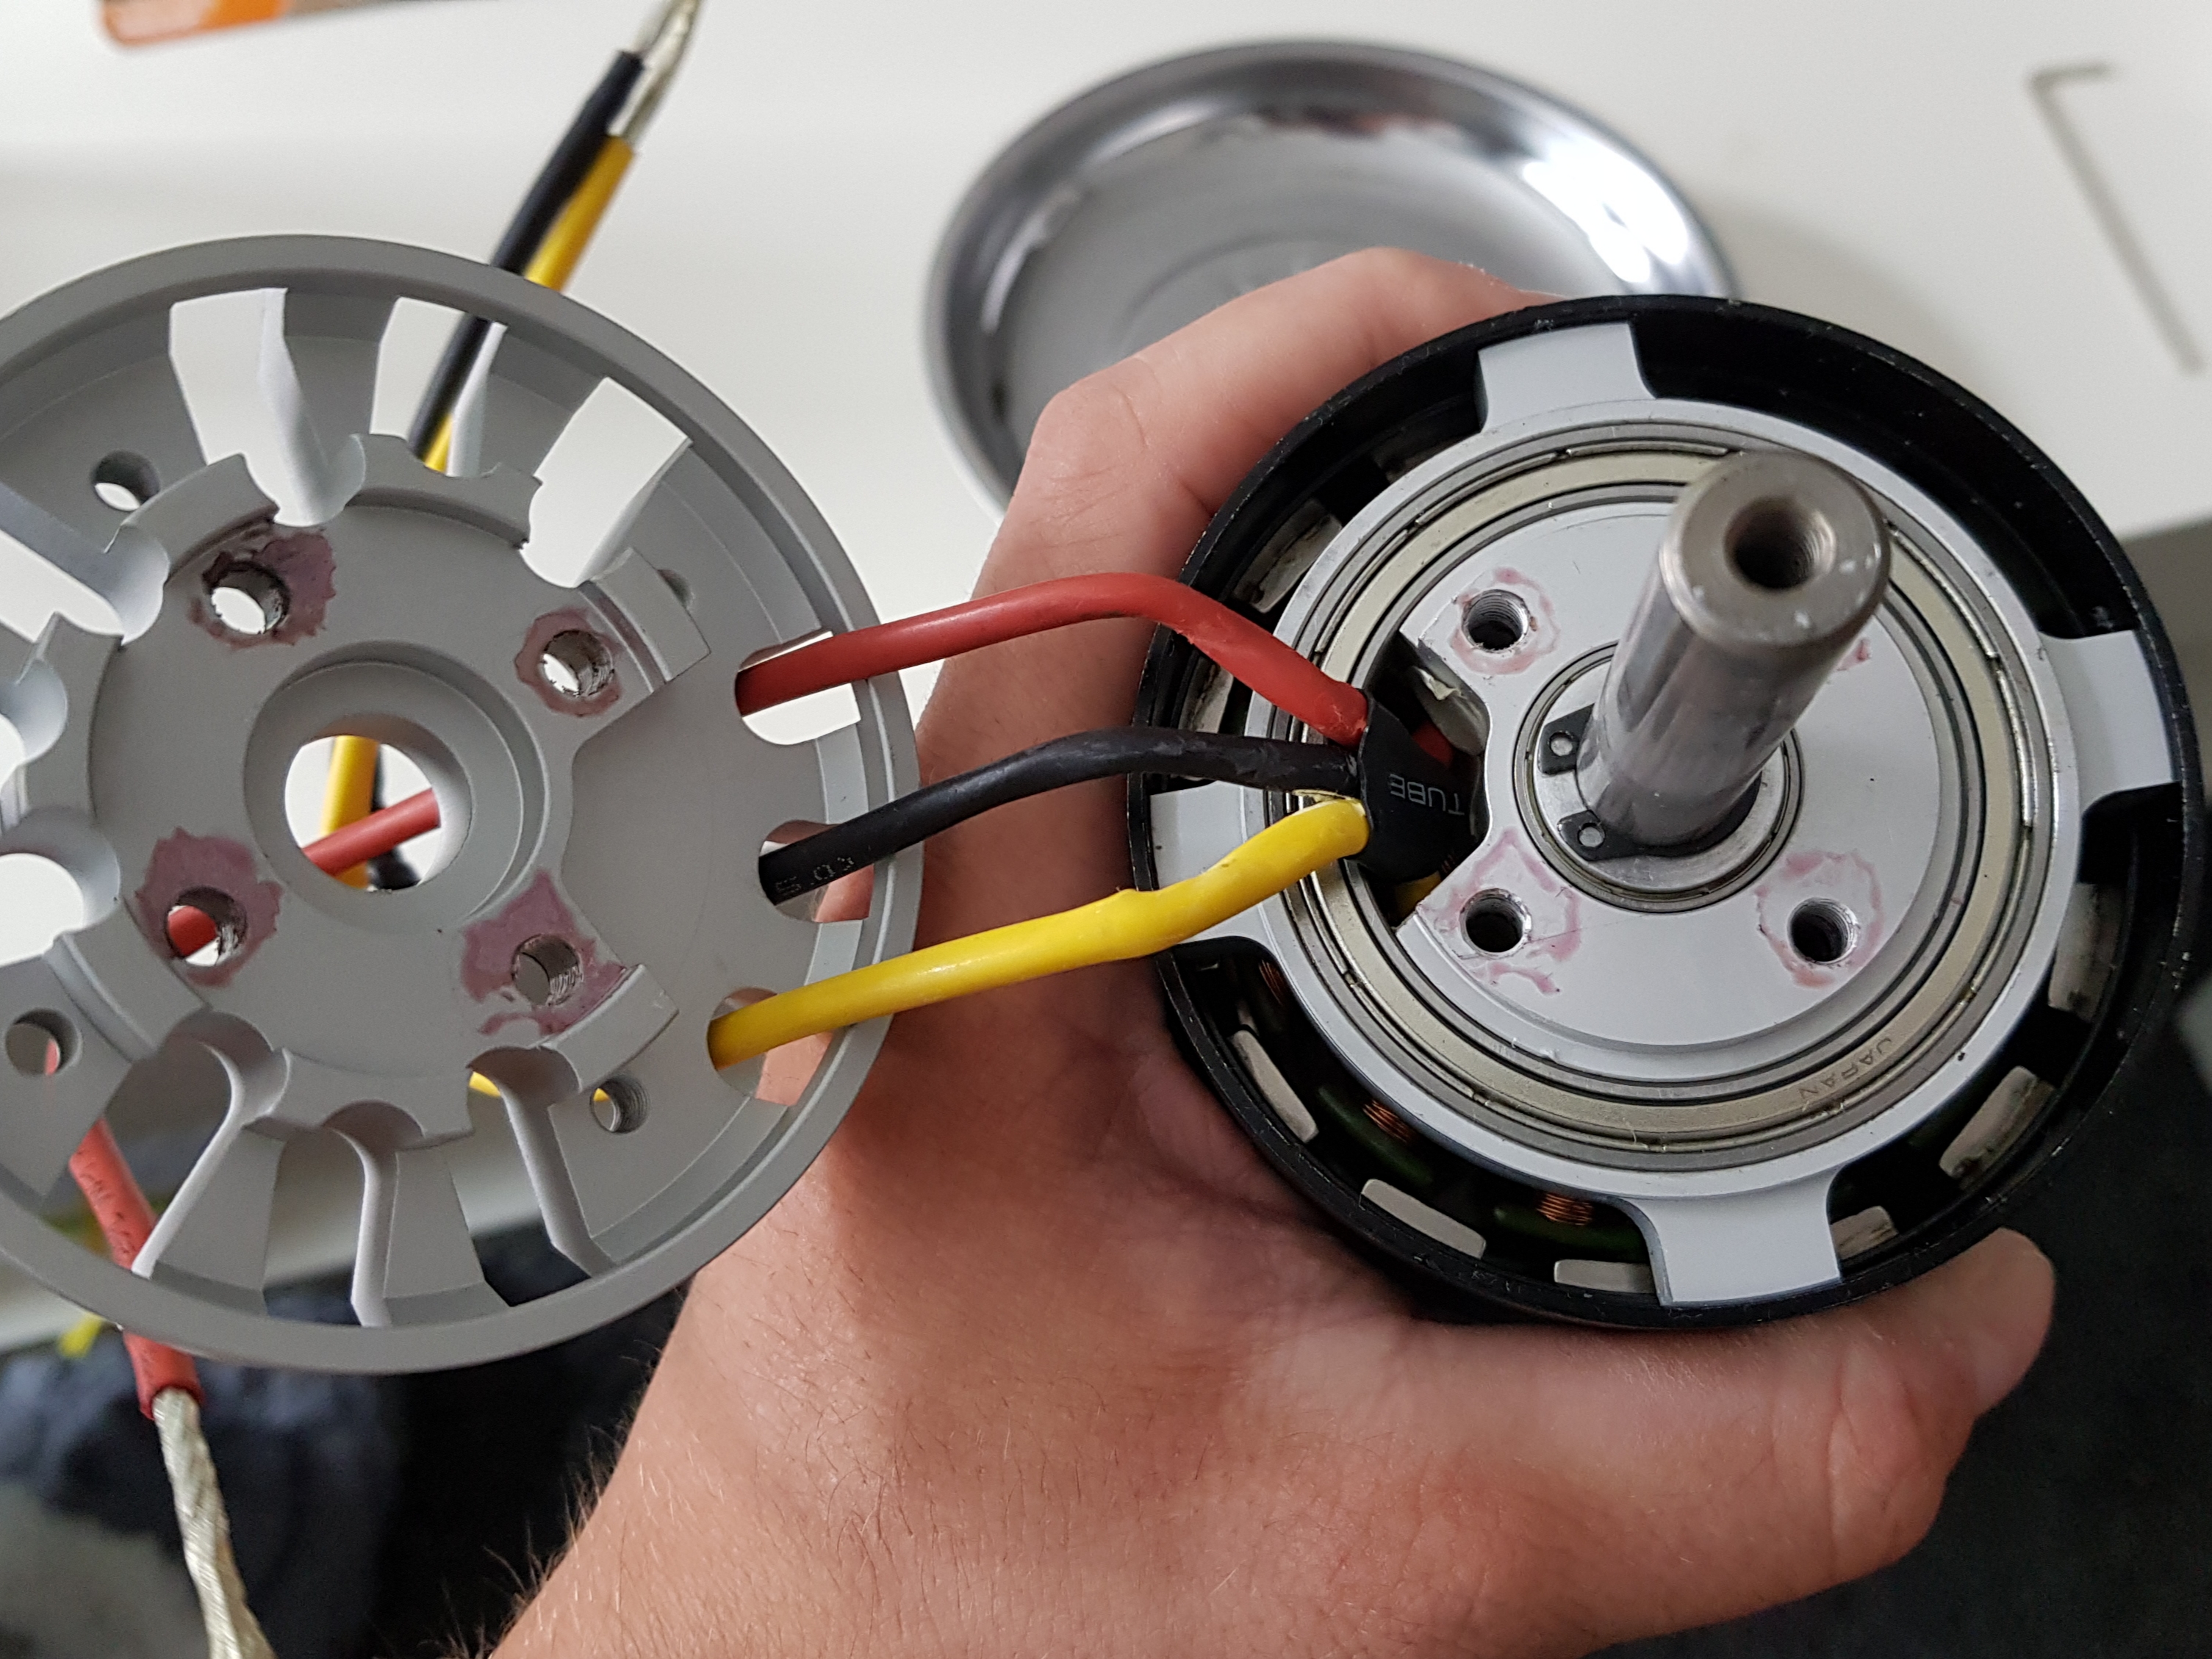
Step 5: Separate rotor and stator
Grip the mounted motor accessory and push the shaft against the ground with the backside of the motor facing down, the stator will easily separate from the rotor bell, but the shaft isn’t long enough to overcome the magnetic forces, so you need to (have someone) pull the rotor up while you hold the stator down to the ground.
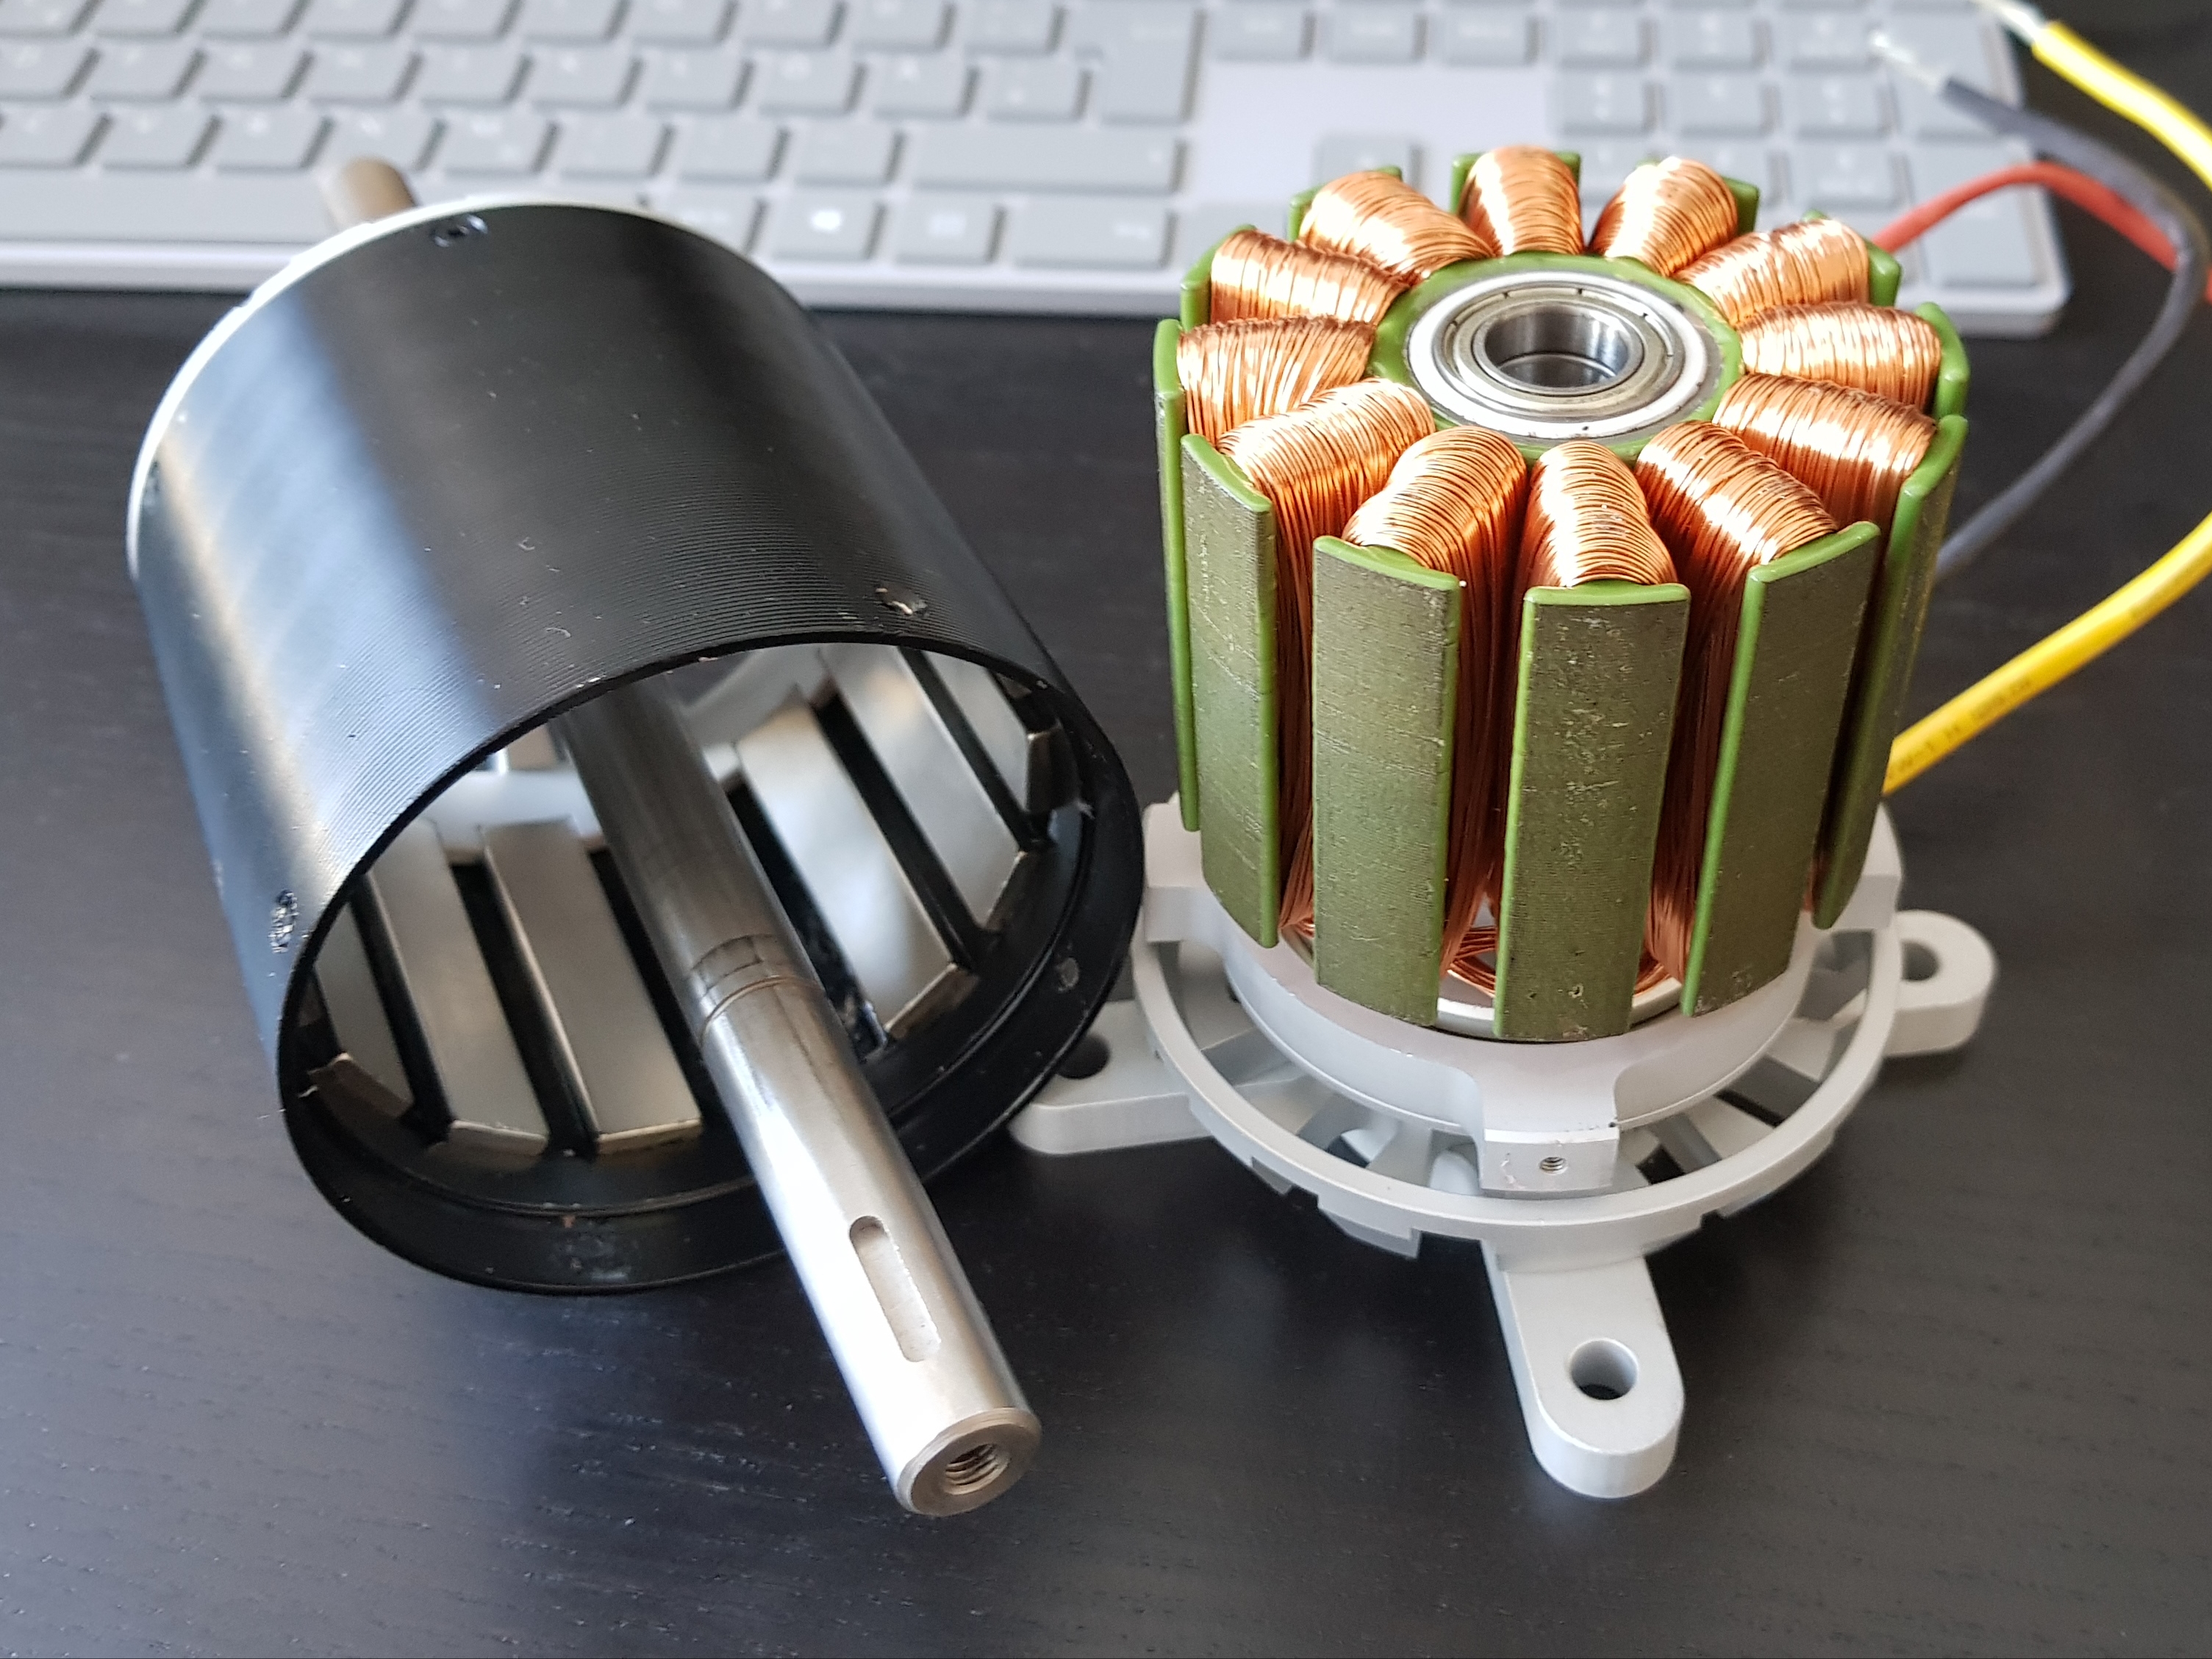
Step 6: Remove base plate and accessory
Remove the base plate and accessory again.

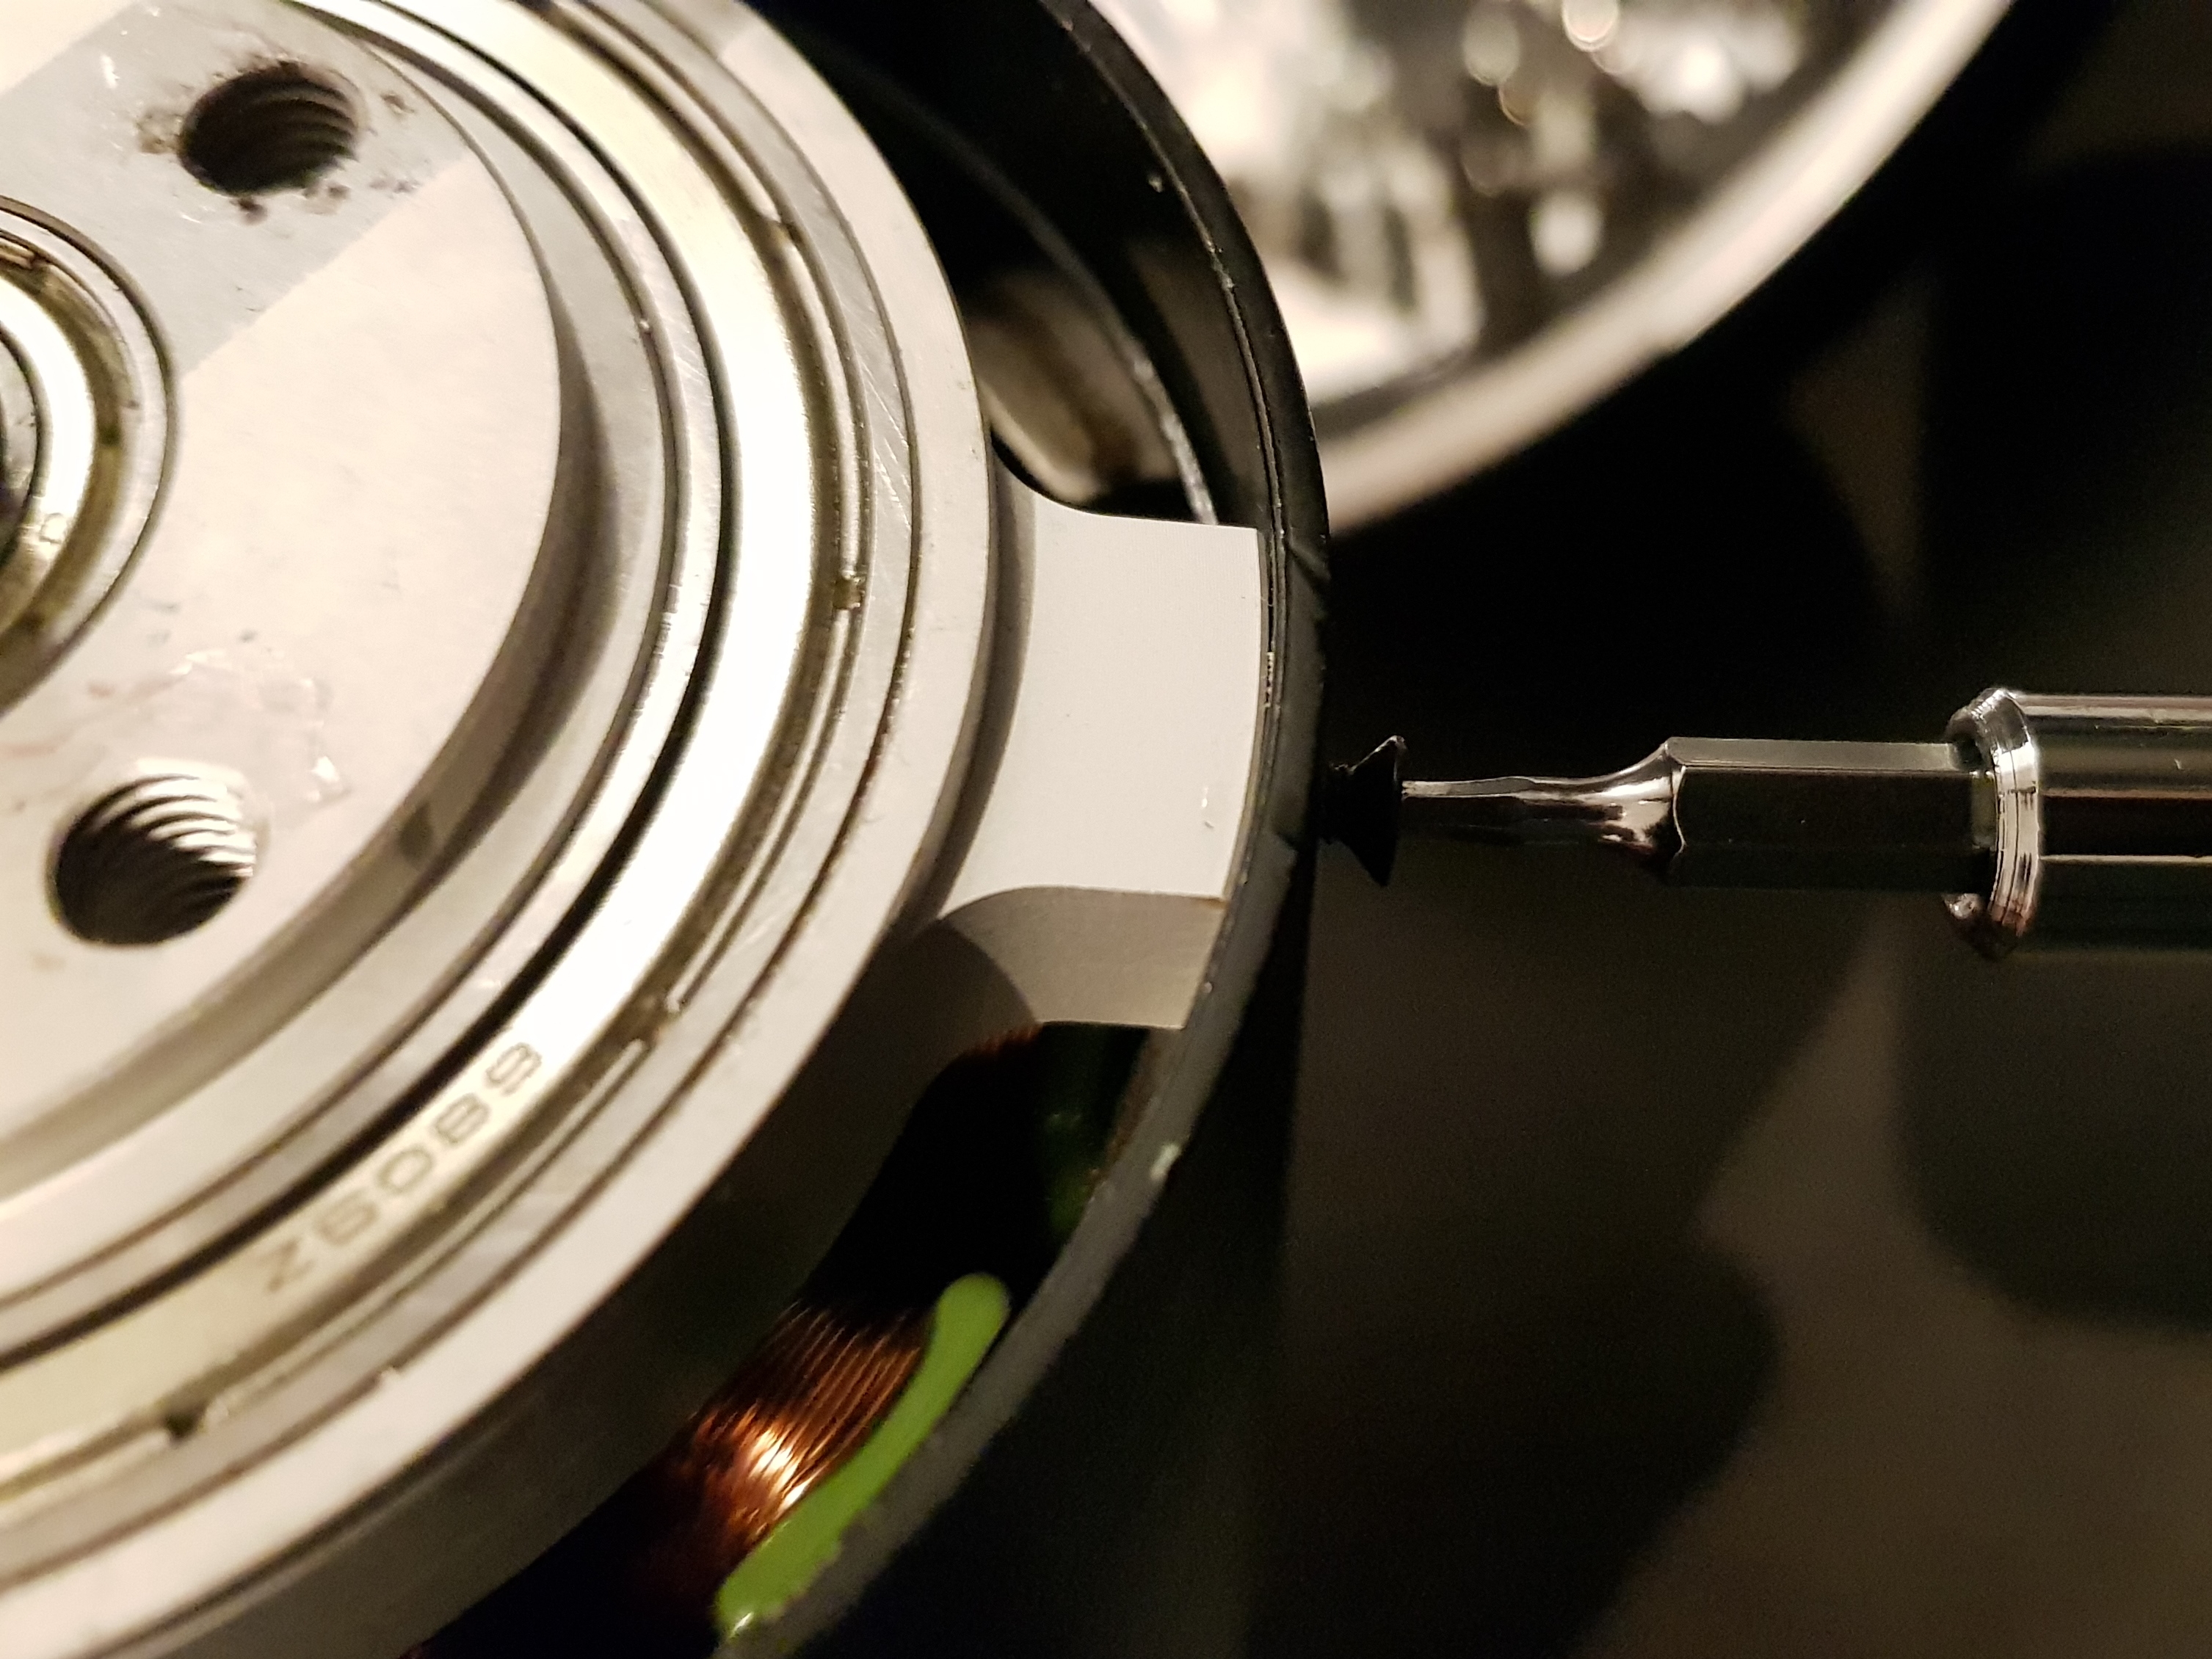
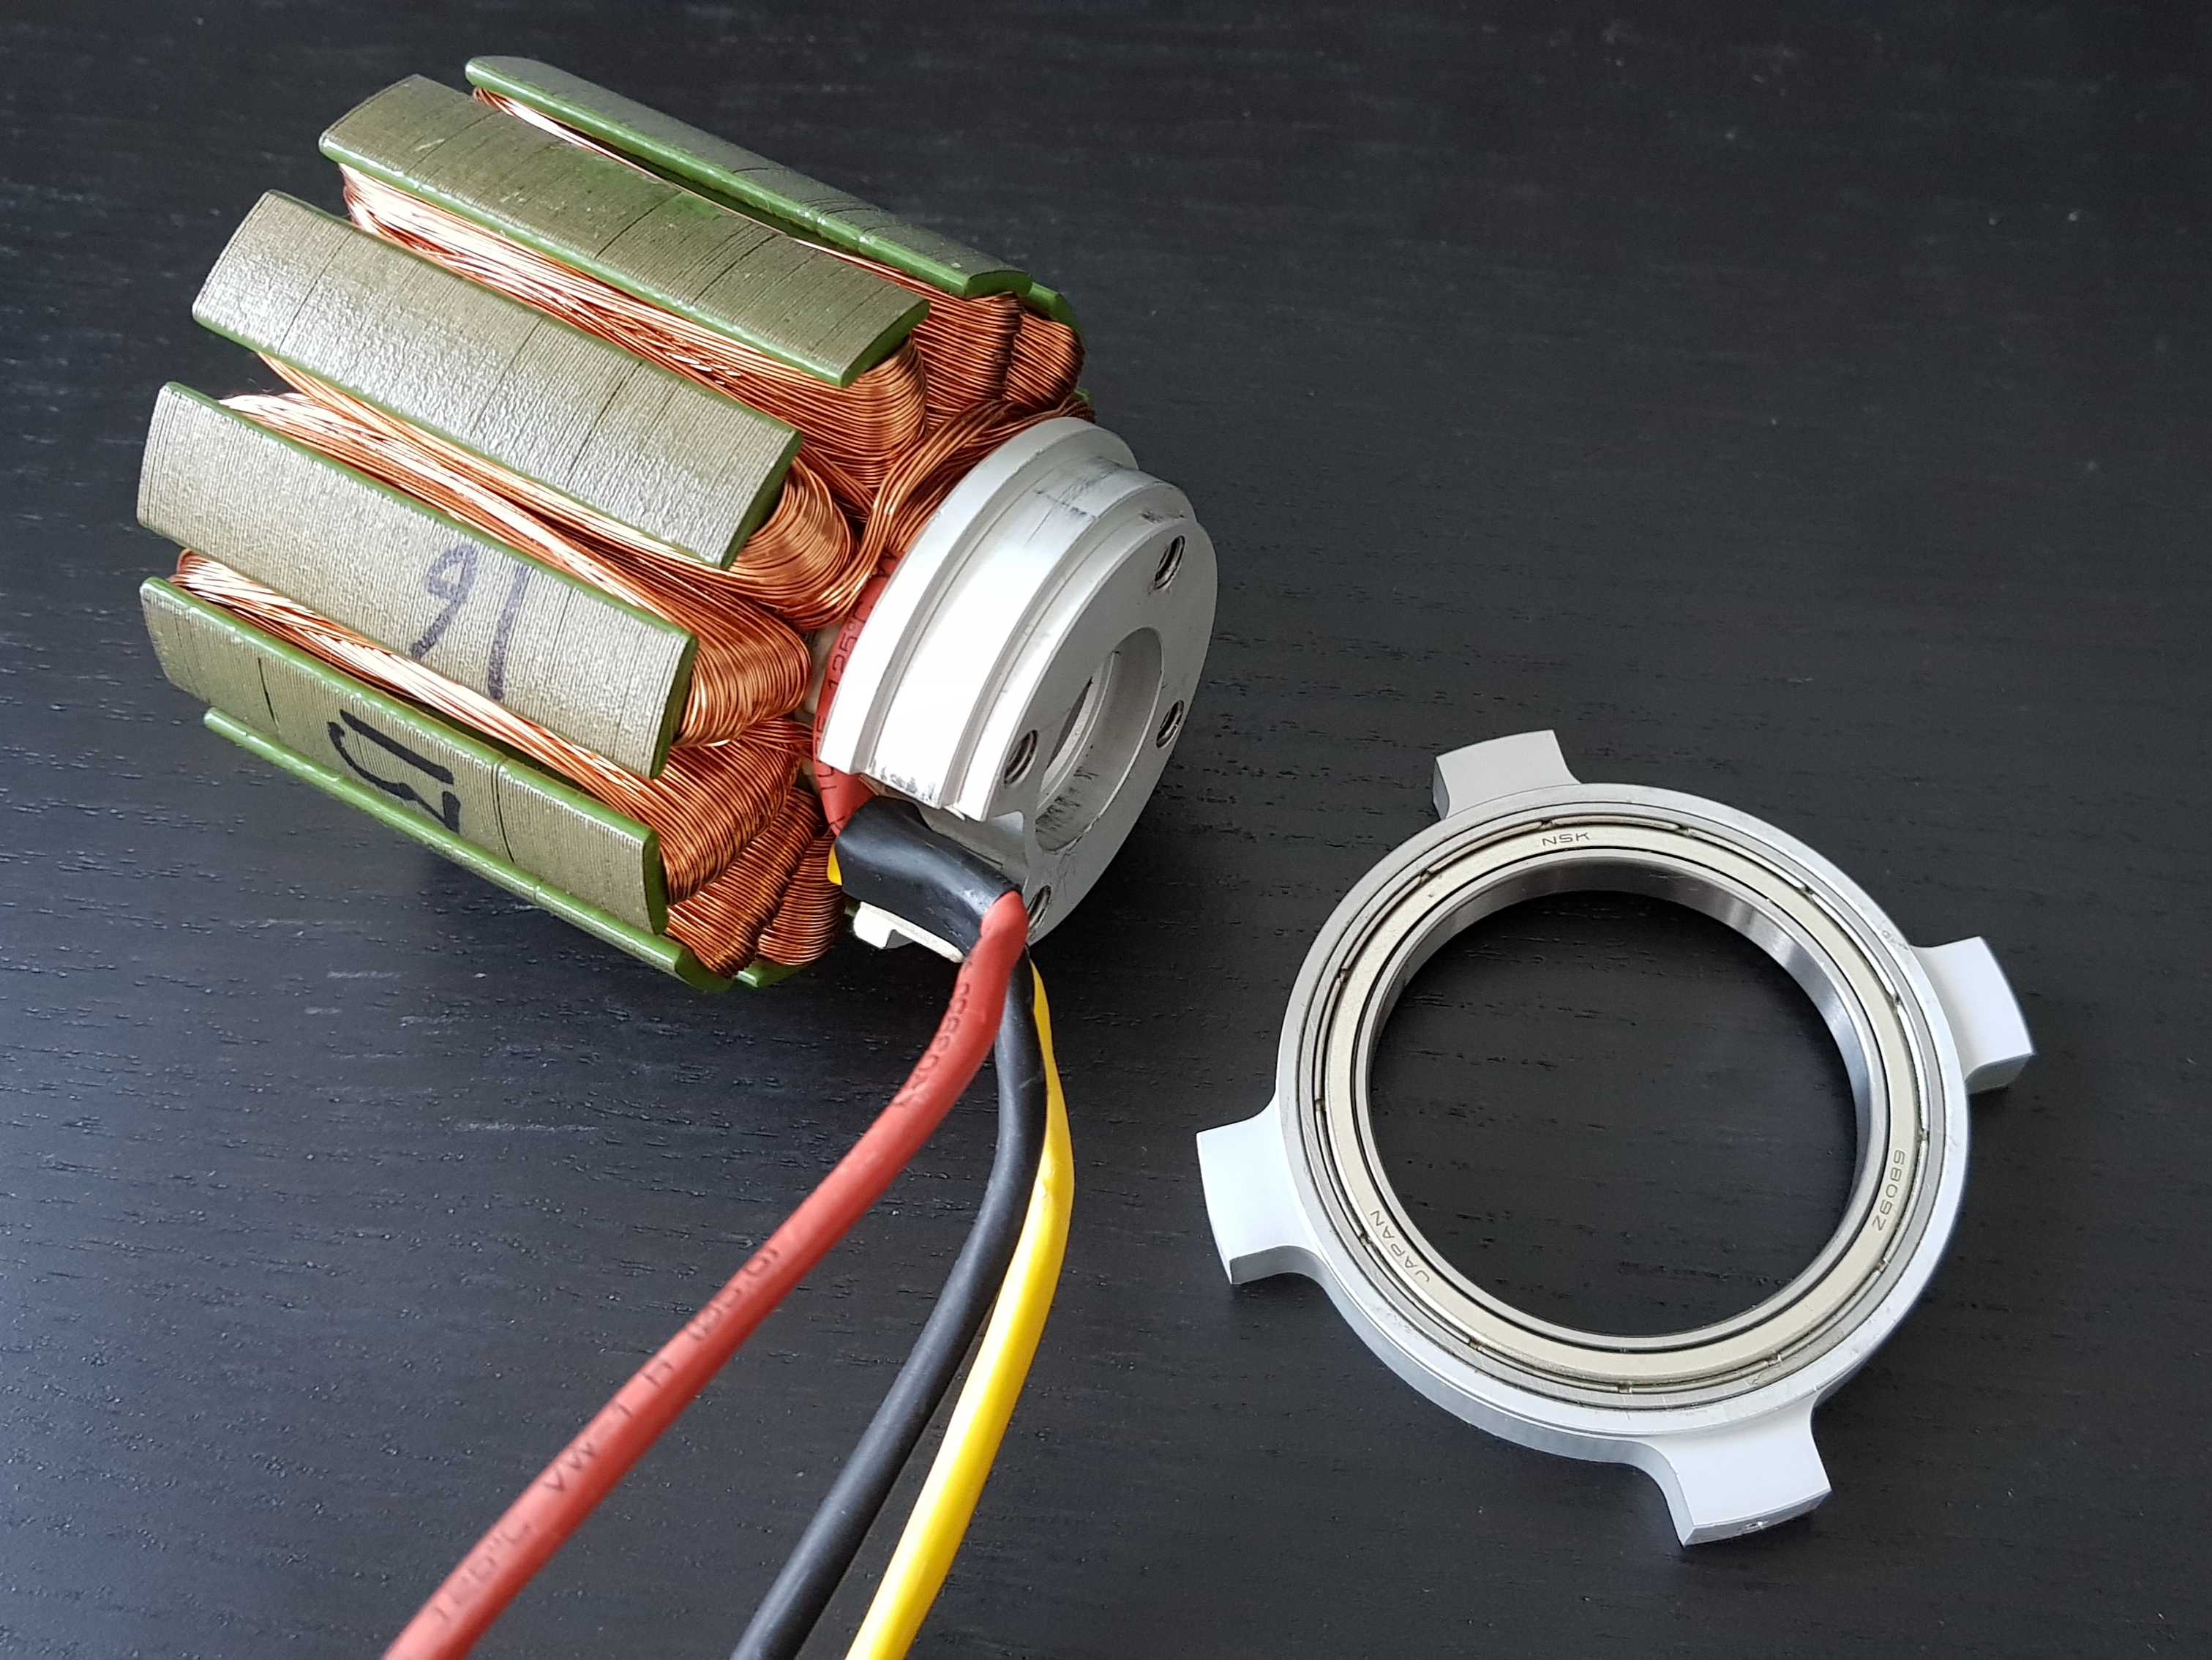
Step 7: Remove large bearing mount
By slight hammering, remove the mount of the large bearing from the stator.
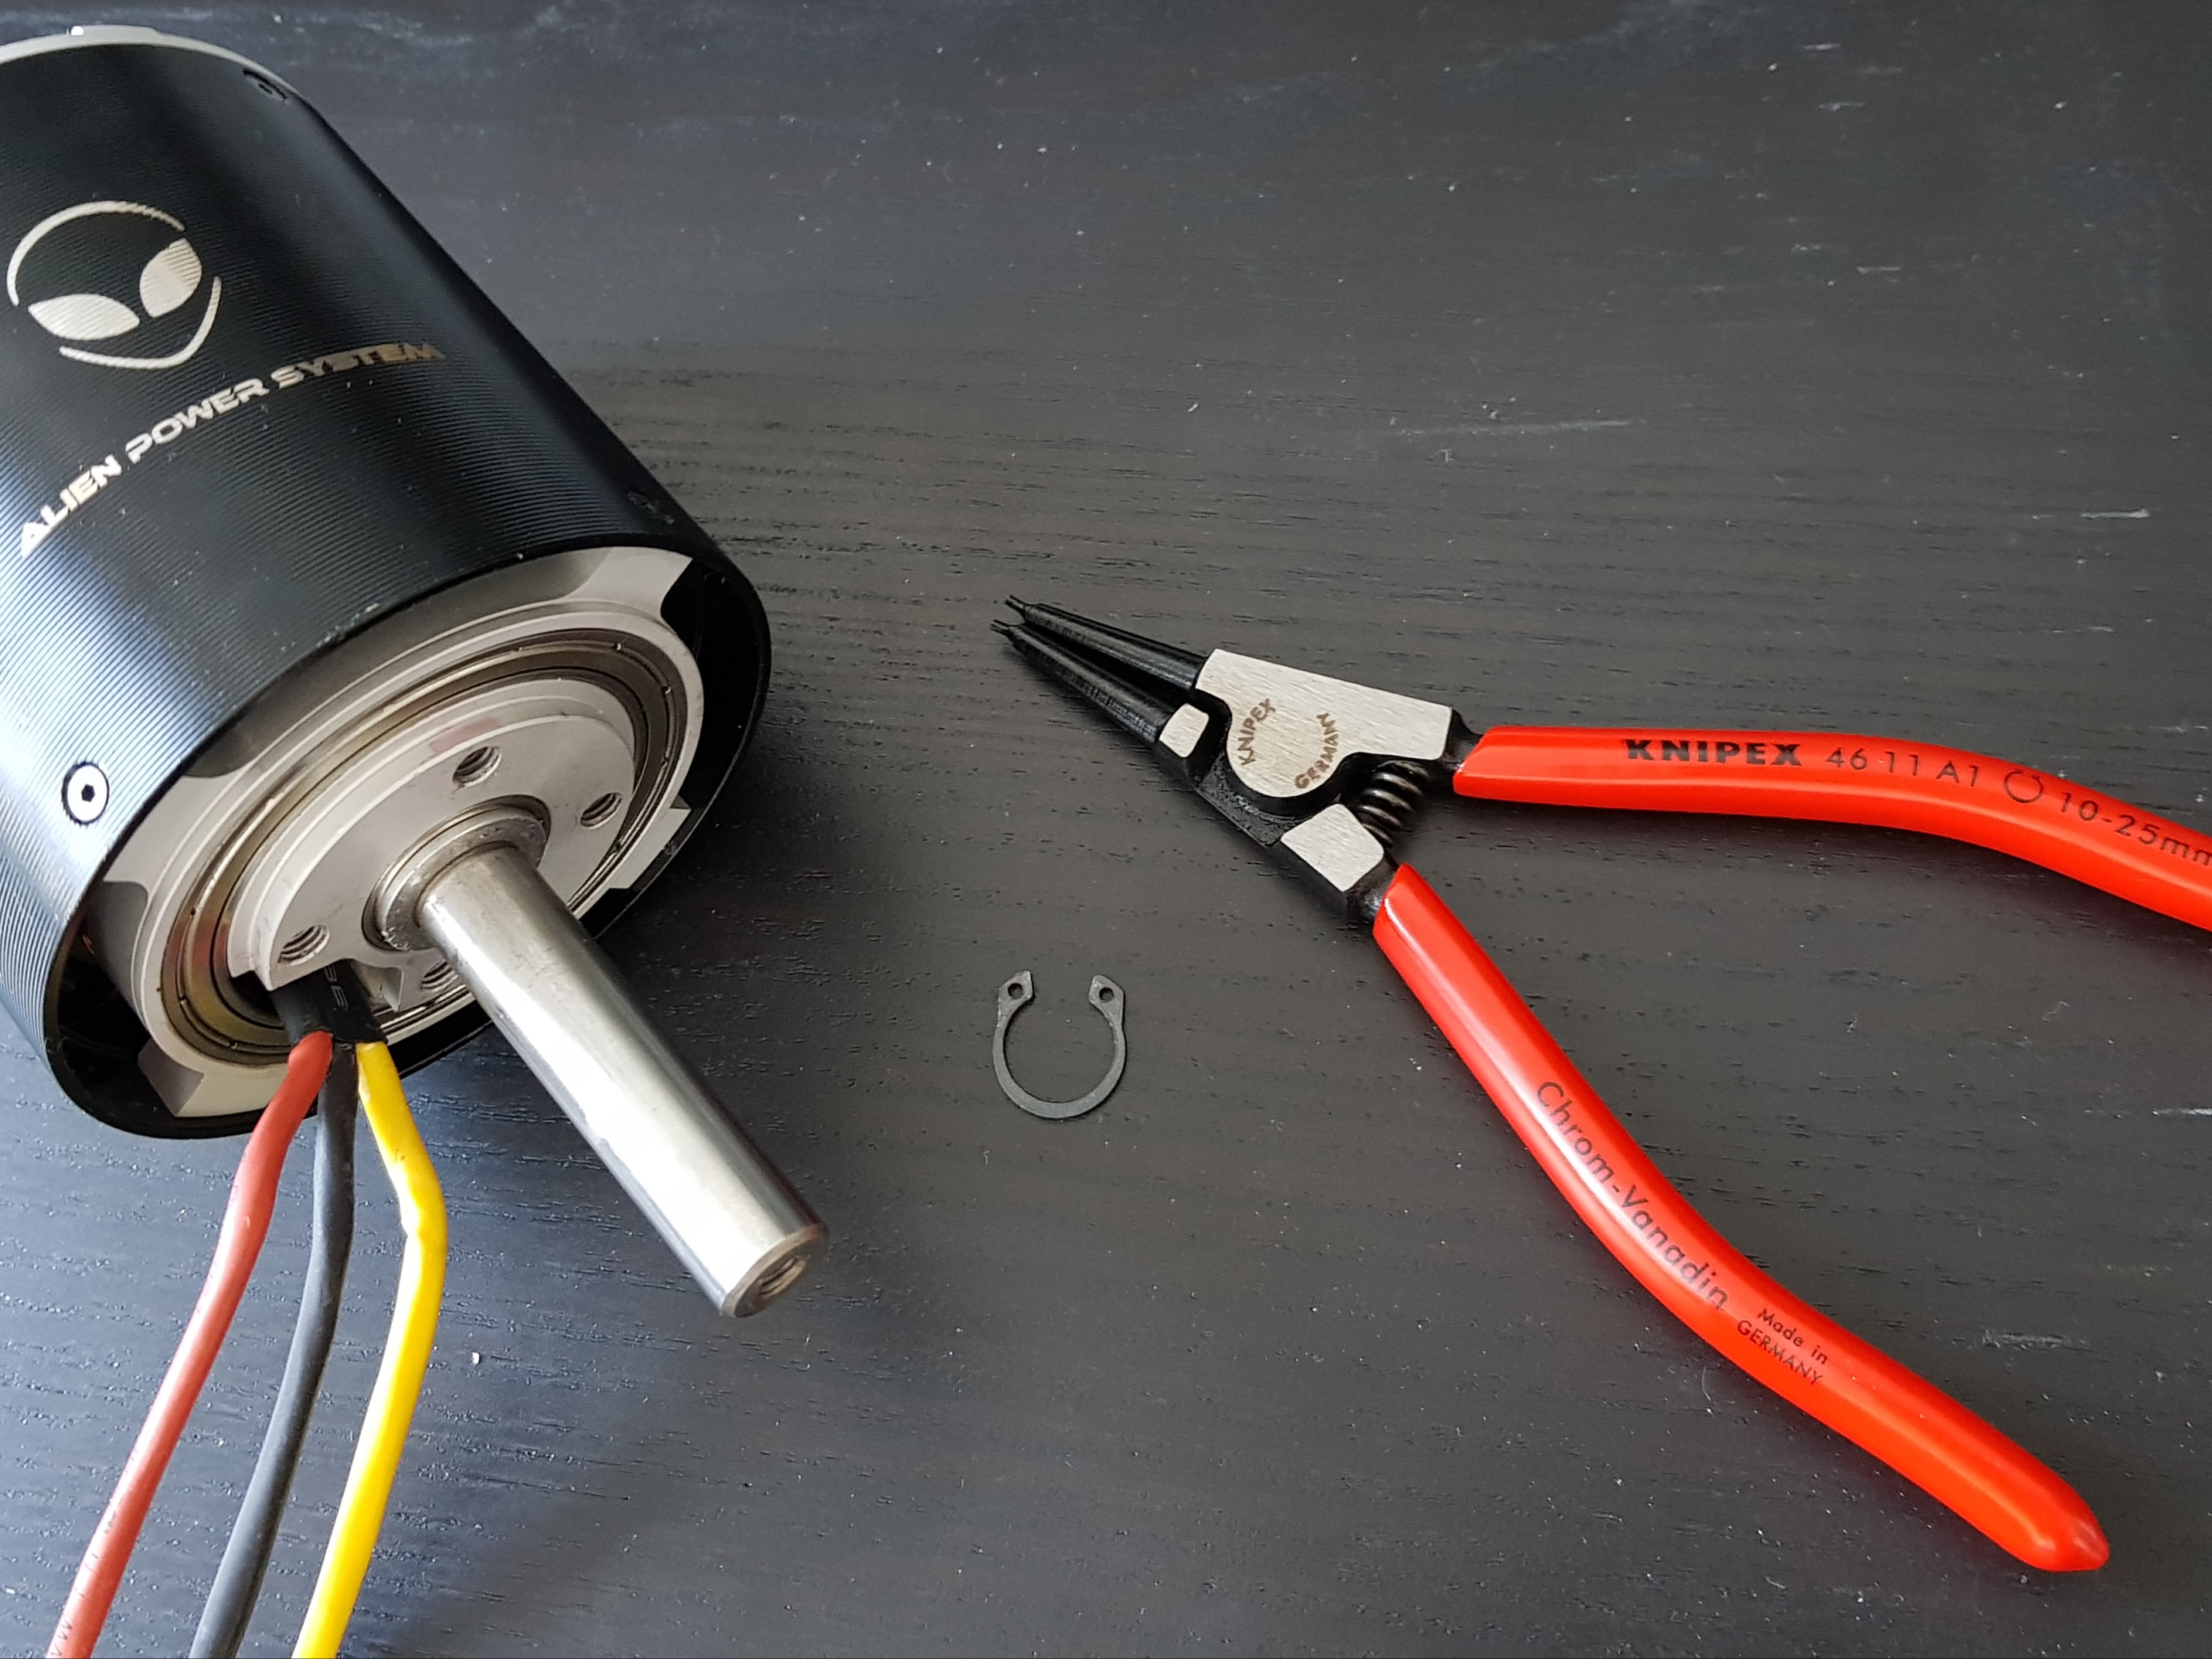
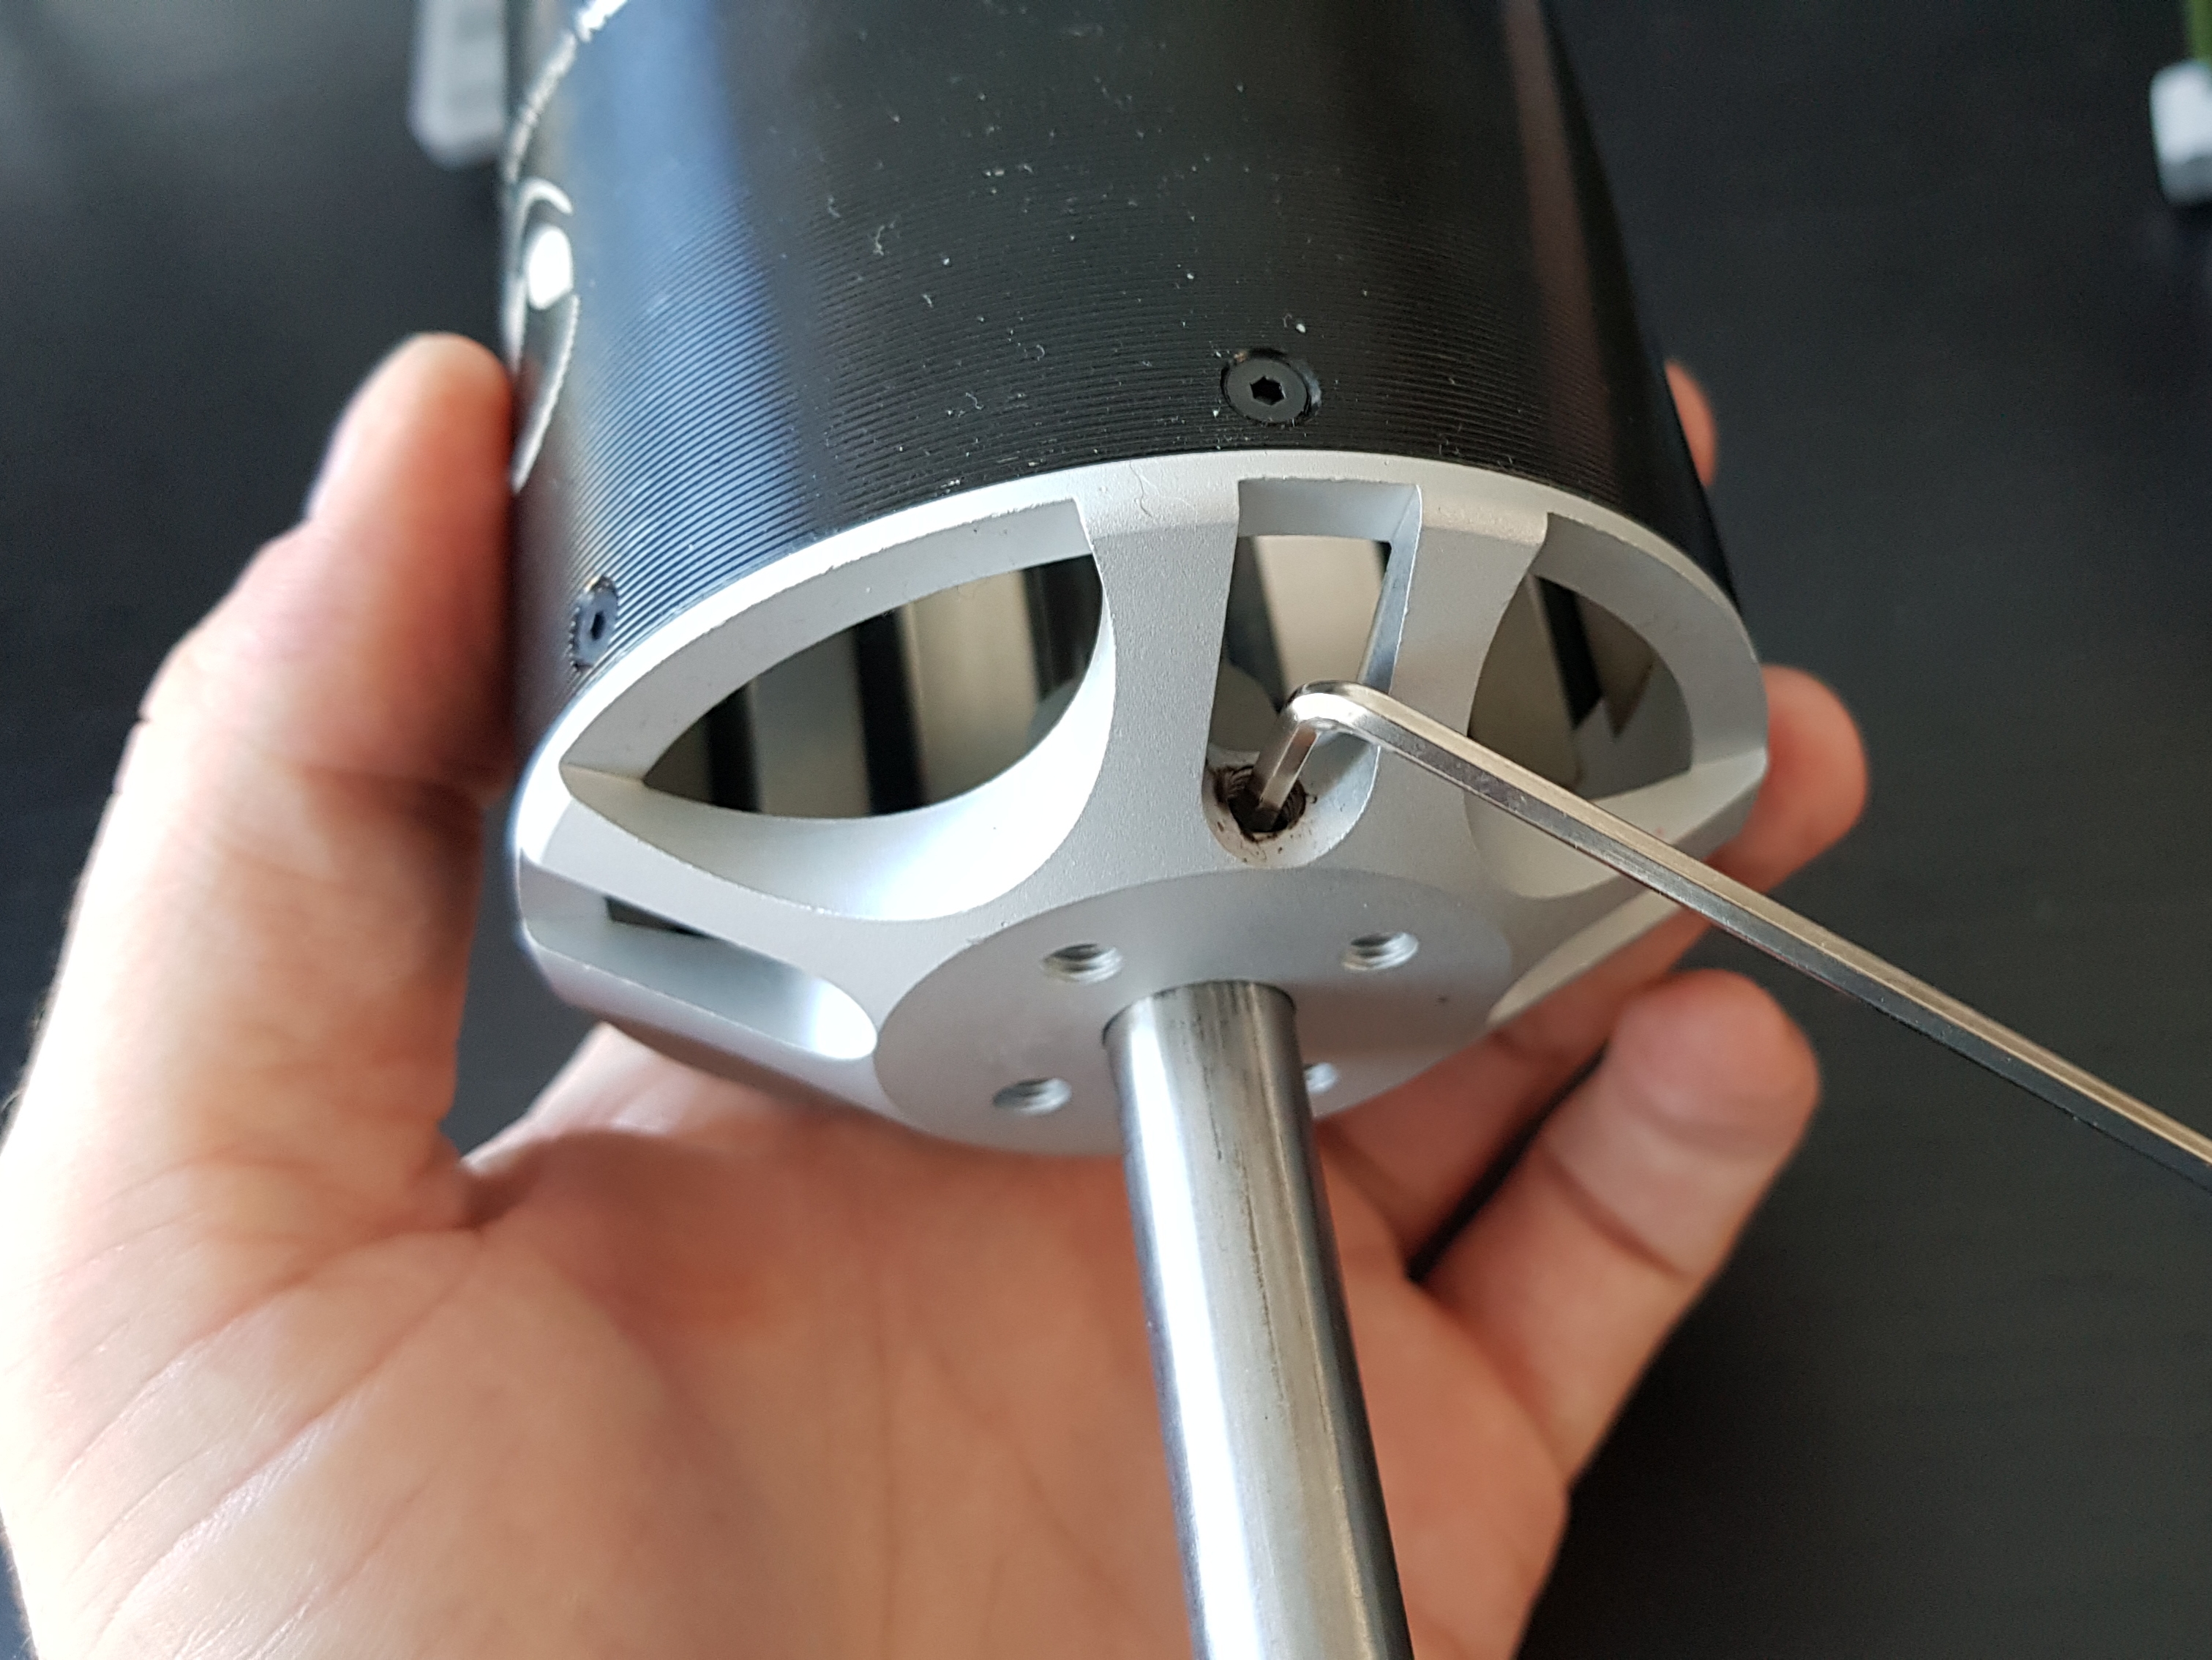
Step 8: Remove shaft
Unscrew the 2 small hex screws that fix the shaft to the rotor bell and remove the shaft by hammering on the front side (at least in my case this side had a smaller diameter, it won’t fit the other way around).
Step 9: Remove small bearings
Use fitting tool and/or the shaft to push out the three small bearings in the stator, be careful not the damage them if you want to reuse them (only slight hammering, no sharp tools).

Step 10: ?
I didn’t manage yet to remove the large bearing from its mount, it sits very tight.
Info
Just for the record: The C80100 has
- a 12mm shaft (actually between 11.95 and 11.91 measured)
- 3 small bearings of size 6801
- 1 large bearing of size 6809
7 Likes
It hurts when you use hammer and bearing in the same sentence 
Never use a hammer at a bearings. Either you will damage the surface of the press fit or the bearing balls 
there is a tool called puller, most are for outer bearings, but there are also multiuse with inner and outer bearing remover:
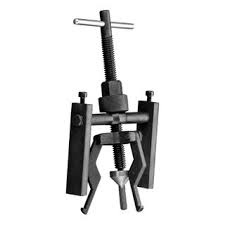
These are cheap or can also easily build by your own.
2 Likes
I only did it because I replace the stock bearing with stainless ones anyway. And I wrote ‘push’ intentionally, very slight hammering is just the last resort and only if you don’t care much about the bearings.
My large bearing came out easy… i think it was kind of glued…
You can try heating it up… the support should expand twice as much as the bearing.
I had to heat the rotor bell to get the shaft out for some reason…
1 Like
I also thought it might be glued, I will try heating it up.
The shaft was really tight but it was slightly narrower in one direction and with a small hammer I got it to move about 1mm per stroke.
@Mat Thanks, I was able to press the bearing out (wearing gloves) after heating the whole thing up to around 100°C (again, not advisable if the bearing should be reused as the grease starts boiling). The bearing support was a bit sticky so the whole thing was glued.

1 Like
How are do you got out that tiny H1,5 screws? They are glued in. I tried to heat them up with a solder iron but I can not unscrew those little bastards. 2 of 4 heads are already destroyed…
I would be really thankful for a good advice 
Yes, those are a pain …i got them all out by soaking them with W40, using new hex bits to avoid rounding the head (or hammering in slightly bigger torx bits when that happen.)
finally, I had to cut a flat head slot in one of them to get it out.
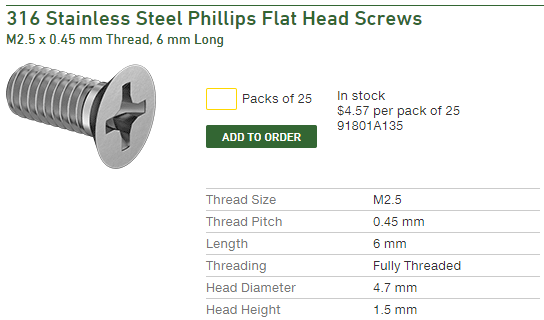
I replaced them all with some 316 stainless ones, the head is stronger, but it’s always nerve raking to get them out…
Another option once you have them out is to enlarge the holes and re-tap them to install bigger screws… My backup 130kv motor came with bigger screws installed…
Use a butane torch. It melts the threadlock way better than a soldering iron.
I used a Dremel to cut in a slot to screw those bastards out with a slot screwdriver.
1 Like
I had to one like that yesterday too to open my motor …
I’m fed up now and i’m installing those instead:
1 Like
That are exactly the one I bought today from my favourite local tool store.
1 Like
I disassembled my 80100 and I have two washers from my motor, one is after the stator bearing and I dont know where the second one belongs  Does anybody know?