Lift efoil motor wanted to buy used or new

Yes, Alexandre, I expect that o-ring’s age and assembly errors caused this catastrophic failure.

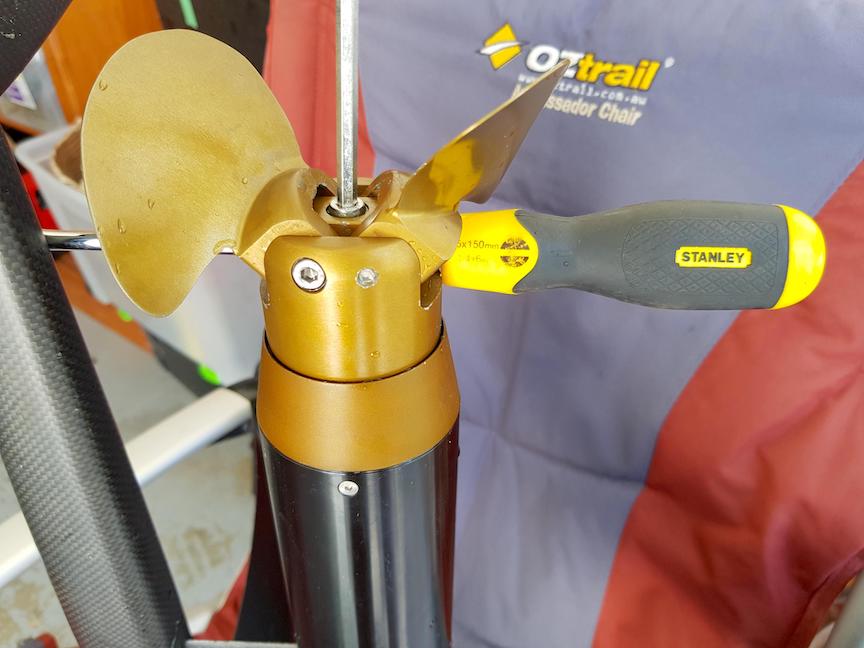
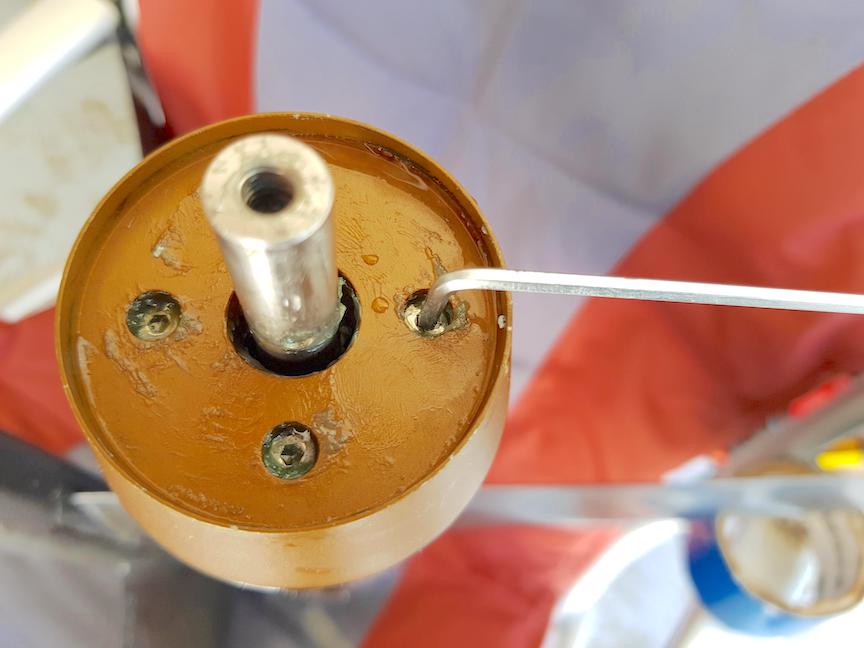
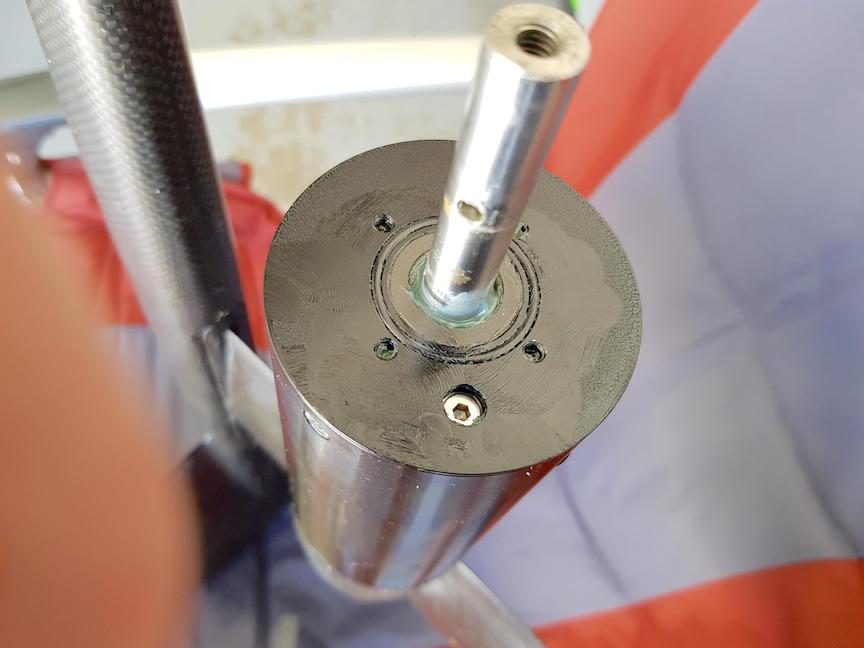
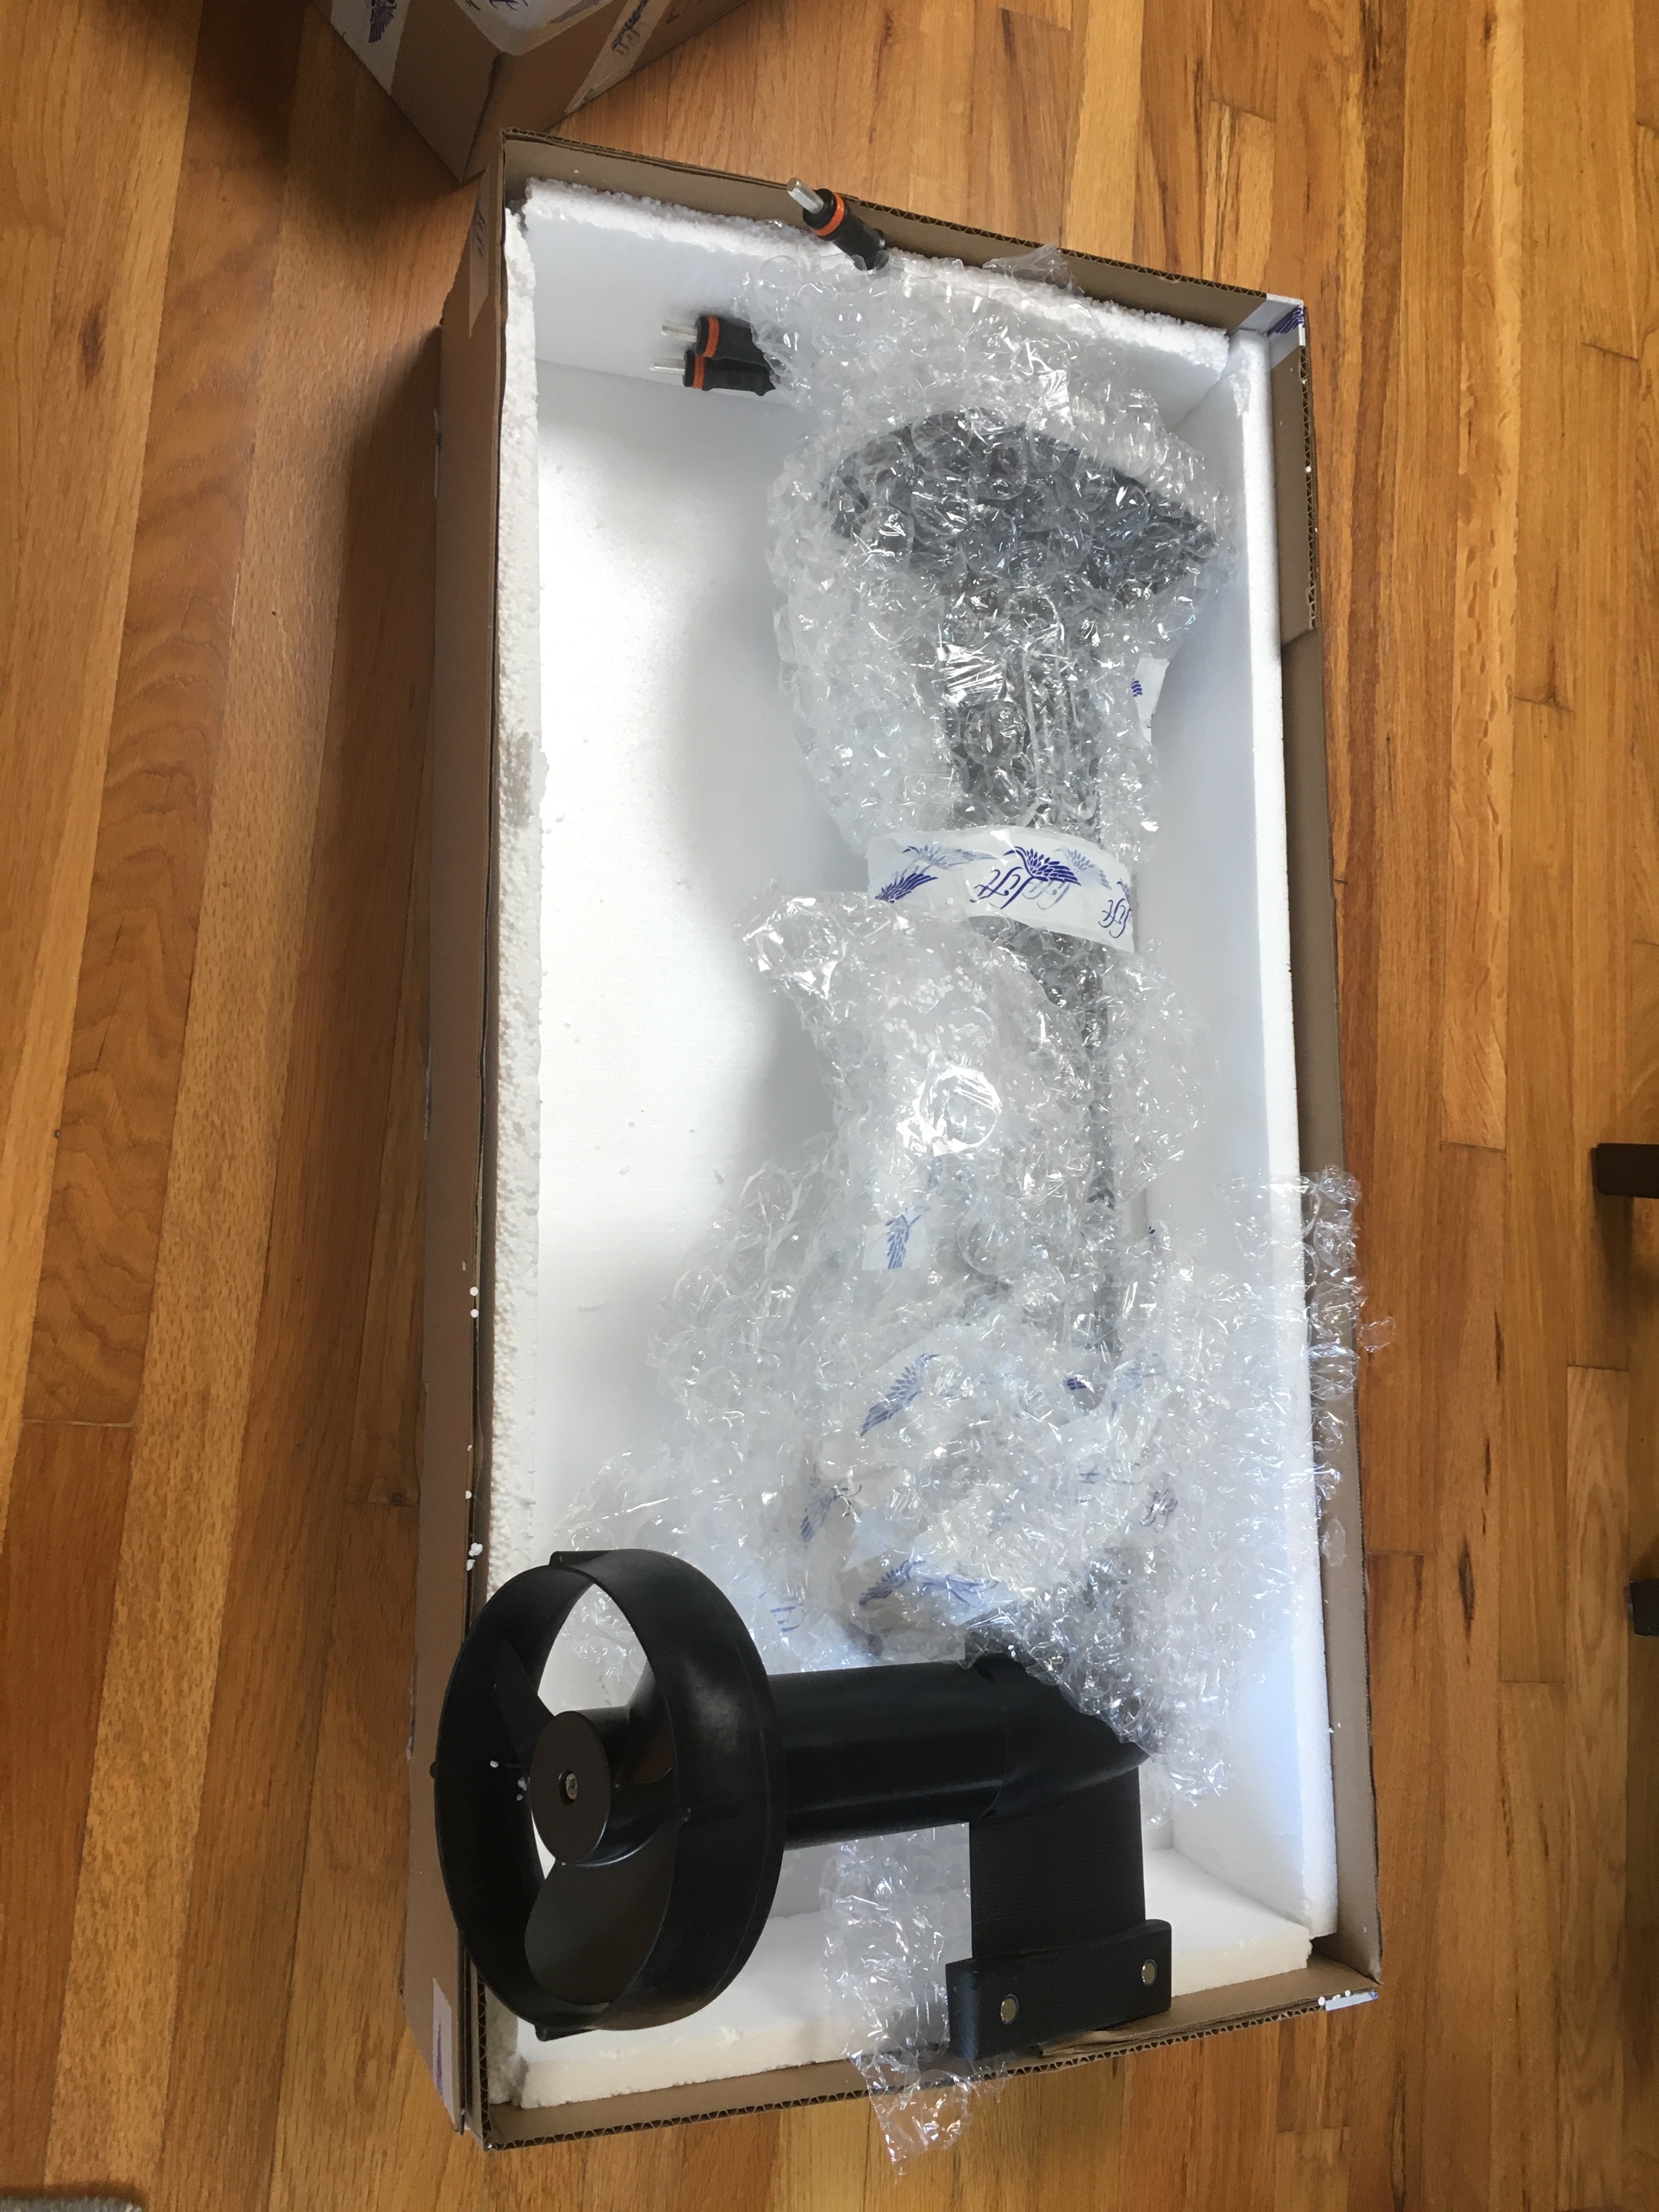
For the record, I never saw any oil leaking and there was some rusty residue concealed by the duct-mount at the junction between the back of the motor housing and the housing itself. I only saw this rusty residue after removing the duct-mount.

Motor made the usual operational sounds and worked fine when I most recently had it in the water a couple of months ago.

I just updated the firmware and was ready to get in the water again and then this rusty can of worms

I hope to get this motor in shape again and I expect that the motor’s enamel-coated magnet-wire may have corroded to the point of shorting out time will tell what Lift and I can work out this week.

Small update,
26 october 2020. The machine shop that has disassembled and cleaned my rusted efoil motor has now ordered the bearings needed to put it back together.
They told me the bearing is 6001Z. Ebay sells them for about $15.00.

I believe ZZ are « waterproof » or armed on both side , check Z and ZZ

ZZ means metal disc on both sides. Only protectin against dust.
RS means rubber seal on 1 side, 2RS on both sides. The rubber seal gives better protection but is not waterproof.

Hi,

Sorry to see this. This is third (known) motor with very limited hours that fails this way (yours, Alexandre’s one, and Greg - the original poster-). Seems indeed like the Oring failure due to sharp countersink screw hole is the main cause, however tolerances between the two housing parts are standardized so a bit tricky to fix easily.

Seems also that Lift is sourcing this motor for only 1-2 years then, otherwise we would have seen much more complaints on this problem I guess :thinking:

Not only LIFT has leaking motors. Fliteboard too last March 2020 in the gear - solved within 10 days. Let’s hope it is the case here.

Greg (who started this thread) and I have been in communication.

Jerry Tirado at Lift quoted me $900 for a replacement since out of the warranty period… I countered that the motor is touted as a waterproof sealed unit with no suggested periodic maintenance or inspections of shaft seal or o-ring or sewing machine oil level checks.

Jerry reported that this is a newer product to the market and refinements and improvements are being made to the product line all the time. He went on to say that as issues appear Lift may then develop new maintenance or inspection guidelines to address issues such as the one with the 3 motors (and counting) with oil leaks and then water intrusion issues mentioned on this page.

Jerry said that if I ship the mast and motor to Lift HQ in Puerto Rico they would inspect and see what they could do for me. :pray:t4: :crossed_fingers:t4: :pray:t4:

I would be pretty dang annoyed if I was a Lift customer dealing with this type of treatment with a unit less than 2 or 3 seasons old. It feels like a truth in advertising issue to me, but to screw your early adopters who are beta testing your product just sucks.

1 Like

Yesterday, I got a litre of the sewing machine oil used to fill the Liftfoil electric motor. While I wait for the machine shop to reassemble my salt water corroded motor and see if it will work, I decided to check out the oil level in my other Lift motor. I removed the 3 bladed folding prop and the hub and then opened up the small screw and ‘o’ ring in the top of the motor. I used a 10cc syringe and started filling up the motor with oil. It took about 60cc’s of oil, 6 full syringe fulls to top it up. It would be a good idea for all Lift efoil owners to buy the oil and check their motors frequently.

Im not so sure its a good idea to fully top it up. When the oil heats through use or lying in the sun, it will have nowhere to expand.

I suspect the air gap is there for a reason. I would check with the Lift rep before you use it.

Here’s photos of the way I put more oil into my Liftfoil motor.
Photo 1. White Machine Oil-‘Light Duty’ sewing machine oil I ordered from ebay here in Australia.
Photo 2. Allen wrench in machine screw holding folding prop with Philips head screw driver immobilising prop so I can unscrew it.
Photo 3. The four Allen head screws holding the prop hub on. Notice all the marine bearing grease smeared on just about everything.
Photo 4. The Allen head machine screw where you fill the oil. Note, don’t totally fill it up, it needs expansion room. See the ‘o’ ring around the sealed bearing? Make sure to center and grease it. This ‘o’ ring is what is supposed to seal the motor from seawater incursion.

I would suggest , after open it , first to empty in the oil , and check for contamination , filled it up full , empty it again ( « cleaning ») , measure volume , check oil specification for expansion and refill to need with new oil

1 Like

Hi.

Did you drain the old oil out first and look at it’s condition? Once empty, fill all the way up to see how much it will hold, then drain half out. Or if it’s easier drain it all out over night, then fill half way full.

Half full is my recommendation. At half full the oil will be desplaced into the windings by the spinning rotor and the rotor will spin freely. If you fill it all the way up the rotor will be forced to spin in the oil and the viscosity could reduce efficiency.

:call_me_hand:

2 Likes

Liftffoil motor restoration project update.

One of our two electric motors filled up with seawater due to an ‘o’ ring failure.

A totally rusty immovable mess was how it looked.

I contacted Lift about it and they offered to sell me a new motor for USD $1,400 delivered to me in Australia which end up being AUD $2,000.

So I soaked the motor in wd40 for over a week and then took it to a local machine shop.

They managed to remove the core and it was really corroded from the seawater.

Over the next few weeks they managed to clean all the rust off but the electric wires at the bottom of the inside of the motor were exposed from corrosion.

I spent another week carefully applying layers of LOCKTITE ‘Oil Resistant’ epoxy to cover the wires, one layer per day.

We put the motor together yesterday and half filled it with oil.

Today I put the motor back onto the mast, reconnected the wires, etc. and amazingly enough, IT WORKS!

Wifey rode one of our boards and I rode the newly repaired one for an hour, all seems good.

Tomorrow I will use it again, drain the oil, refill it and repeat until the oil does not look rusty.

Total cost from machine shop- AUD $700, my time at least 10 hours.

Stress factor: HIGH, Satisfaction level: VERY VERY HIGH.

Thanks for all the online advice and encouragement.

What did I learn in the two months of hassling with this and not being able to use my Liftfoil??

Check the oil level in the motor frequently.

8 Likes

For the next cases, to decrease or cancel this machine shop bill, may I suggest phosphoric acid ? Any rusted steel part submerged for 1-2 hours looks new and is (slightly) protected (phosphatisation)

Pros:

  • highly available It is sold in paint shops and paint department of DiY shops under the name “Rust remover” or “Rust destroyer”
  • sold in small quantities, cheap: cost 10usd / quarter litre
  • eats rust beautifully (FeN+ ?) and cleans steel/metal chemically (preserves copper)
  • shouldn’t eat epoxy varnish or o’rings

Cons:

  • salted surfaces must be cleaned first with fresh water
  • removes galvanisation from galvanised steel/metals that become unprotected so need to be protected afterwards (Corrosion X)
  • dissolves some paints and could not be friendly with aluminium

yojamey out of curiosity I did some investigation based of your picture and observation.

From looking at the picture of the O-ring grove and how the O-ring is seated in the grove. It is interesting to note the grove being about the same width as the O-ring. Typically it is recommended to have the slot wider than the o-ring to allow the oring to compress without permanently deforming and have somewhere to move when installing. Maybe this is causing the screw holes to bite excessively into the O-ring and the flattening?

just my thoughts it’s a shame to see o-rings being damaged this badly. :nerd_face: :nerd_face:

1 Like

I can confirm you that on my motor the o-ring was pretty hard to take out , no space to grab it , I when put it back after cleaning and polishing housing ( smooth around the holes) I through it was never going back on but it did , with oil and gently twisting , so far no oil leak so I guess no water intrusion possible

On my second set up , I respected the manufacturer spec on O-ring ( 4) , I never got a watertight can , probably because of the sls printing part and the aluminum can ( even 2mm) low tolerance

Even after trying different diameter and tickness , but also leaving a gap …

A happy ending to my tale of woe.

Jerry at Lift came through!!!

I sent Lift my seized motor with seawater intrusion and Lift shipped me an entire wired-mast, motor, prop guard, and prop.

Now I can get back out on the water.

Following Greg’s lead I ordered some sewing machine oil and blunt-tipped needles on 10ml syringes so I may do periodic oil checks in the future without disassembly. I will attempt to fill and then draw off enough oil to leave an air space to allow for the oil’s thermal expansion.

4 Likes

You are one lucky guy! Was your Lift under warranty? Mine was 2.5 years old and as I mentioned, Lift quoted me US $1,400 to deliver it to me in Australia.

Over a year old so officailly past the one year warranty period and I was initially quoted $900 if I shipped my mast to Lift…

I lobbied that since the motor is supposed to be a sealed unit with no suggested maintenance or inspections or seal and o-ring replacement intervals I would not know how I could possibly protect against such a catastrophic failure.