Nice work Al. Looking good.
the coupler has grub screw for the gearbox shaft?
in my set up , the propeller is loose around the pin shaft, it can move back et forward for 1mm, on the back there is the bolt that stop it, in front there is the thrust bearing which lays on the mount on the tube… but the thrust bearing is outside in water
in your step up you could put the coupler is between two thrust bearing, grud srew on the shaft side and on the gearbox side: cut in haft (in the middle lenght) both the shafts , making then overlay , it insures rotation and keep the shaft loose for the thrust bearing
2 Likes
Alexandre,
Great advice, I like the half cut concept I will be exploring that for sure its definitely is a great way to shorted setup .
Many Thanks,
Al
The compartment looks very nice, Roger! I think I want to take it the same way. Do you actually screw screws into the board (foam+fibre glass) or do you have some threaded inserts (https://uk.rs-online.com/web/c/fasteners-fixings/sheet-metal-panel-fasteners/inserts/?sort-by=Body%20Depth&sort-order=desc&applied-dimensions=4294880586) and plywood lid with bolts?
How is the water tightness so far? And do you have some kind of second compartment where you lead the wires to the mast? I see the cable glands go out of the big compartment and wander where it leads to. THanks for your help!
Hi @Marc87,
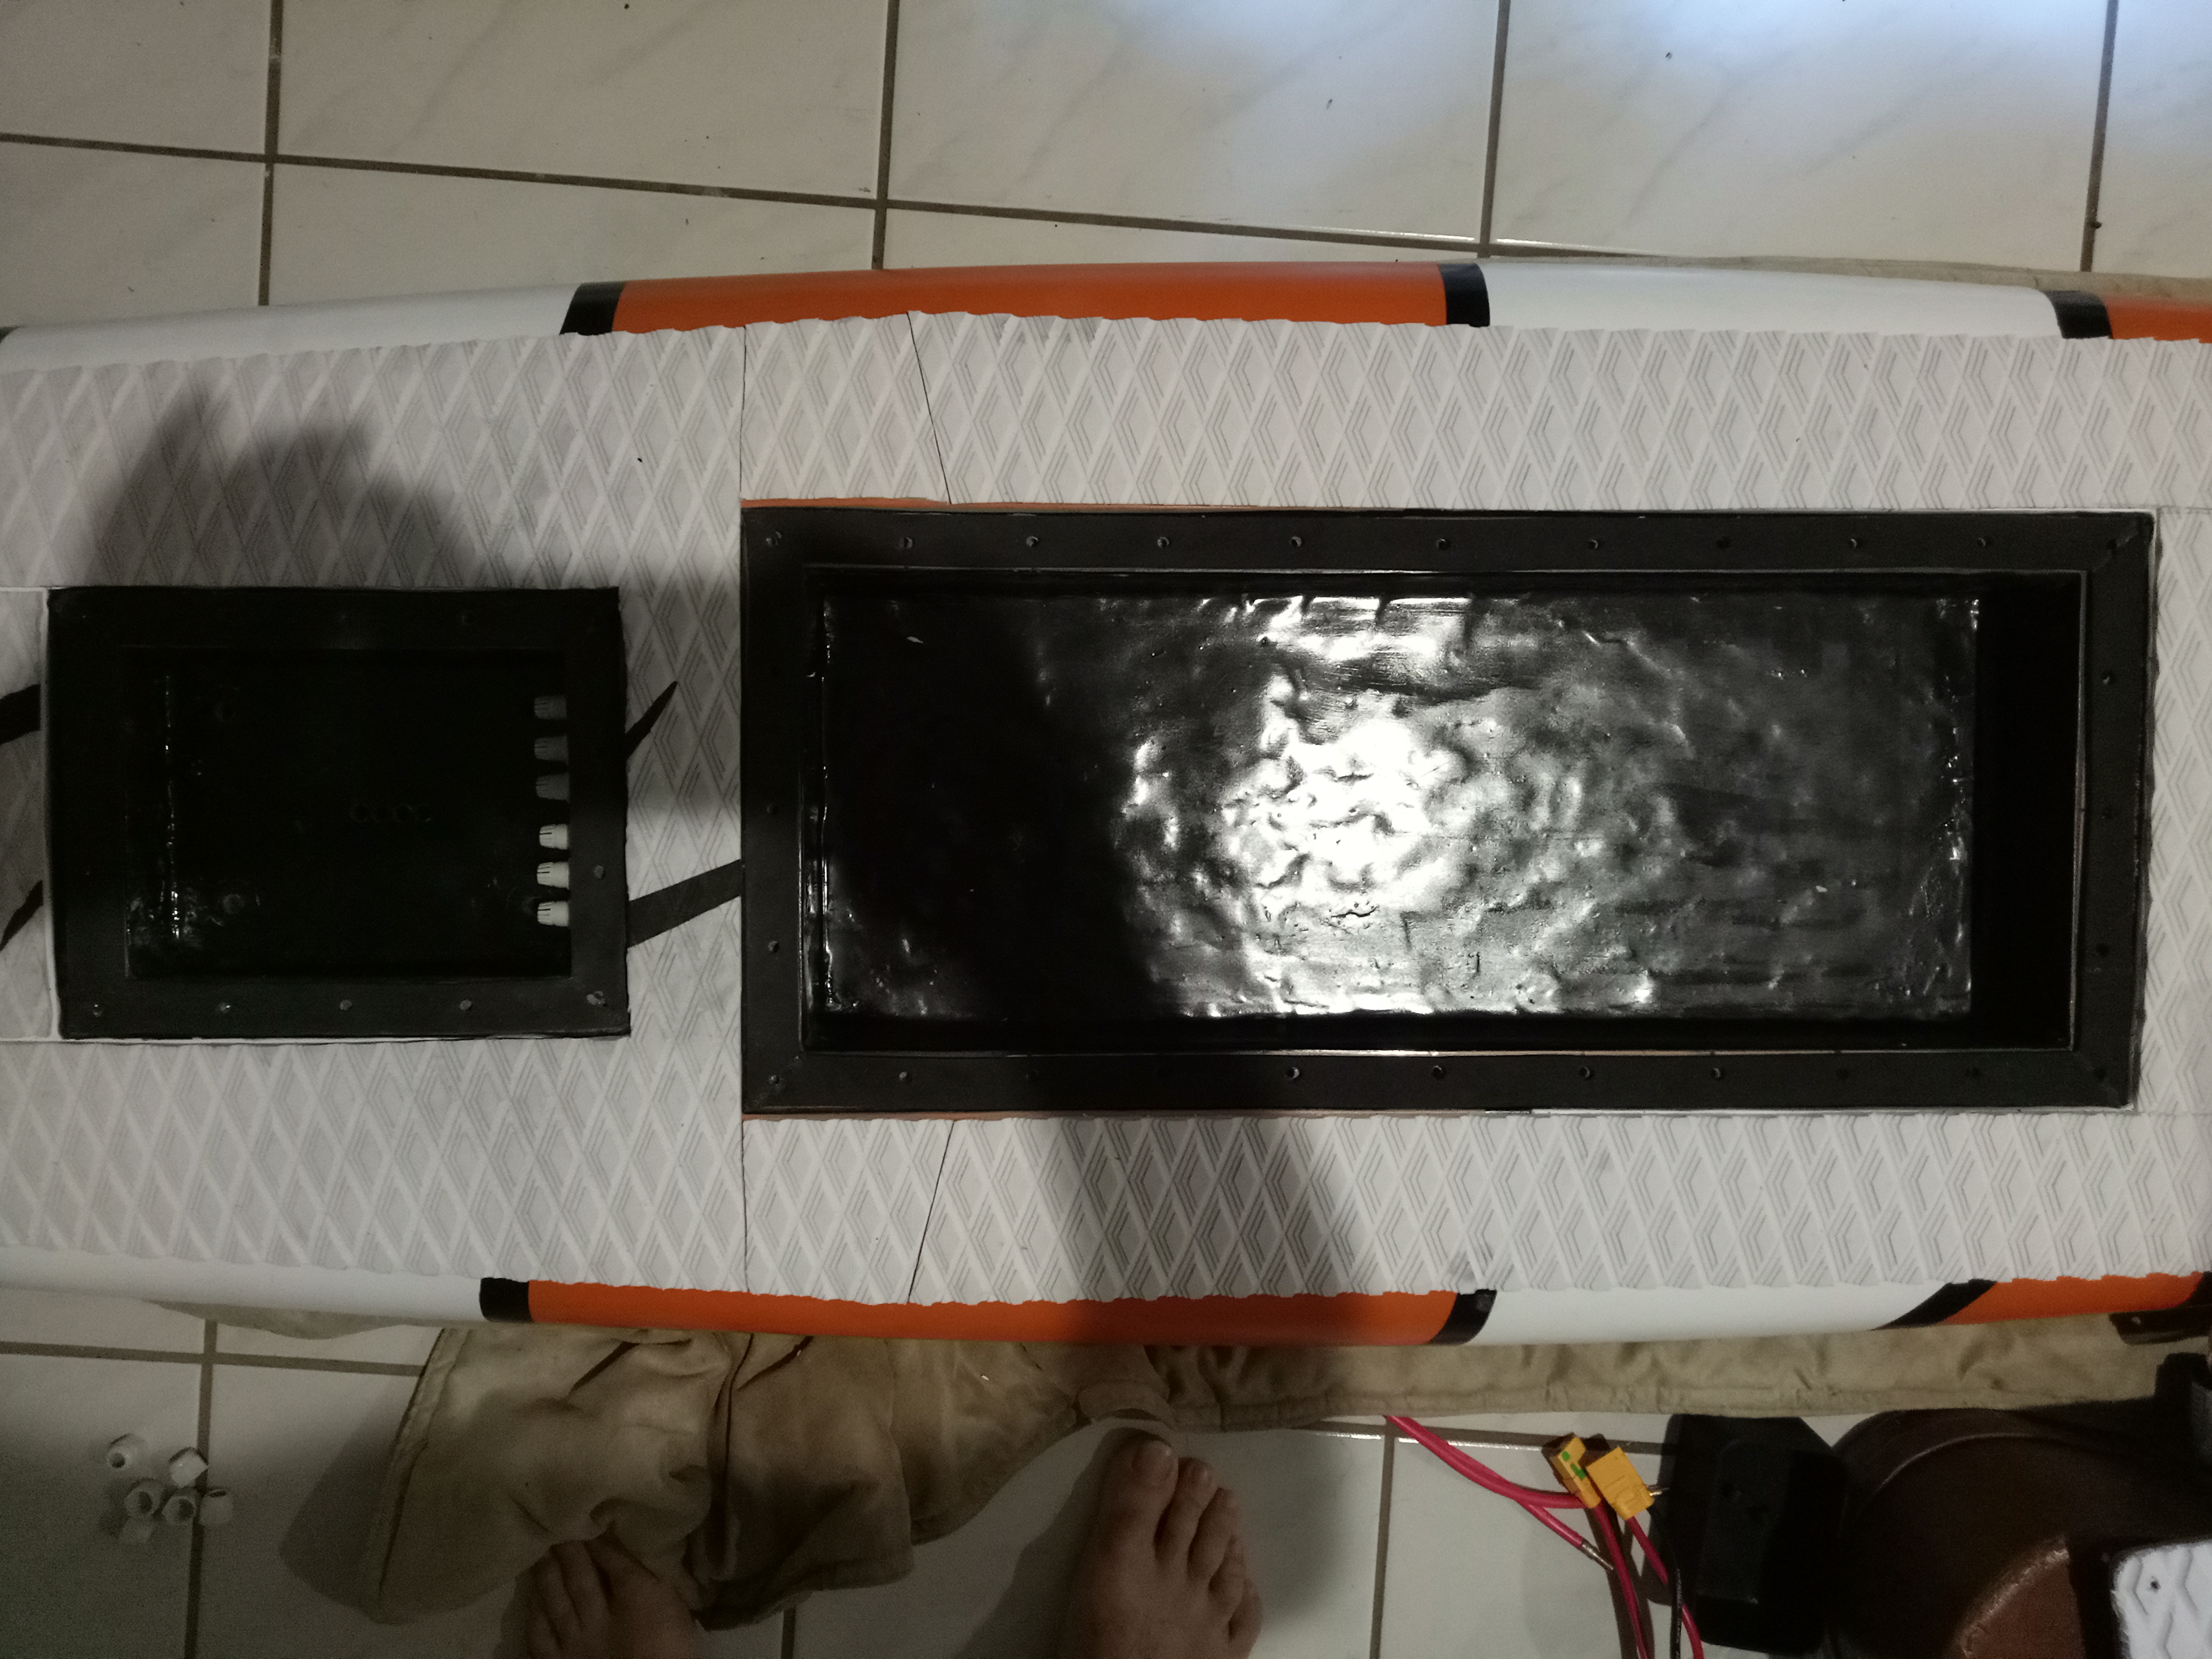
I used stainless steel T nuts inserted into a 6mm marine ply frame and then epoxied it into the board. It is impossible for the thread to pull through because they are inserted from below, before the frame was put in the board.
I tested my board in my pool first and had no leaks, but after my first ride test, I found a very small amount of water had made it through. I’m still not sure if the leak came from my water pump or through the enclosure seal.
The last few months I have been redesigning a few things. I now have a 3D printed enclosure that fits inside my board. The batteries fit inside pvc downpipes with a 3D printed end cap on one end, and the other fits into the electronics compartment that I made. This way should I get a leak, everything still stays dry.
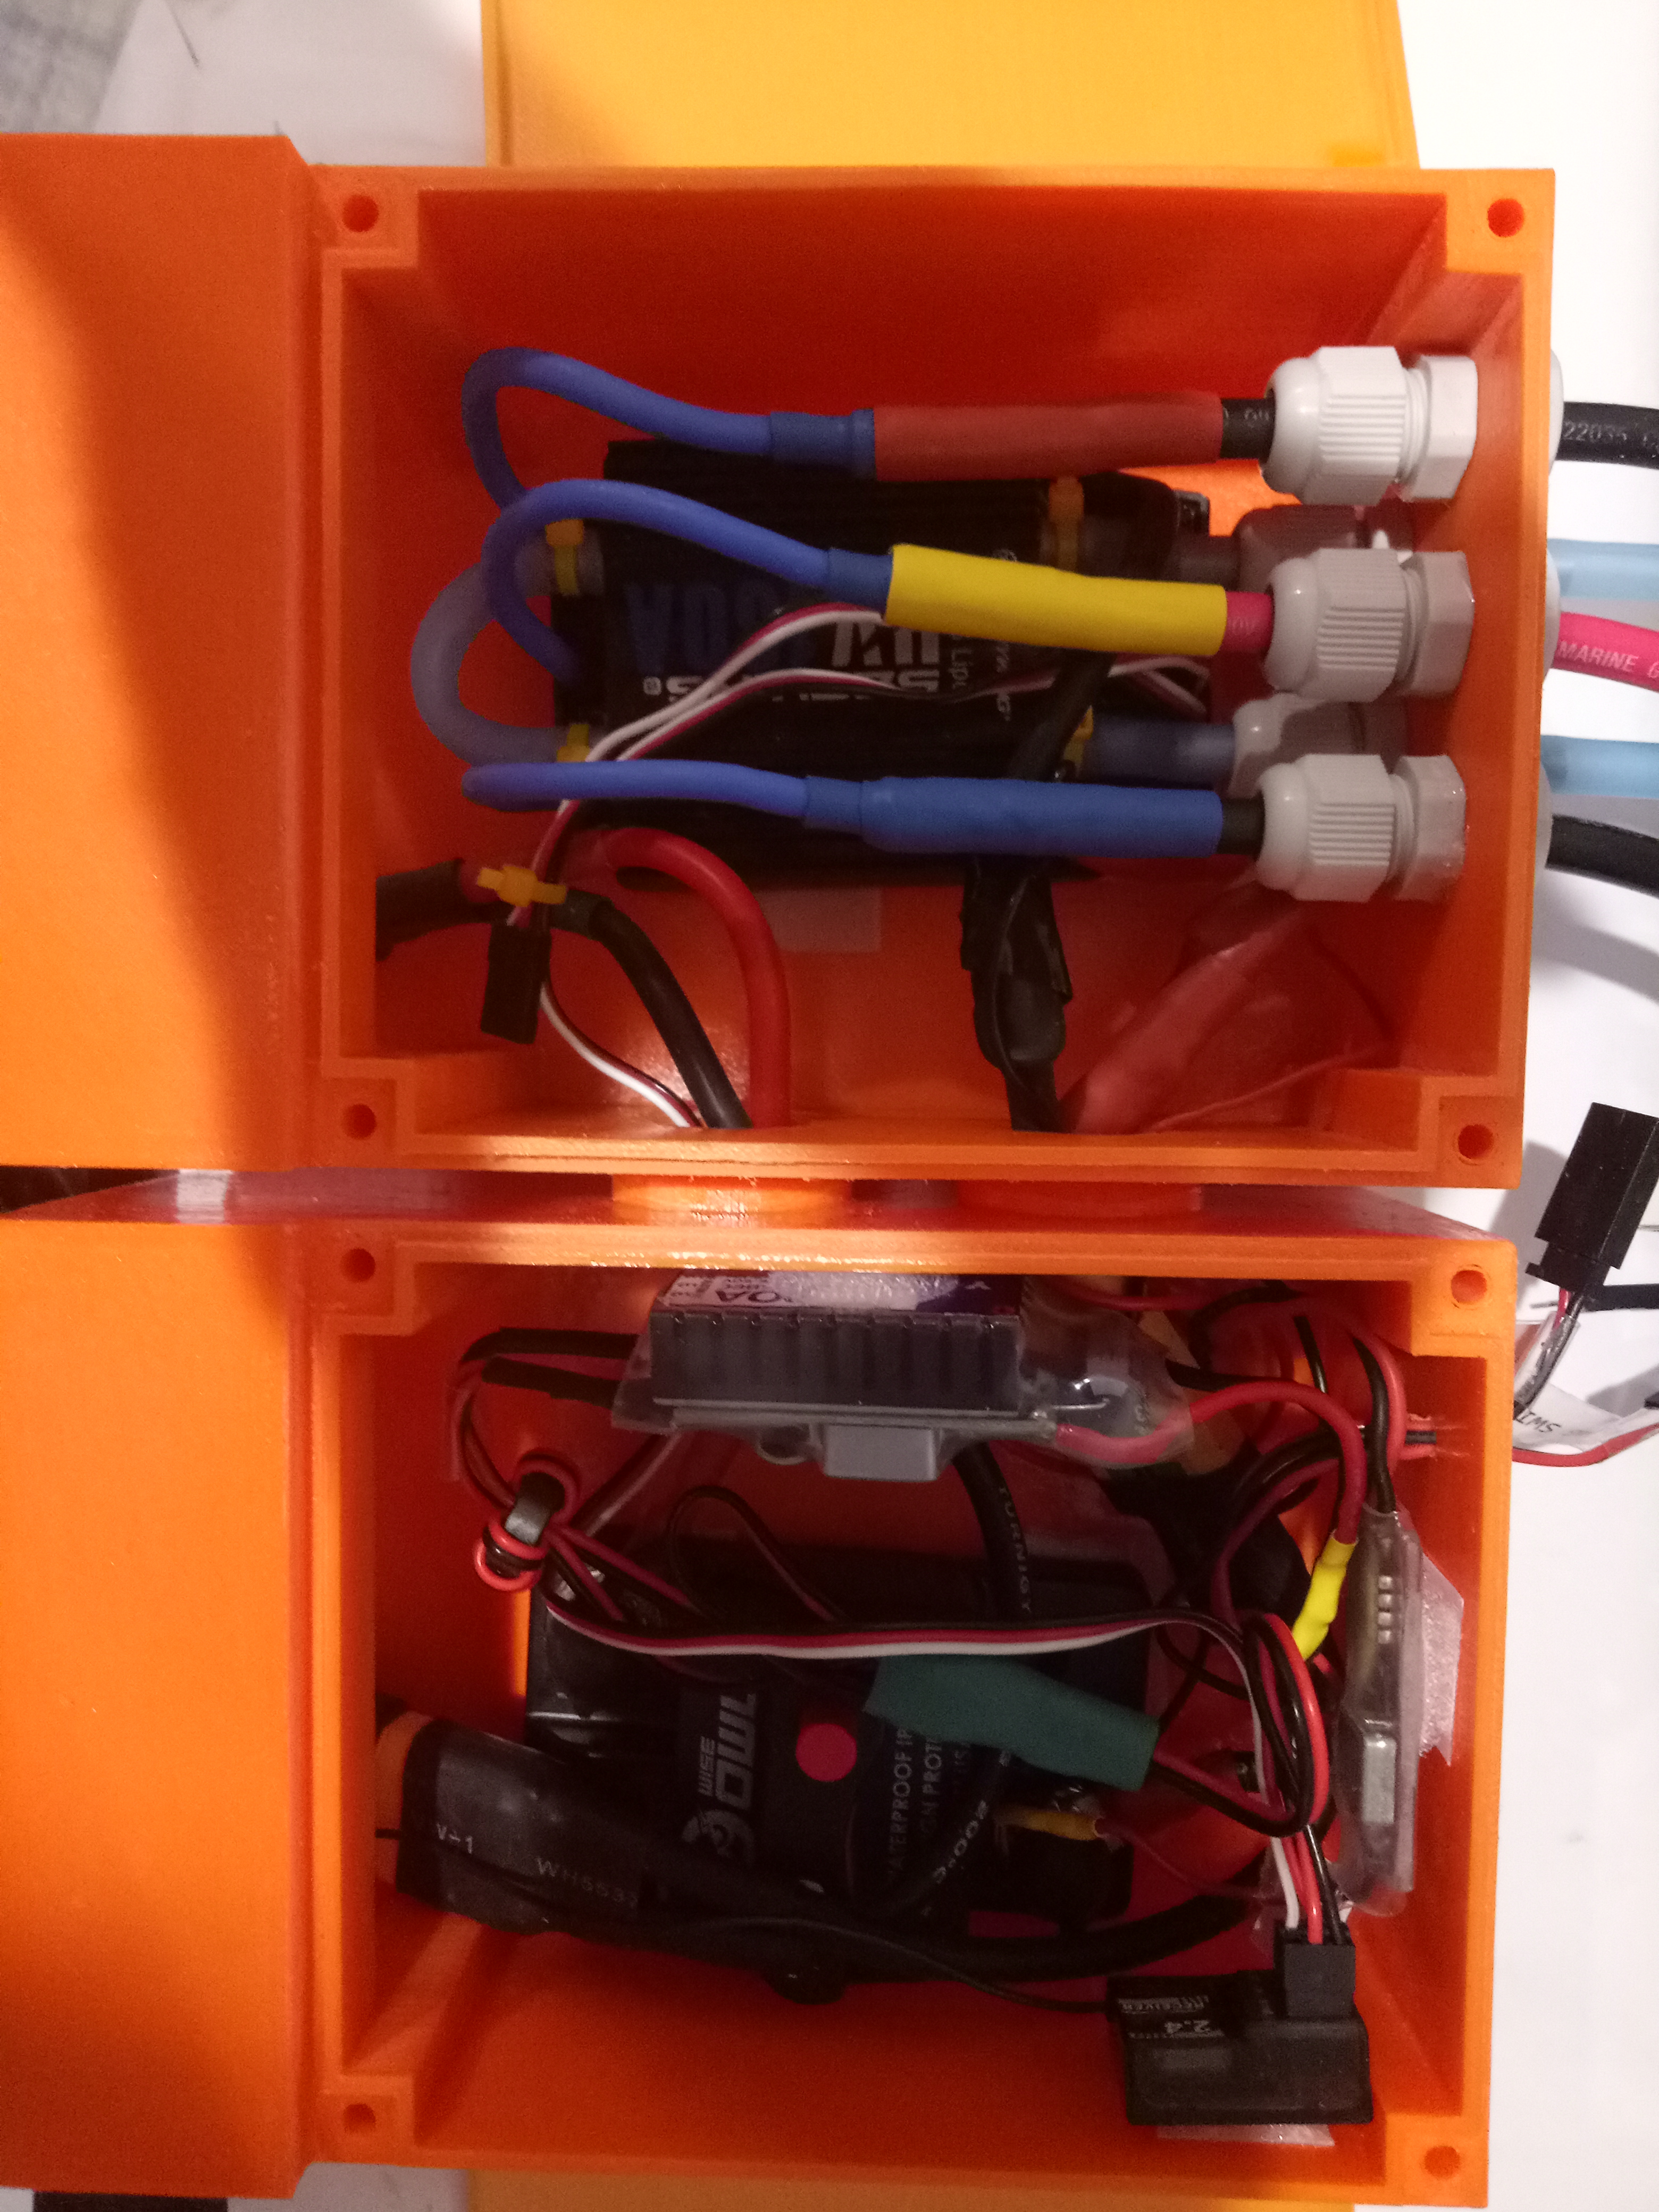
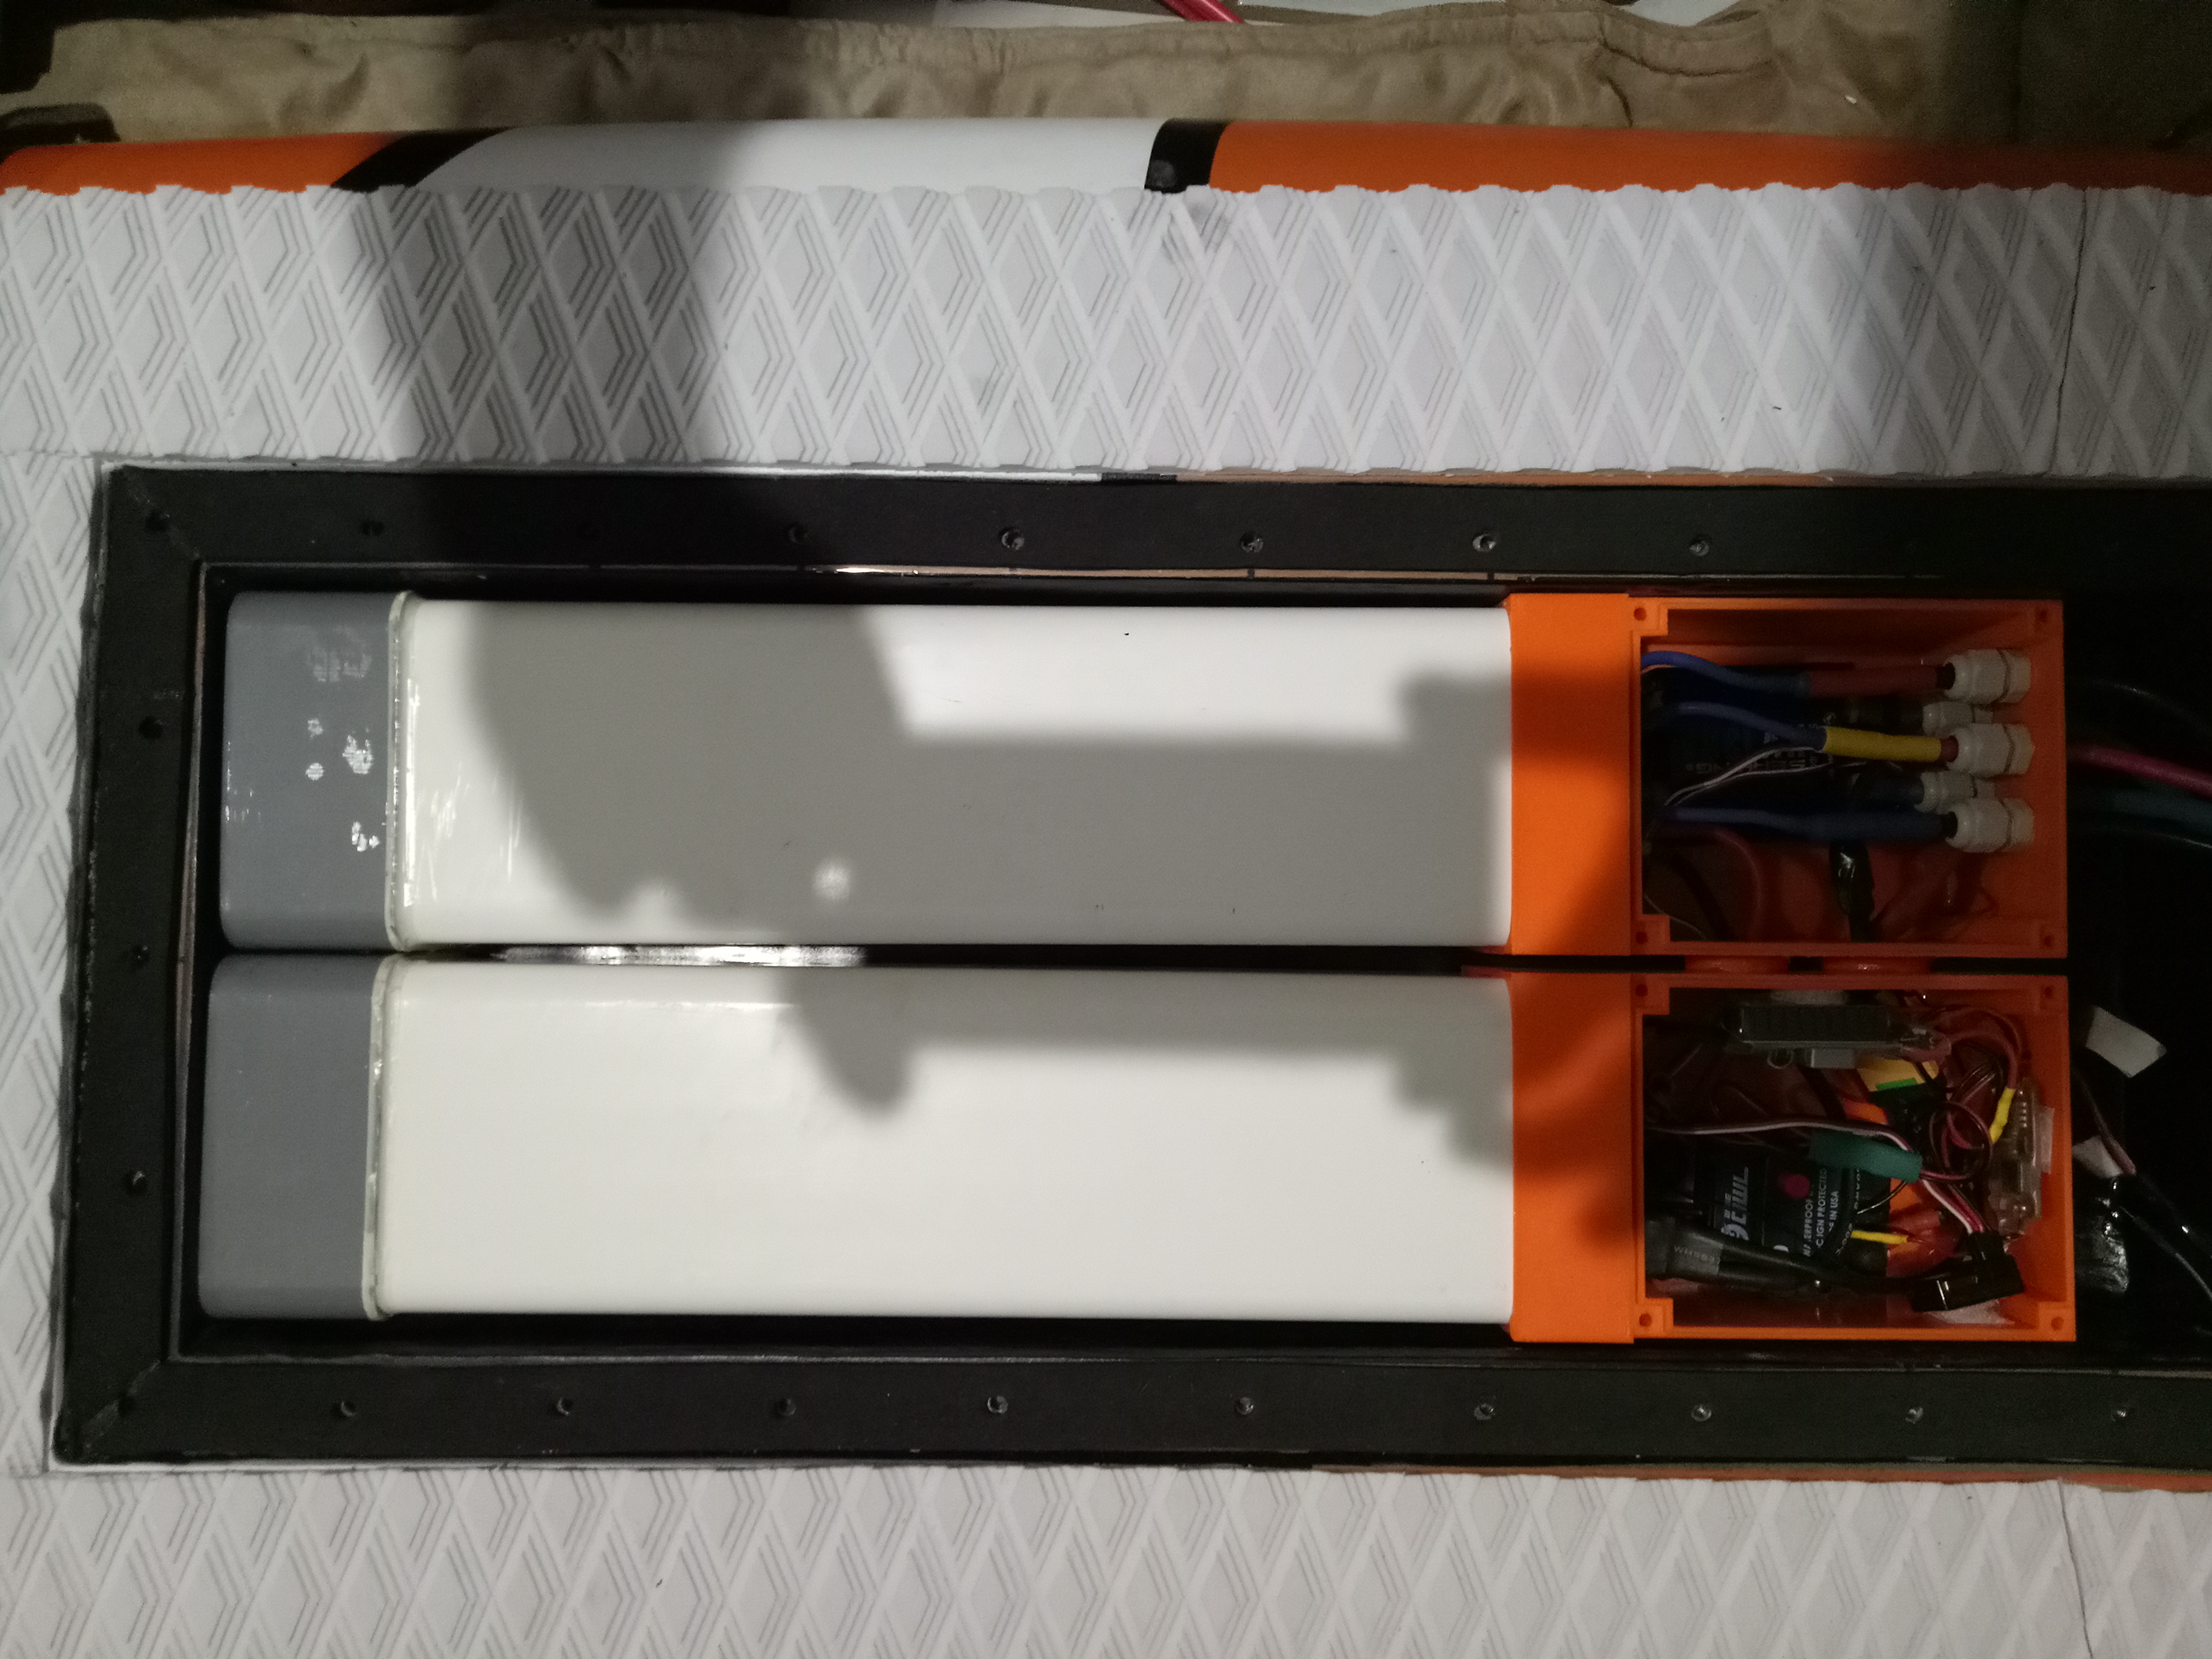
My board has 2 compartments. The main compartment houses the batteries and electronics and the second is a small compartment for the mast mount and cable entry. the motor cables and cooling tubes go through carbon tubes that are fitted between the 2 compartments. The cable glands you see are there to seal between the 2 compartments.
6 Likes
Thanks for the clear details, looks great! @rogjalon. I am going to dive into this kind of setup a bit more, looks really waterproof and neat.
Did you already had the possibility to test your new setup?
No, not yet. I hope to have it in the water within a couple weeks. Good luck with your build.
Really nice work! Did you vacuum bag it?
What do you use for lid, polyester or aluminium?
Keep up the good work!
Thanks Riwi, I didn’t have equipment to vacuum bag it, so I just did it in small sections. The lid is 6mm marine ply coated with Epoxy.
1 Like
6 months after my first test I was ready to hit the water again. Then I noticed this. A cracked mast clamp. I think I may have over tightened it.
Bugger… Grrrr… Back to the drawing board.

I did something similar. I ended up printing mine horizontally to avoid a repeat.
1 Like
Thanks @michion
I already have a spare printed the same way but your idea sounds like a good solution.
Roger,
Did you add any fibre glass or was it coated in epoxy only ?
Perhaps few layers of fibres on the spare one may help?
Also consider adding a spacer ring in the gap or some type of packing so once the tension is placed on the mast any extra force from the bolt is resisted by something solid.
1 Like
could be too much screw just one on either side of the mast were sufficient …
1 Like
I only coated it with a couple coats of Epoxy. No glass. I think it will be ok, I just won’t tighten the new one as much.
A thin, 110g m2, layer of glass makes all the diference. Easy to apply and sand to.
I showed my son your board, hes four and a half. He freaked out and your flying nemo might get a “brother” in Sweden. I dont think I will be allowed to paint my new board any other way 
1 Like
Hey Rickard,
Thanks for the tip.
I’m glad your son likes the colour theme of my board. I made it to blend in with the Great Barrier Reef area that I live in. Feel free to make the same, there can never be to many Nemo’s.
2 Likes
I finally got Nemo back in the water. Works great.
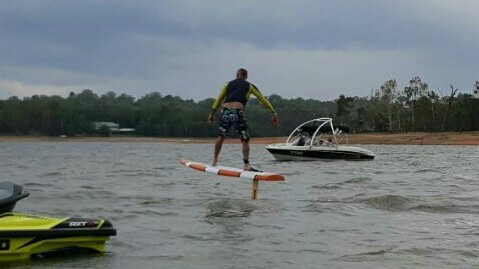
5 Likes
Well done , looks good on the water.
1 Like
Thanks Alex, I was pretty happy with it. I was in the water for 90 Minutes, but I guess half that time was getting back on after falling. It seemed to get easier to ride with every go.