My name is Peter and I am a Computer Engineering student at Santa Clara University. I am working on a team of three to build an e-Foil and related software products for our senior design project. We will be presenting our work on May 28th (along with 70 other diverse engineering teams) via YouTube live stream at the Santa Clara University annual Senior Design Conference. The conference is being held online for the first time due to covid-19 for the public to watch so I encourage all to watch and see what entry level engineers at the Jesuit school in Silicon Valley are working on.
Like many here, I enjoy kiteboarding. My go to spots are 3rd Ave and Sherman Island. I wanted an e-Foil for obvious reasons. To finish my Computer Engineering degree I needed a project and building an e-Foil falls more into Electrical Engineering so to make it work I would need to have a strong software component. I read efoil.builders for months and recognized few users used data to refine their designs. Metr.at was a step in the right direction but I was turned off by the fact they had made their own expensive proprietary transmitter. We would not have the VESC where it is today if Vedder had not made it free and open source; for Metr.at to make a closed add-on goes against the spirit of open source.
Using a generic BLE VESC6 module and the $2 Vesc Tool Android app (supports Vedder) I could log my own data! Metr.at still wins over this approach because of it’s great plotting capability. Logically it follows, how to plot the Vesc Tool data in a great way? With my own software!
Vesc Tool Plotter is the software component of the project. It is a web app (in progress) where you can upload a CSV generated by Vedder’s Android app and get a sharable link to a plot of your ride similar to Metr.at. You will have the ability to specify different parameters about your build like which battery, motor and foil you are using. You can search for data from other builders based on these parameters. The goal is to help humans analyze different builds to refine open source e-Foil design.
The scope of the project for our presentation ends there. We were building an e-Foil prior to covid-19 to collect data for the app using designs from efoil.builders however it is now considered extra. I am still building it of course. I will be posting in here over the next month an accelerated e-Foil build where I take the KISS principle into to uncharted waters. With 70% of the parts on hand and 29% in the mail we will see if it is really extra or not.
A final word of the data driven e-Foil design approach. As I mentioned Vesc Tool Plotter is designed for human analysis but the underlying architecture is not. By recording large amounts of labeled data my stretch goal is to analyze e-Foil designs with machine learning algorithms. e-Foils are complex systems which are governed by the laws of fluid dynamics other complex physics. I have no clue how each component of our system interacts but I do know how to train a model which does. A benefit to this approach is by analyzing the whole system (as opposed to discrete pieces) the relationships between components are present in the data. My pipe dream is to have a model trained with a reward function which minimizes current draw using features like propeller pitch and diameter. I could go for rides on several different 3D printed propellers and view the plots of the effects against each other using Vesc Tool Plotter then get a recommendation from the ML algorithm to, for example, decrease propeller pitch to improve my efficiency. Now that’s data-driven e-Foils!
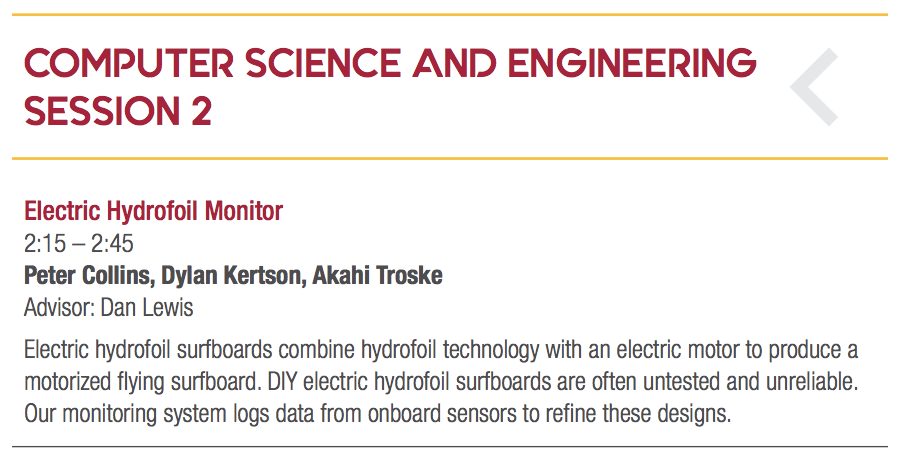
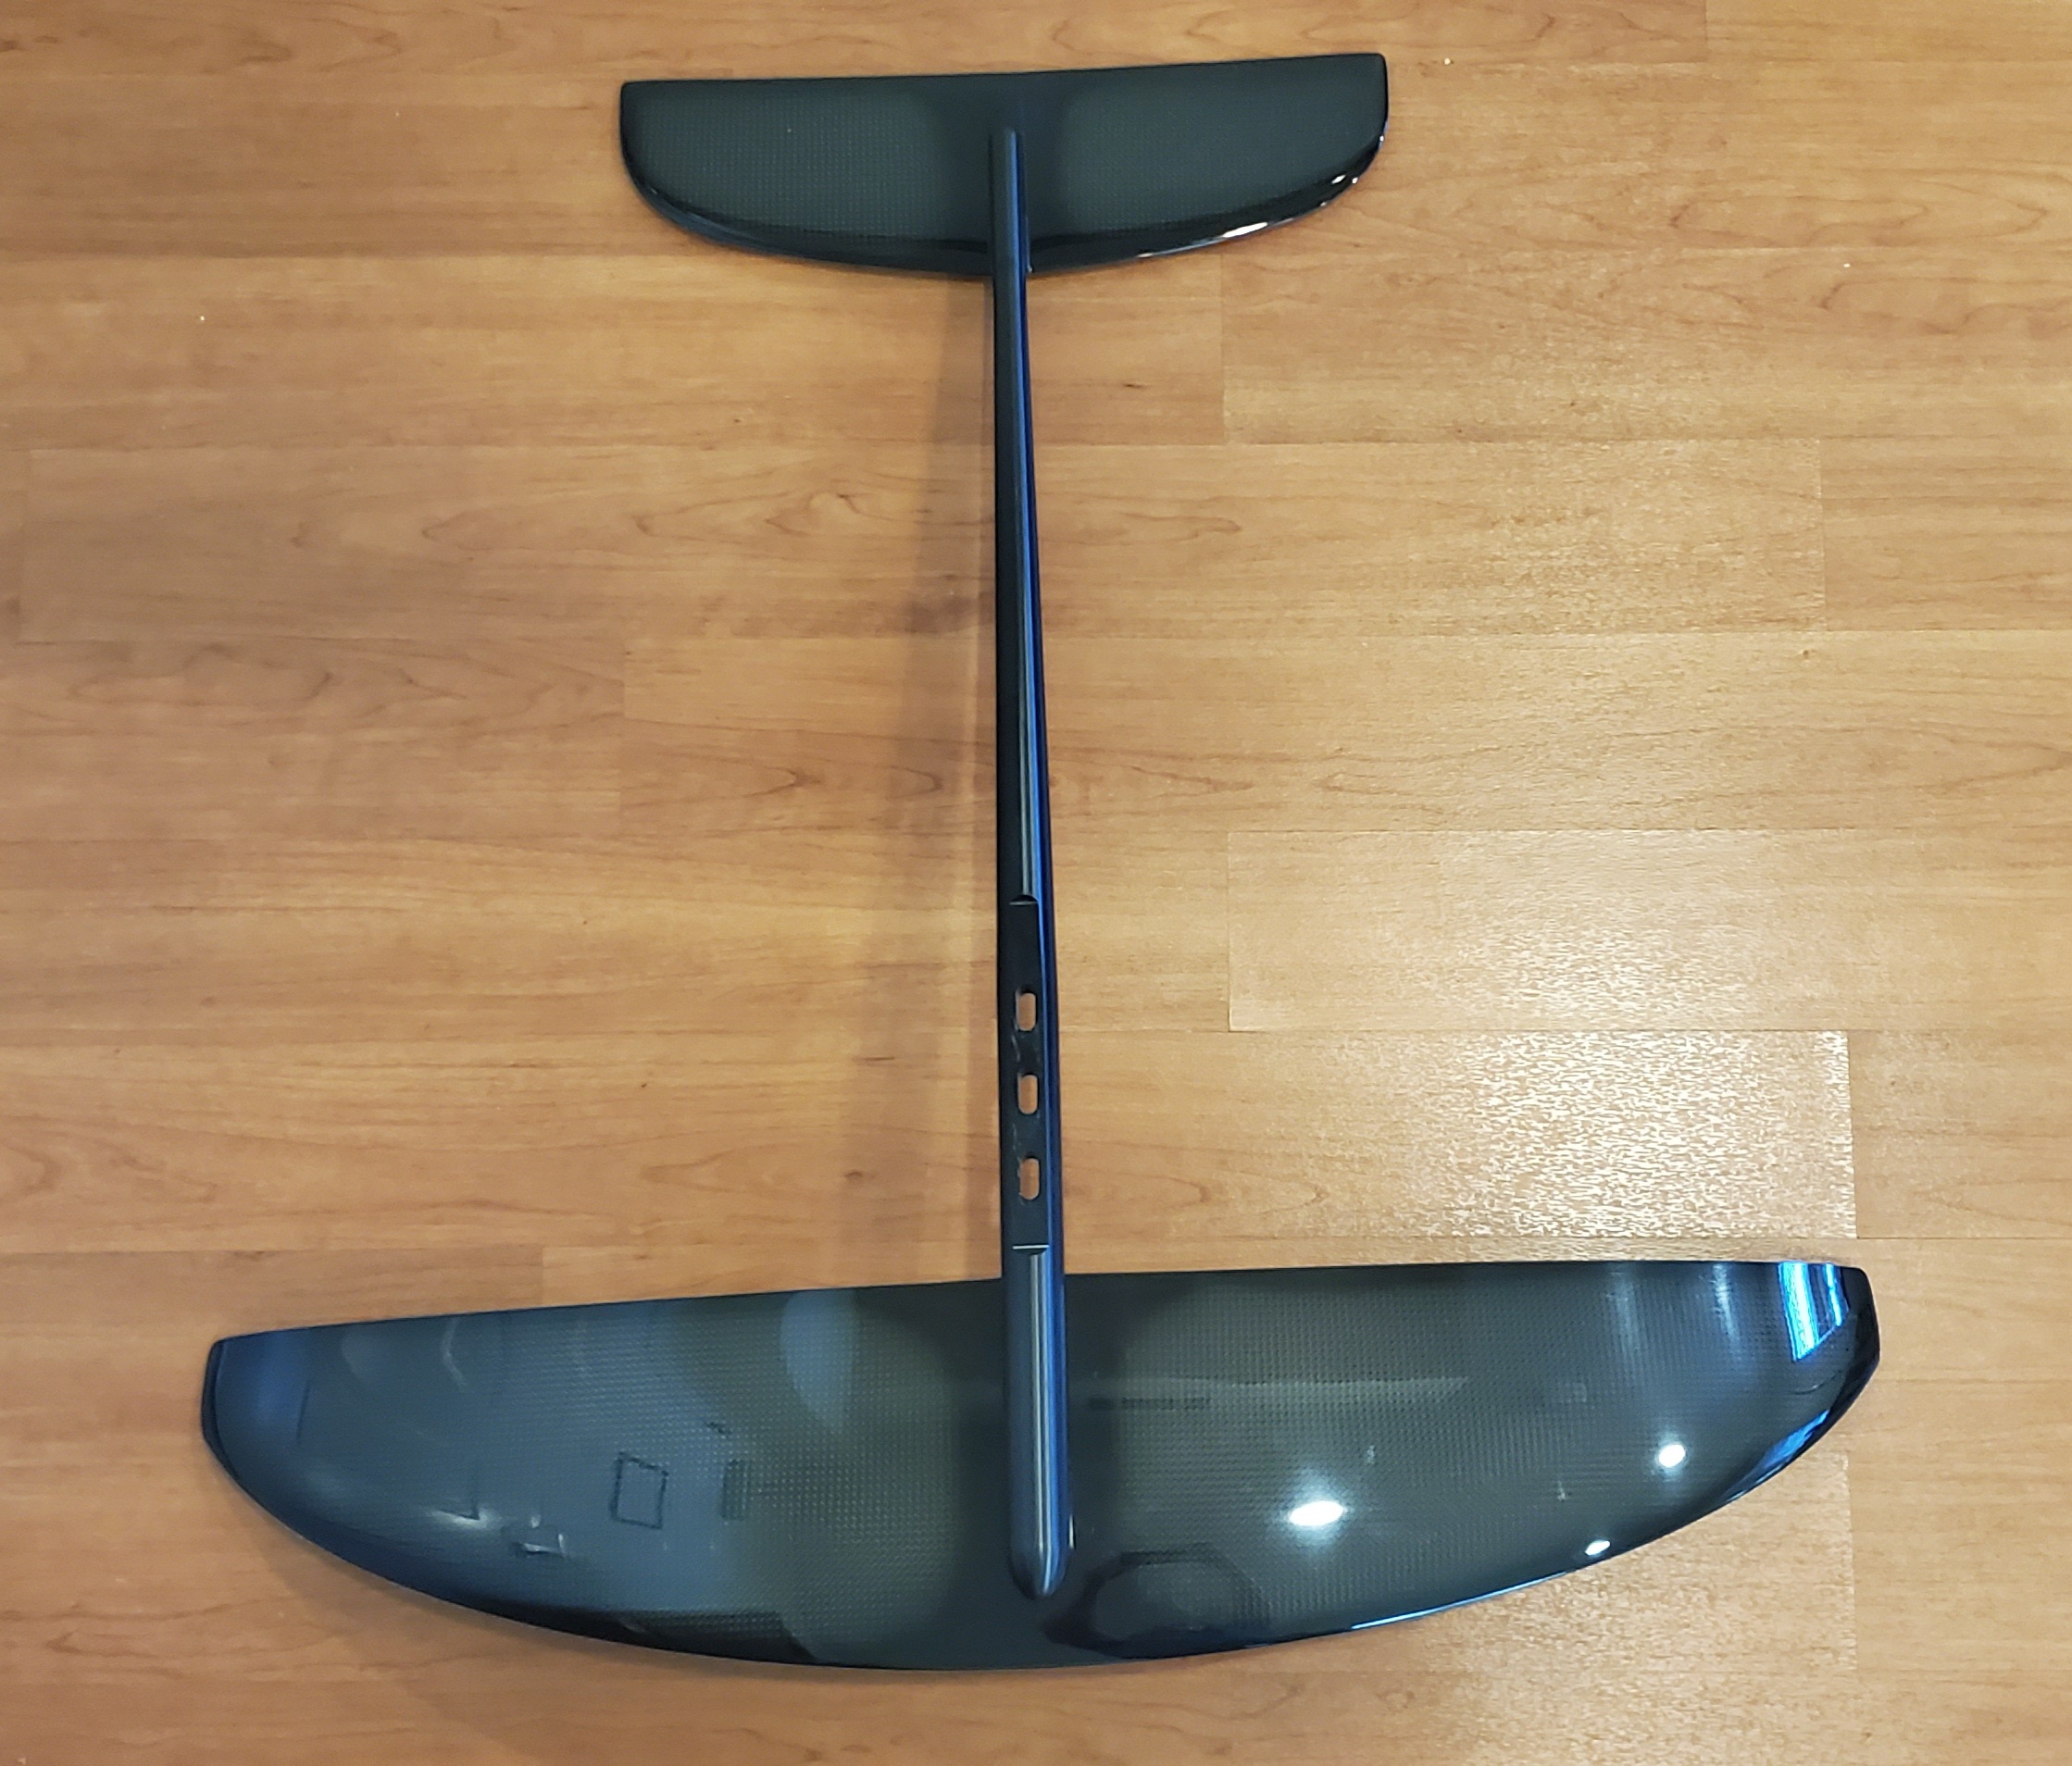
We are using the Slingshot Airstrike foil stand up paddle board (FSUP) for our build. It is 7’8" long, displaces 145L and has a foil mount. Keeping it simple.
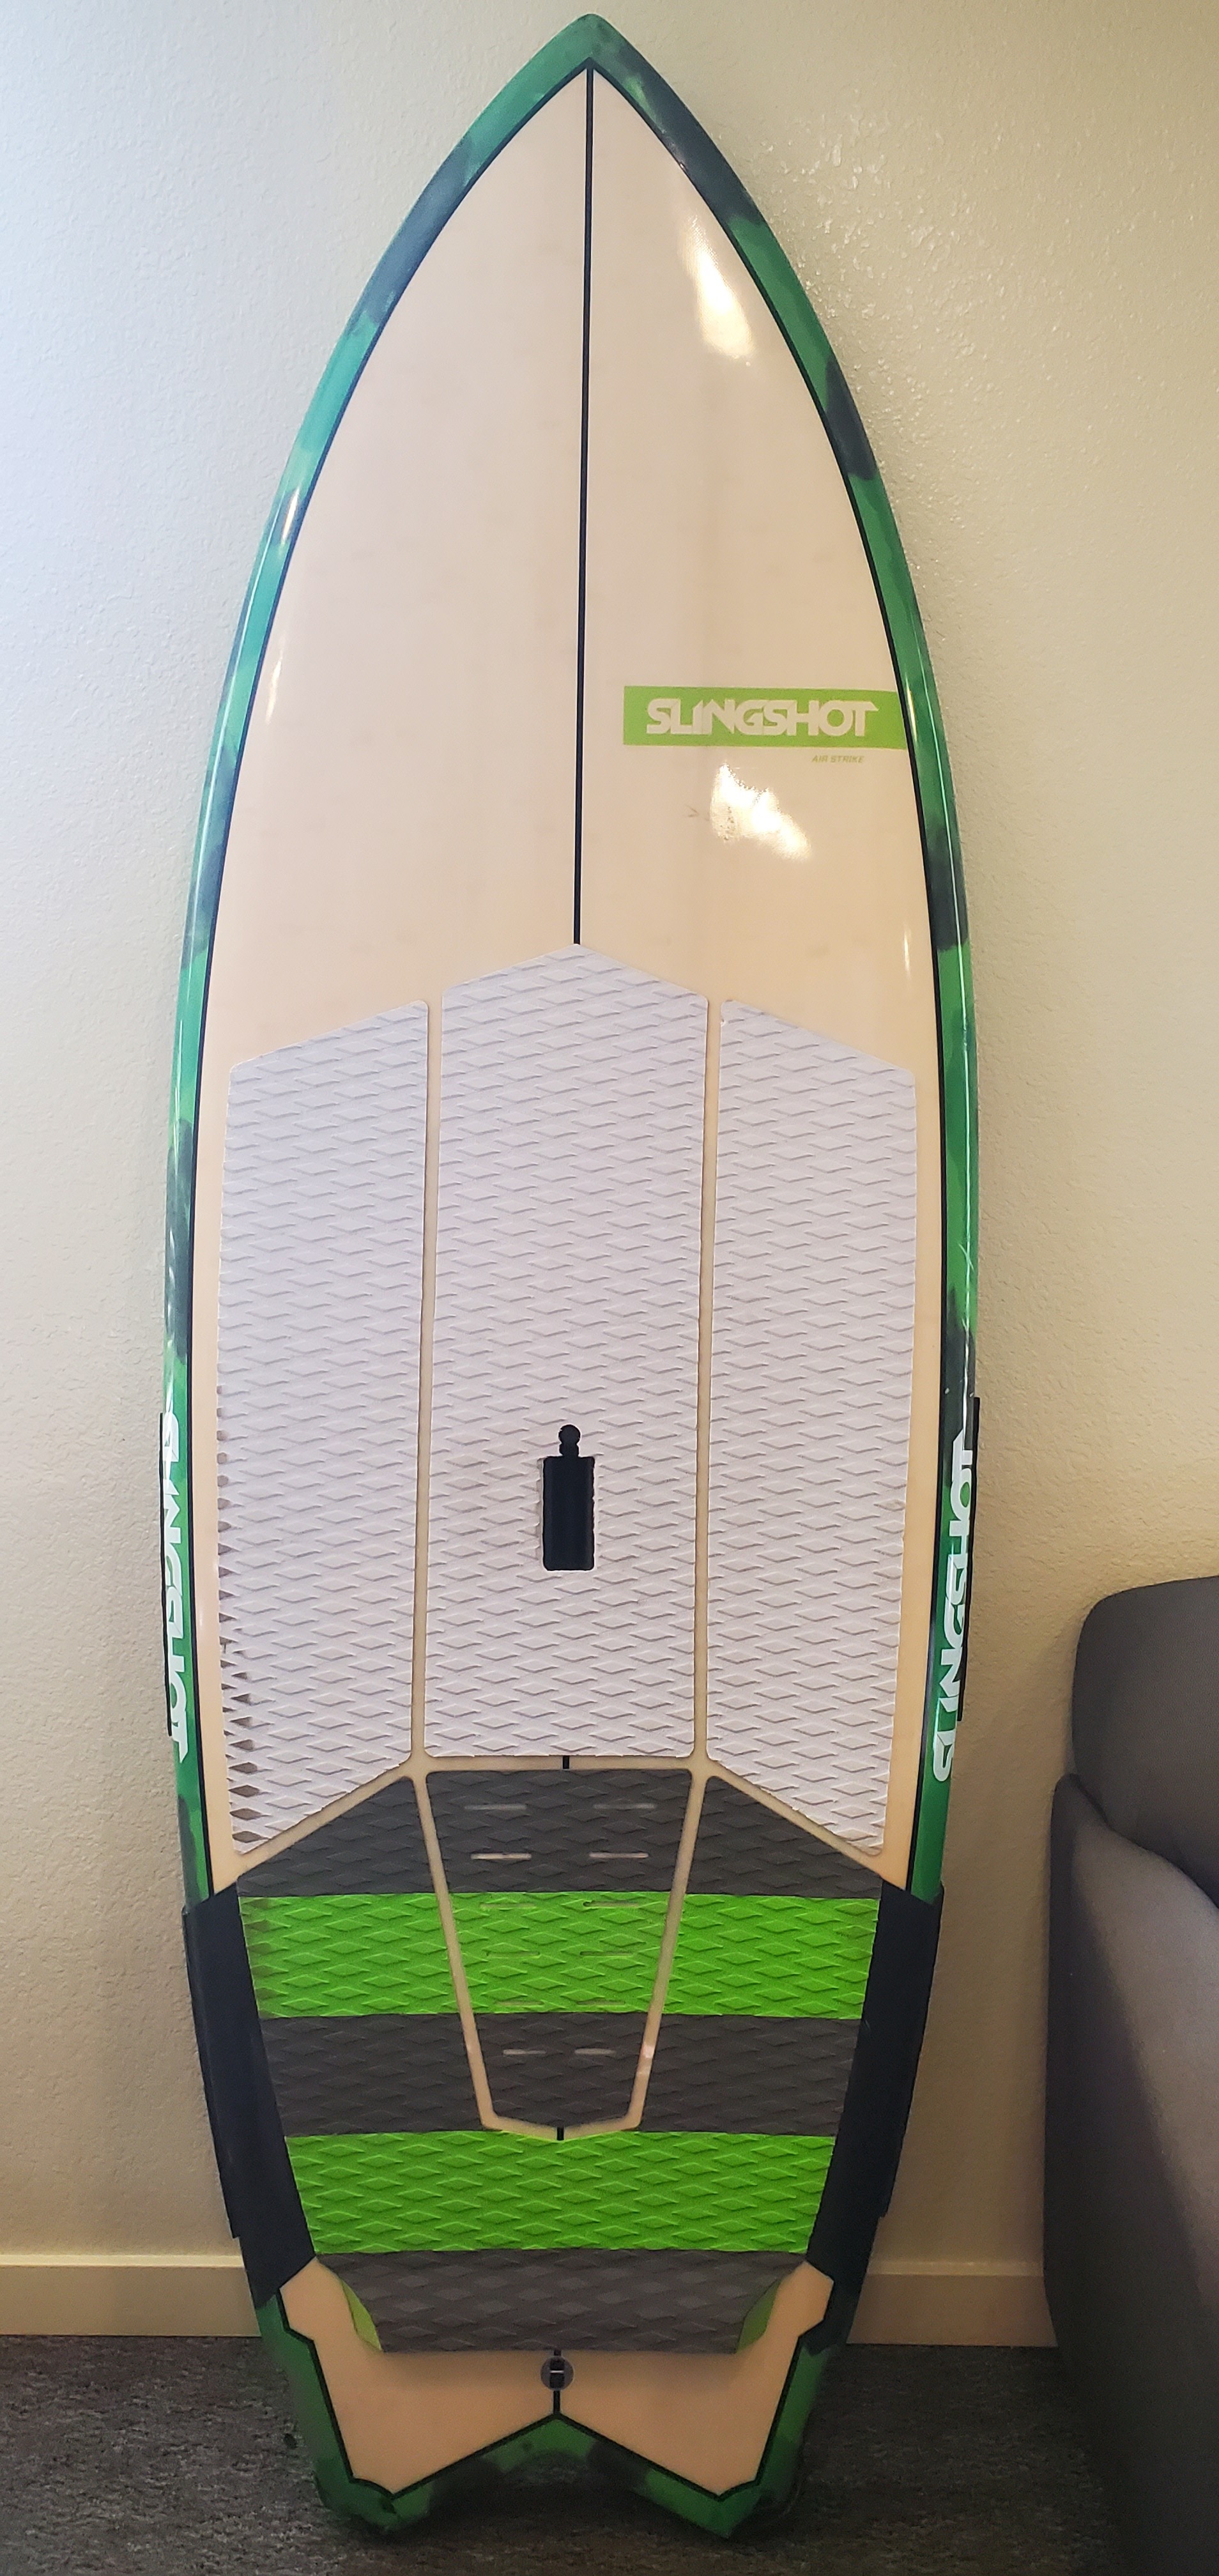
For the motor controller enclosure we are using a Polycase AN-06F. It’s an IP68 rated aluminum enclosure with dimensions 6.73 x 4.76 x 2.17 in. It has a flange for easy mounting.
As mentioned in the introduction post we are using a VESC motor controller as the primary academic purpose of our build is data collection. We are using an implementation of the VESC6 by Benjamin Vedder manufactured by Flipsky with an advertised rating of 200A.
Note: I purchased this VESC during the planning phases of the project. Some time has passed since then and Flipsky now sells the 200A version in a potted enclosure with water cooling ports. I suspect it is more robust. In an effort to keep it simple we will implement passive cooling.
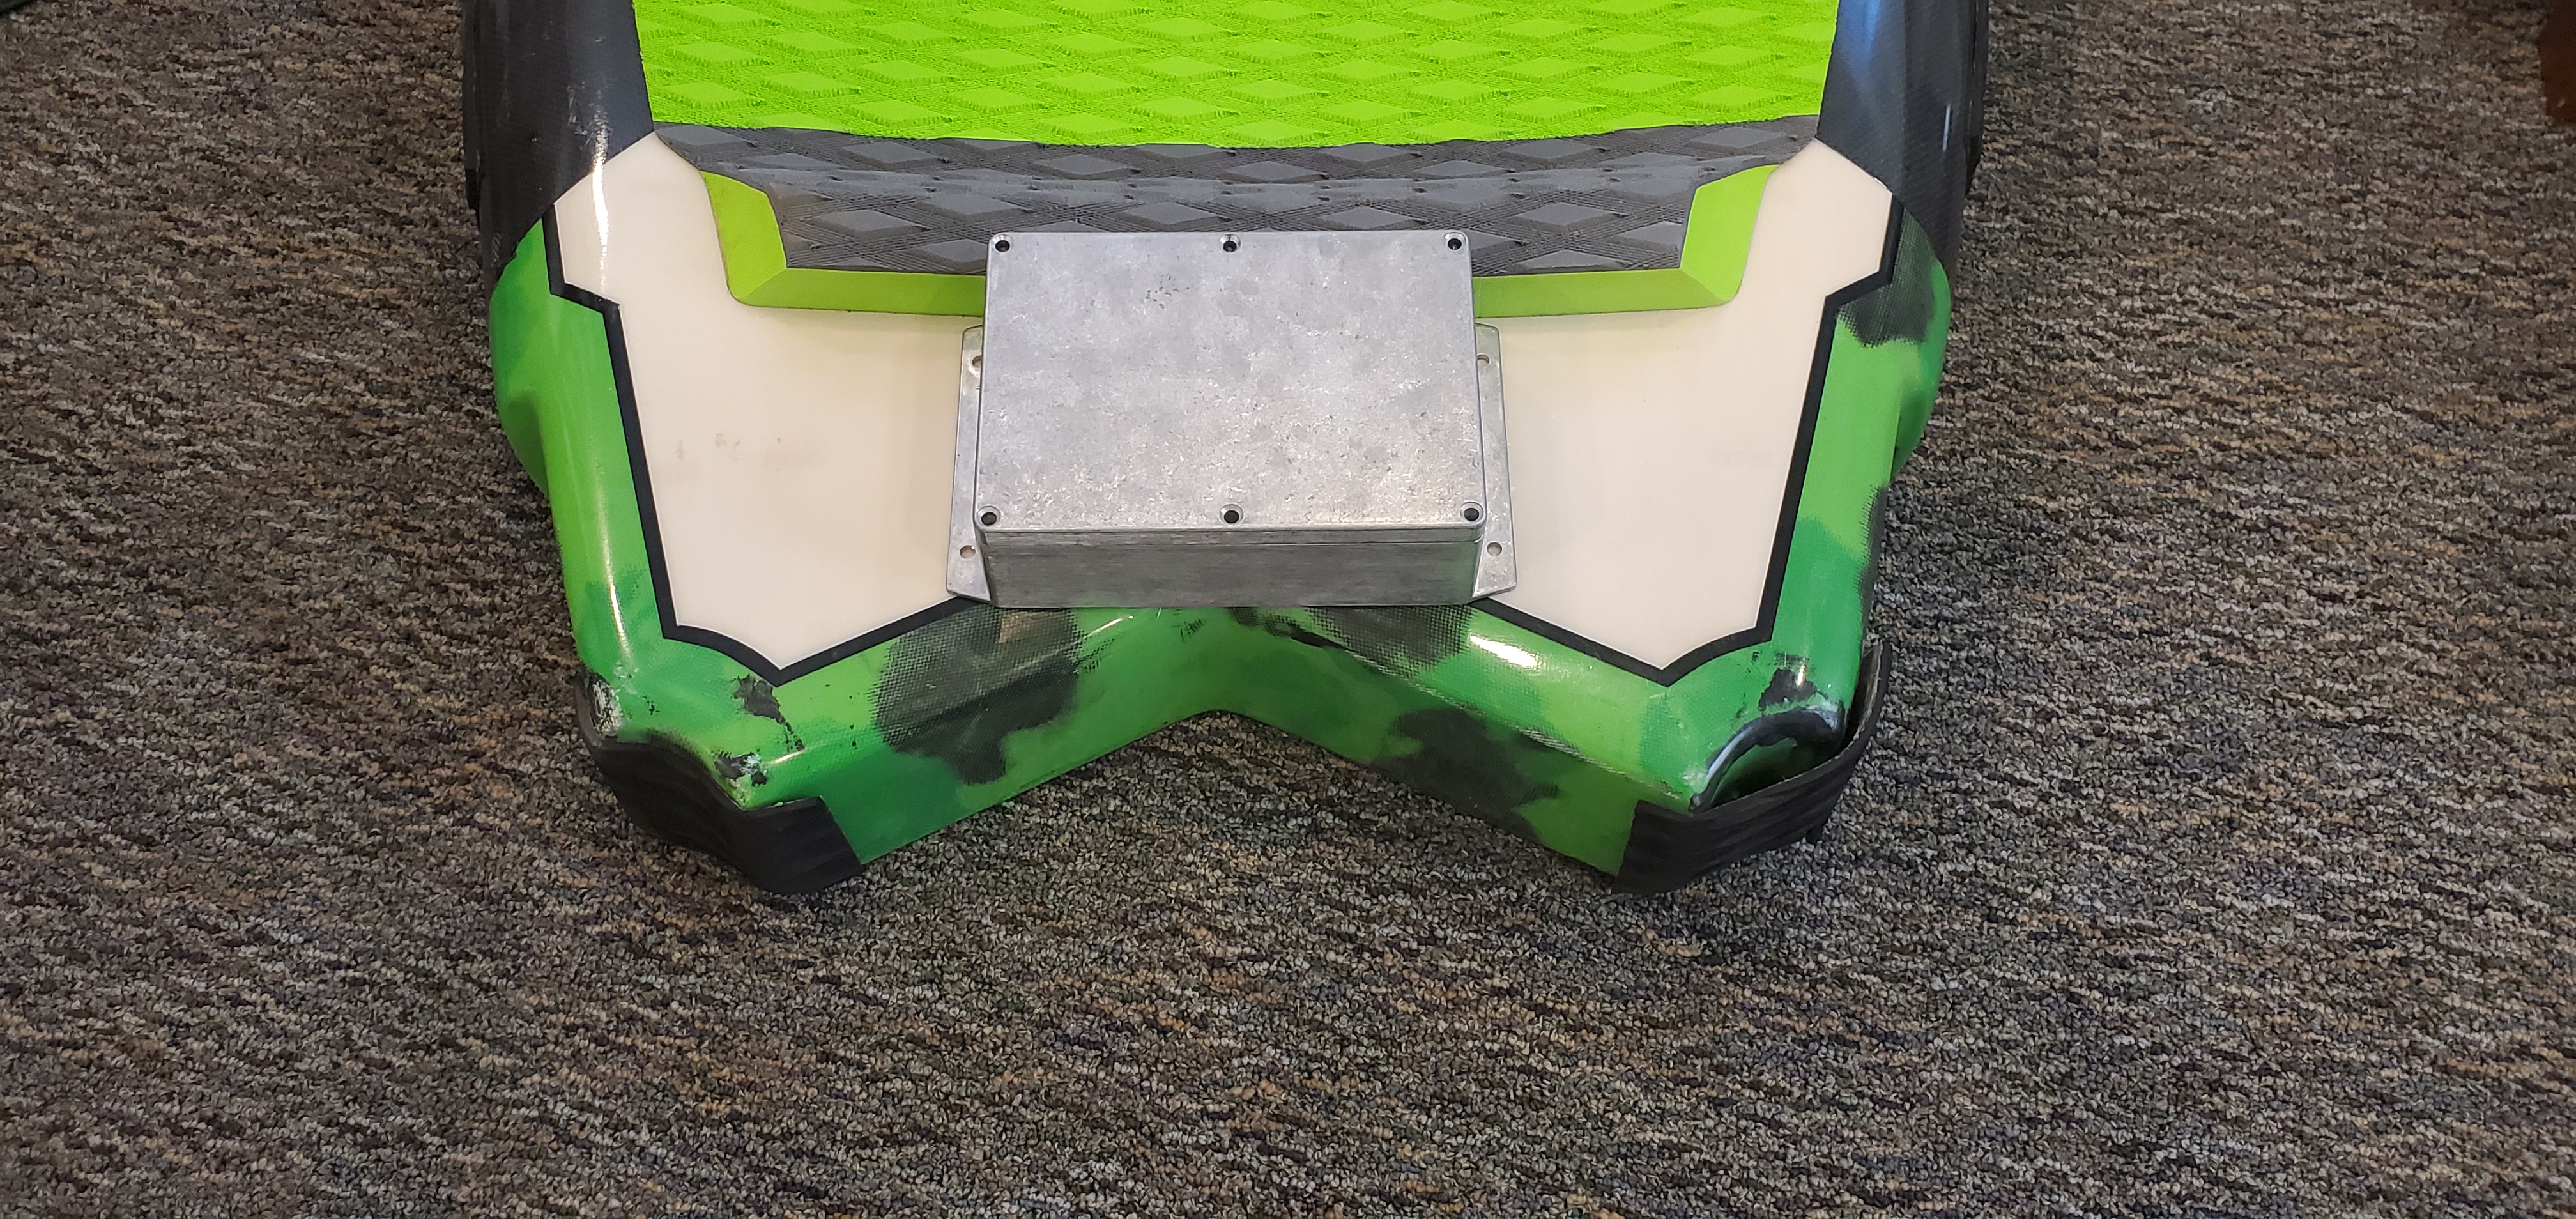
The Maytech remote allows us to view RPM and battery voltage on the display without occupying the VESC communication channel. We are able to get these values by jumping a motor wire and battery wire directly to pins on the Maytech receiver PCB. We also purchased JST-PH 5 pin connectors to make a small harness. Note: JST-PH is smaller than Li-Po battery balance leads.
The Flipsky Bluetooth module for VESC6 allows us to connect an Android phone running Vedder’s Vesc Tool app. We can display these values to the rider while datalogging via the phone mounted inside the battery enclosure.
The Maytech remote features two accessory relays (exciting!) for whatever you would like. We will not be using the 30A relay for a water pump (even though its ideal) because we are keeping it simple. Did I mention we are keeping it simple?
Hey my names Dave I’m a mechanical engineering student on the east coast would definitely like to talk about refining your design. My schooling combined with yours can come up with a great refined system.
I have extensive experience in FEA and fluid analysis using CAD programs. I also have built Multiple surfboards from scratch as I live near a surf supply ware house . One thing I don’t have experience is in the electrical aspect. I do have experience in data collection and processing for electrical systems that relate to mechanical world.
The goal was $3,000 and that ship has sailed. The final components that make it into the board will likely meet our $3,000 goal however. It is often overlooked in these builds the expense involved with the aggregation of little parts like adhesives, connectors, wires and enclosures. Tool access is also often overlooked. We were fortunate to receive a grant award from our university to cover the big stuff. Thanks for the interest.
Still 4K under the cheapest on the market. Did you guys buy the board and foils aswell. If so approximately what percentage of the total cost was just electrical components?
Thank you. Keep an eye on this thread as I’ll be updating it frequently up until the conference. I will convert this to a personal project after the conference and continue over the summer.
Yes sir! At 4.5" thick its asking for an electronics cavity to be cut. Learning from past projects, don’t ever make your version 1 complicated. Keep it as simple as possible! I’m using Velcro to secure the battery and ESC enclosures.
Simplicity should not come at the expense of safety! I am using an EL-AN200 200A fuse able to prevent flashover up to 58V DC. The fuse should be the weakest point in the system by design. I think with a fuse of this size the Li-Po XT90’s would slowly go first. I do believe I should have gone for the 150A version especially with a 12S 12Ah Li-Po back rated at 12C (144A cont. max rating) this fuse is really only good for protecting against accidental shorts. I will install this fuse holder and swap the internal fuse to a 150A.
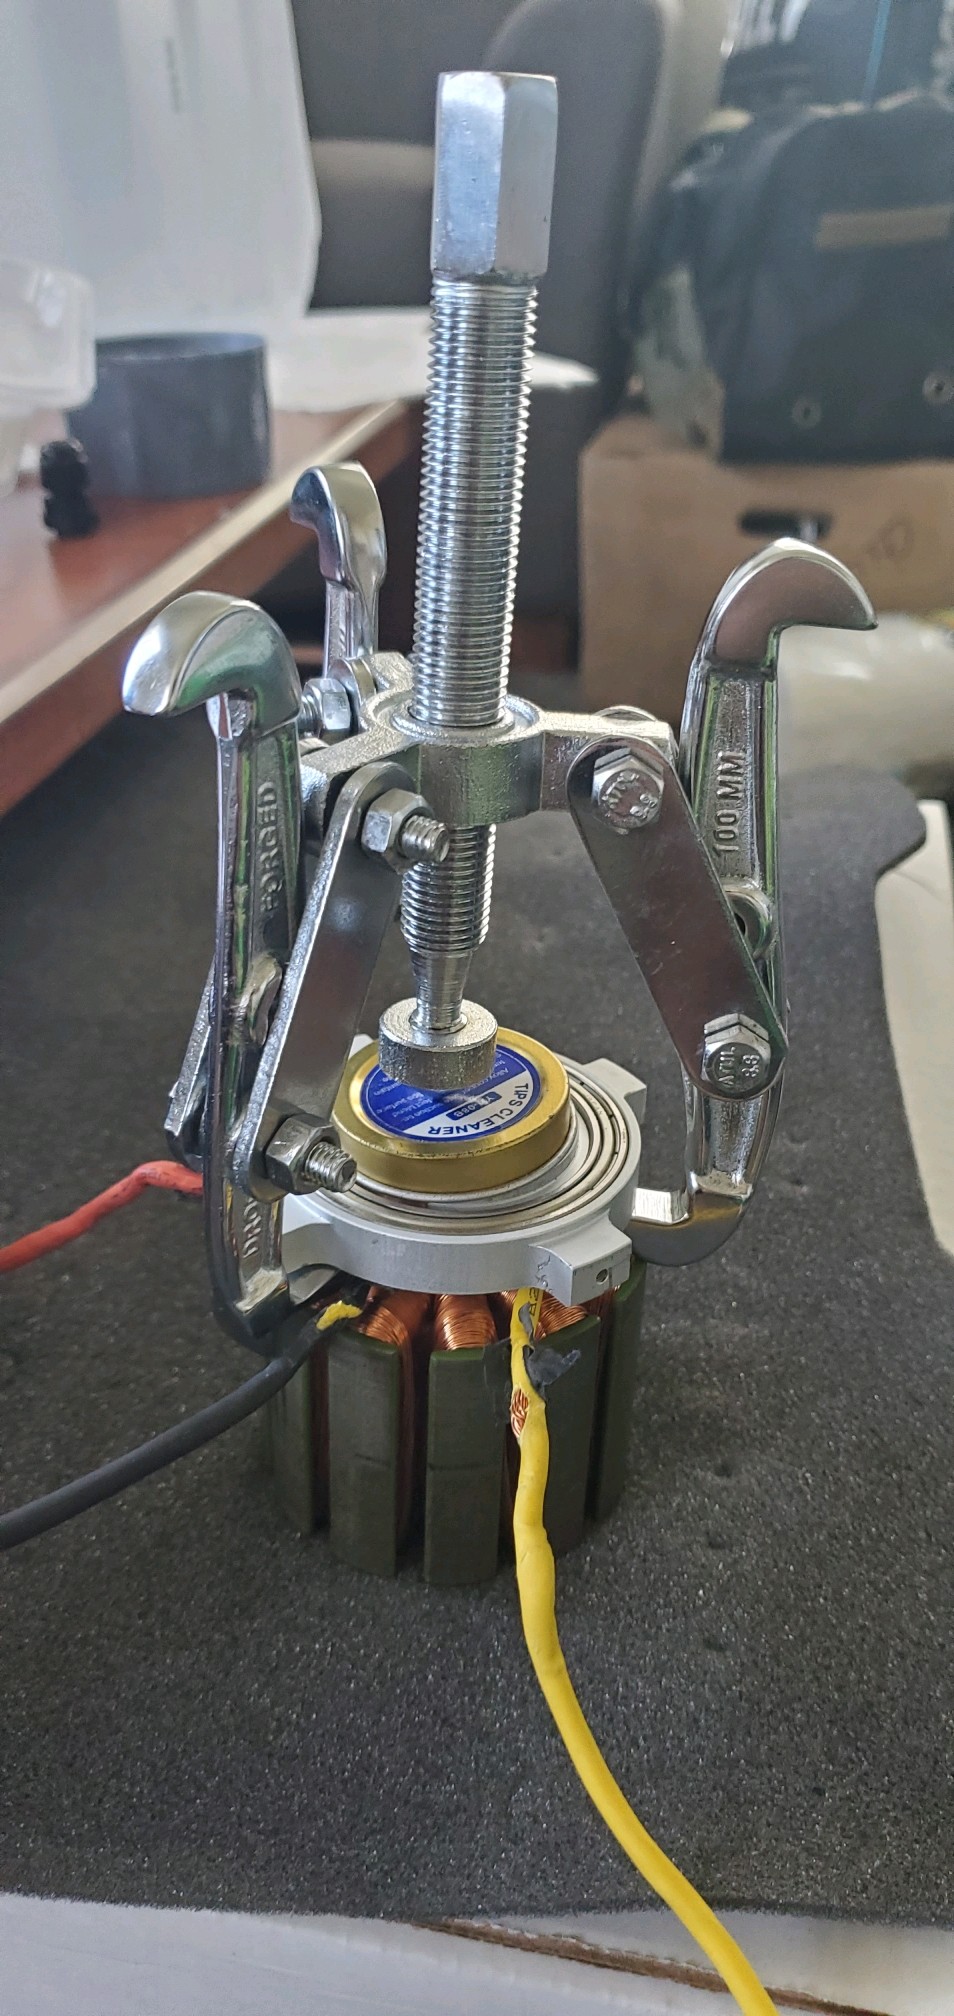
For the motor we are using an APS 80100 80kv. I am getting ready to paint the stator with epoxy. The first step was to remove the main bearing. It was tricky because there is a smaller bearing in the center. I used a cap to span the bearing and put the load onto the stator core. It worked well after the cap crushed down; the shaft bearing looks unaffected.