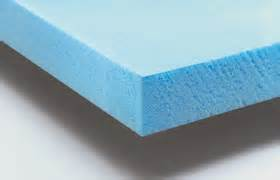
I want to make a couple of forms for CF parts - I am carving them out of that blue foam insulation board you get at the hardware store
but what I need is something non-porous I can shrink or otherwise attach to the foam form and then apply the wax and PVA to. This (randomly chosen) form is a good example of what I’m after.
My google fu seems to be failing me on this one - any pointers? Or am I going about this completely the wrong way?
Rough shape with the foam, then bondo to get it smooth, and finally a thin layer of epoxy or clear coat…
But the usual way to do is more to make your part out of the foam, and get the surface finish it as clean as you want your part, then make a mold with gel coat and fiber, and finally make the carbon piece out of the mold.
Can you give more details about the part you’re trying to make? vacuum bagged or not?
So if I understand correctly I would rough CNC the mold out of the blue foam, then bondo the whole thing, then fine CNC it, sand, coat with epoxy, sand and wax, correct?
In the case of the gel coat it sounds like it wouldn’t work unless you have a positive to make the mold out of, which I won’t.
In the case of the wing I wouldn’t vacuum bag, but I do have a vacuum system that mostly works.
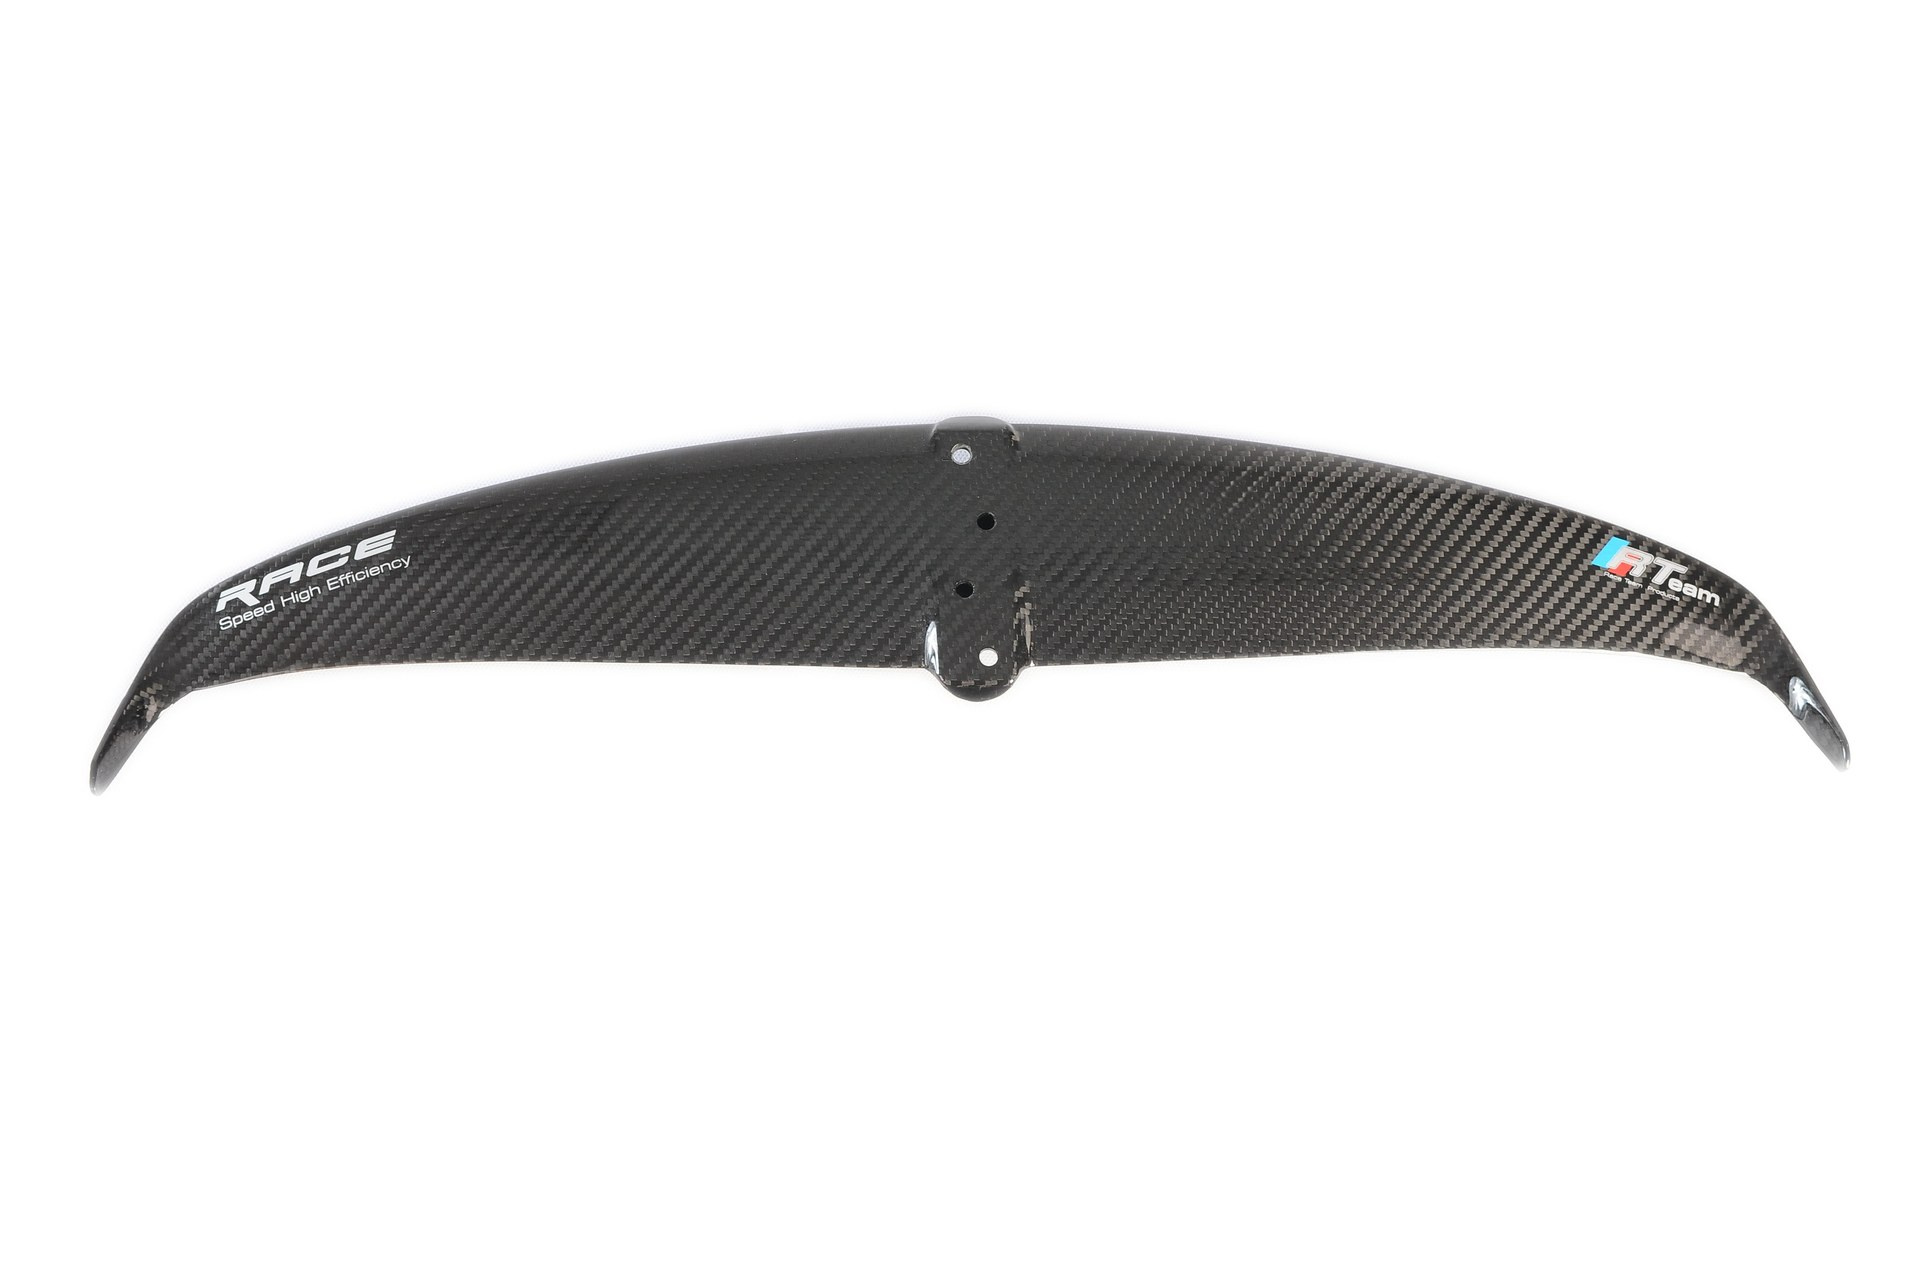
especially for a wing… making a clean mold with the right shape will be much more difficult than making a dummy wing and building a mold from it…
I build my first complete foil with wood cores and carbon around it, and then I did a complete one with mold only.
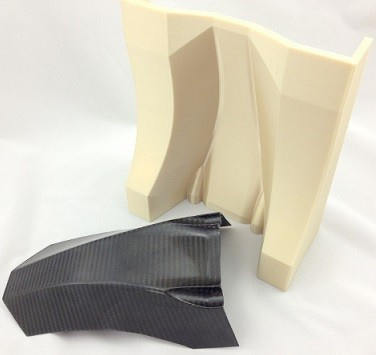
below is the wing example:
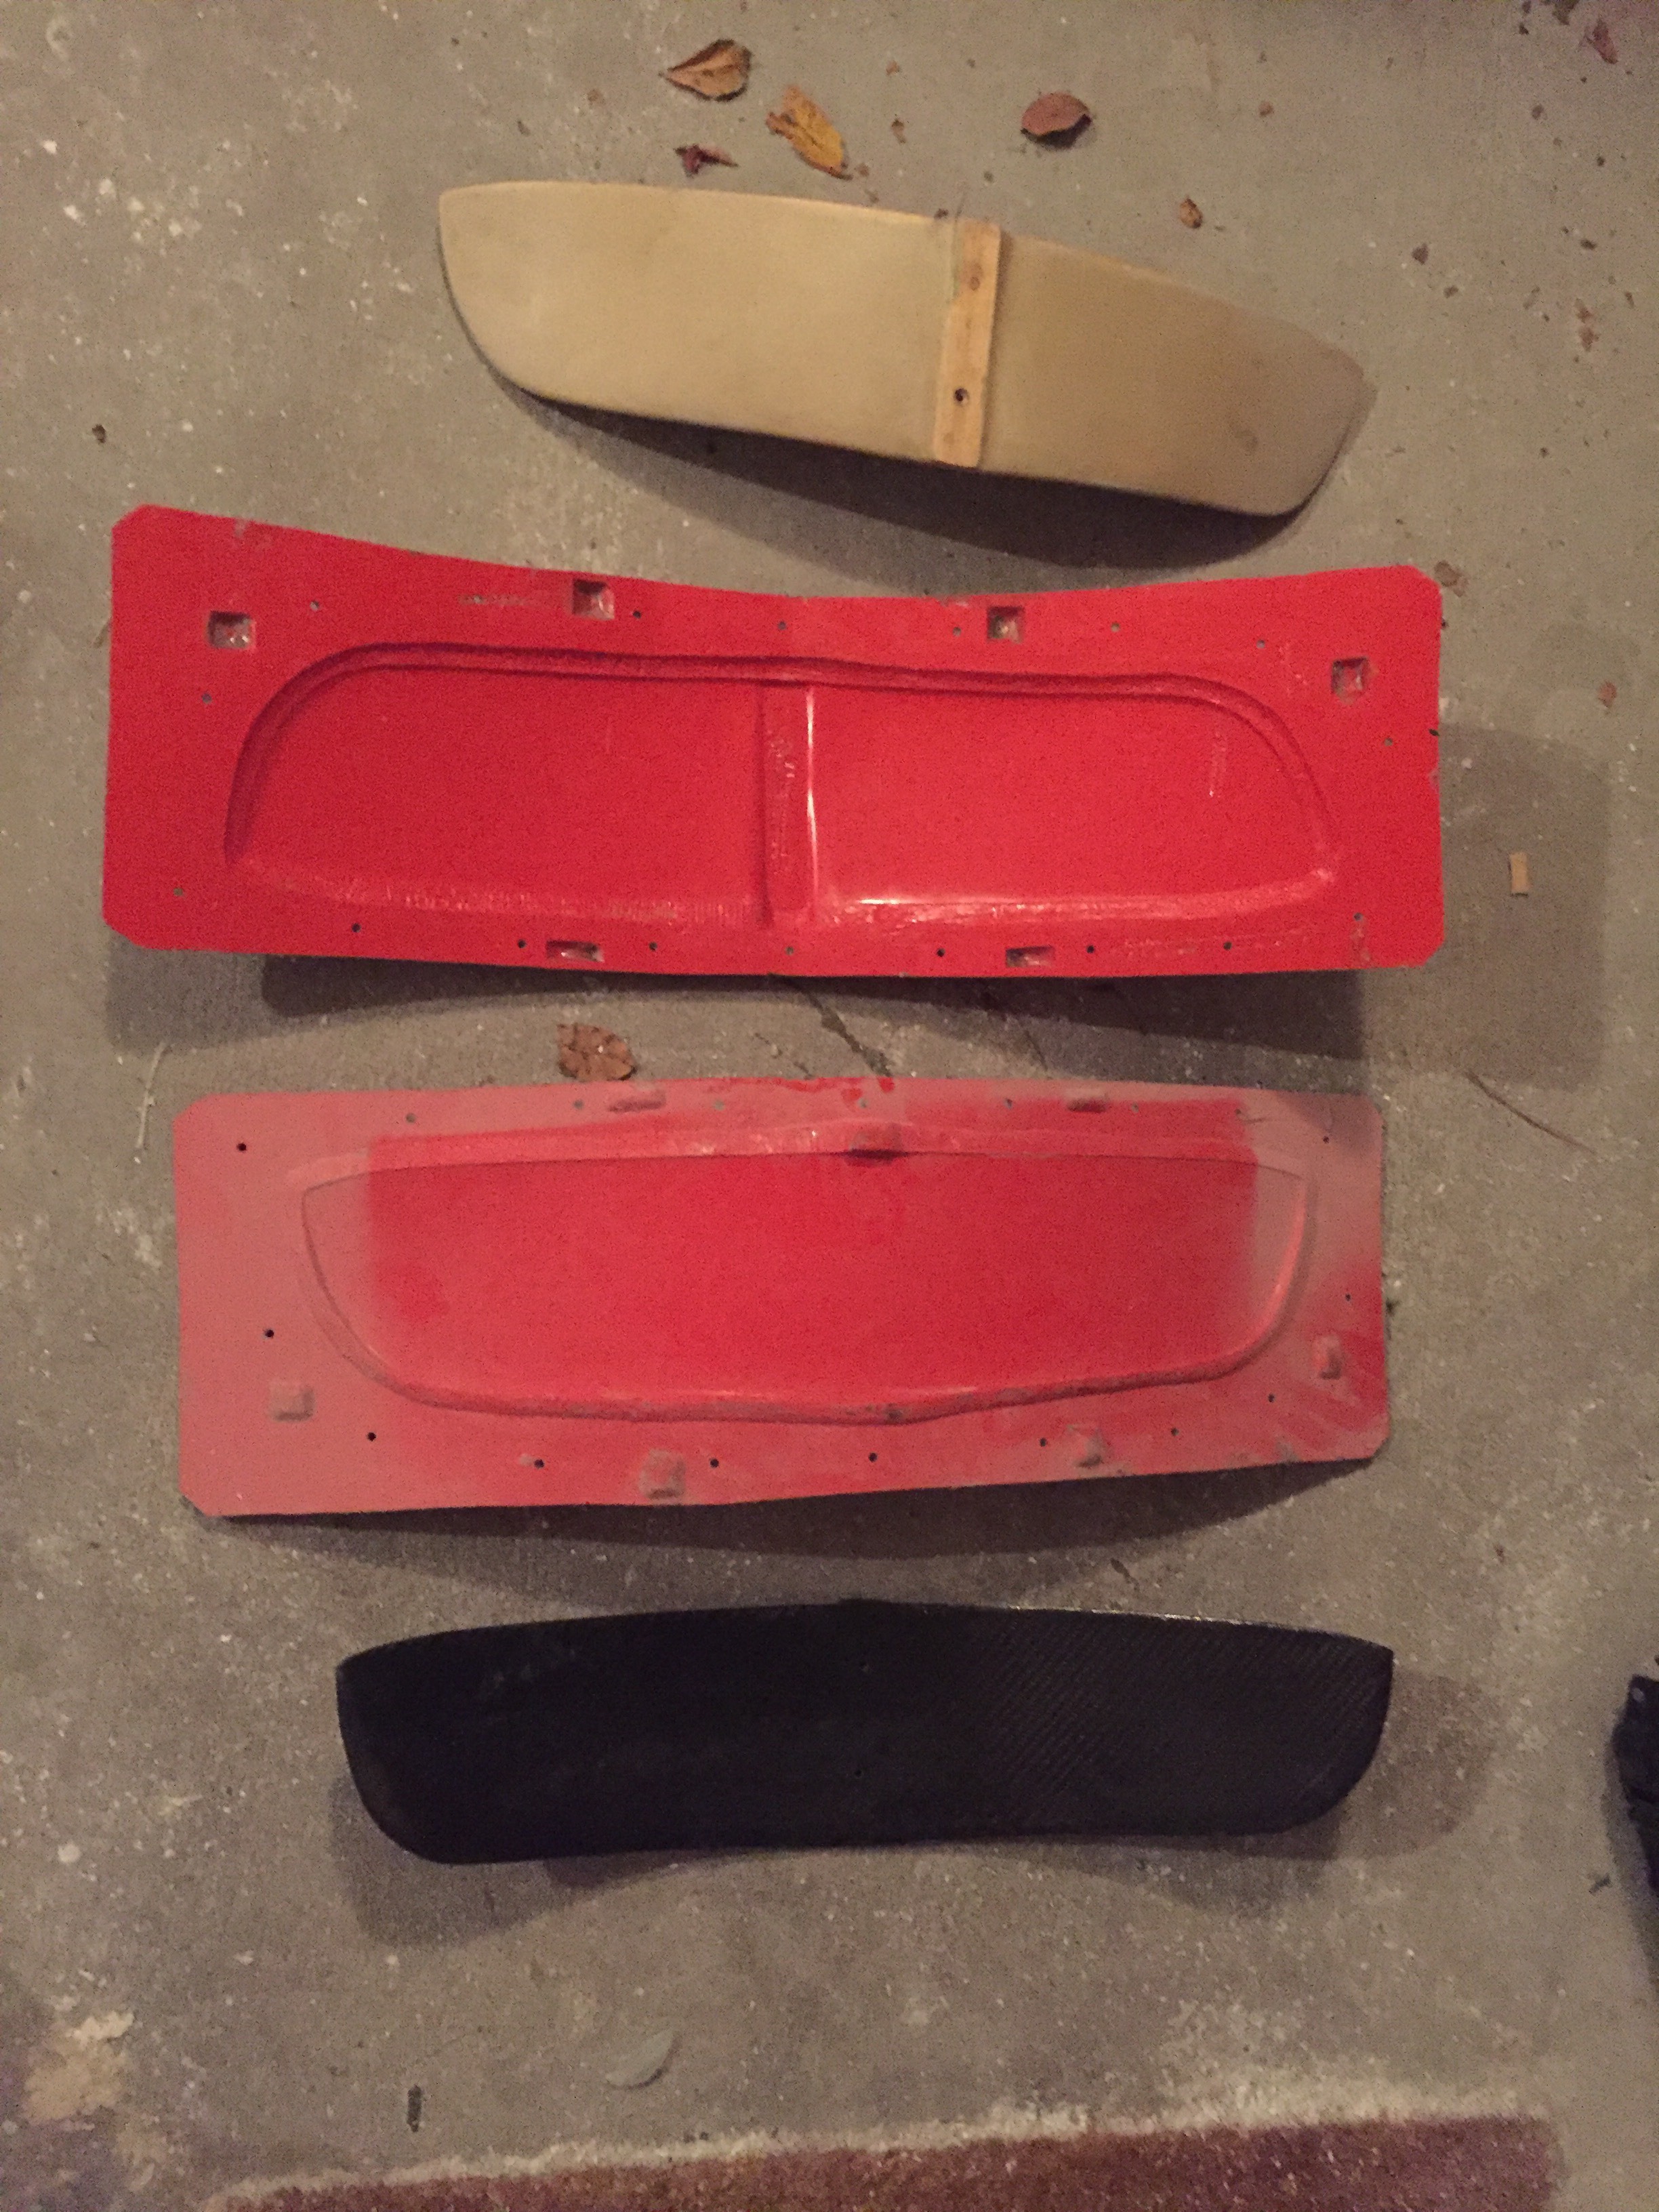
The creme colored is the dummy wing: rough shape in wood (thin layers of wood glued in shape and sanded down) then I used bondo to get close to the right shape and finally some epoxy mixed with filler to get the final shape and finish.
The 2 pieces mold: a couple layers of gelcoat on the waxed and PVAed model, and the fiberglass mat. and some thin foam strips between the mat layers to give some rigidity.
Finally for the final part I molded both sides separately with vacuum, trimmed and then glued them together.
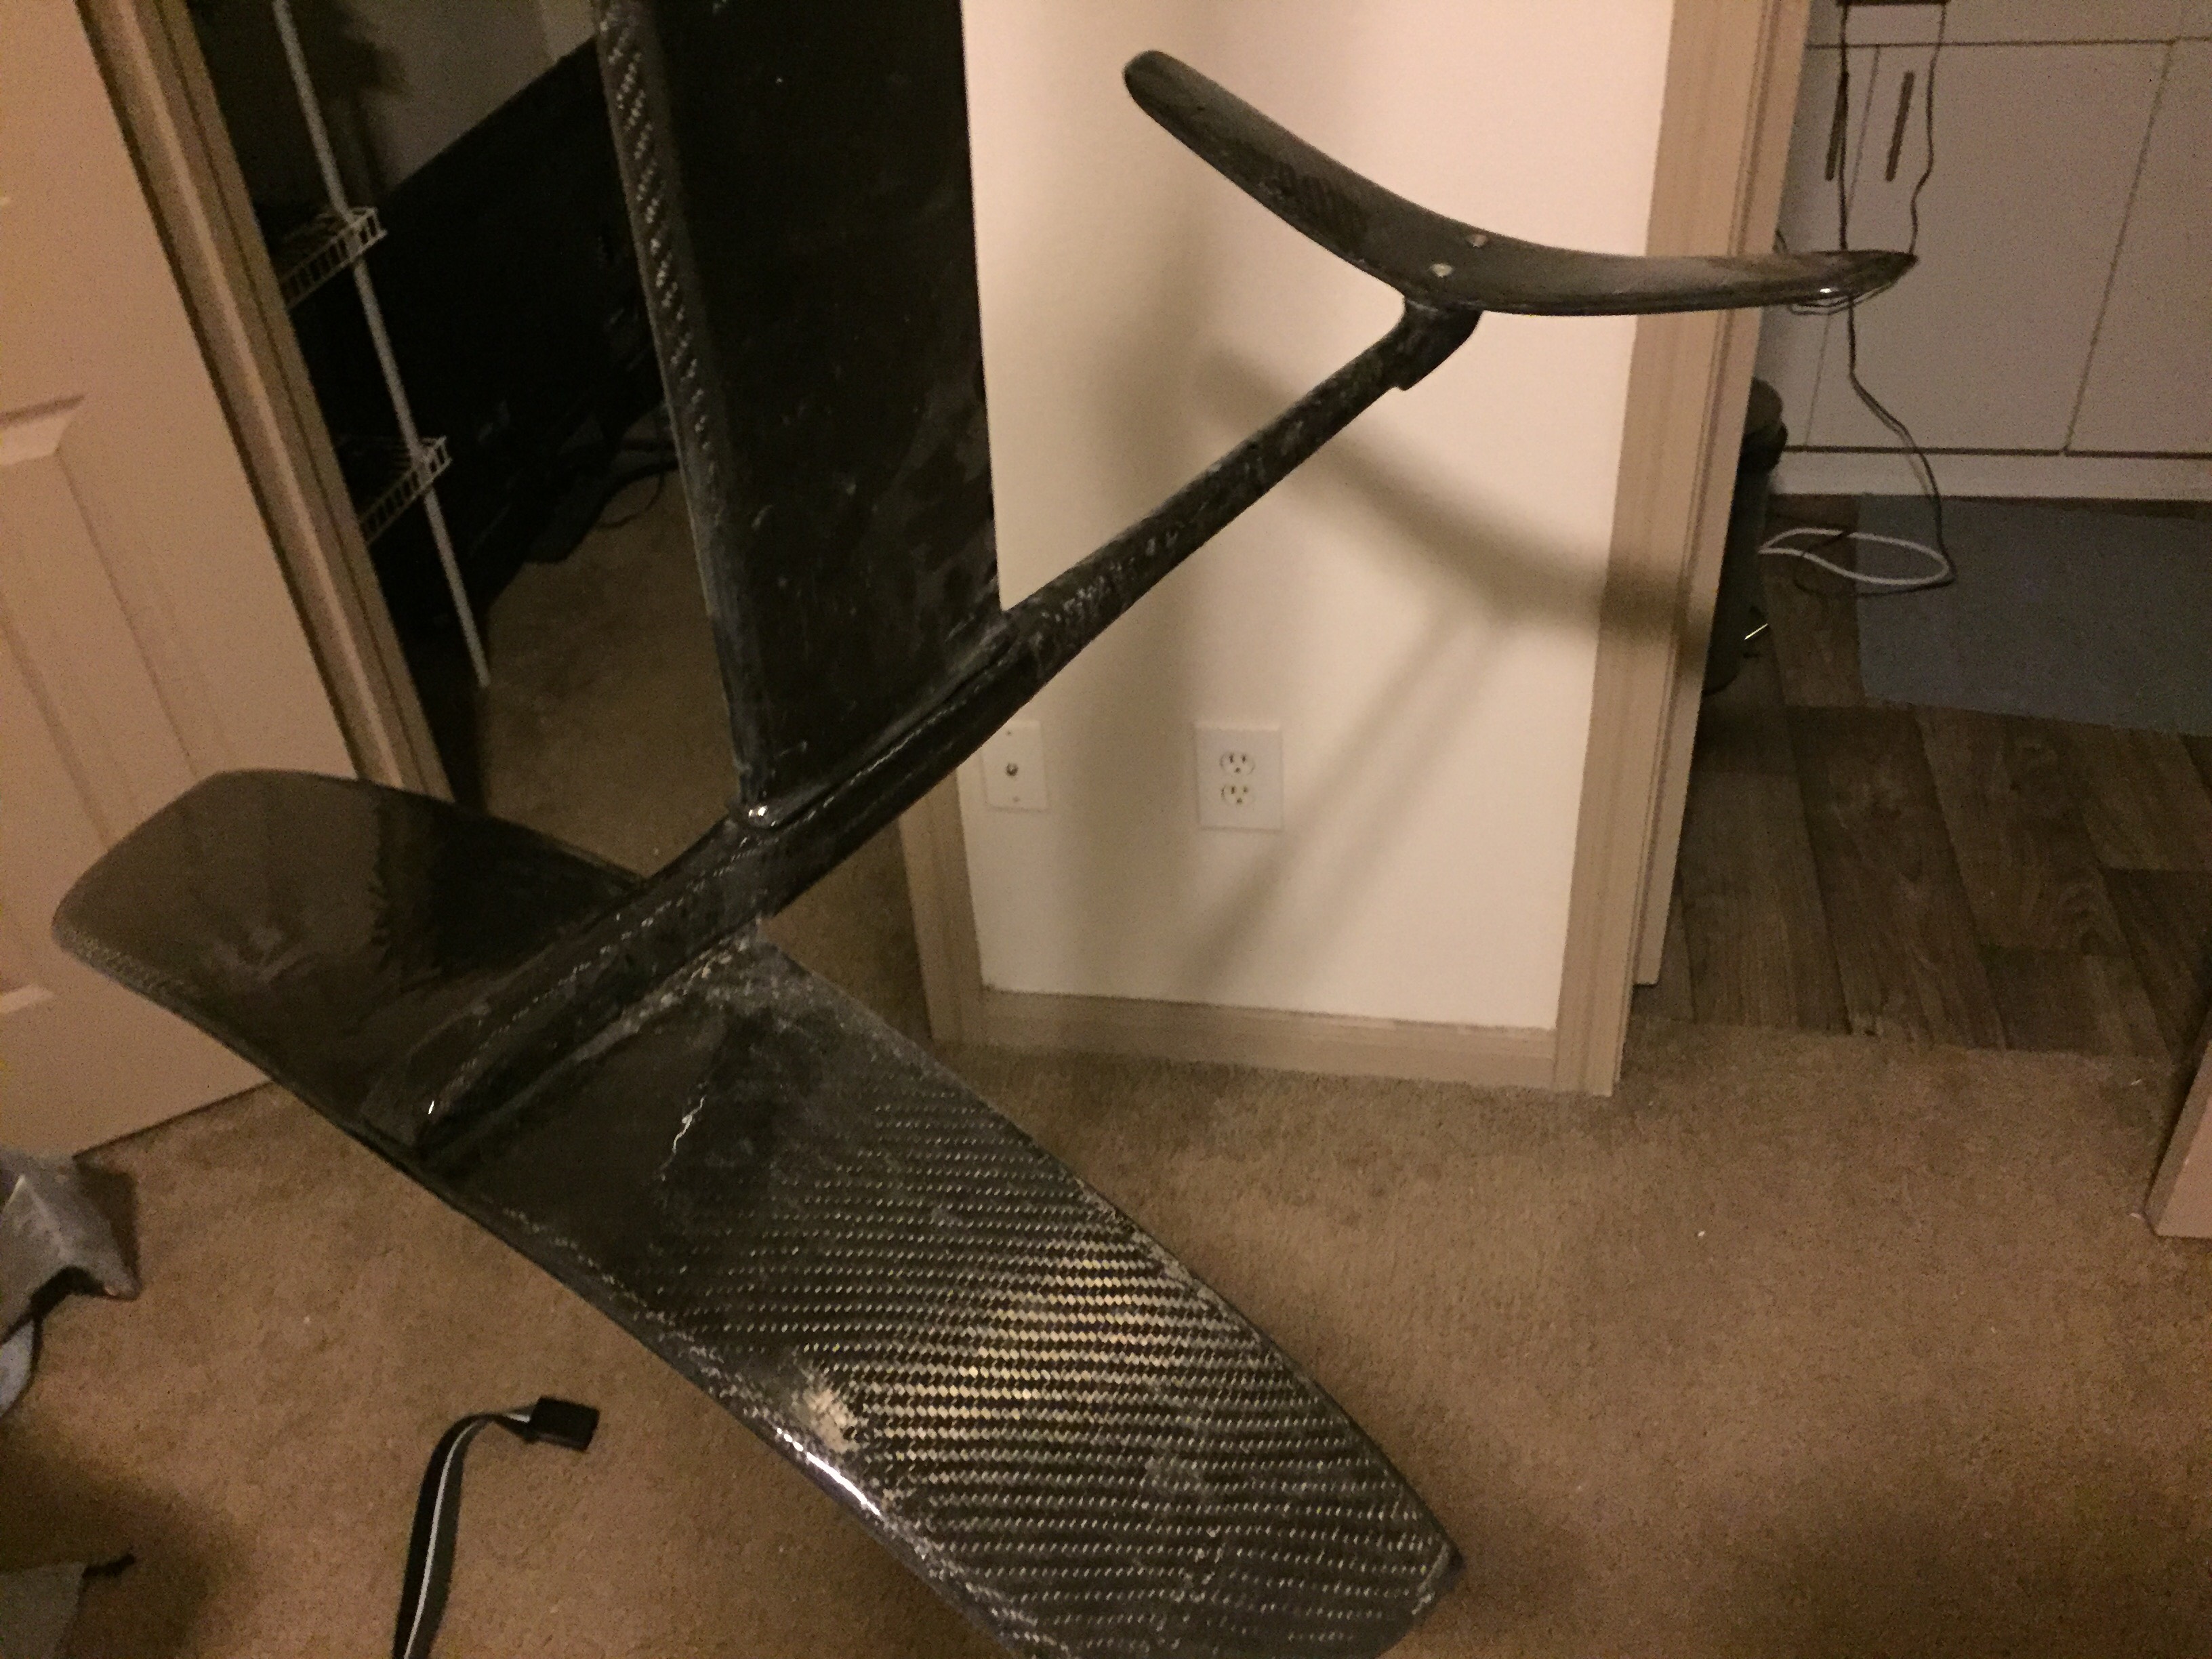
and that’s the finished foil, not the cleanest but it worked for a while for kite foiling… I had rigidity issues at the mast-fuselage and. fuselage wing connection… but it was crazy light
If you have a 3D printer than you could just print the mold directly and smooth the surface out. Or you print a dummy and make a mold out of it.
Cheers
+1 on the mix gently.
For regular glassing, when I do surfboards, I don’t degas, just mix gently and no problem.
If you want to vacuum bag, you can find some epoxy that is less viscous than others, it will help flow everywhere… also, be careful that your bag really presses everywhere even in tight corners. If the bag bridge corners, you’ll likely end up with dry spots…
I made some negative form 20 years ago with my self built cnc and self written software under DOS.
I made some very light wings for a hand launch glider which were shaped eliptical, so the wing tips were bowed and cut back eliptical. It flew rather good. But at the first try i had a severy problem:
I built the forms of styrodur, covered wih epoxy and milled again, sanded, polished, applied wax solution and that was a big mistake. There were small cracks in the epoxy and the wax solution ate up the styrodur beneath. I still managed to use the forms somehow and made my first wings.
The next form was glas fiber reinforced and i applied thickened epoxy to give some meat for the following milling process. But also here i had to epoxy a second time to get rid of bubbles and mill once more, a process taking up to 14 hours without interruption.
The result was amazing: I got a complete hand launch glider with under 200g, the wings weight was below 100g, at a span of 1.5m. The wings could be twisted against each other to provoke rolling, or together, so the tail was completely passive, without any flaps, very light, so the plane was very responsive.
Later i made a flat negative wing out of some nylon or PP on a mill. That was very sucessful. It was a middle part fitting to the hand launch glider wing and i built a 2.25m span glider with twistable outer wings.
This material was nice to mill and to sand and polish and it was separating perfect.
I also used Poly vinyl alcohol as an additional separator. It is a solution, but alcoholic, not eating up styrol. It builds up a closed film and is water soluable afterwards. All forms treated with that were unforming without great effort and gave a perfect finish.
I mostly used 90 minutes epoxy at that time. I used to press the forms together with M10 threaded bars and around 10 bar clamps and large wooden support bars. I estimate the force to 1500kg.
I always let cure for 24 h. then i started a heat treatment by hanging the complete construction above an oil fired oven to reach a temperature of around 70°C for 5-10 hours. Cooling down inside the form is also a good idea. Let it rest for some hours before you start to separate.
Especially for continuously bended wings this directly build of negative forms has potential against the traditional way of building a positive form first. It is easy to process the parting surface in the mill as an integral part and its precise.
Please try it. But i recommend not to use foam and glasfiber. Its a health issue to mill and sand glasfiber. I let a vacuum cleaner run the whole time when milling and i sanded under water only. Invest in a thick nylon or PP sheet and reinforce the back with at least 20mm plywood.
I’m building a downdraft dust collection table this weekend - about 20 x 40". I did a little bit of sanding of the CF part last week and that black dust looks truly scary… I was also going to switch to fiberglass for the battery and control box insets in my board - it seems better than CF for this application.
I guess I’ll be sanding the fiberglass outside with a mask
bind the dust by cooling emulsion while milling constantly instead. Much more effect also on the cooling of the tool. Glas fiber are hard to mill, very abrasive. Carbon is not really better and Kevlar is worst. My tools are always round.
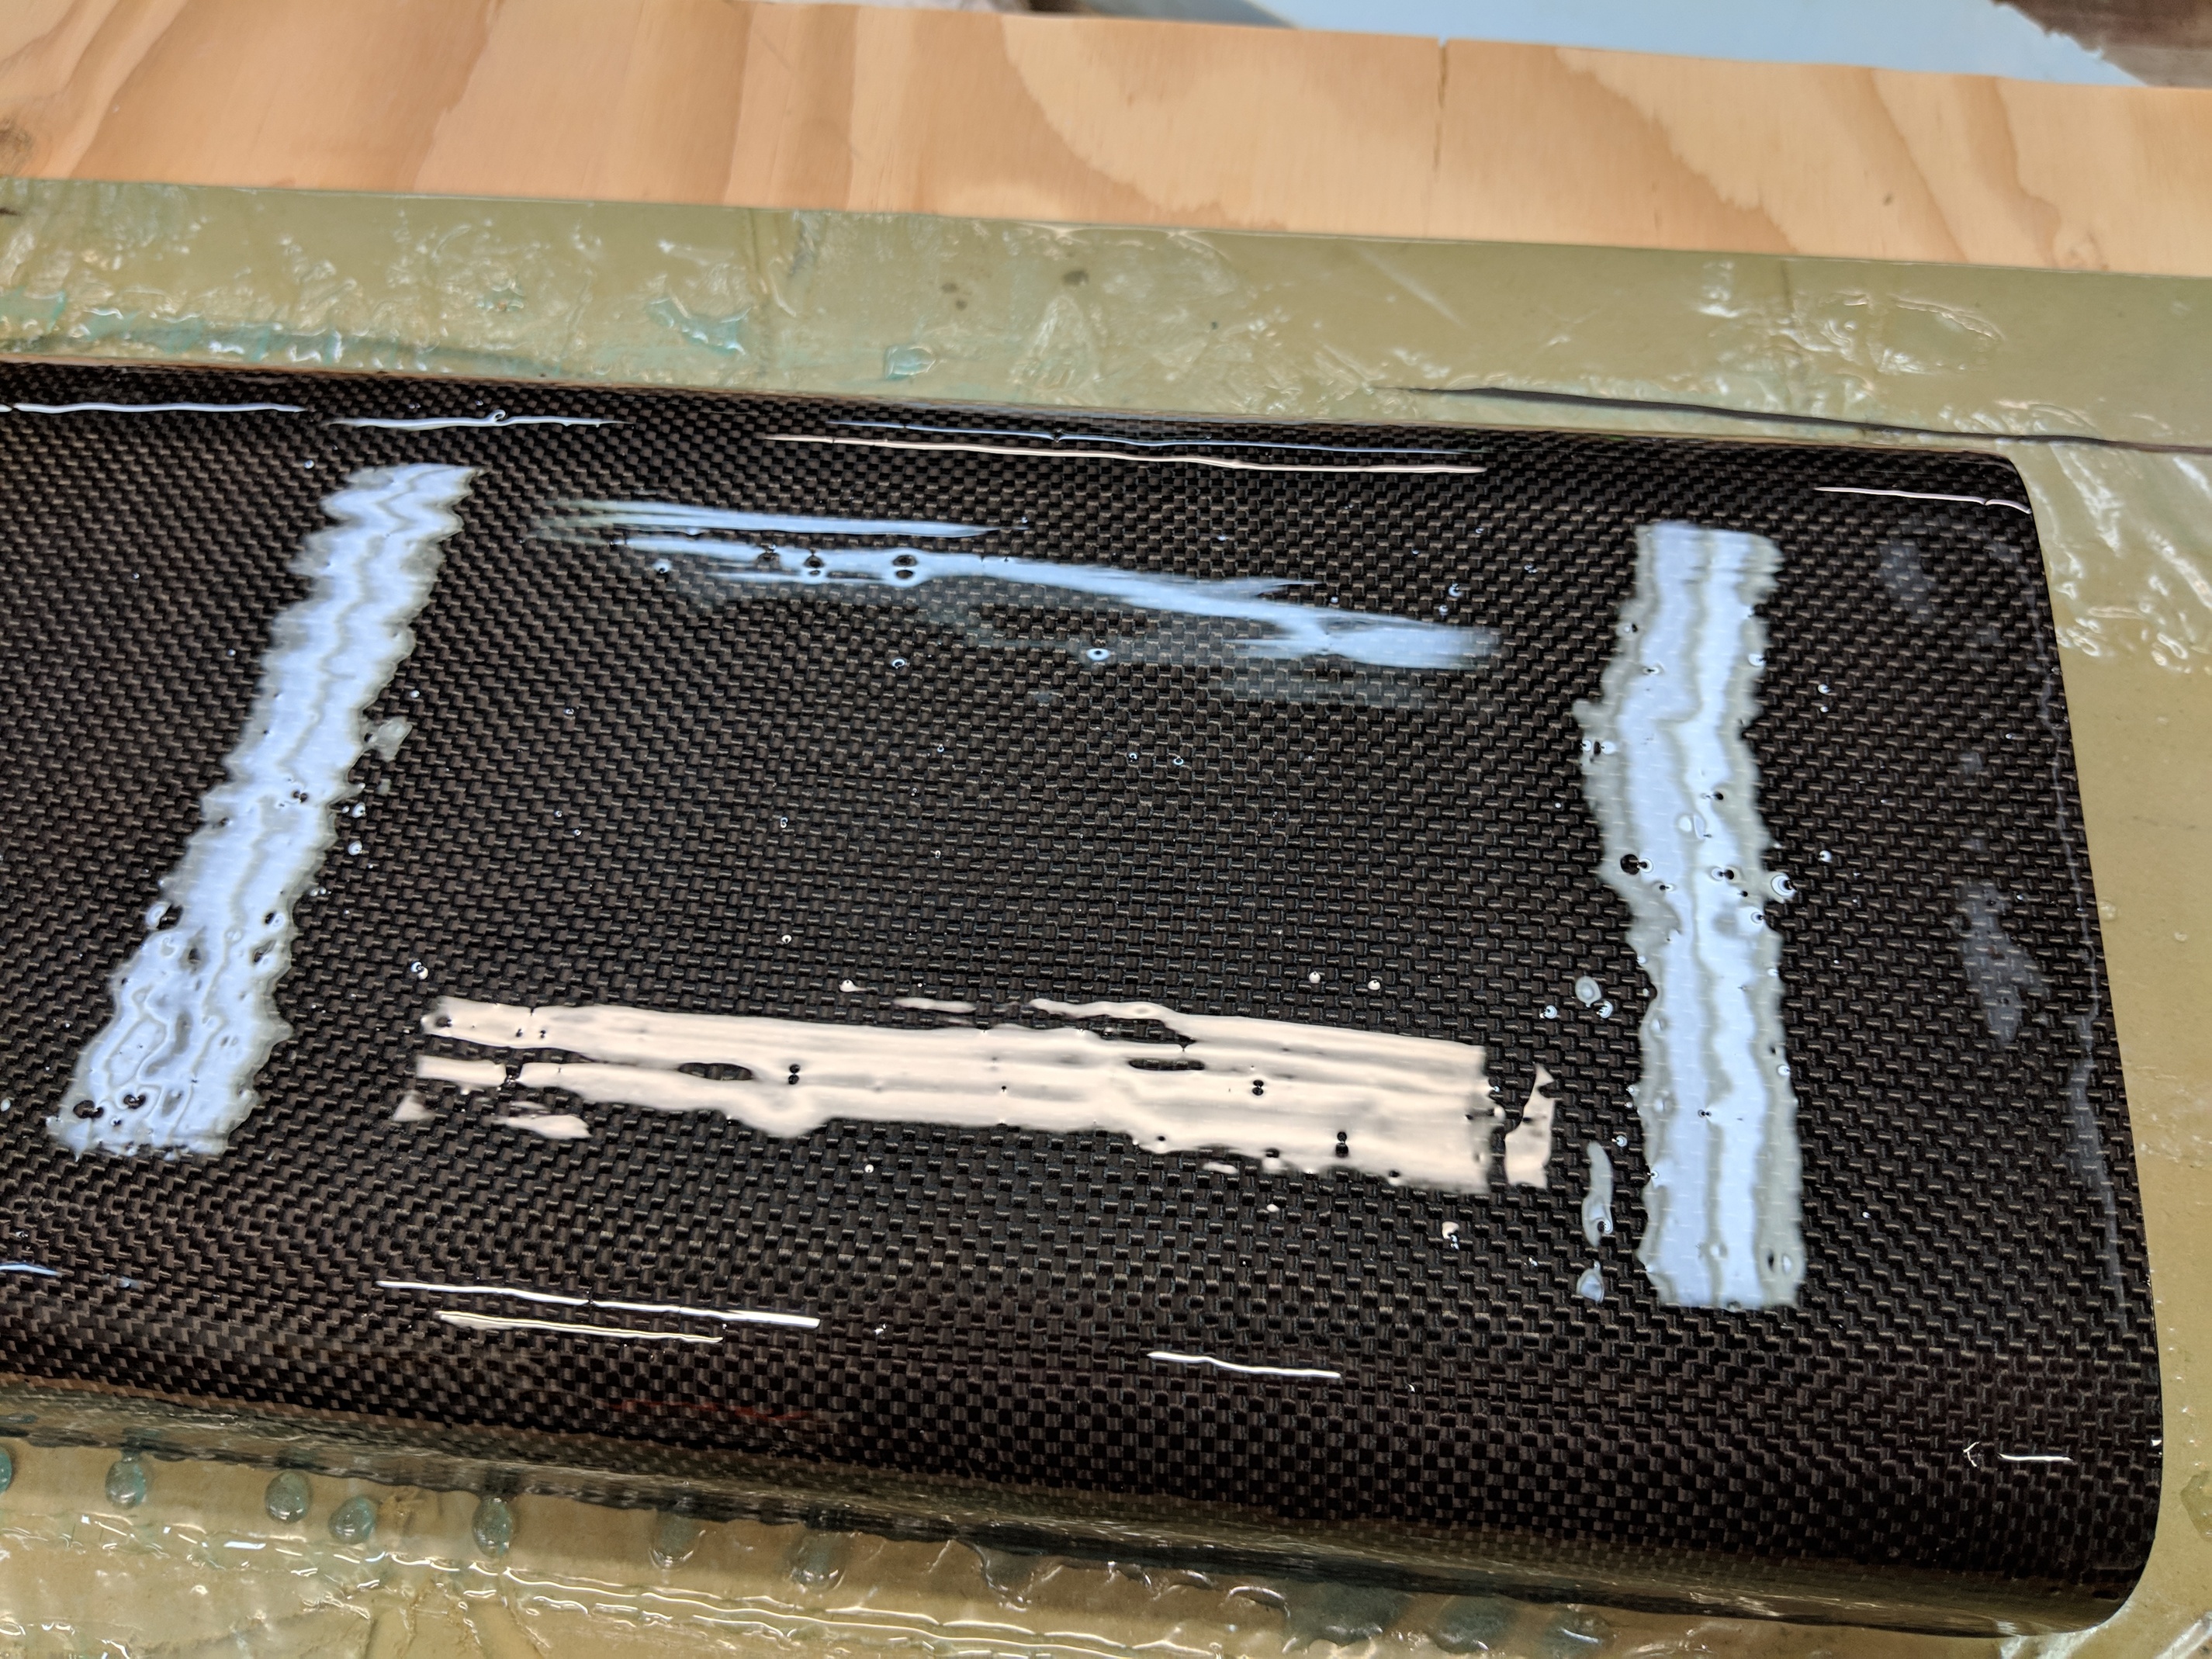
No matter how careful I am in the brushing on of the epoxy I seem to get these bubbles and little divots. I watched a youtube video where the guy said to just hit it with a heat gun. I thought maybe I was too close, or too hot, or too cold or too fast, but no matter how I applied heat It just created more bubbles.
It doesn’t seem like brush hair left behind, but just in case:
I use the same kind of brush, and they tend to loose hairs…before starting, it’s better to “brush” the sticky side of some painters tape pressing on the hair hard on the tape. And all the loose hairs will stay stuck on it. One less thing to worry about.
Next you want to quickly sand your part, I had fisheyes like that on top the parts not sanded.
Now you need to start using gloves to touch the part… to avoid living contamination from greasy fingers
After sanding clean your surface really well, rub with alcohol, you can also run some kind of sticky rags (not sure of the name) to make sure you catch all the dust.
Using lint free rags is better to avoid leaving tiny piece that gets caught in the fibers that might have been slightly exposed by sanding…
It’s also best to avoid using compressed air to clean the dust as it might contain tiny drop of oil…
Finally some epoxies have additives you can add that can help get smooth final coats.
I’m not expert, but I had quite a few issues like that on surfboards,
you can either try to avoid them, or fix them afterward : sand the top coat smooth, get into the small holes as much as you can, fill them up with drops of epoxy, and sand everything back flat… and then get the shiny back with sanding and polishing…
I highly agree with all that has been said above. The only thing I have to add is that if you use high quality epoxy resin it’ll minimize the bubbling and the fish eyes. Also using a product called additive F will make a difference in the wet lay-up and reduce bubbling. I use Green Room epoxy and get good results.
Here this guy uses acetone spray for a mirror finish, I used it for the top coat on my carbon wing and it worked surprisingly well. Check out the video around 6 minutes in, well worth a try if your still having any problems : )
 The magic ingredient.