Hi everyone. Builder from New Zealand here, just finished my E Foil. It should have been finished several months ago but I had to move country and pretty much start again. Hopefully have some test video footage in the next couple of weeks.
Huge thanks to @Hiorth and @pacificmeister for being such great pioneers and for all of your help.
Tambien, muchas gracias a @virus, tus videos me han inspirado mucho.
And also a big thanks to everyone else on the forum for all of your ideas and information.
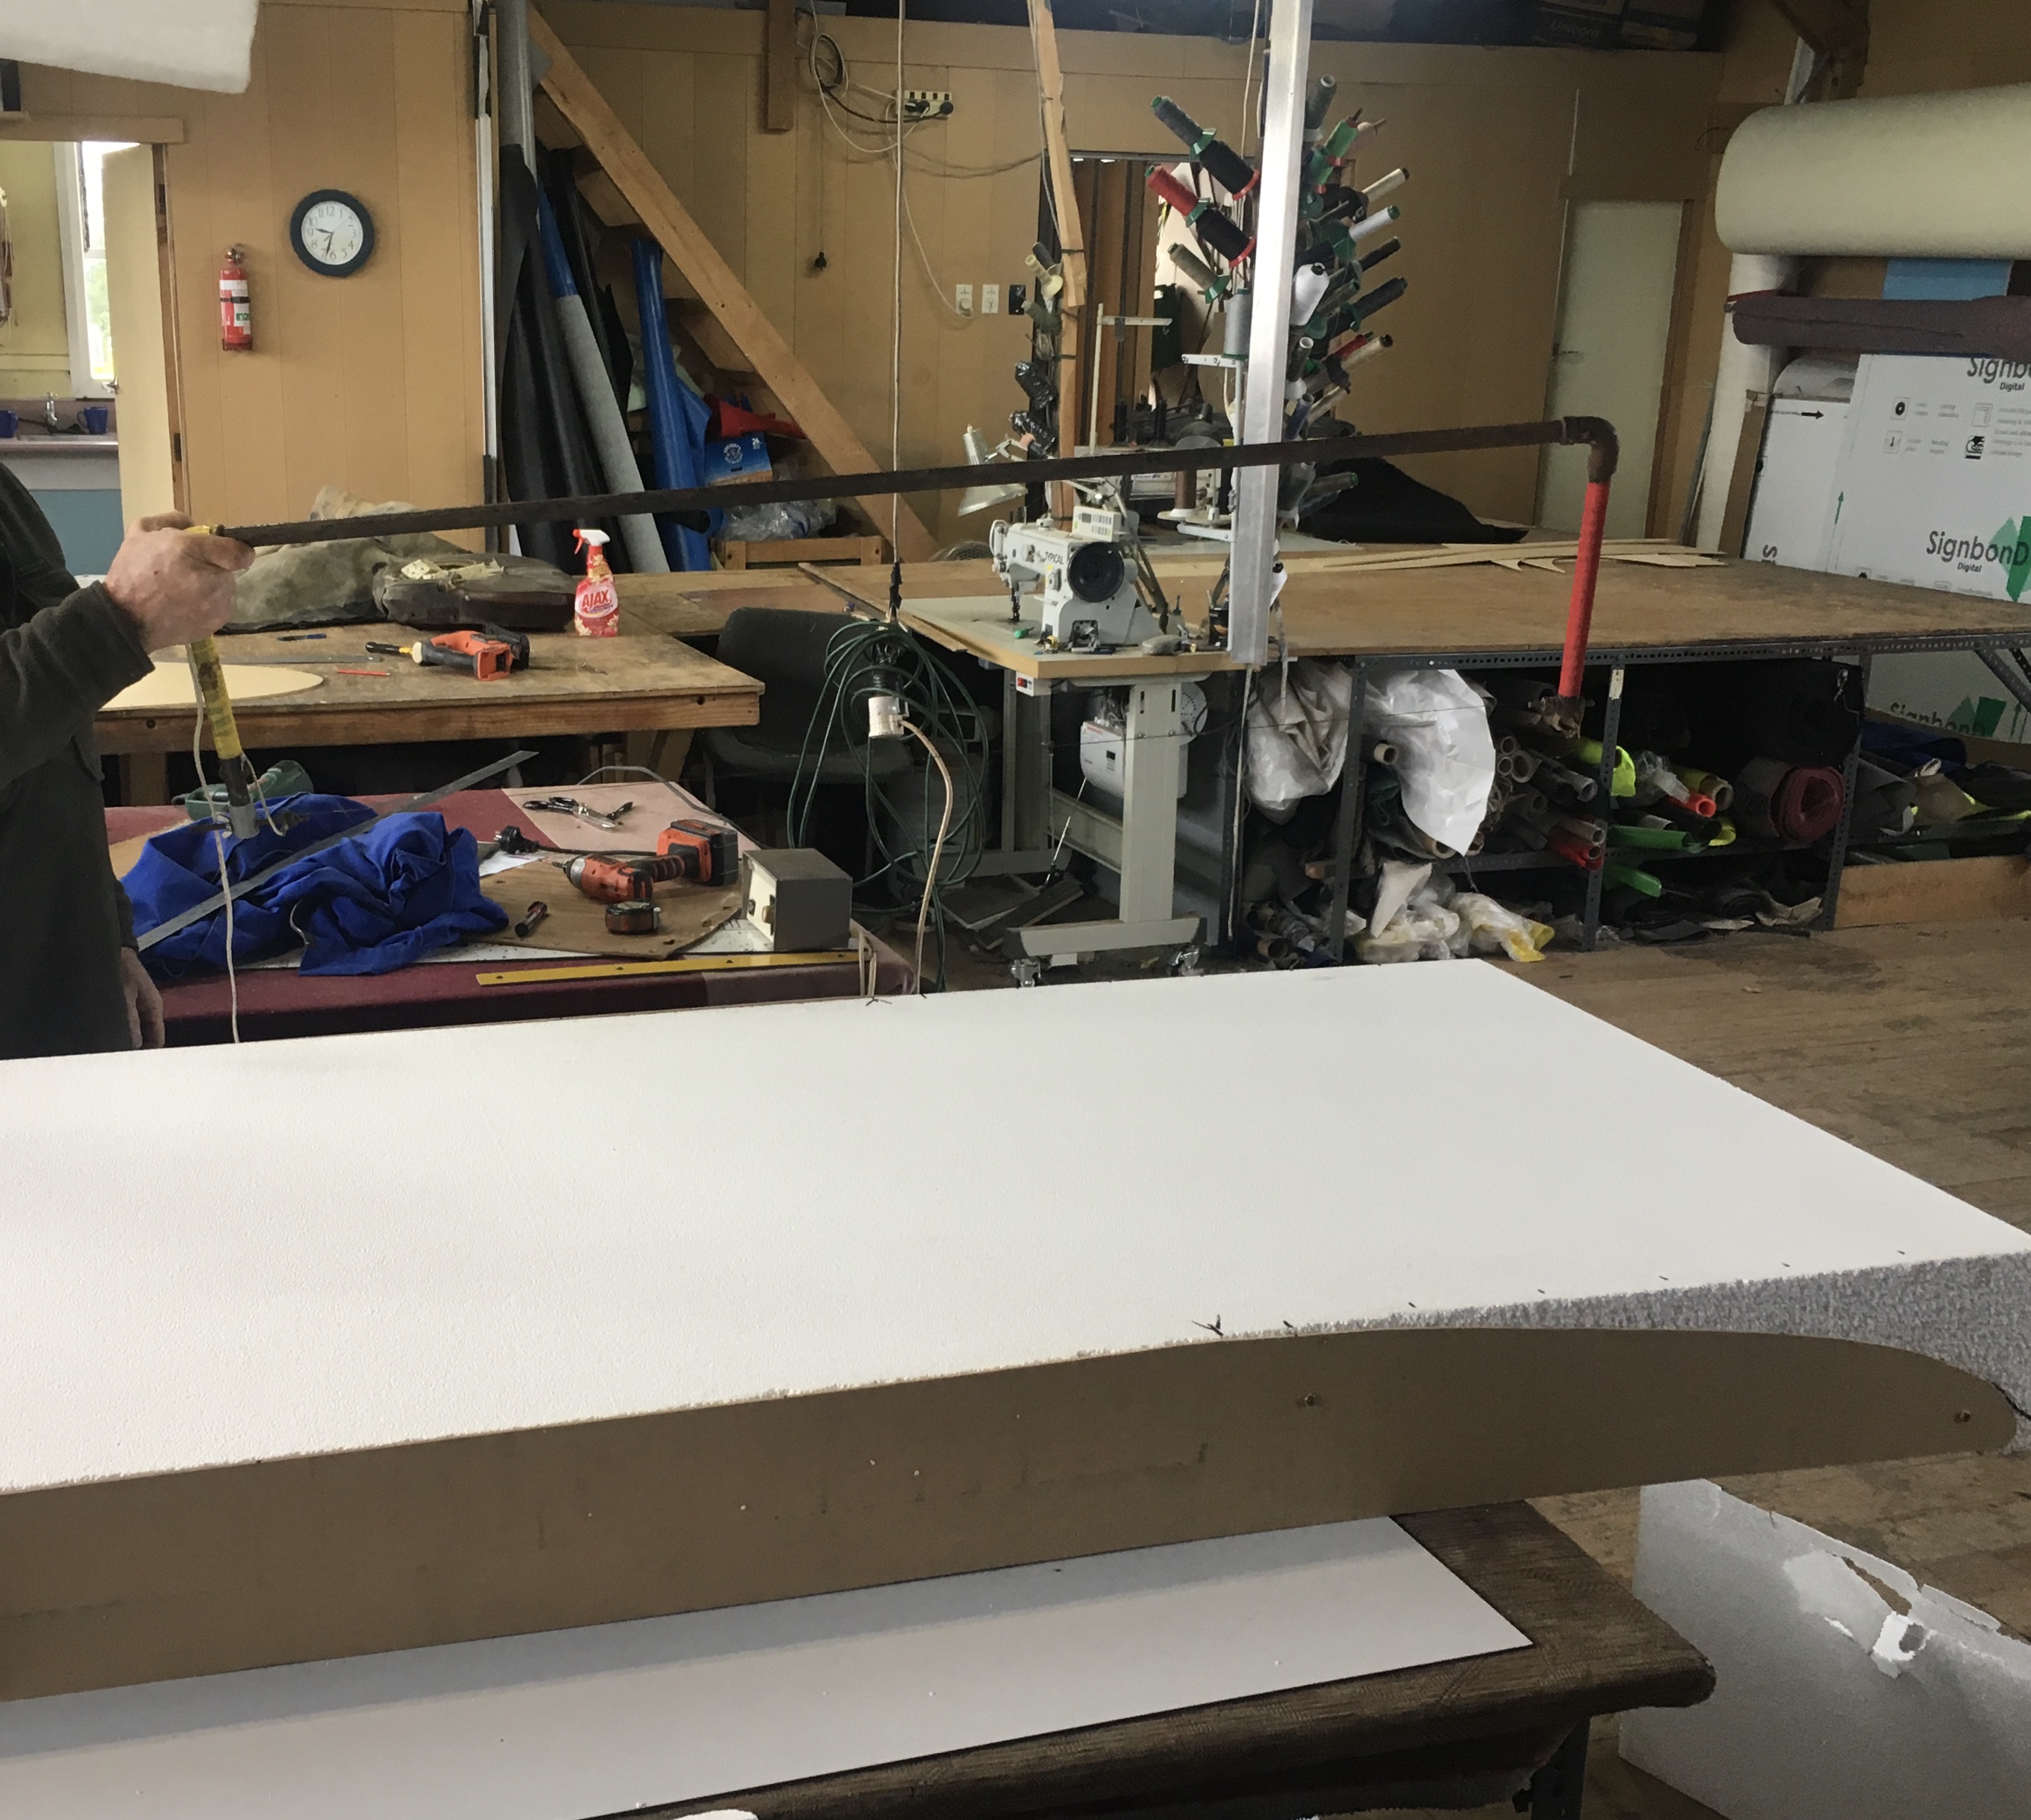
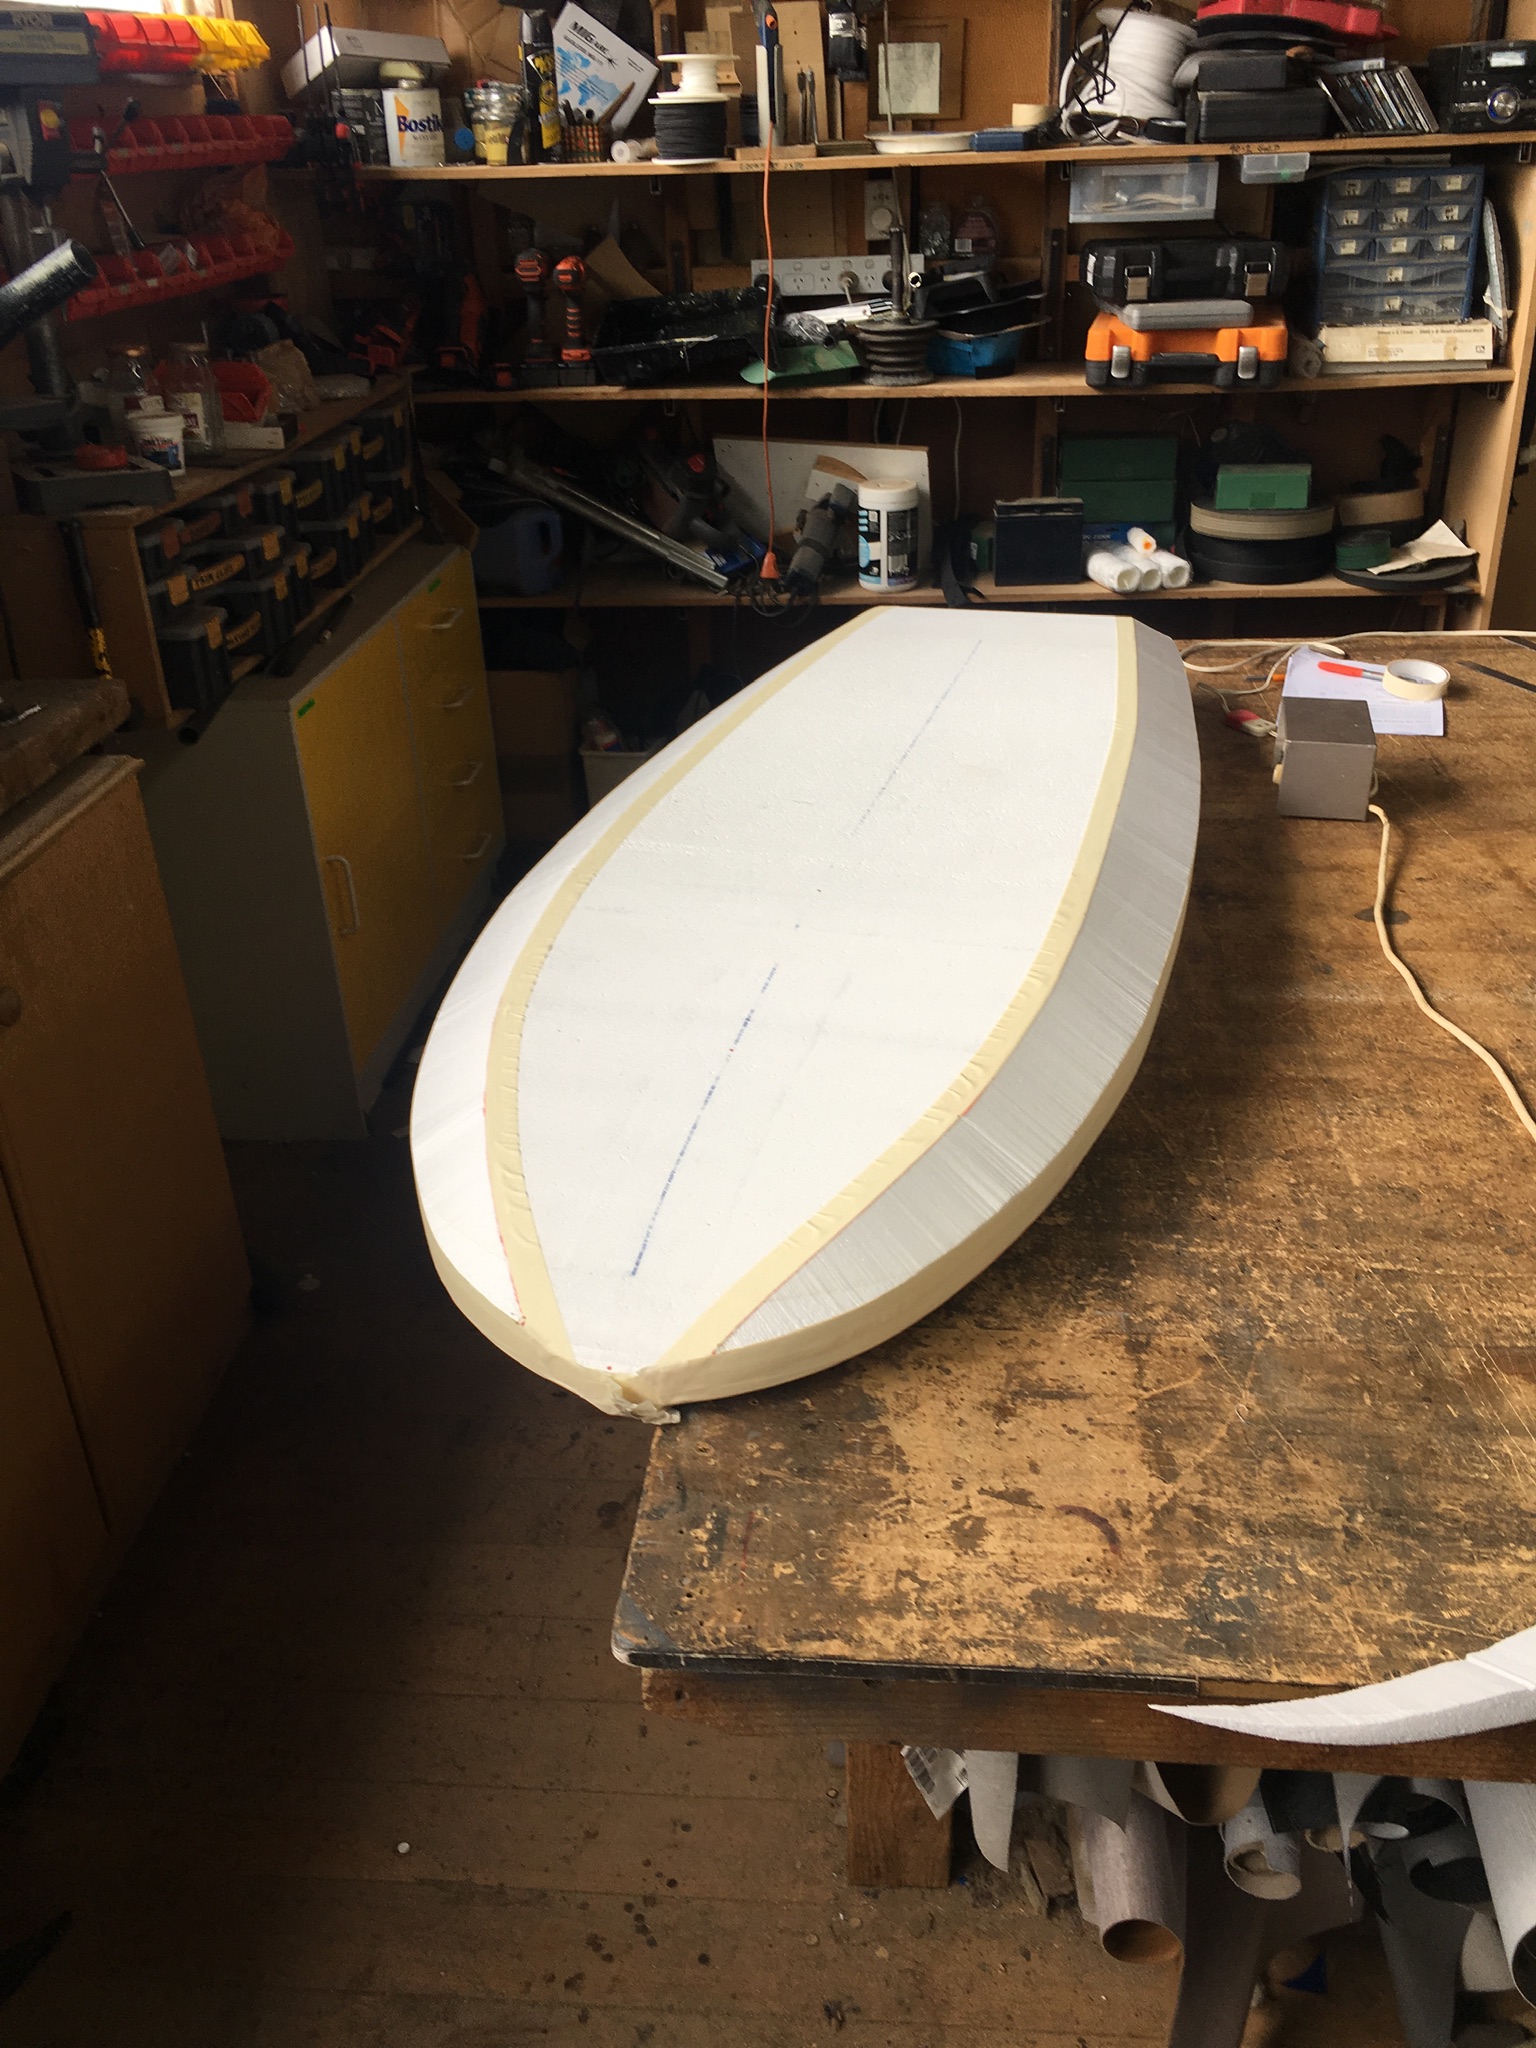
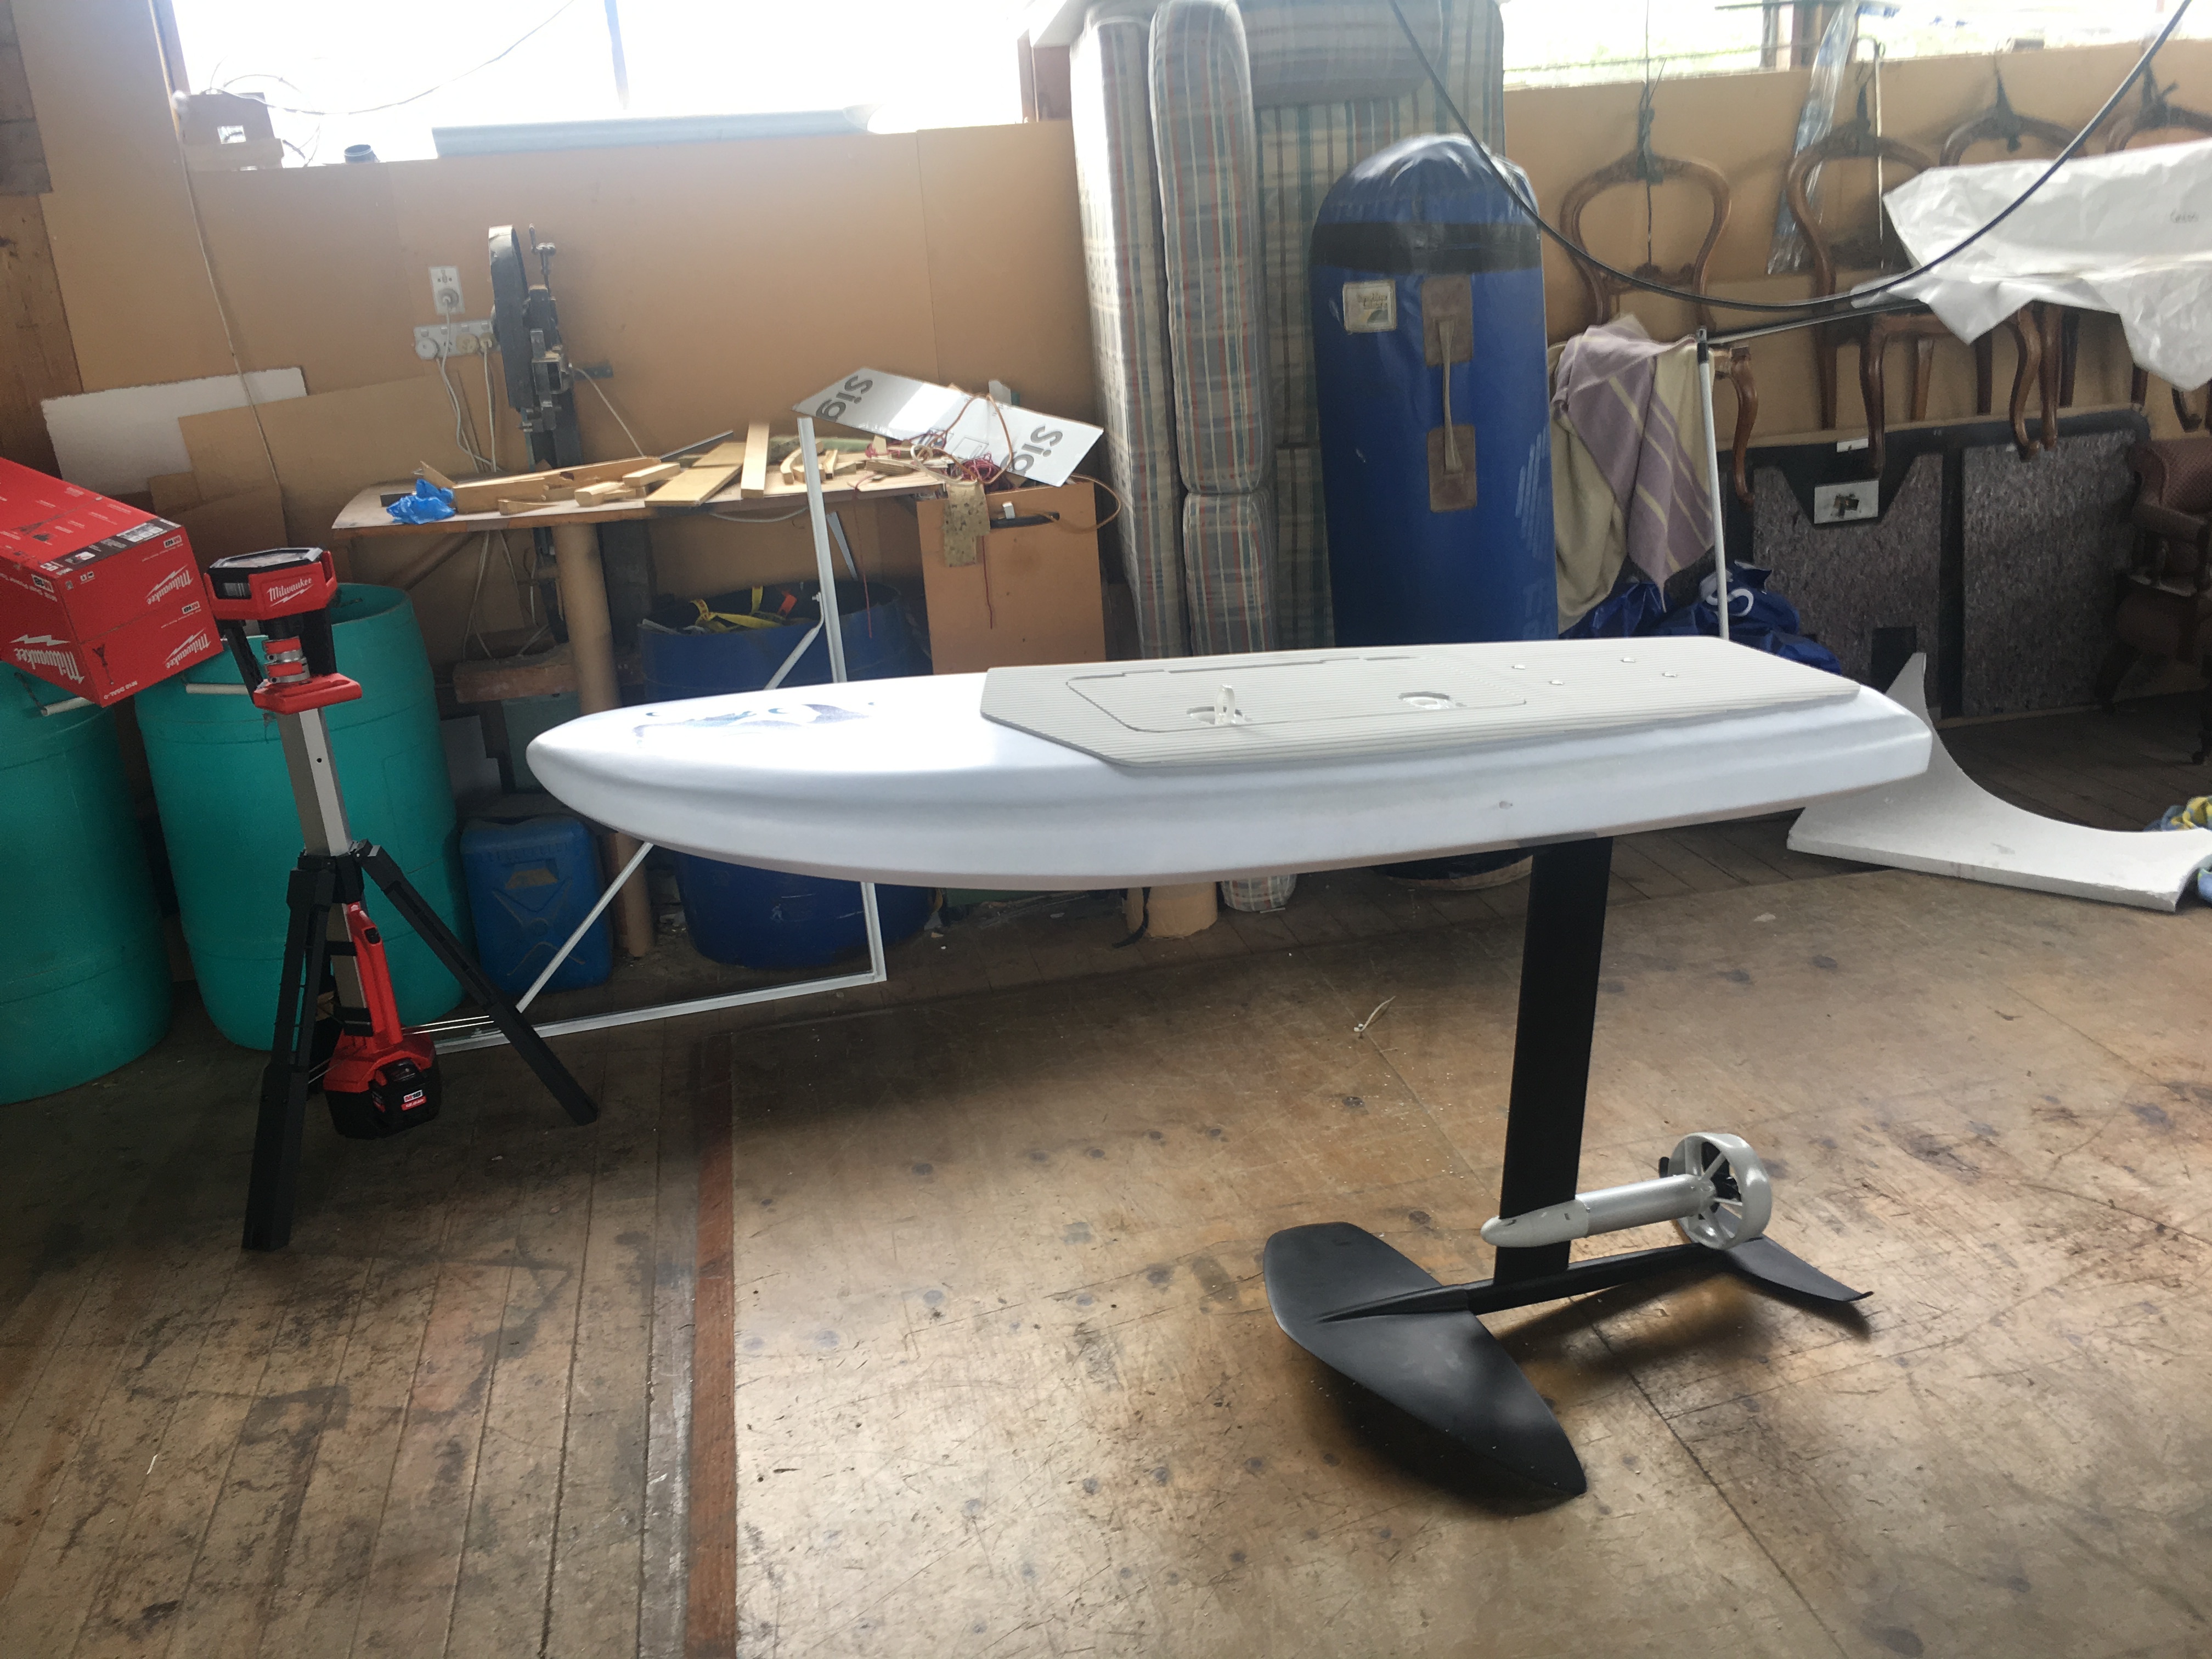
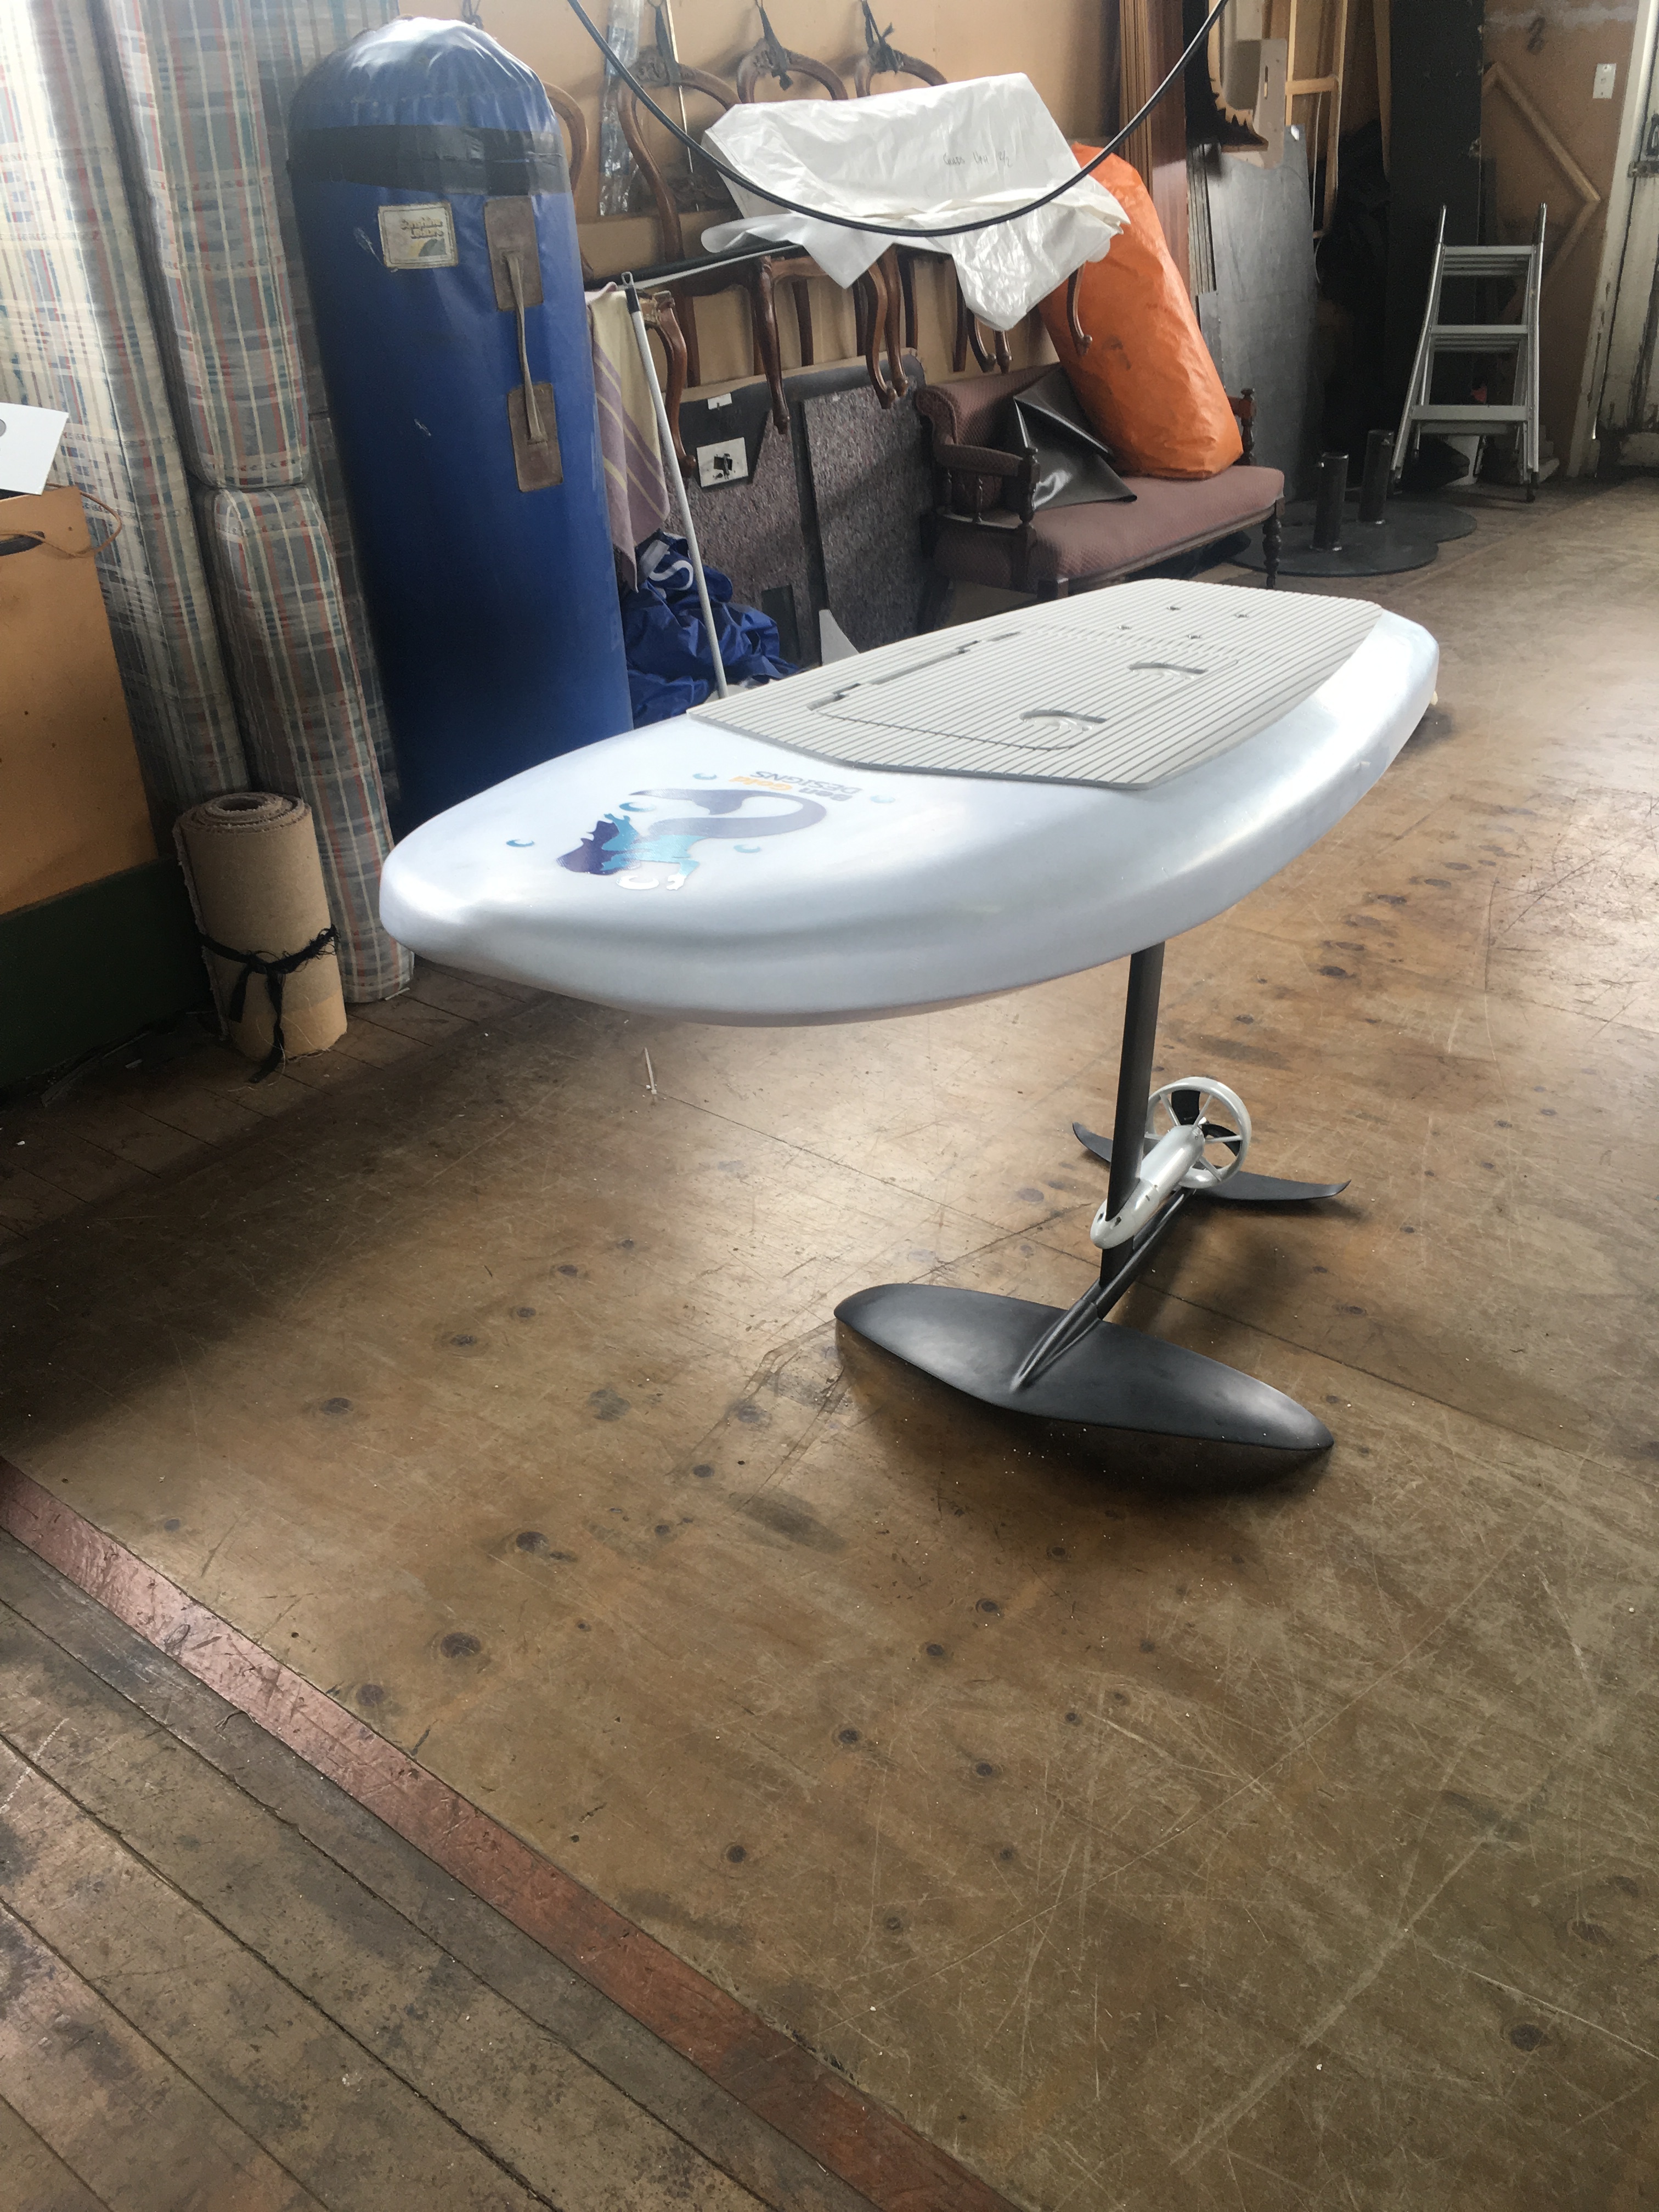
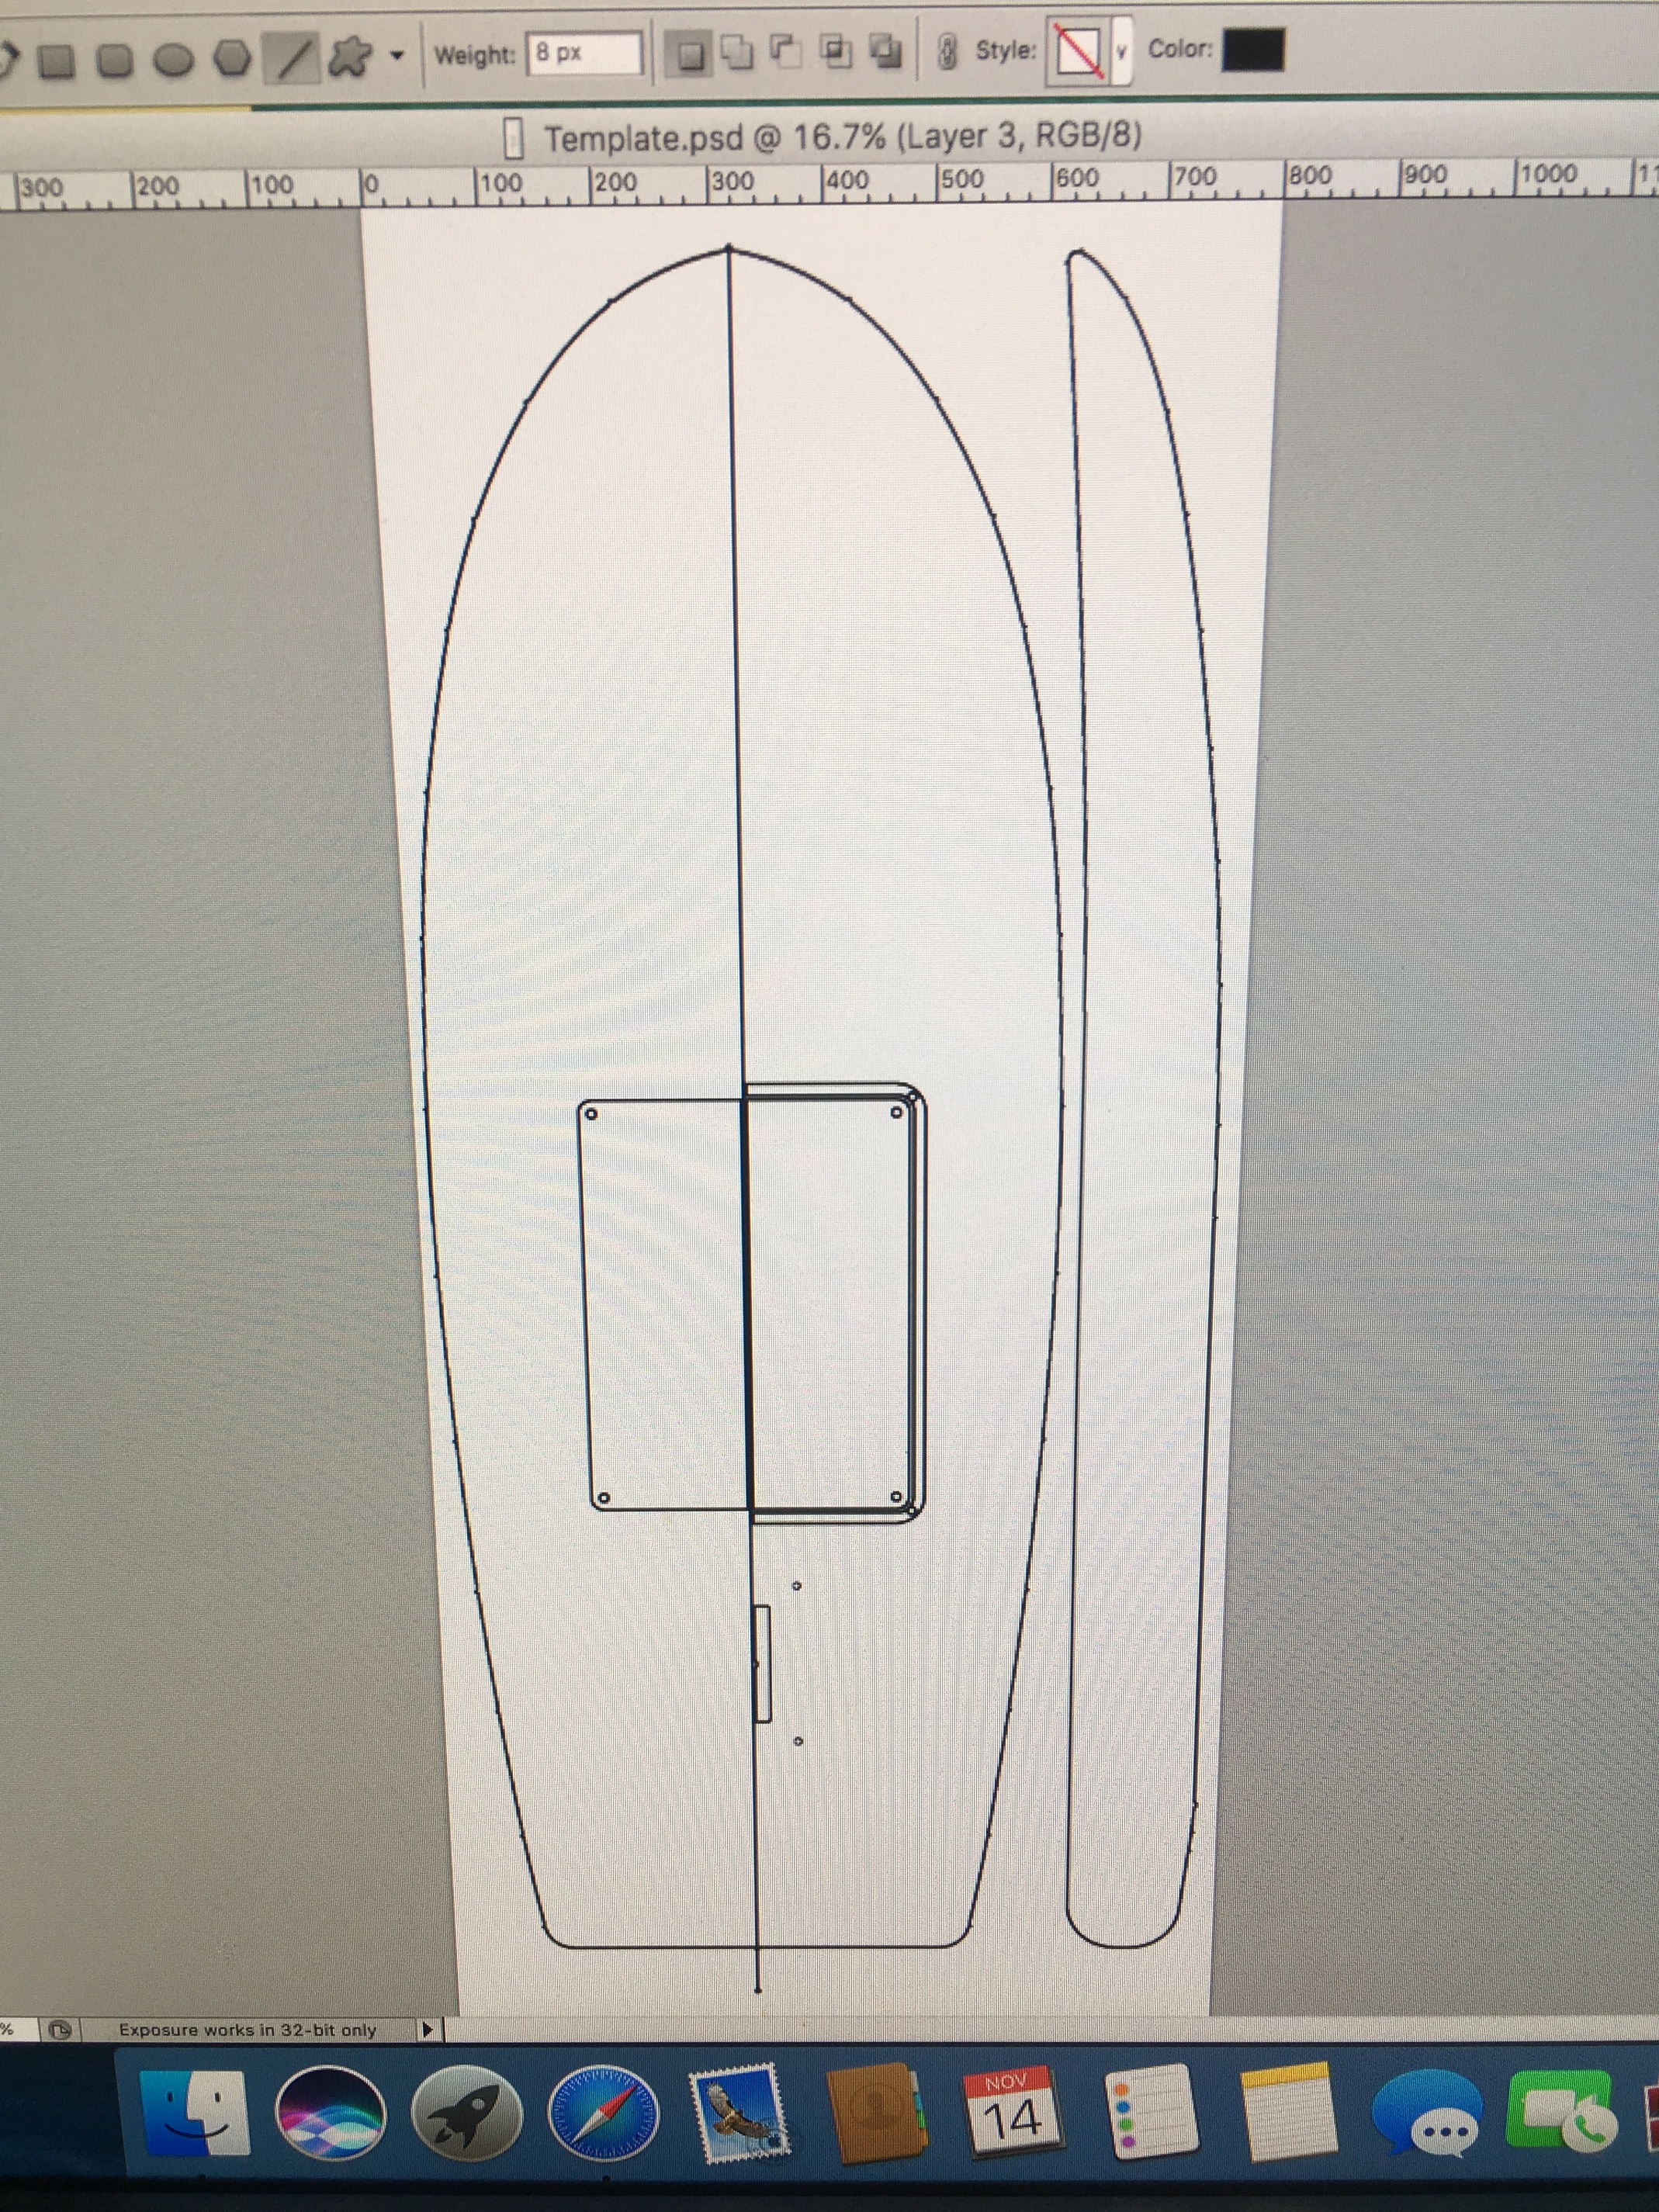
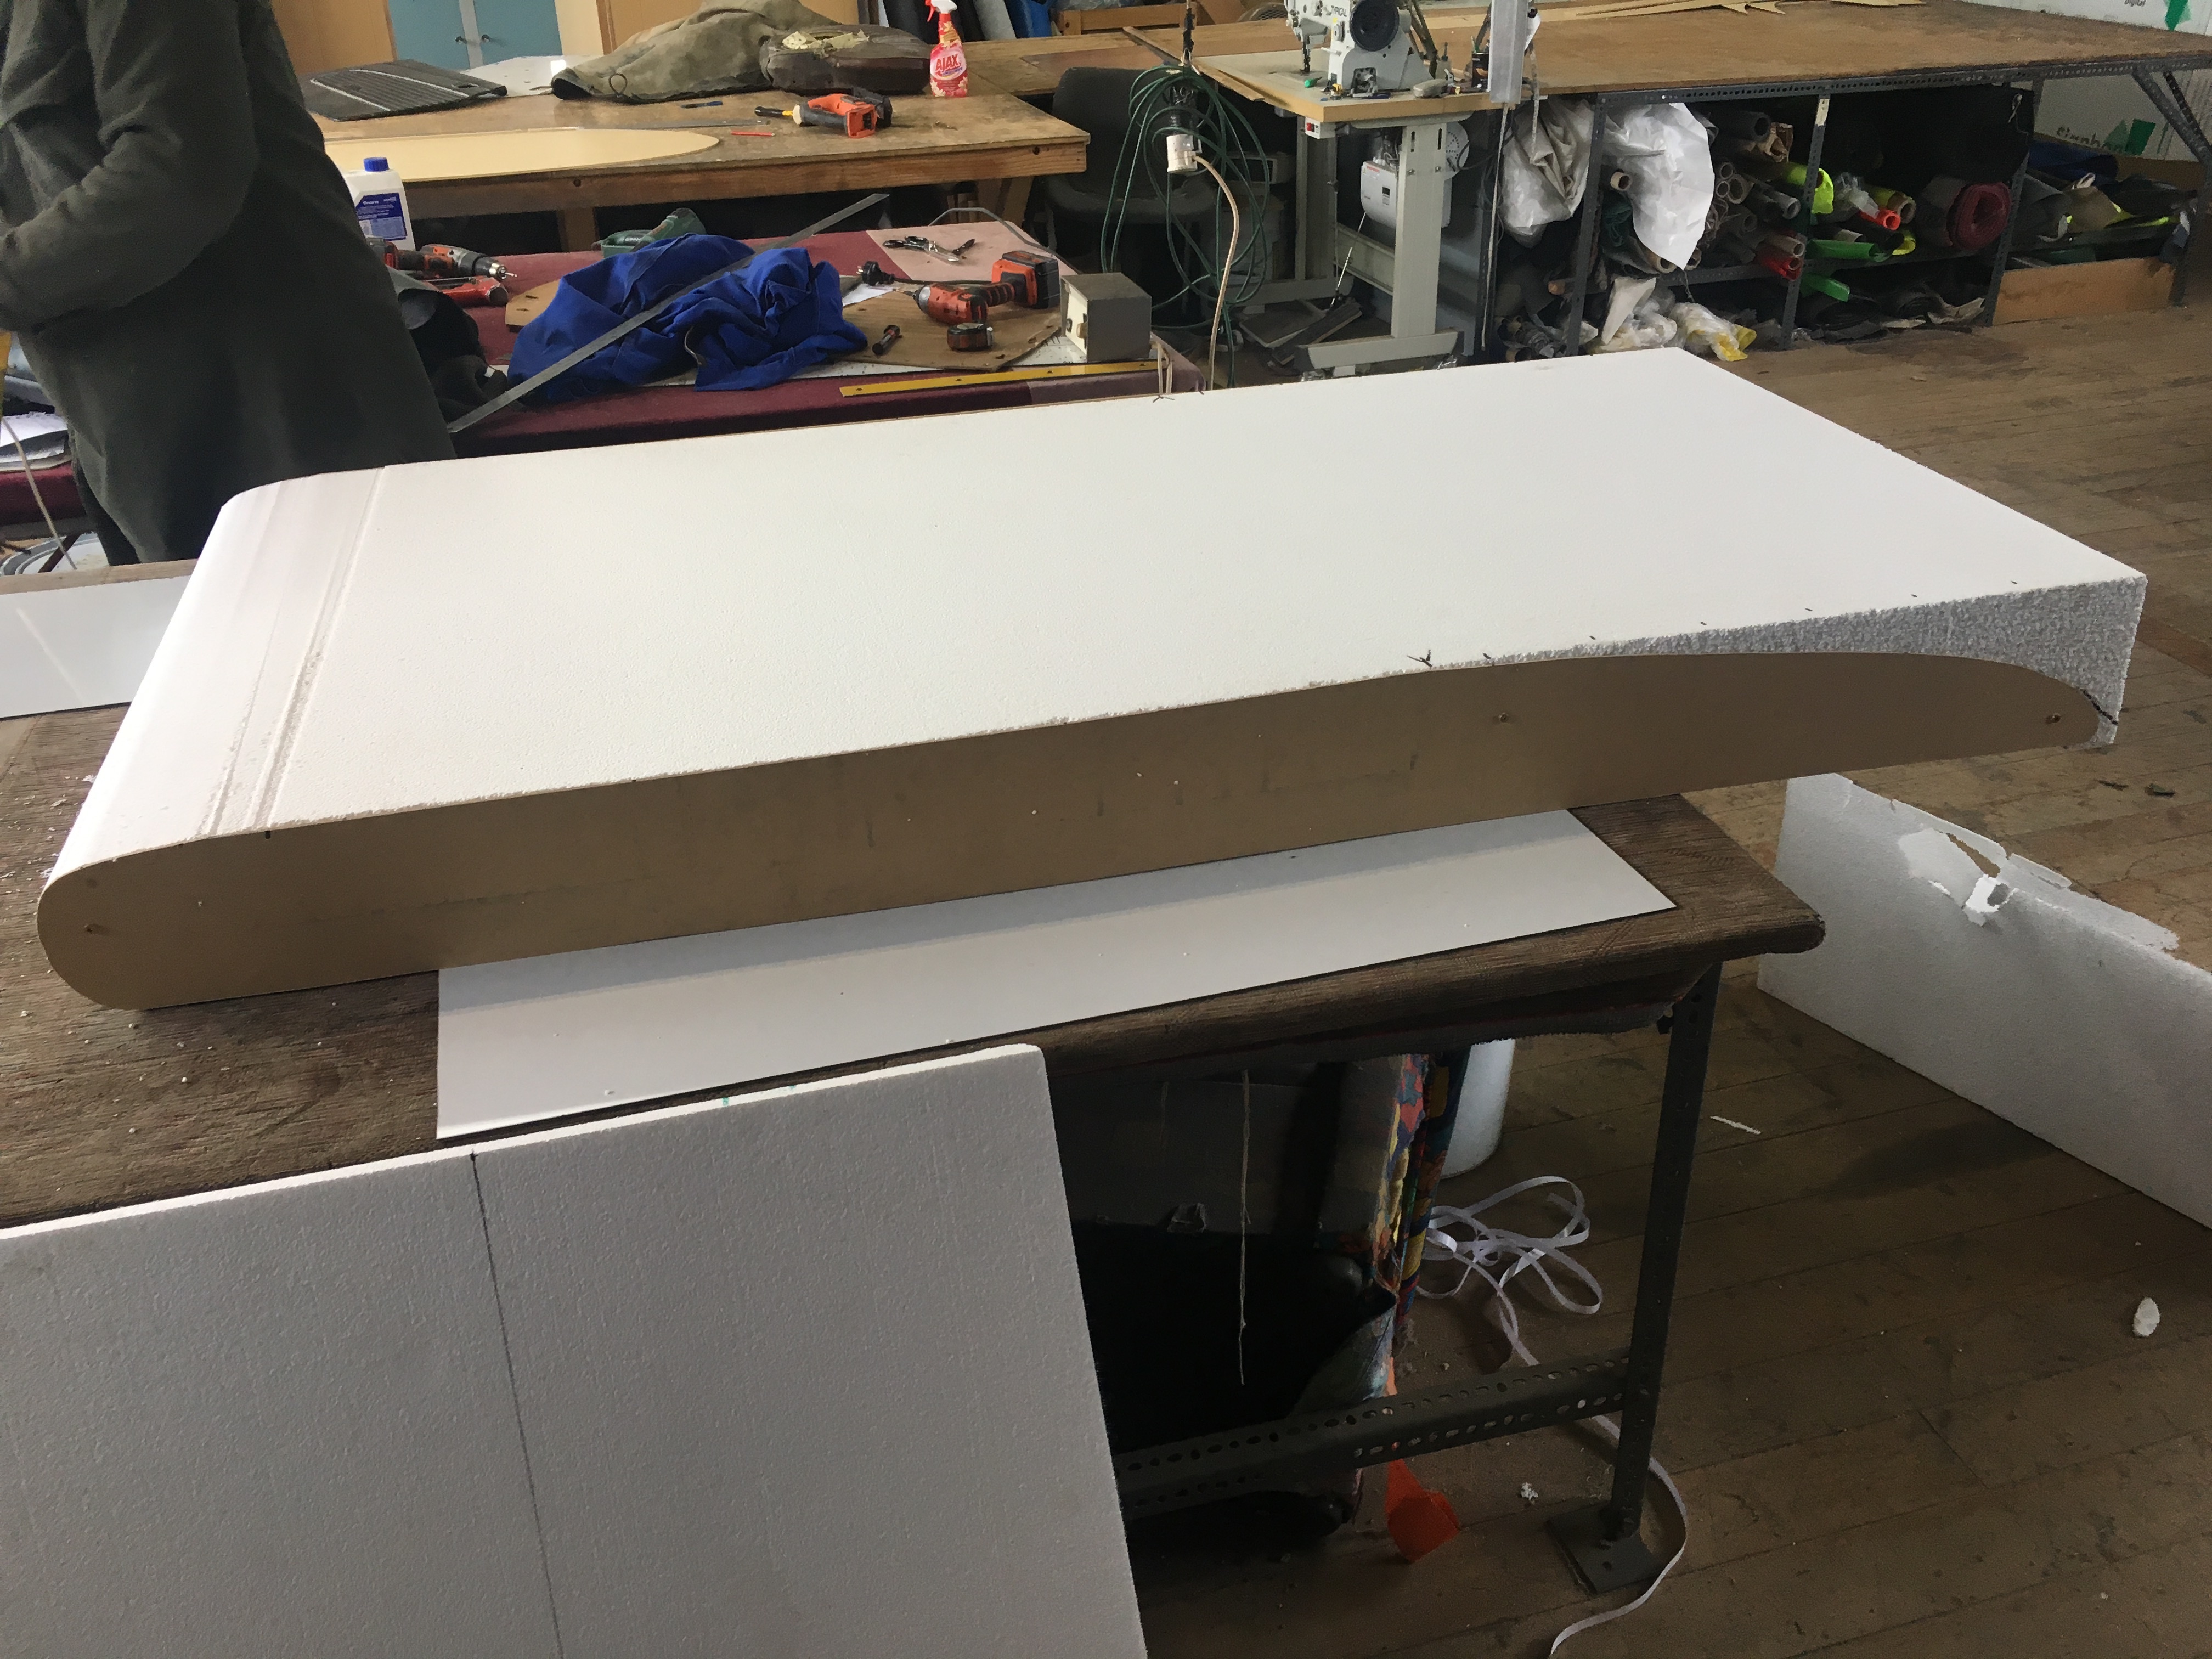
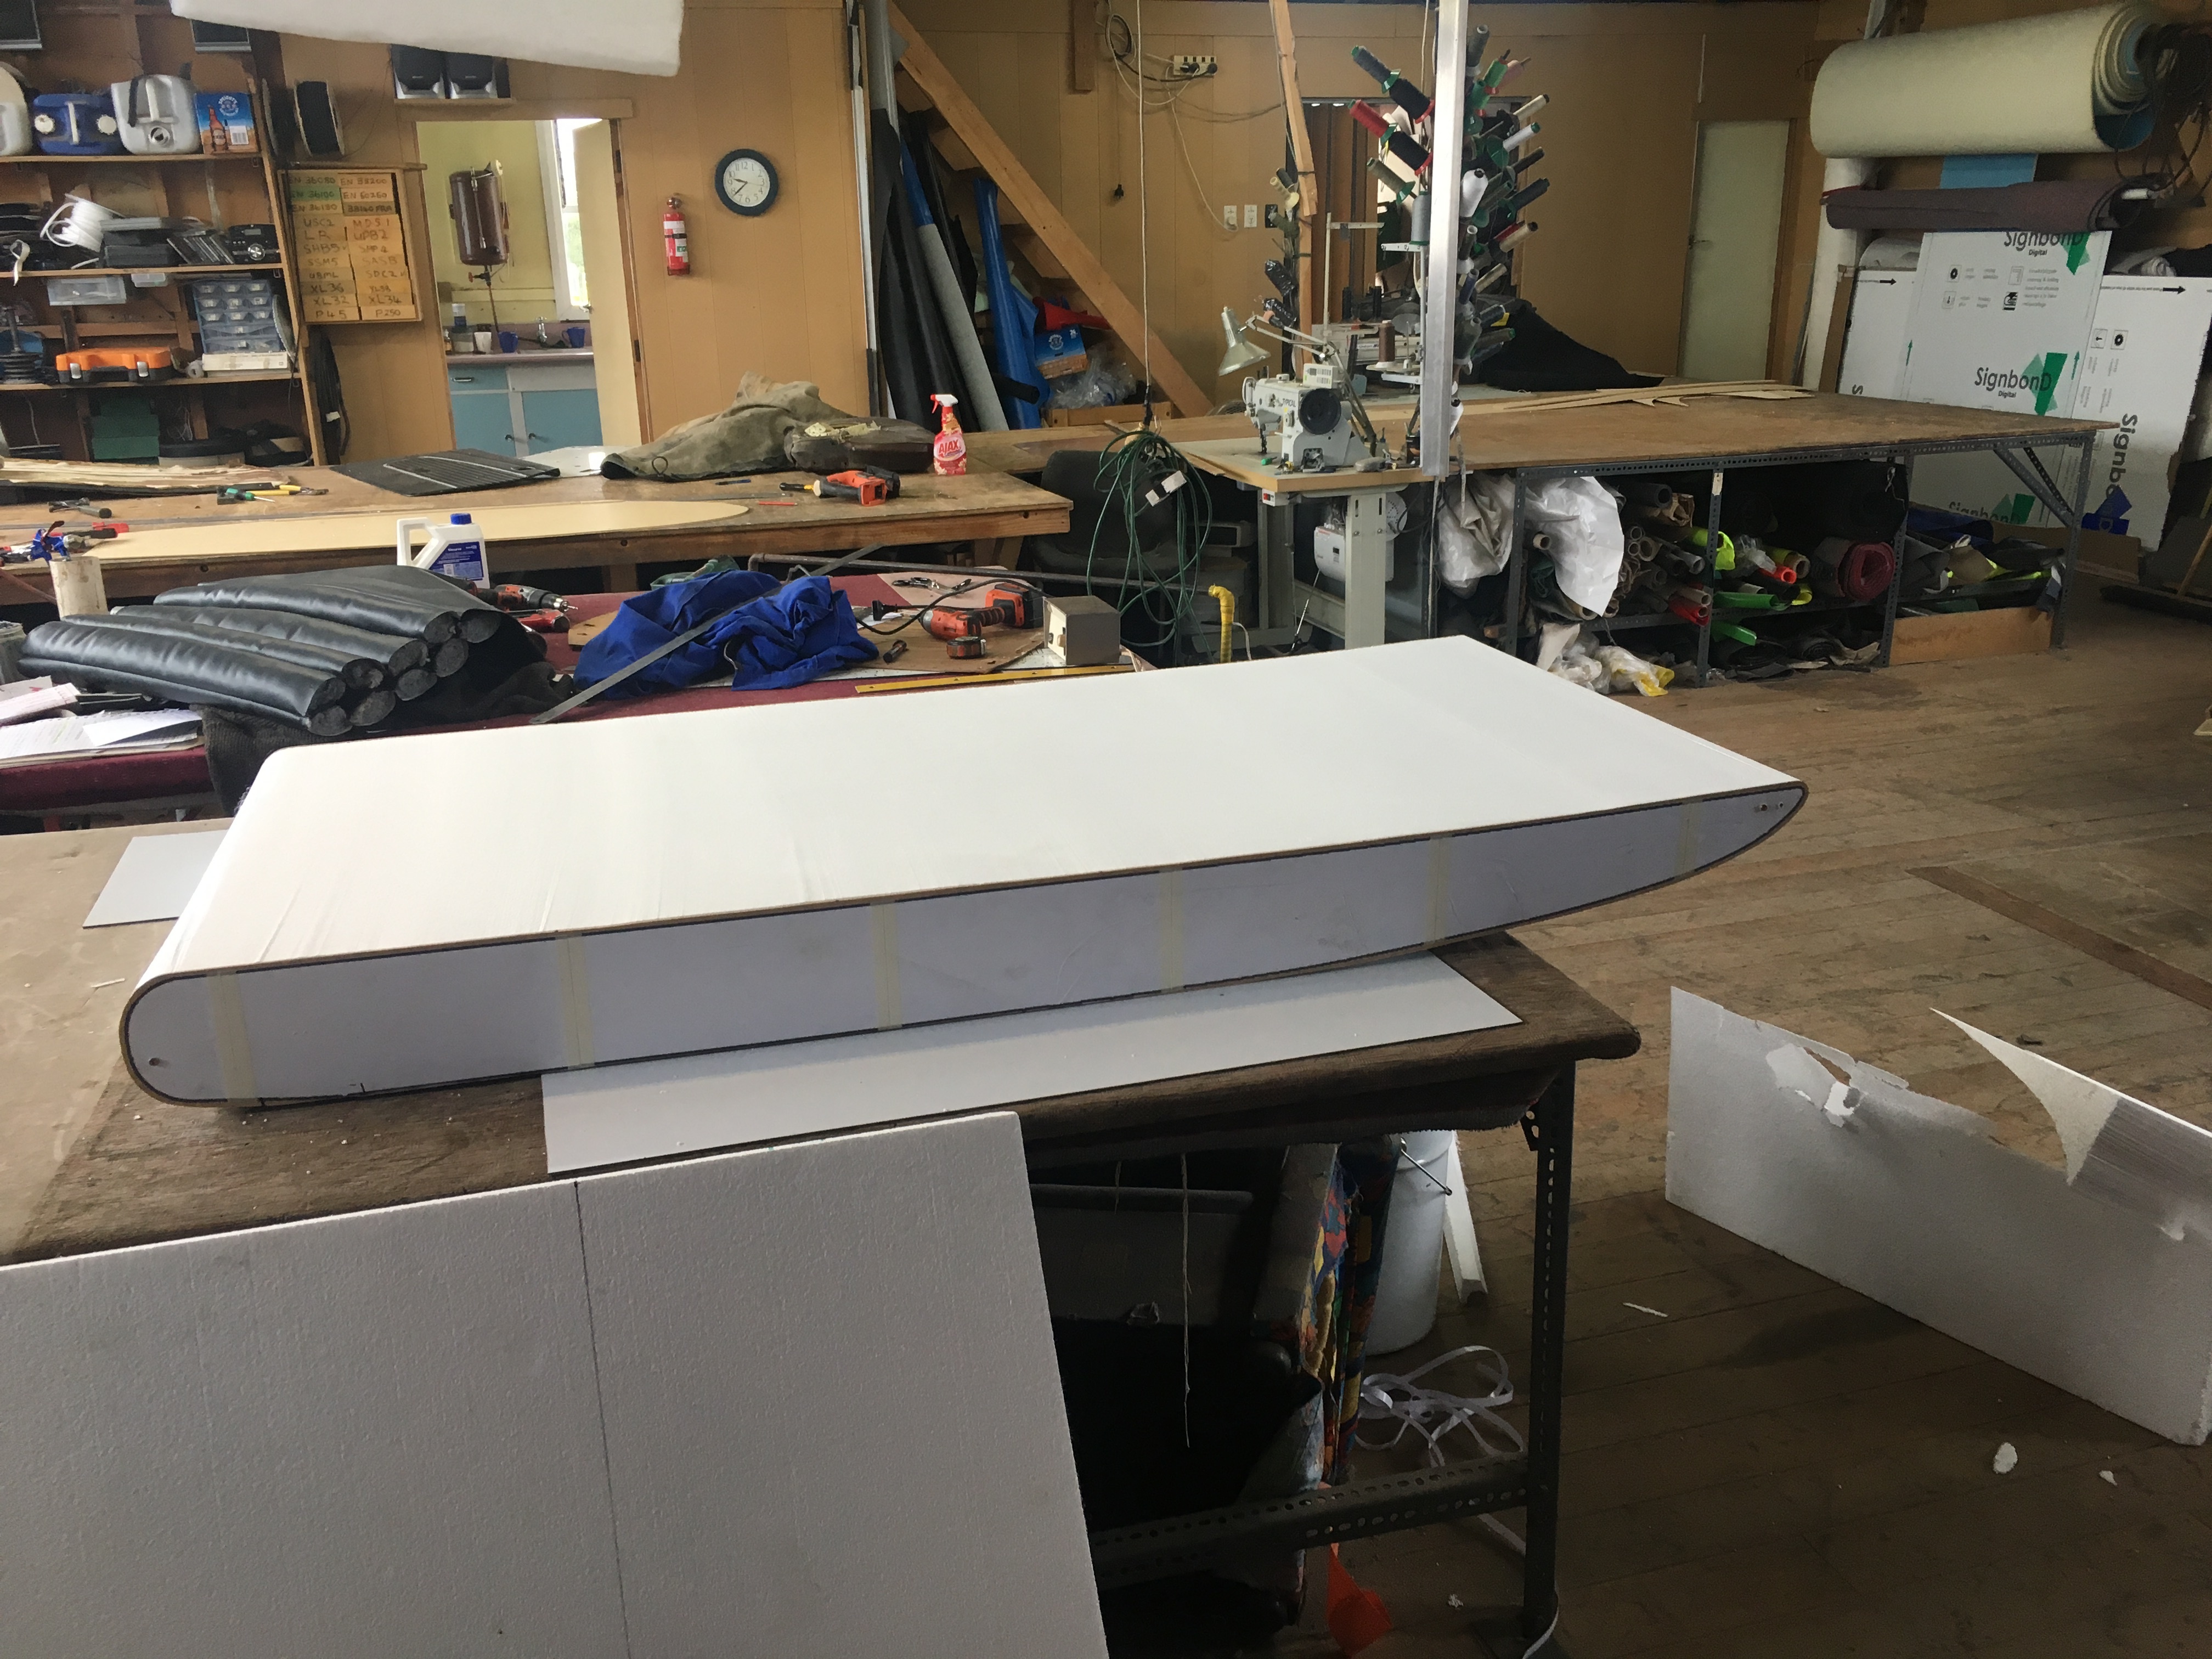
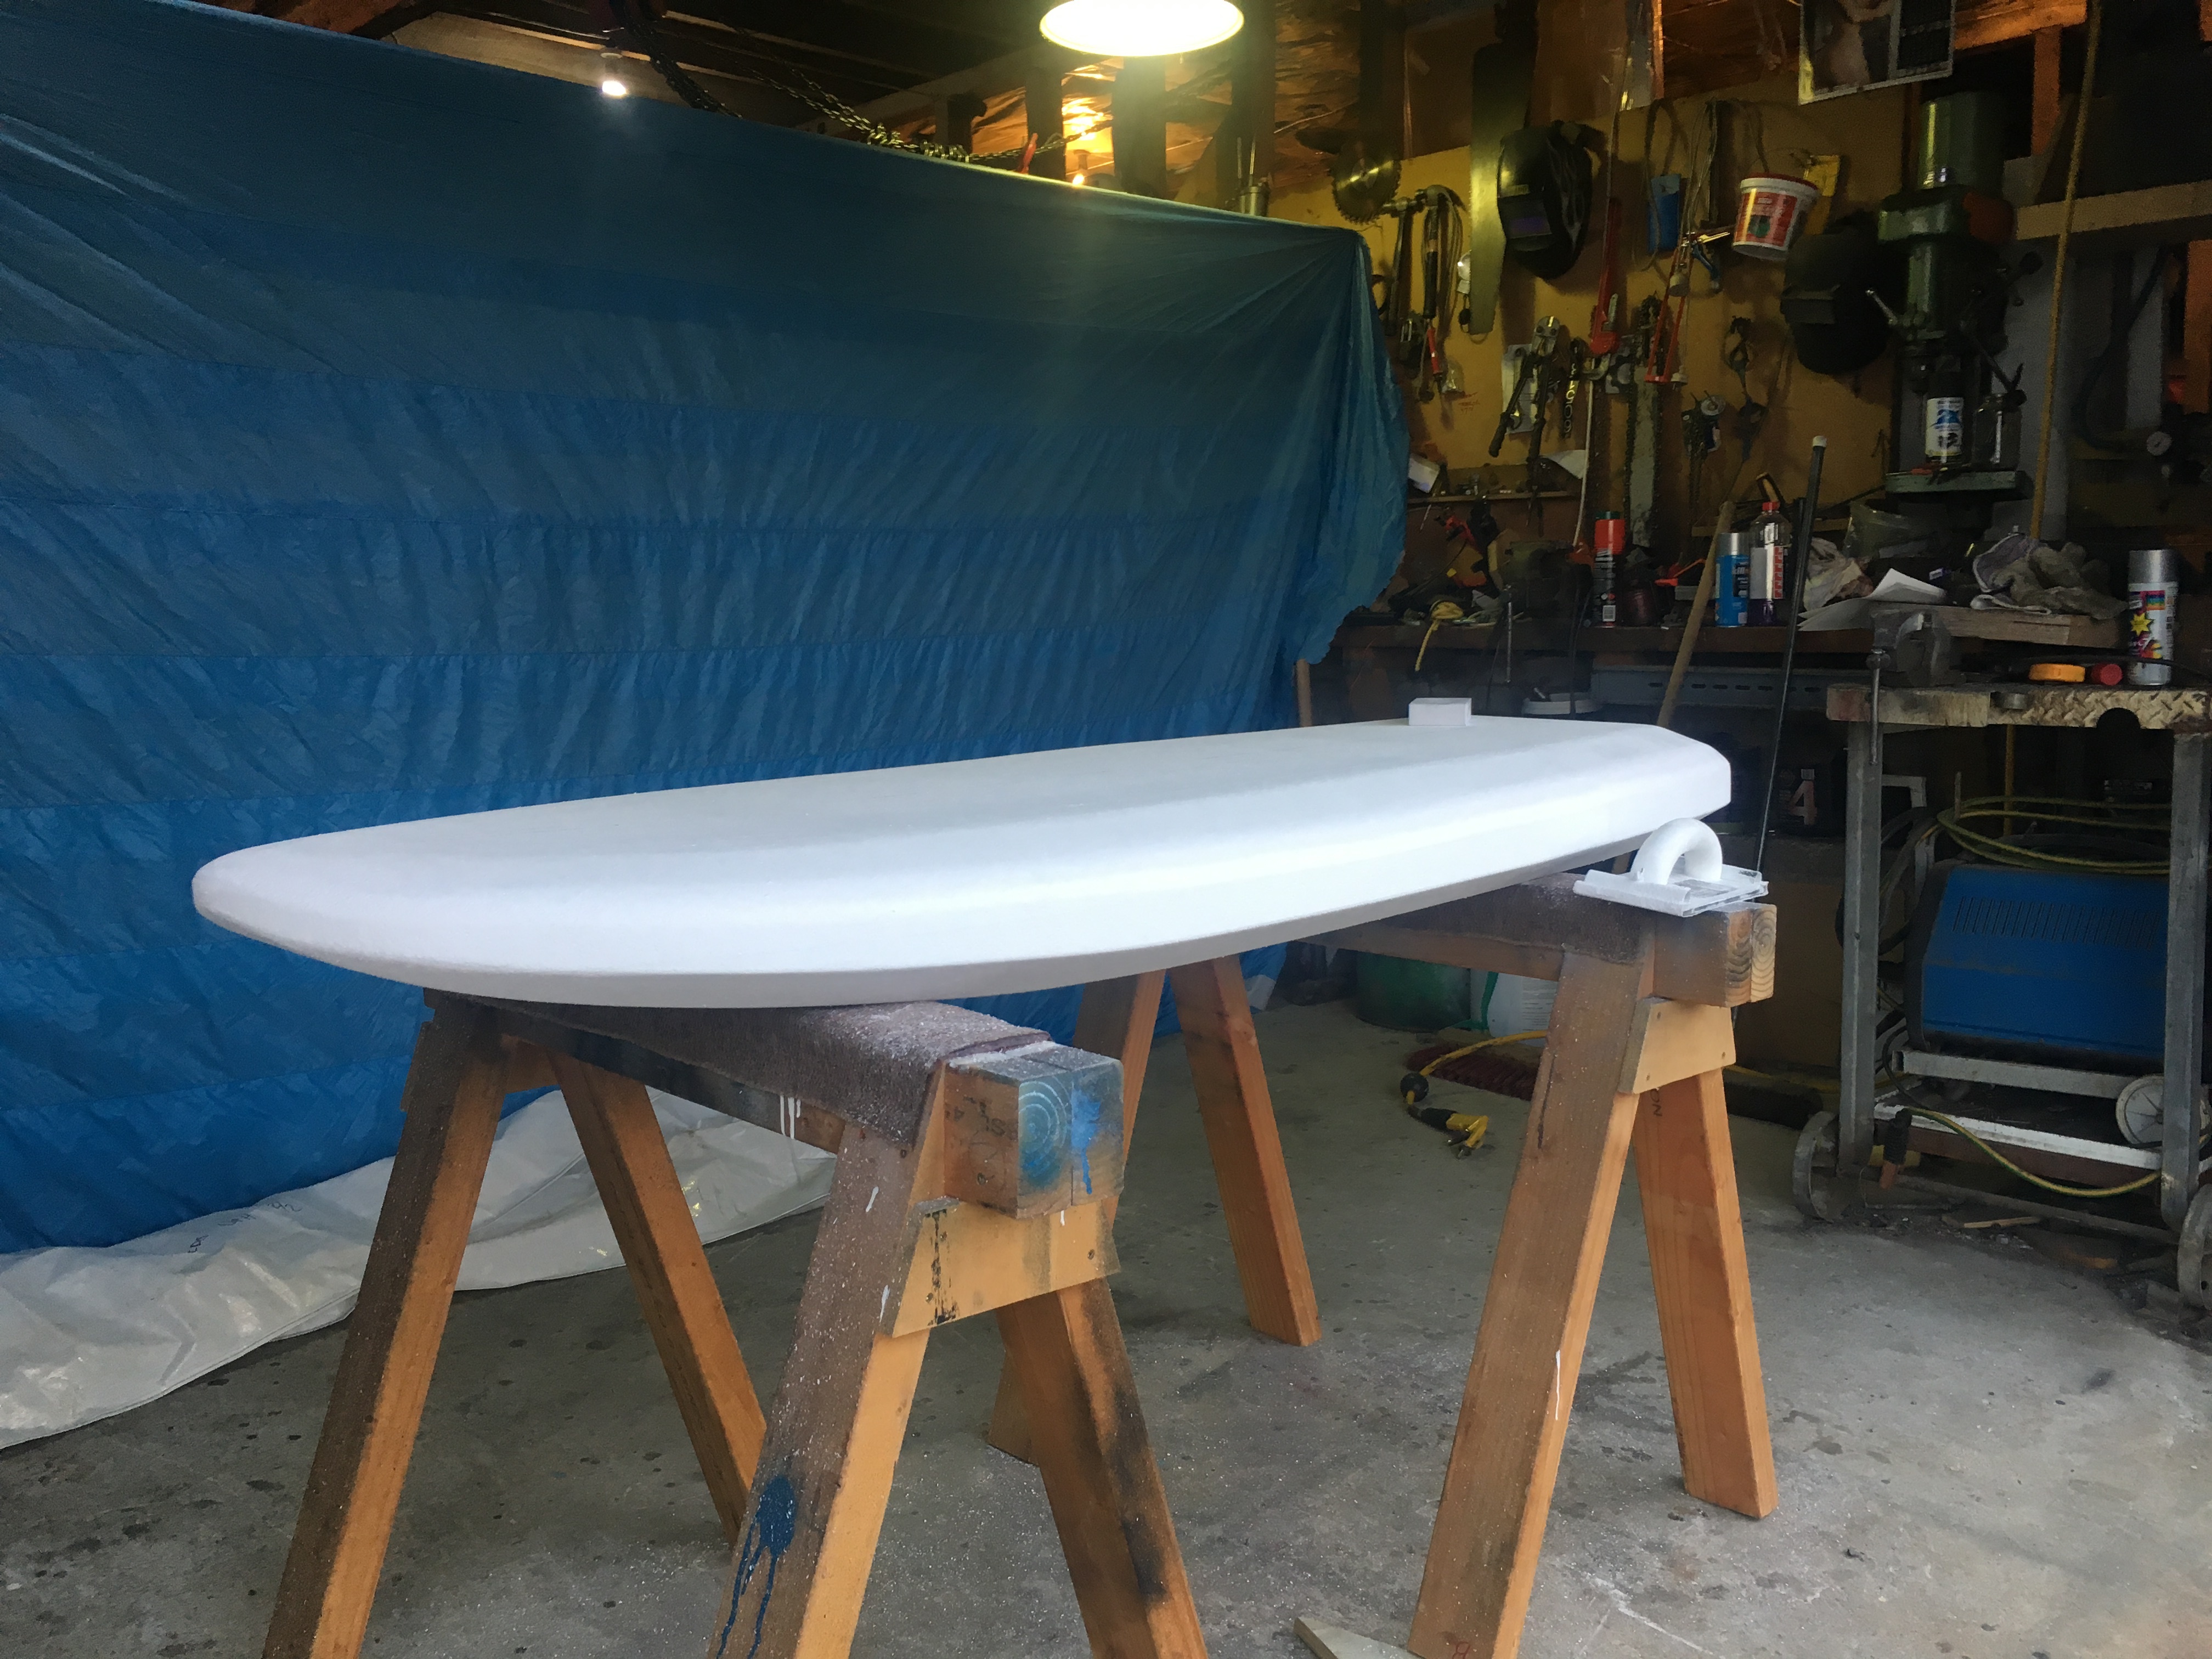
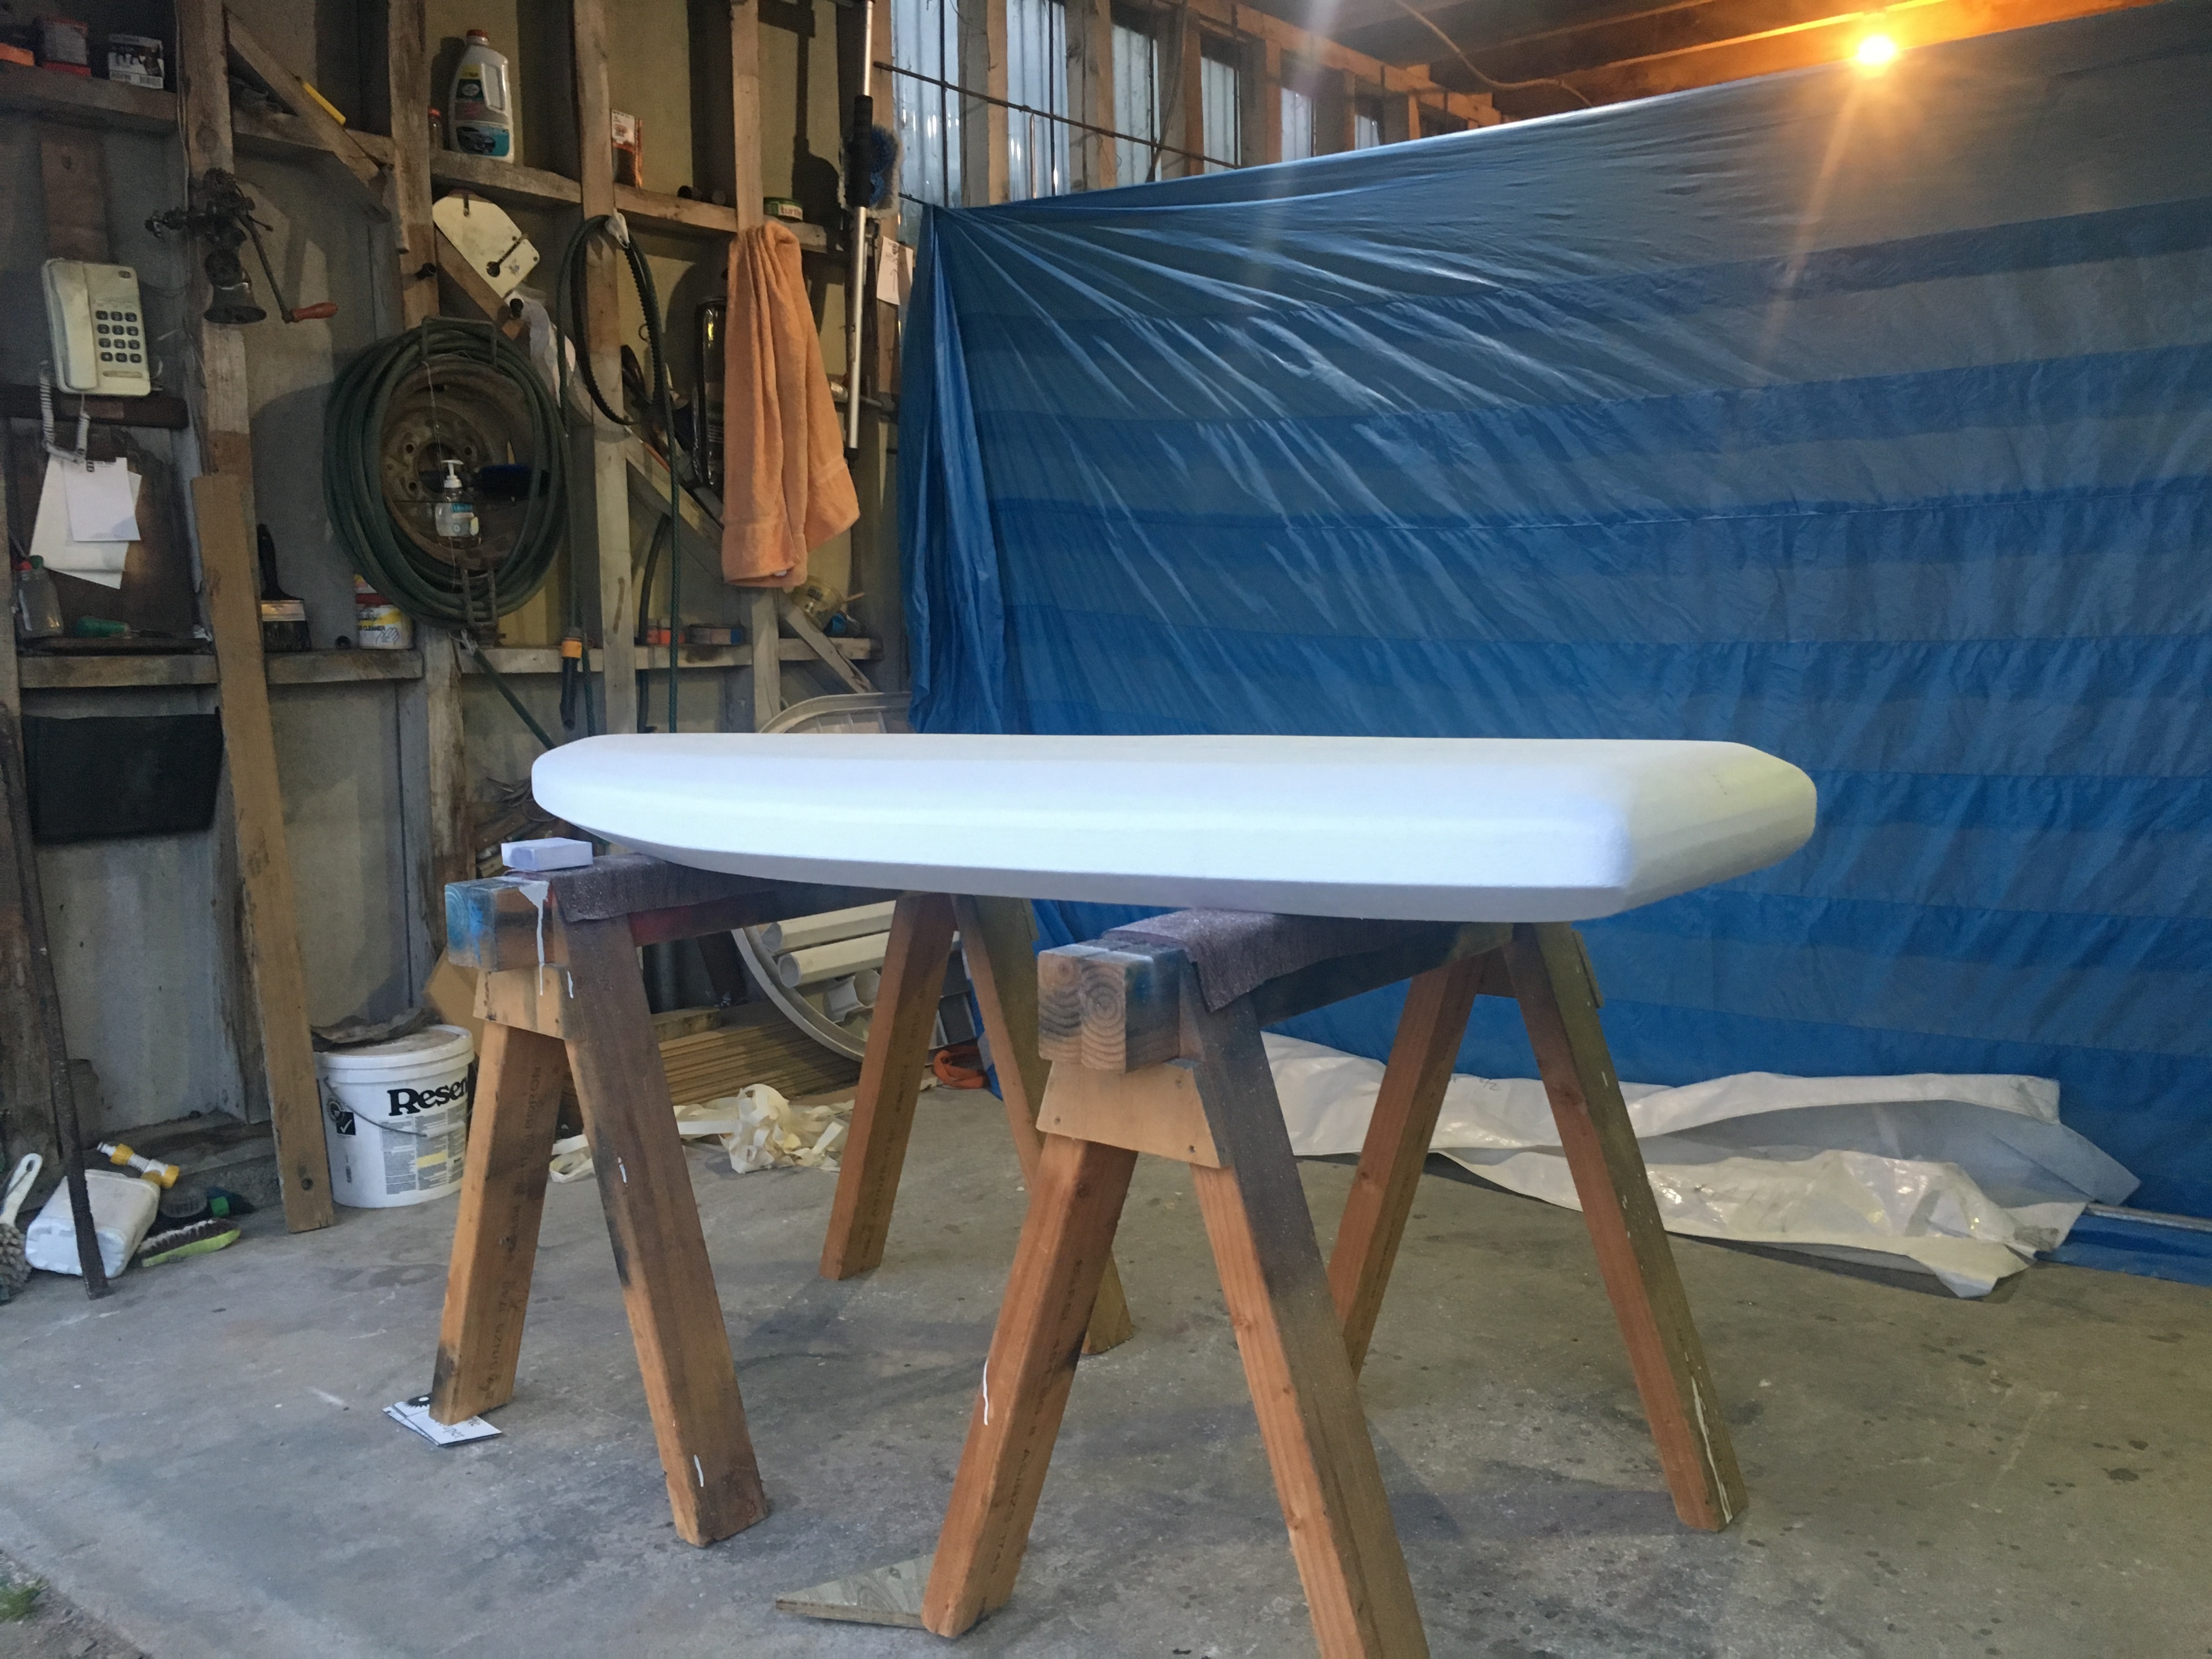
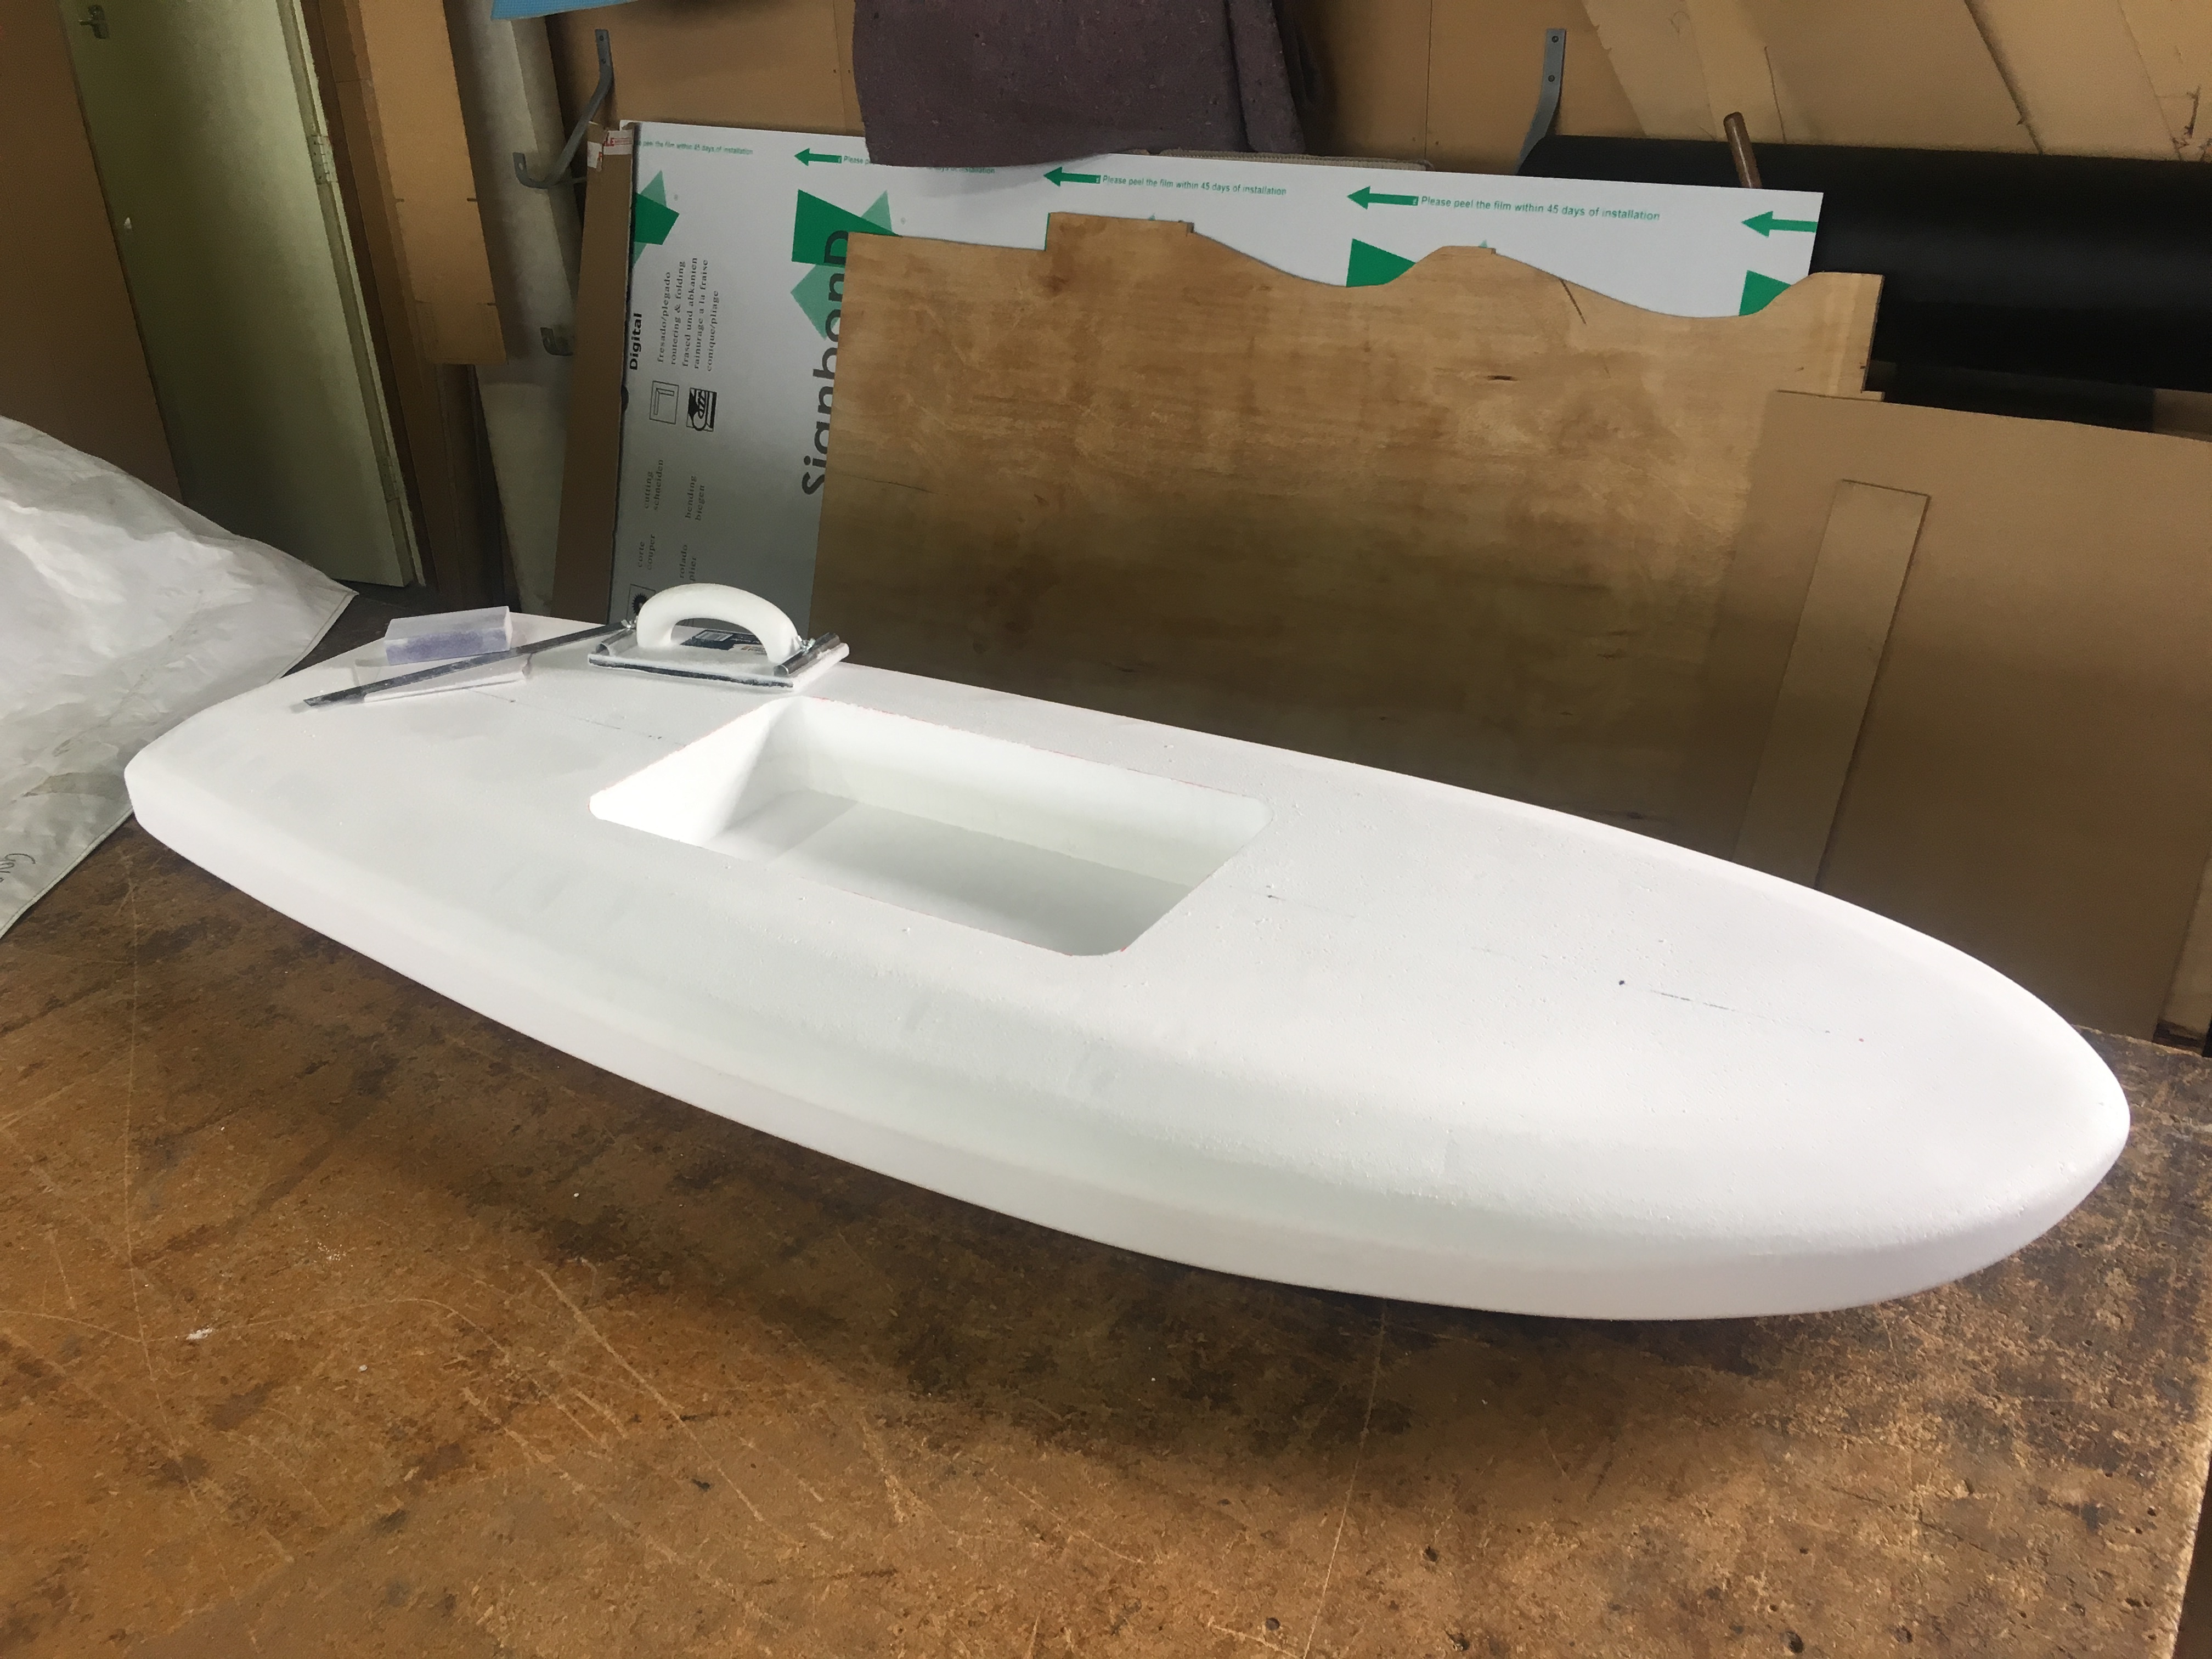
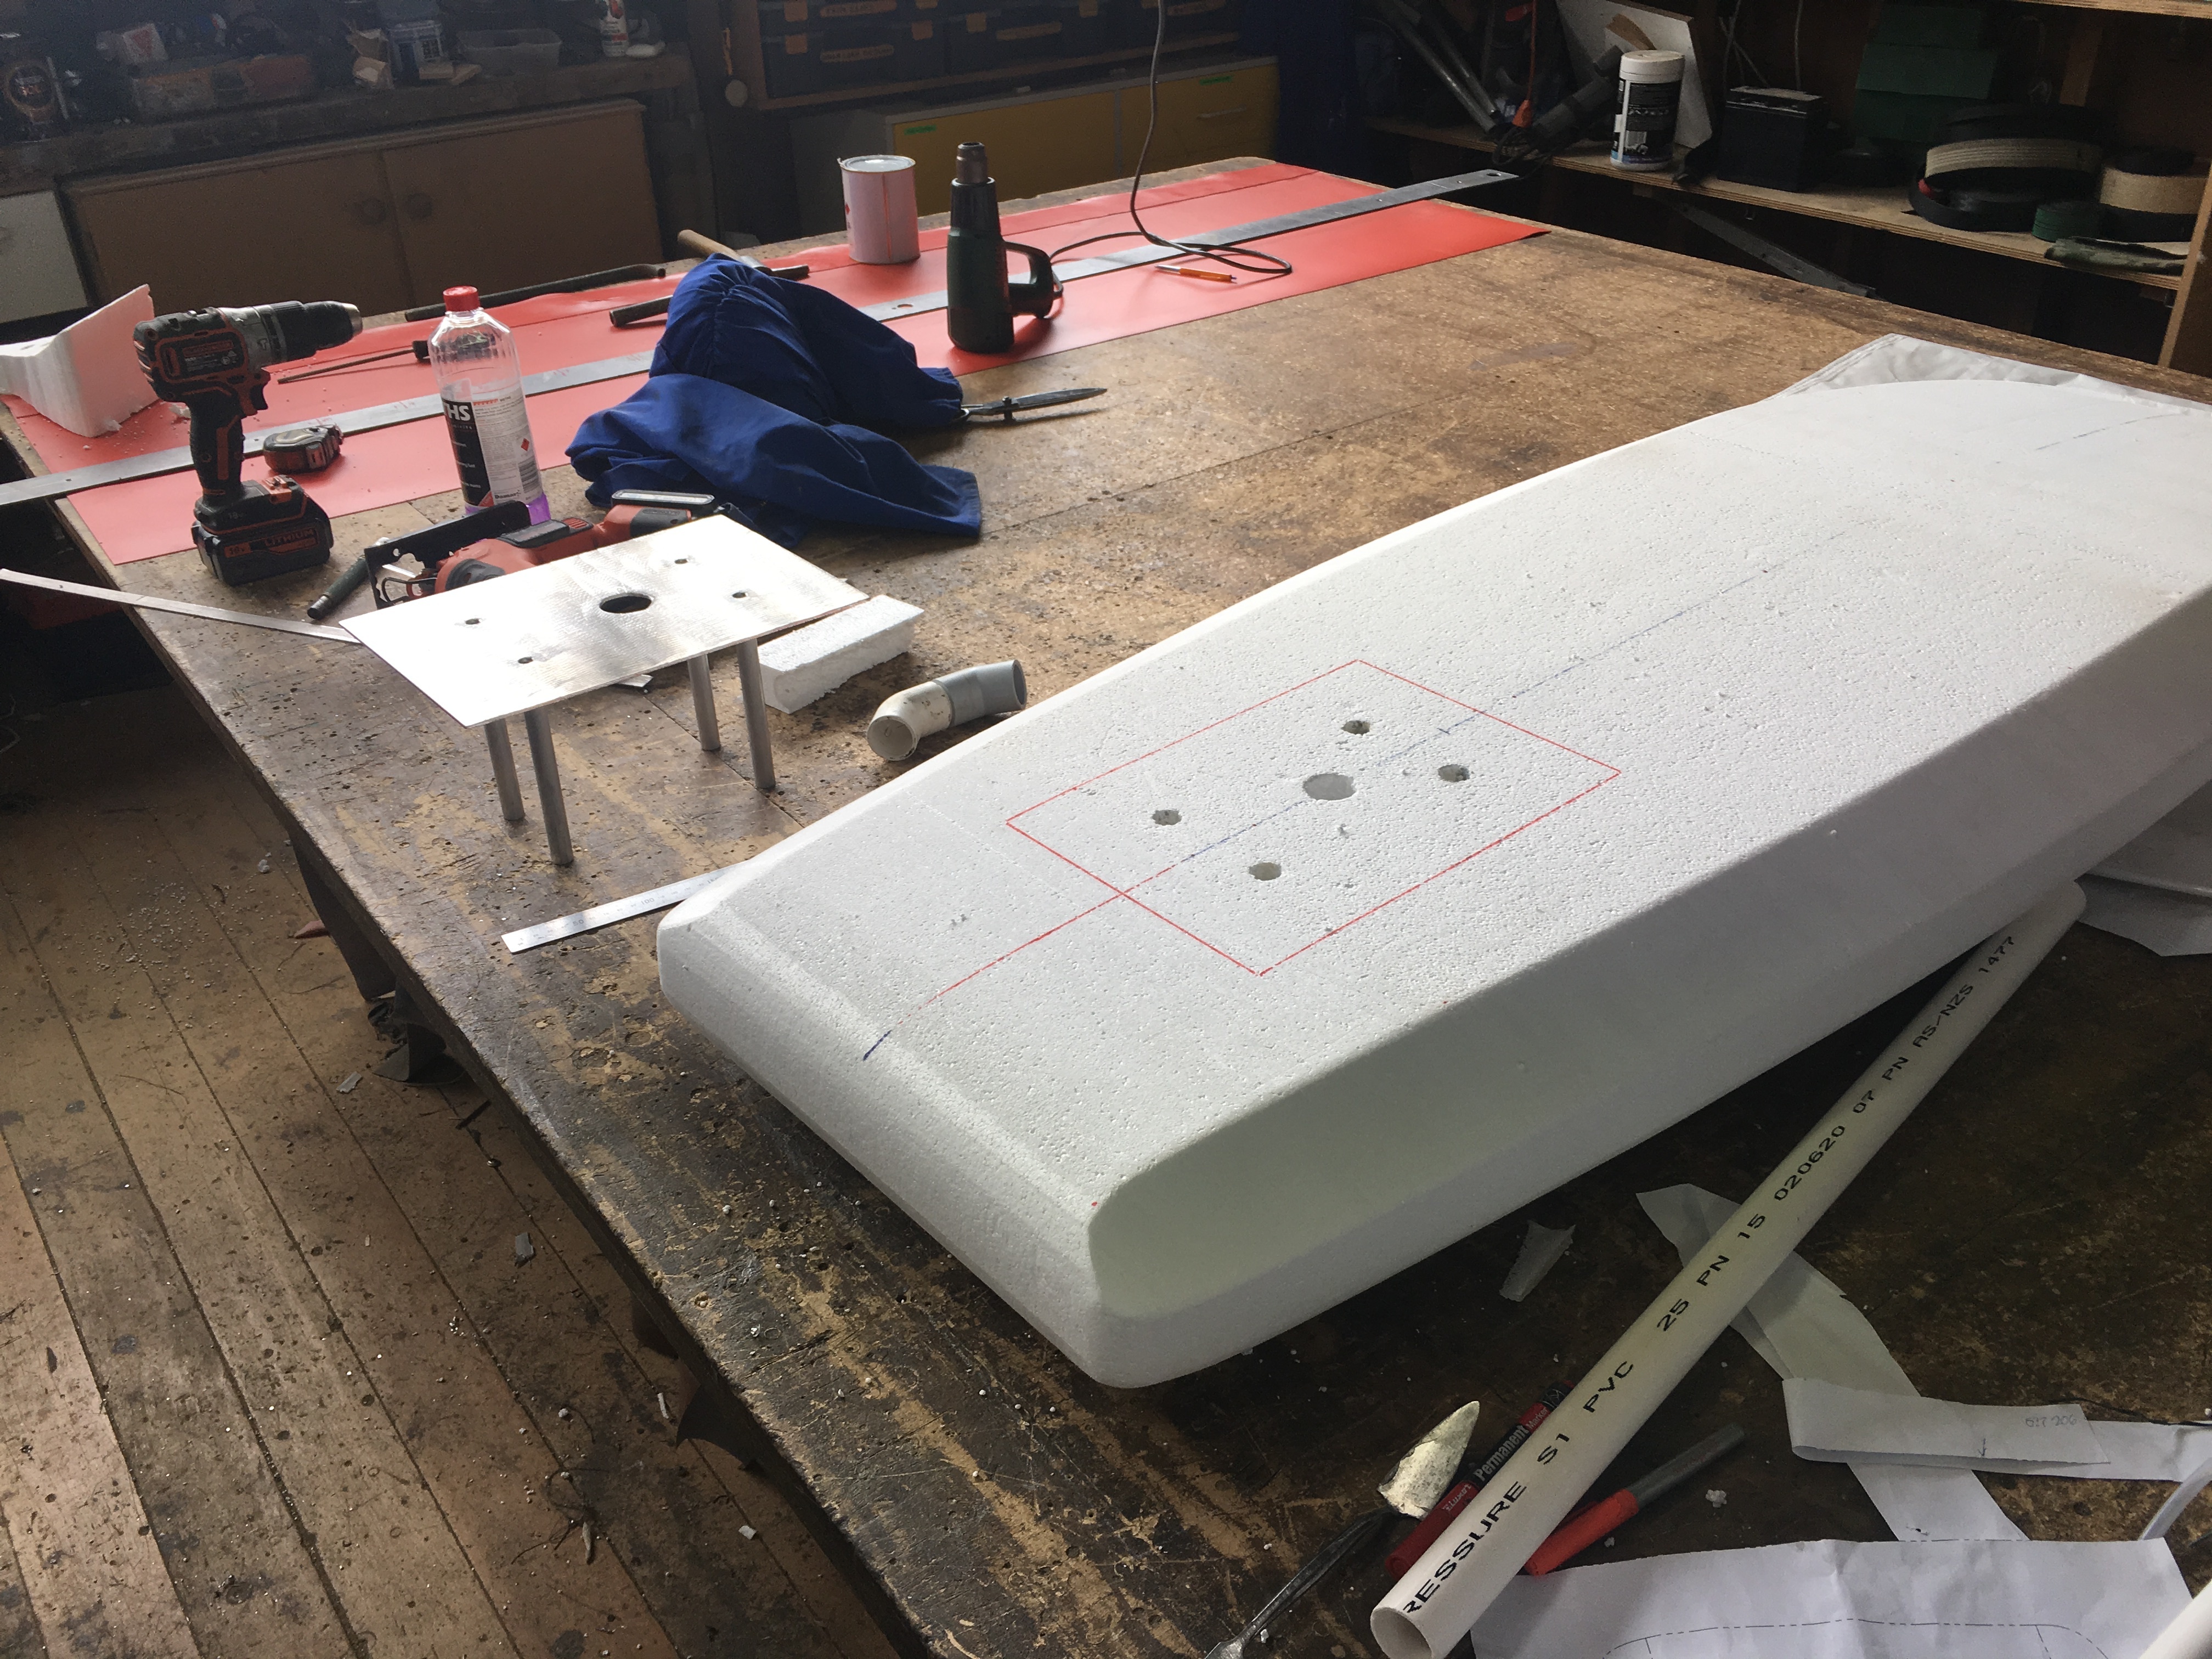
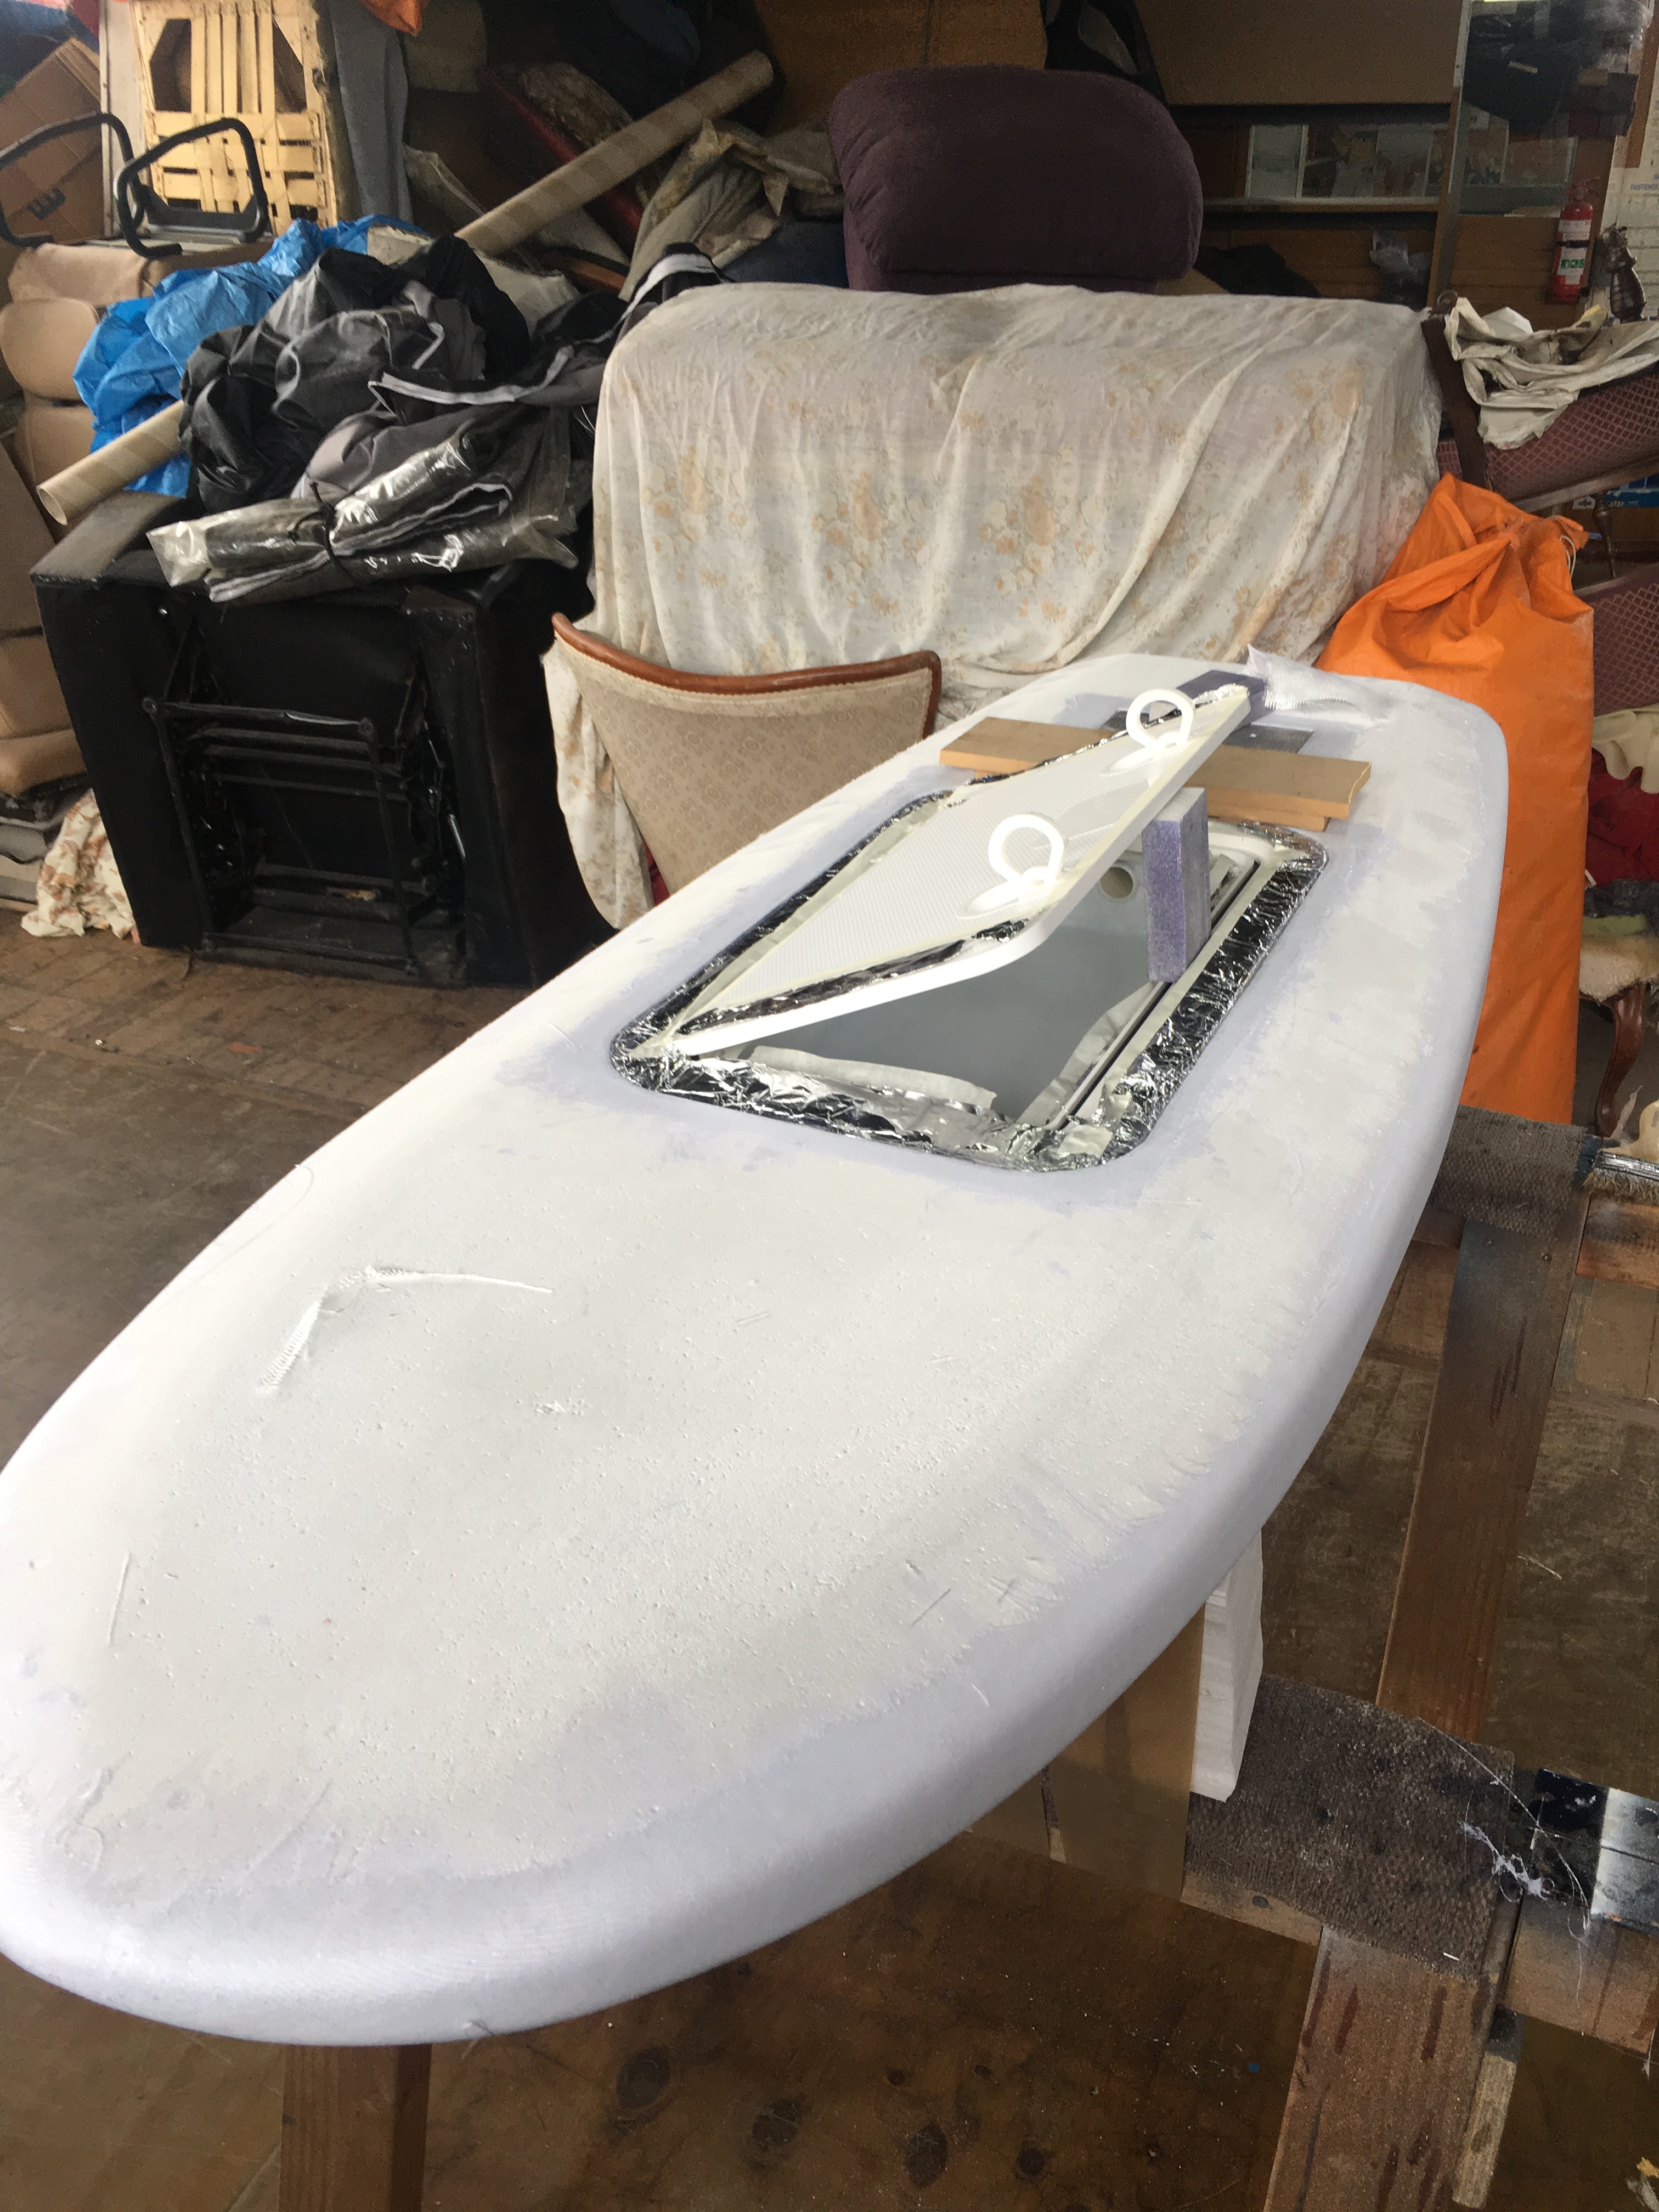
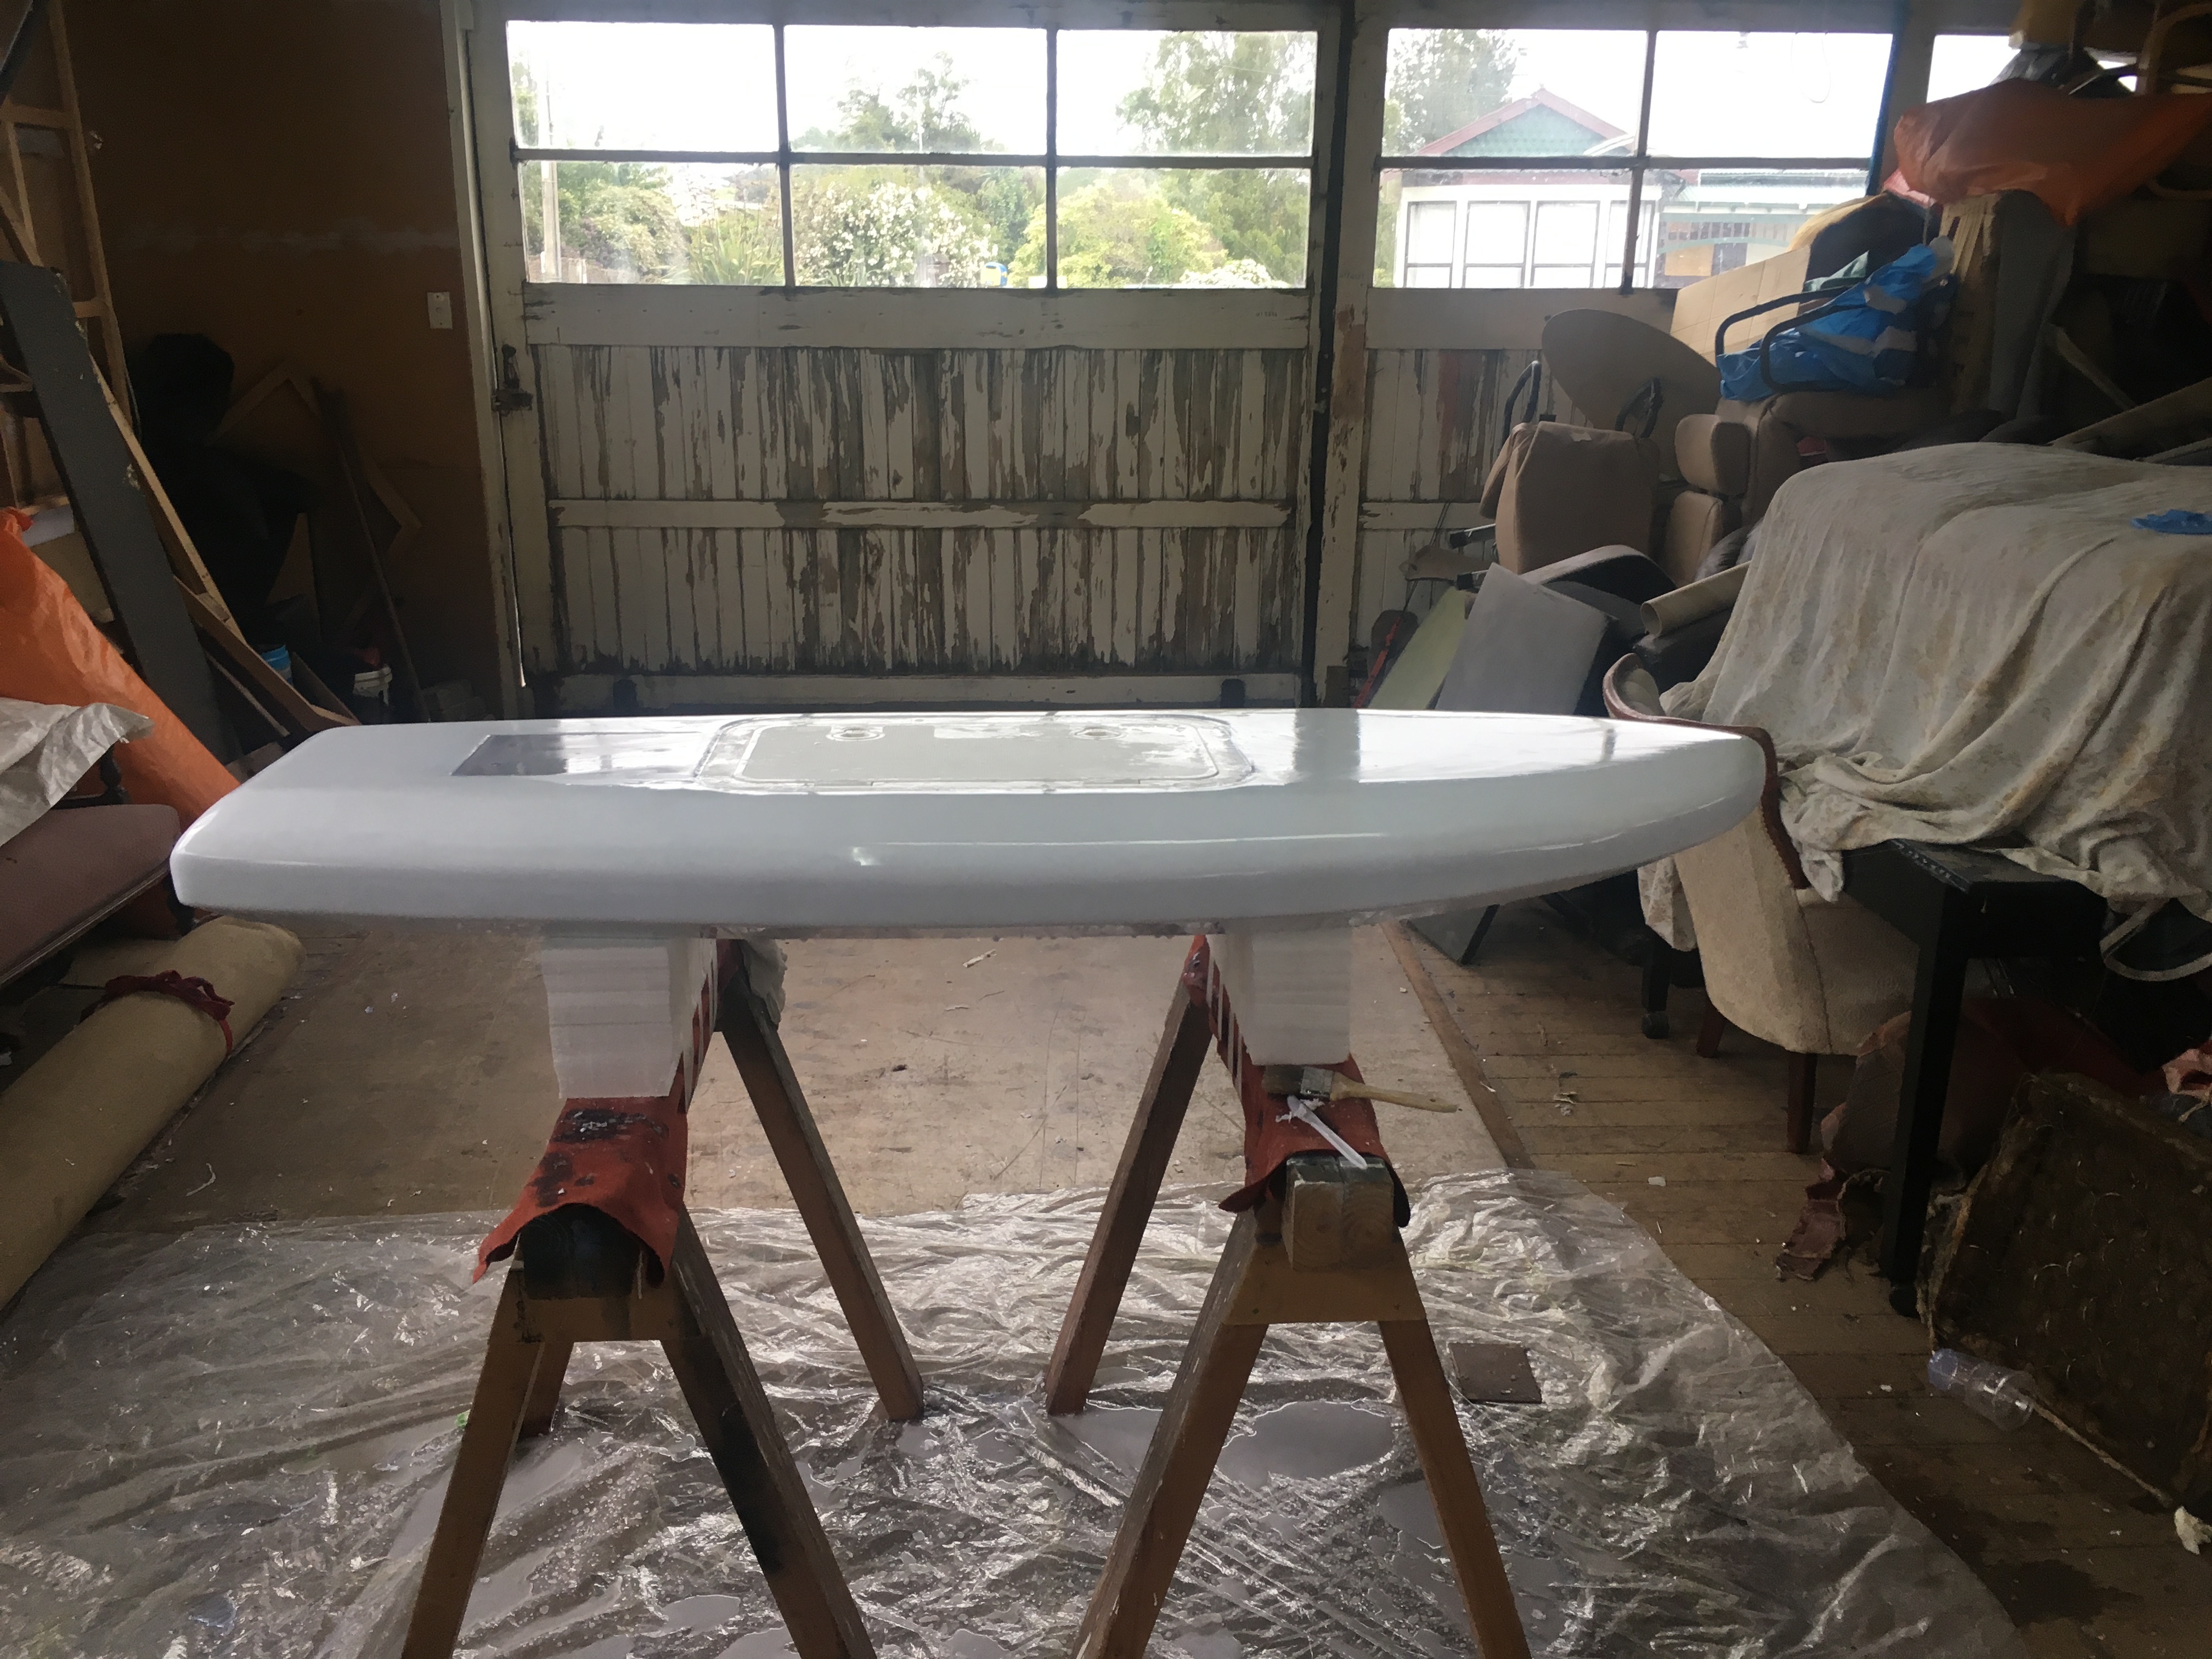
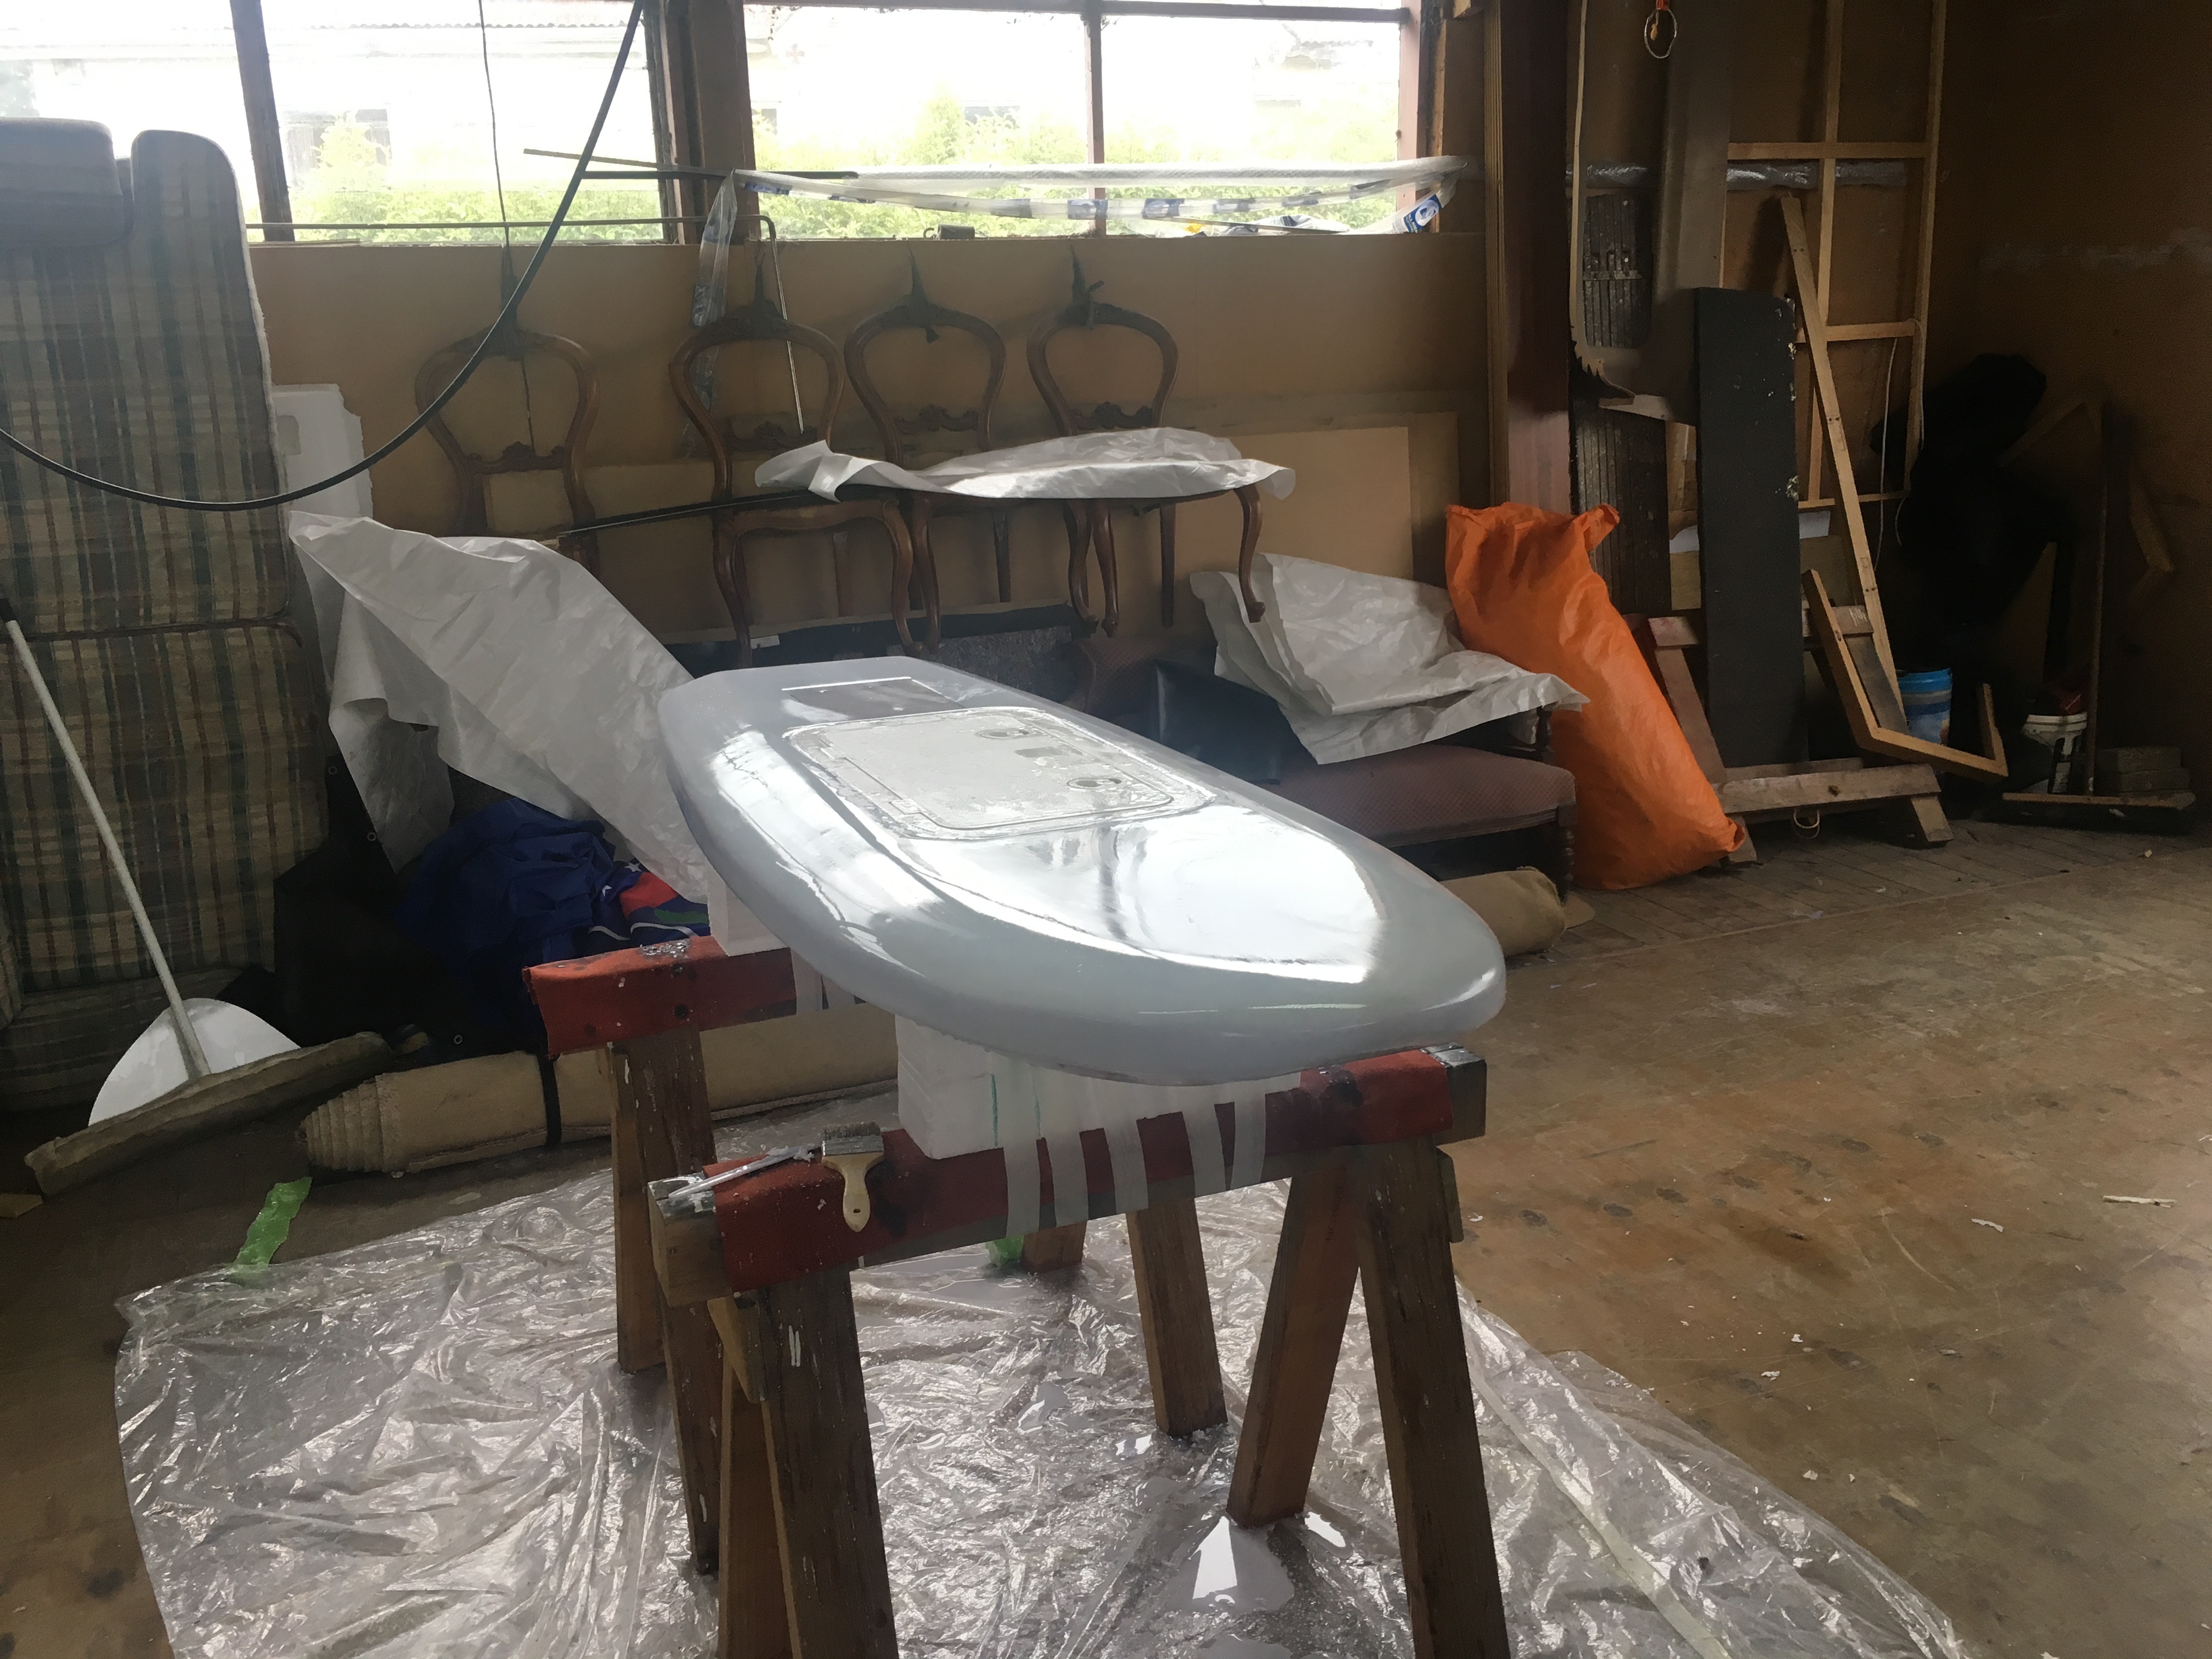
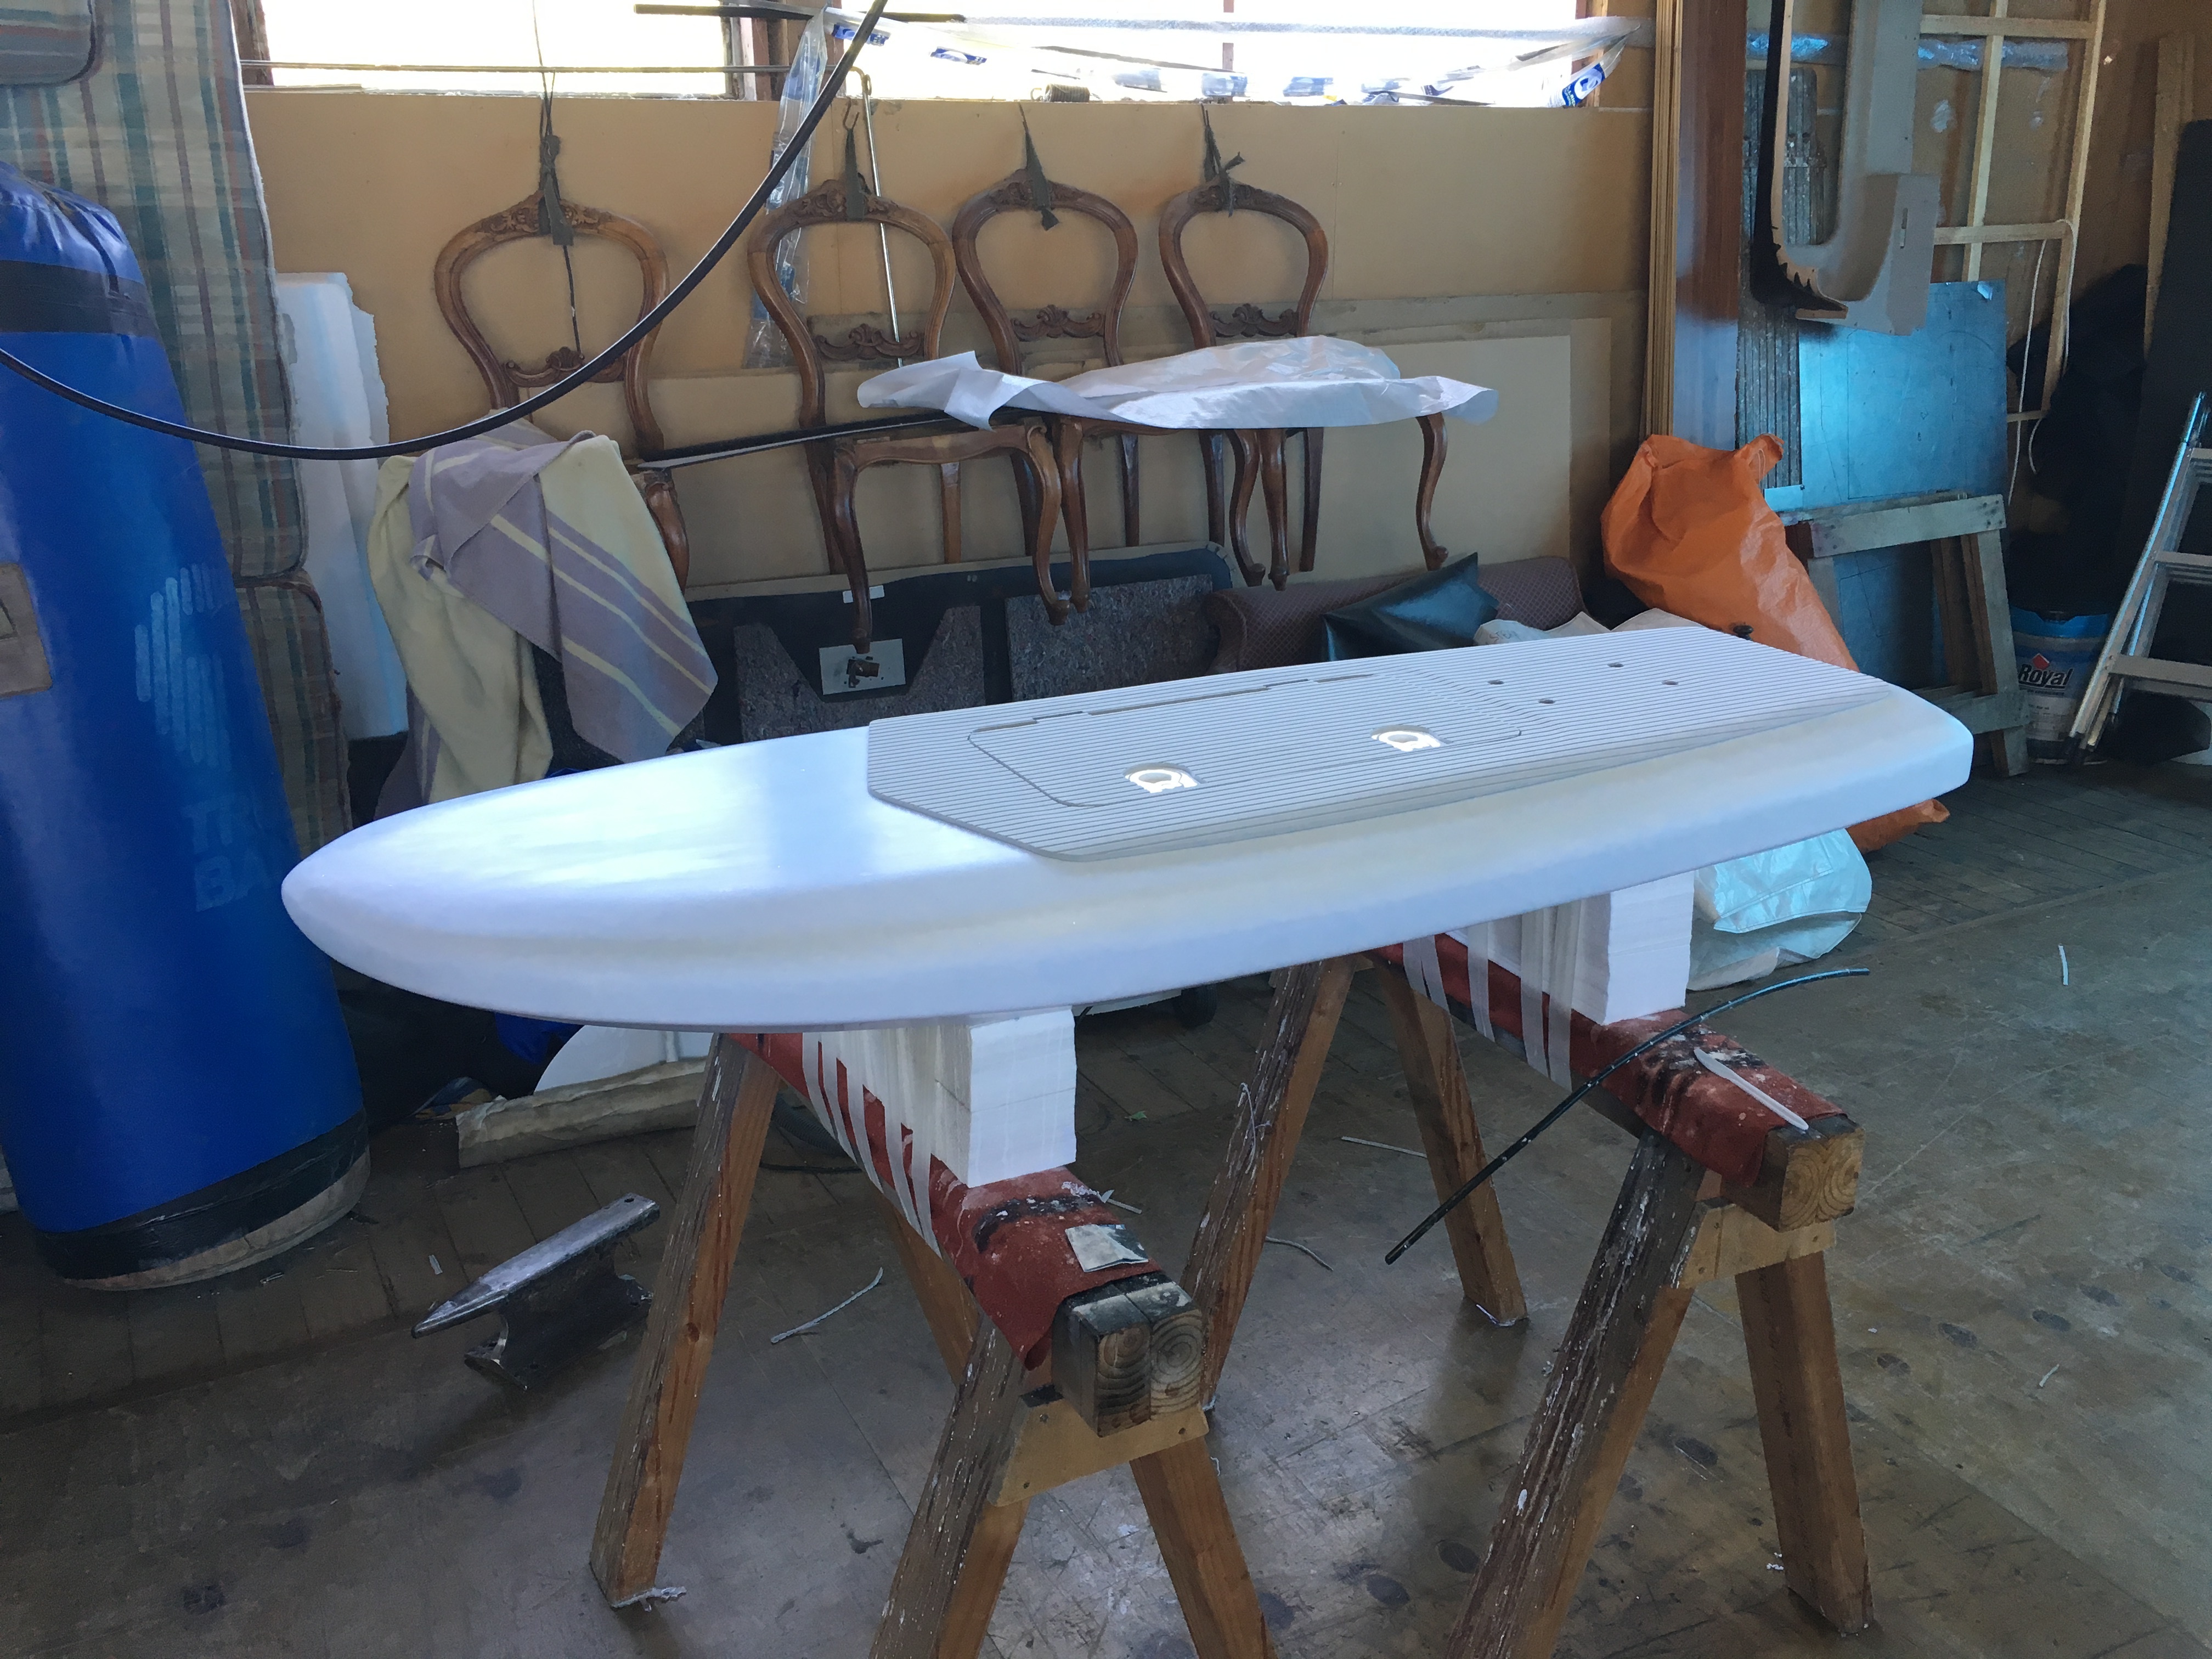
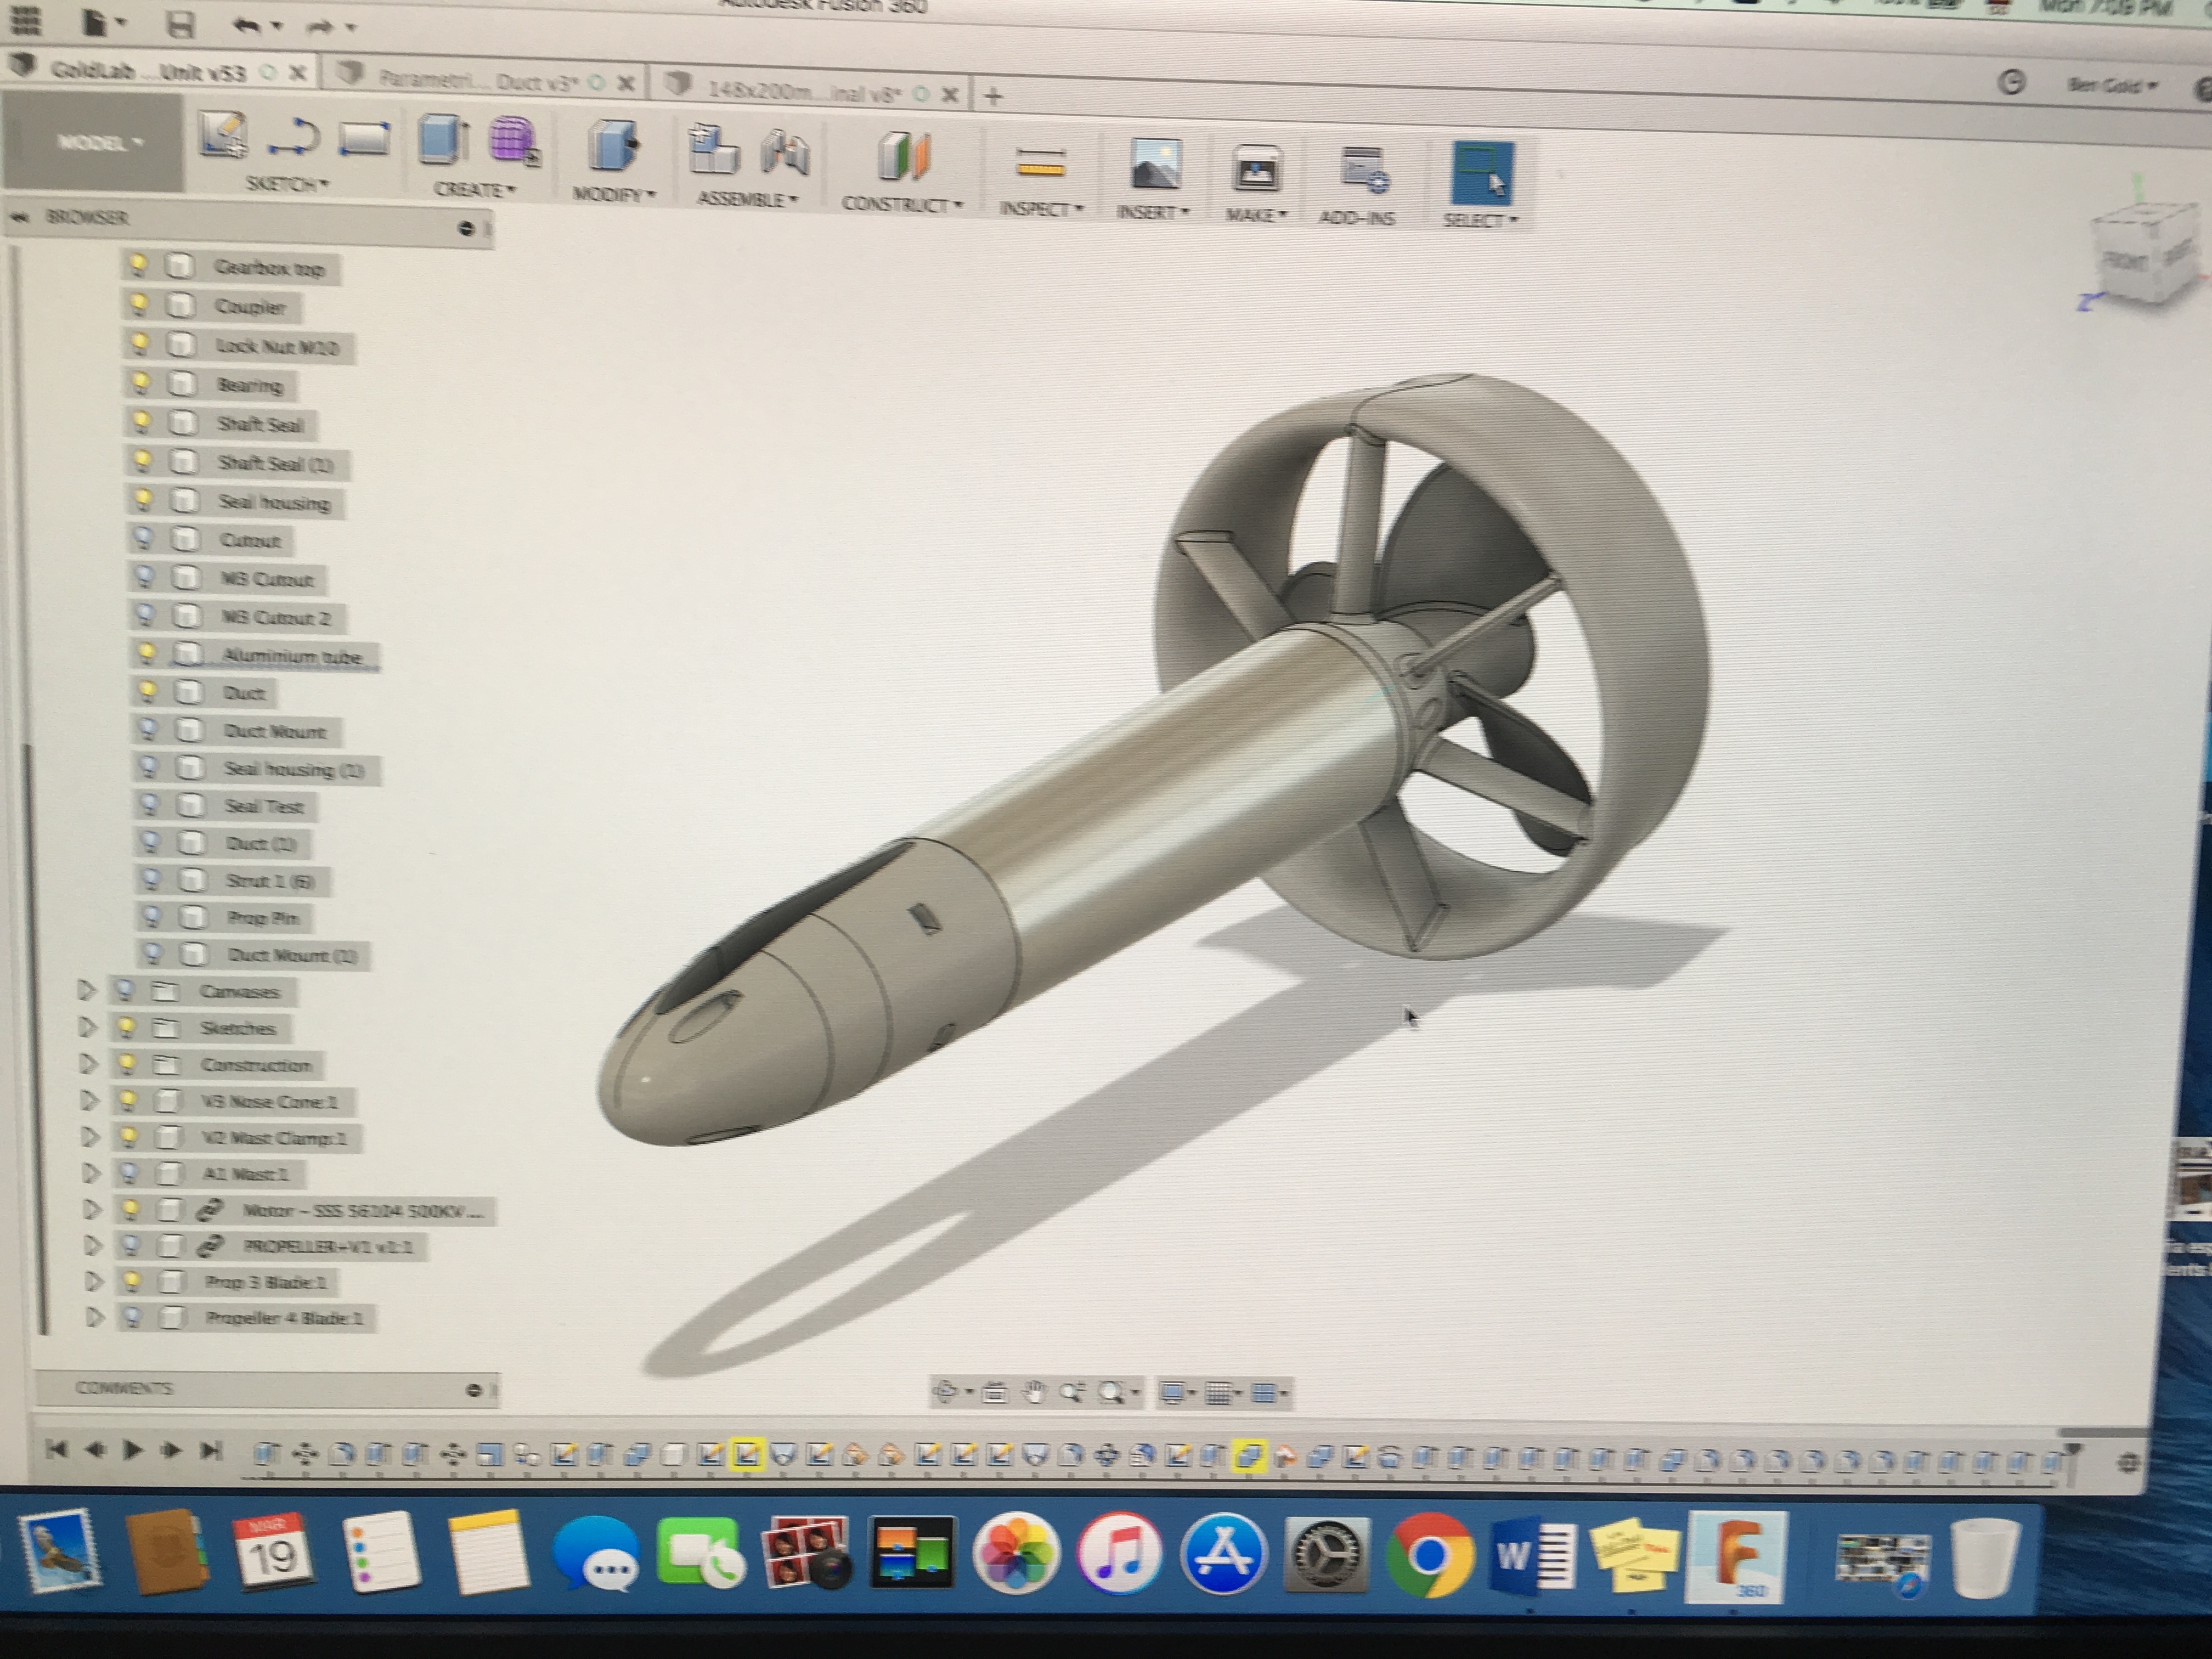
I used two 80mm sheets of EPS, density of 28kg/m3 and glued them together. I drew my design in Fusion 360 and then converted it to a full size pdf in photoshop and printed it on a plotter. I then made templates out of 6mm MDF and cut the board out with a hot wire cutter. I also snapped the rails with a smaller hot wire cutter i made and then sanded the board to do the final shaping.
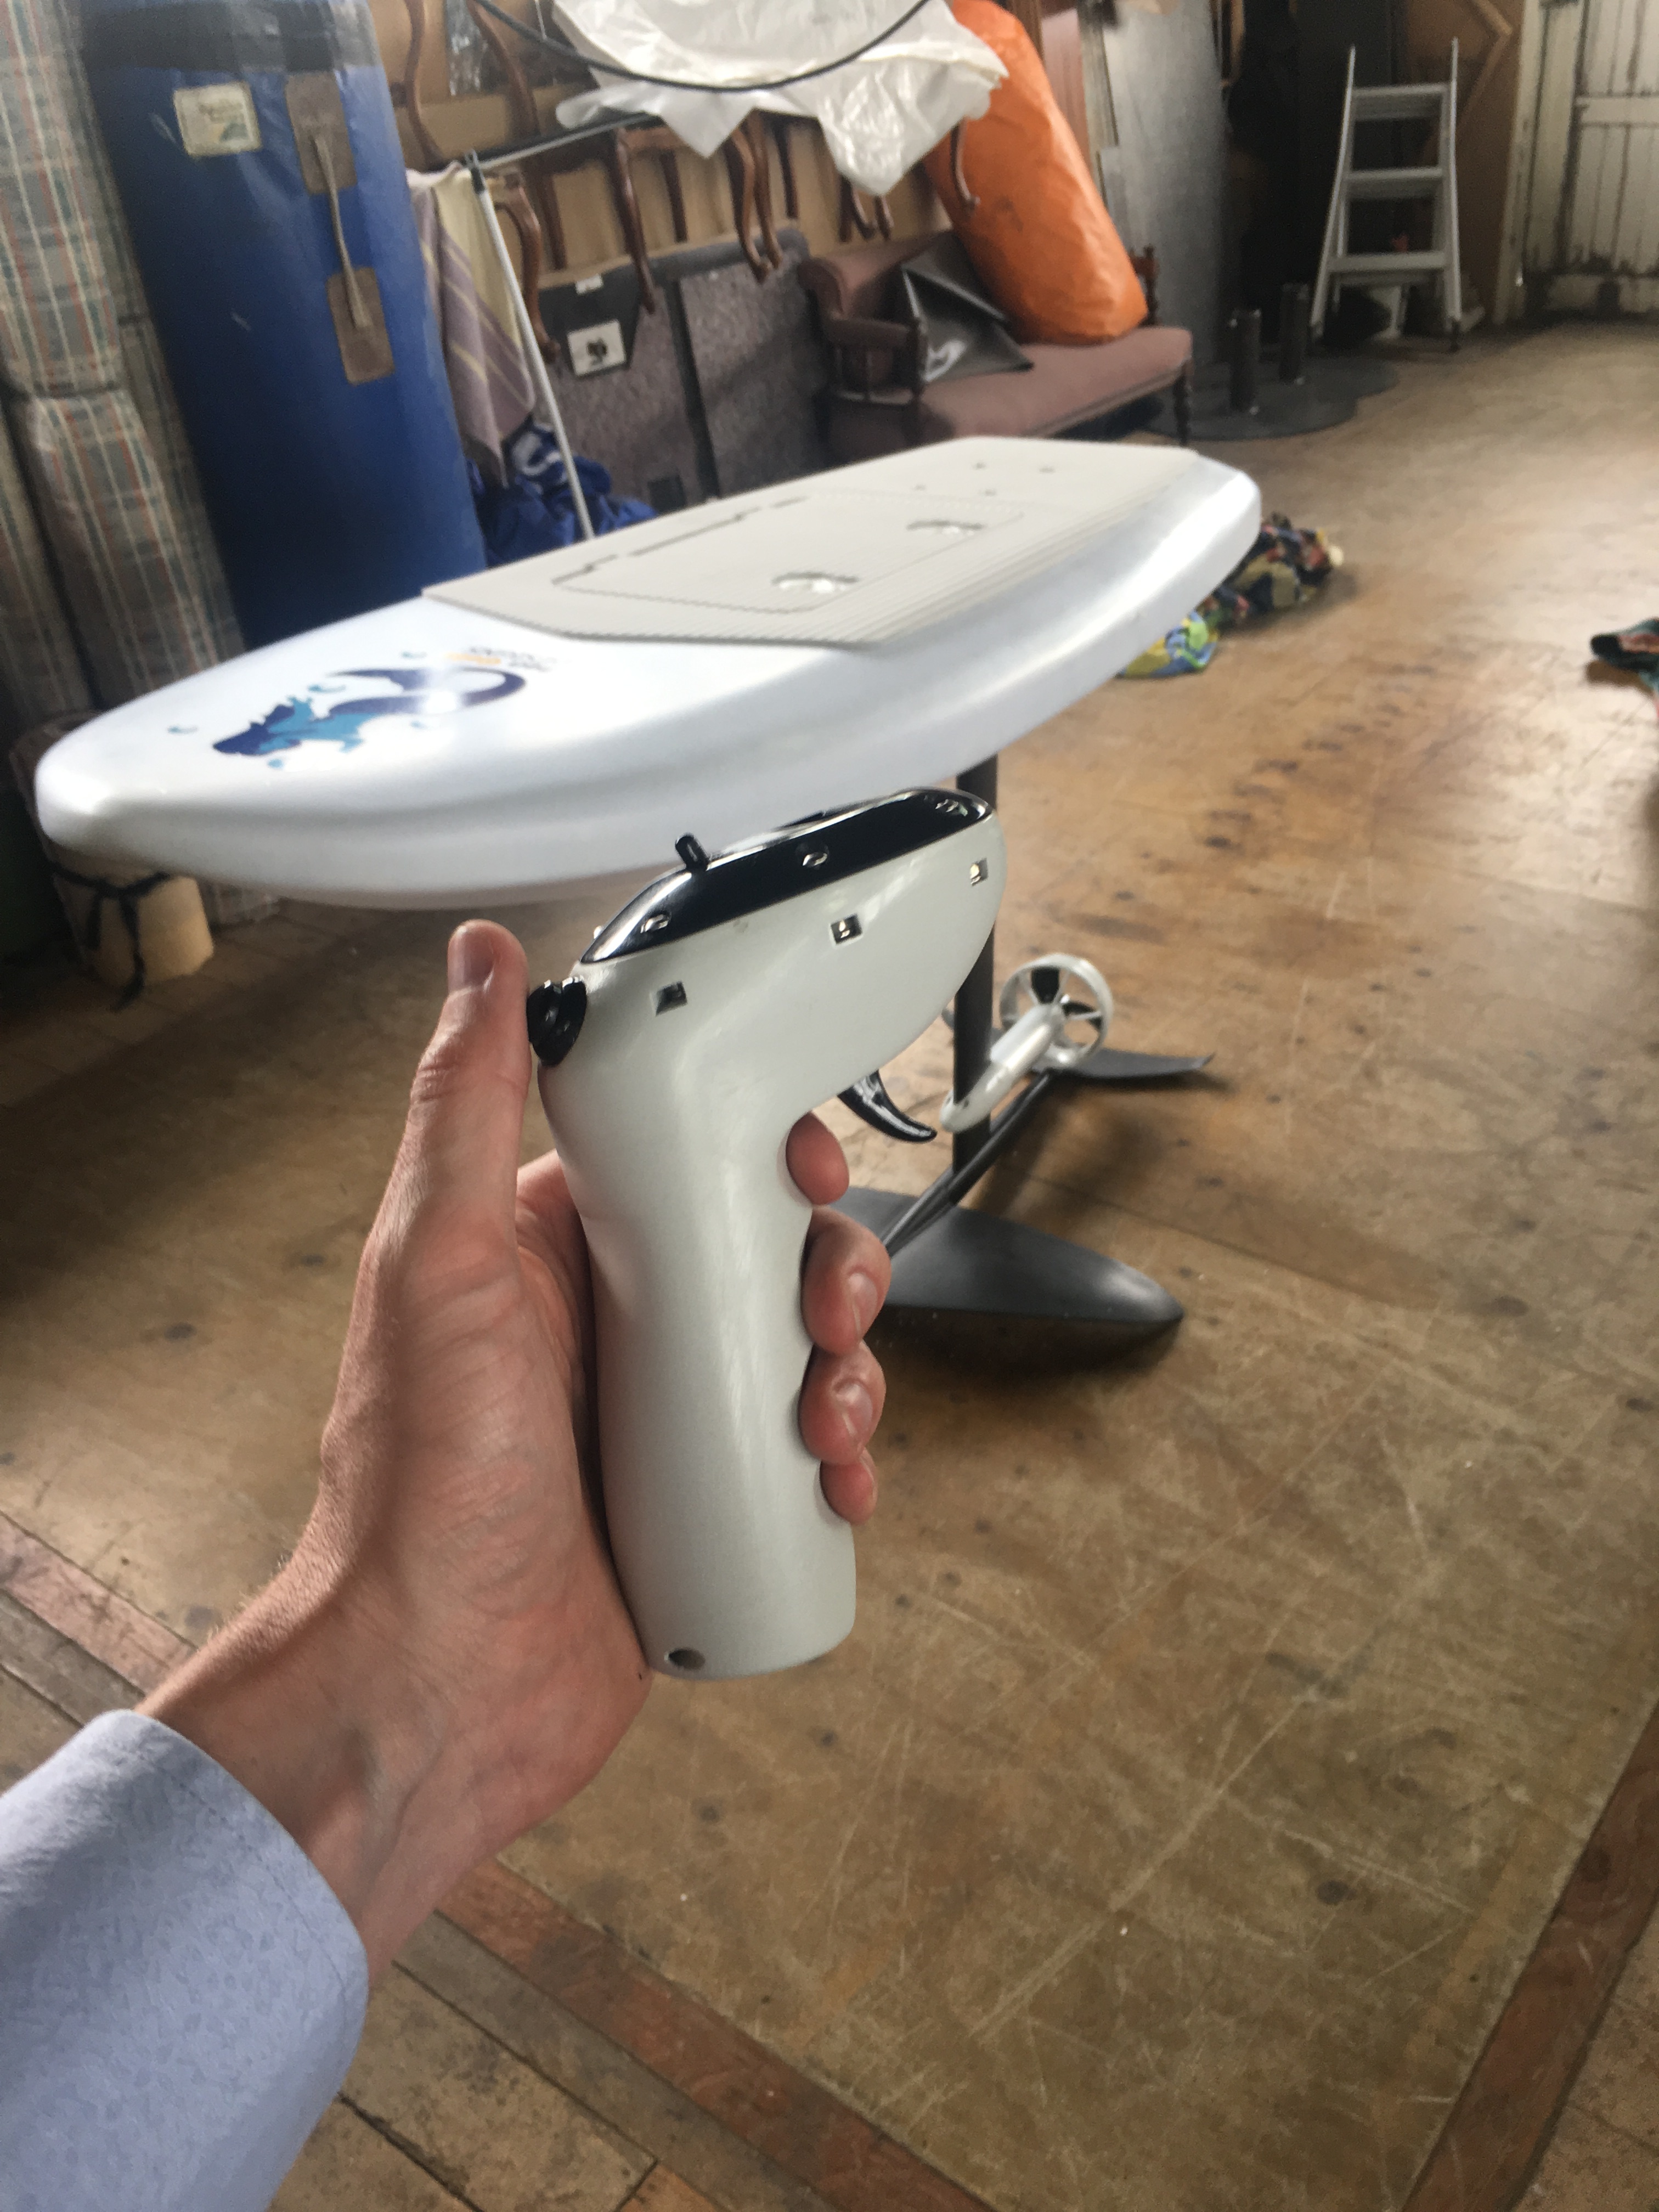
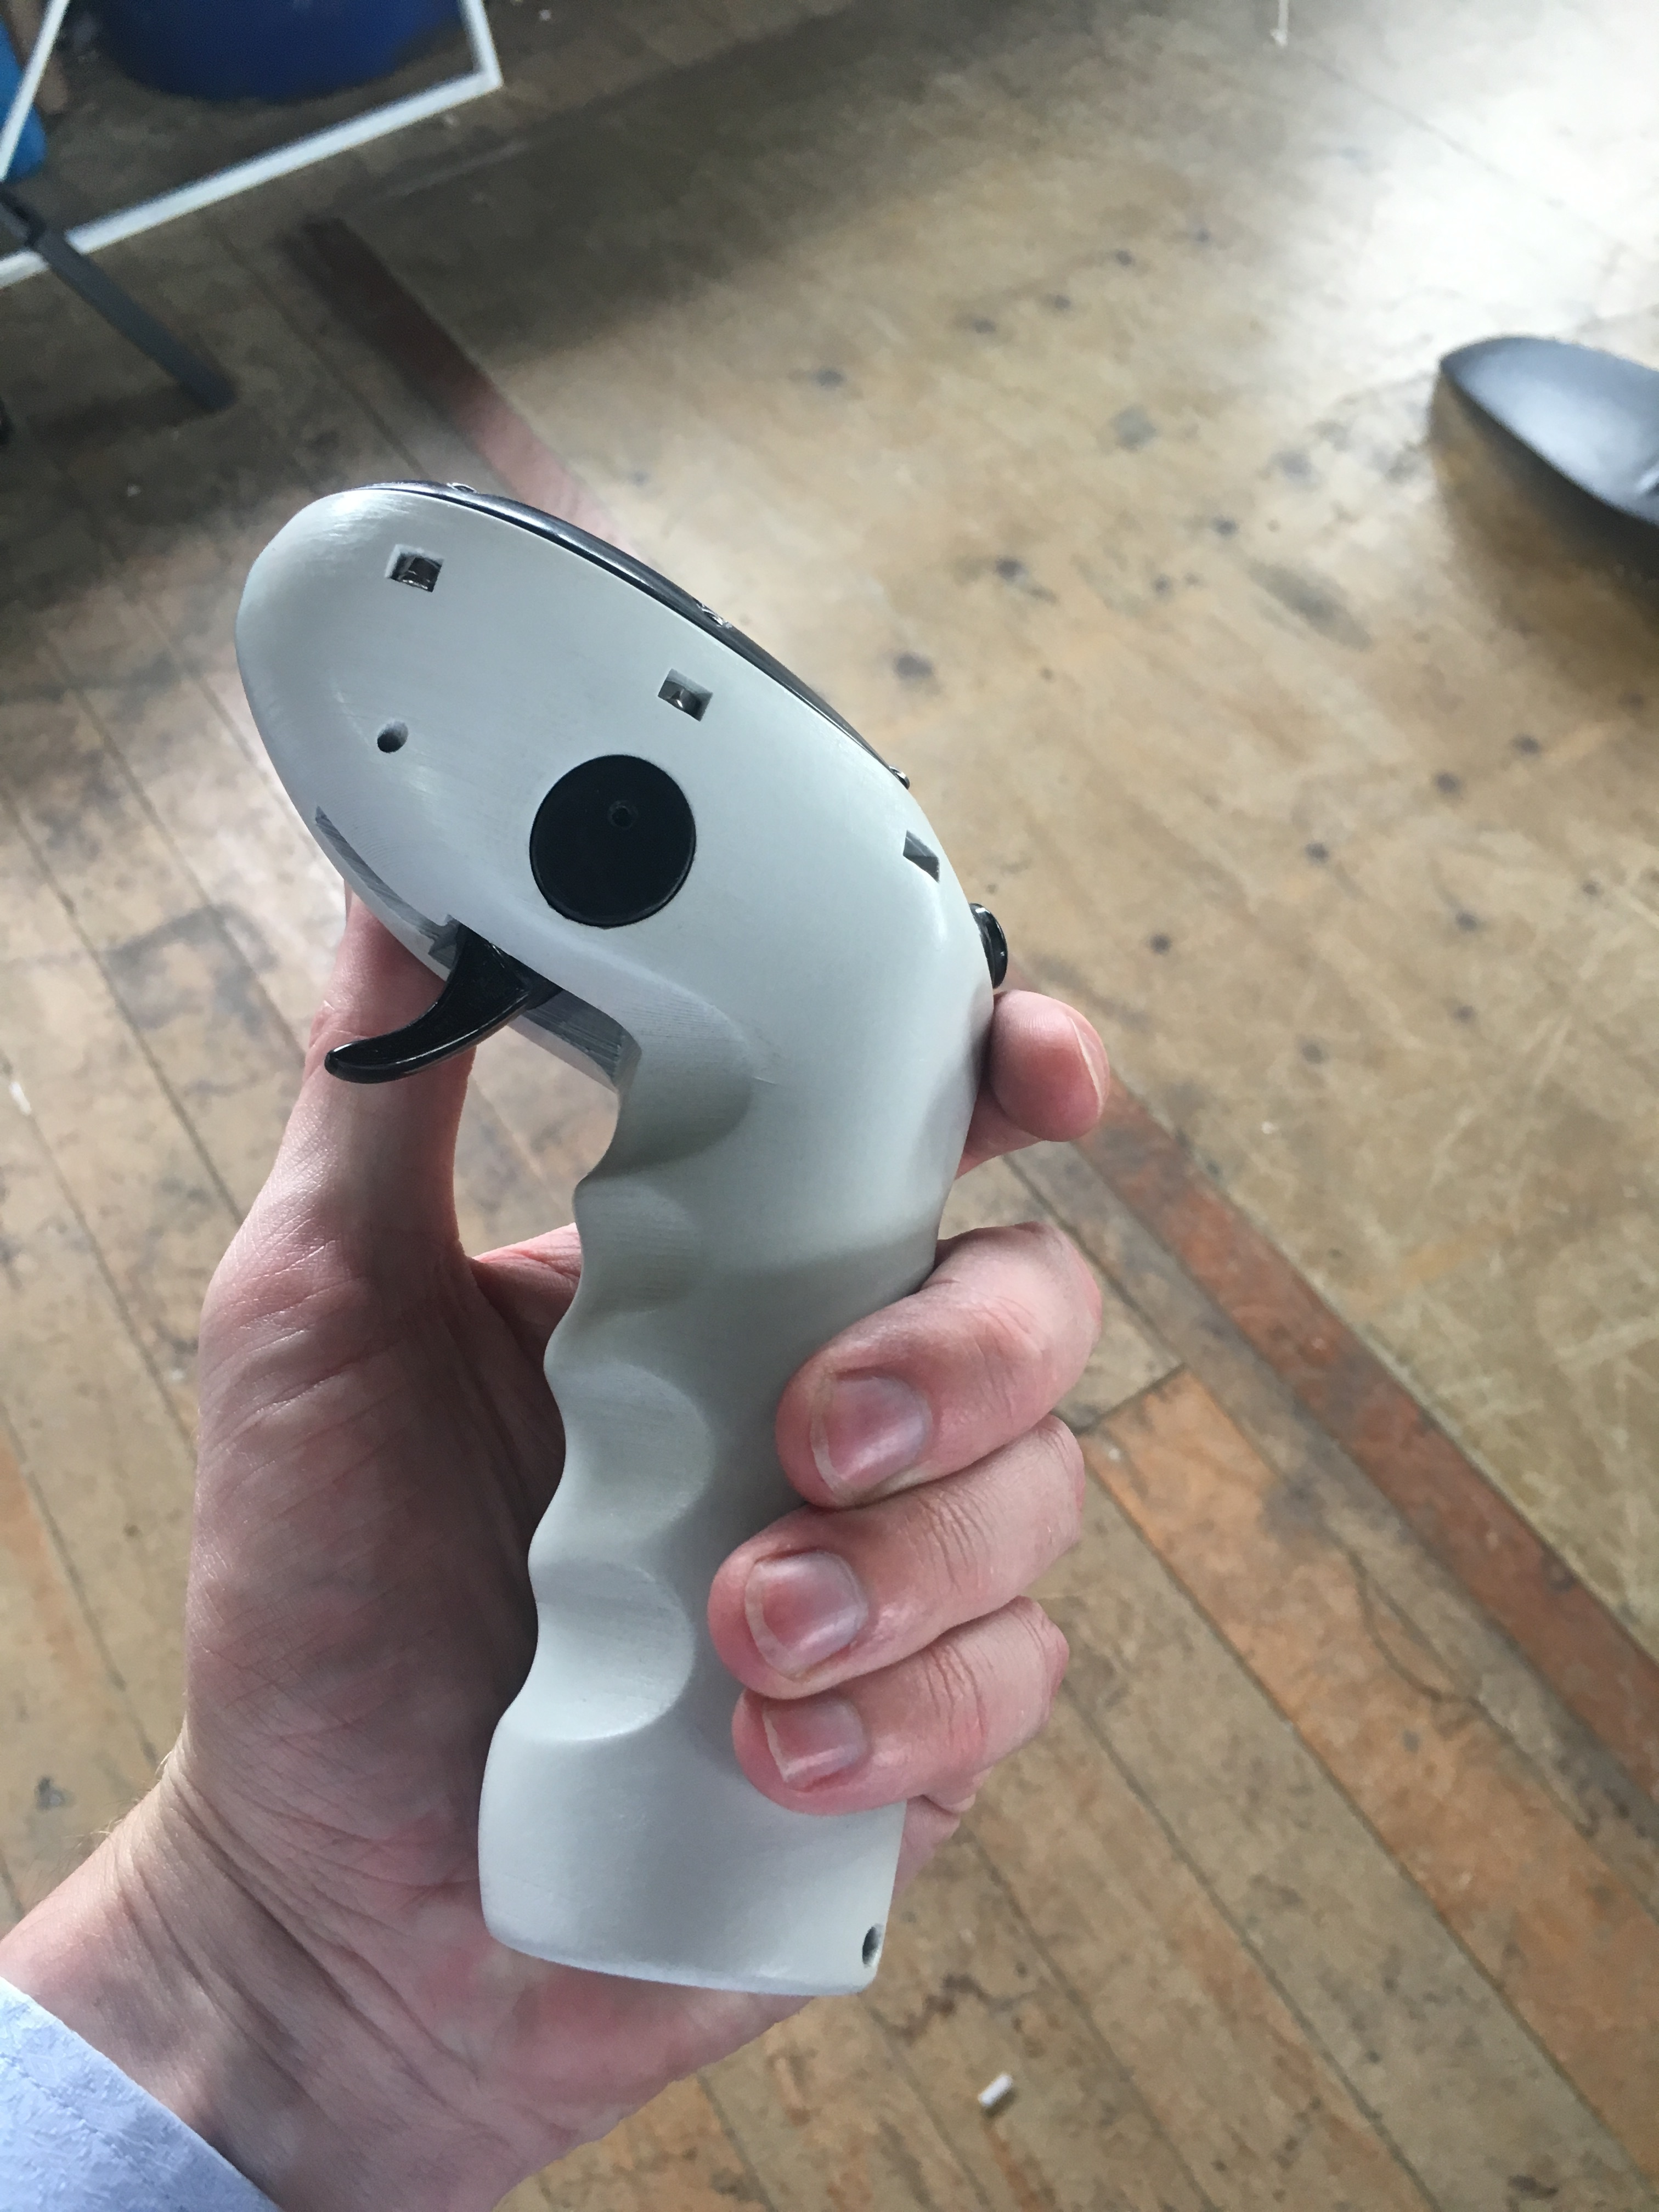
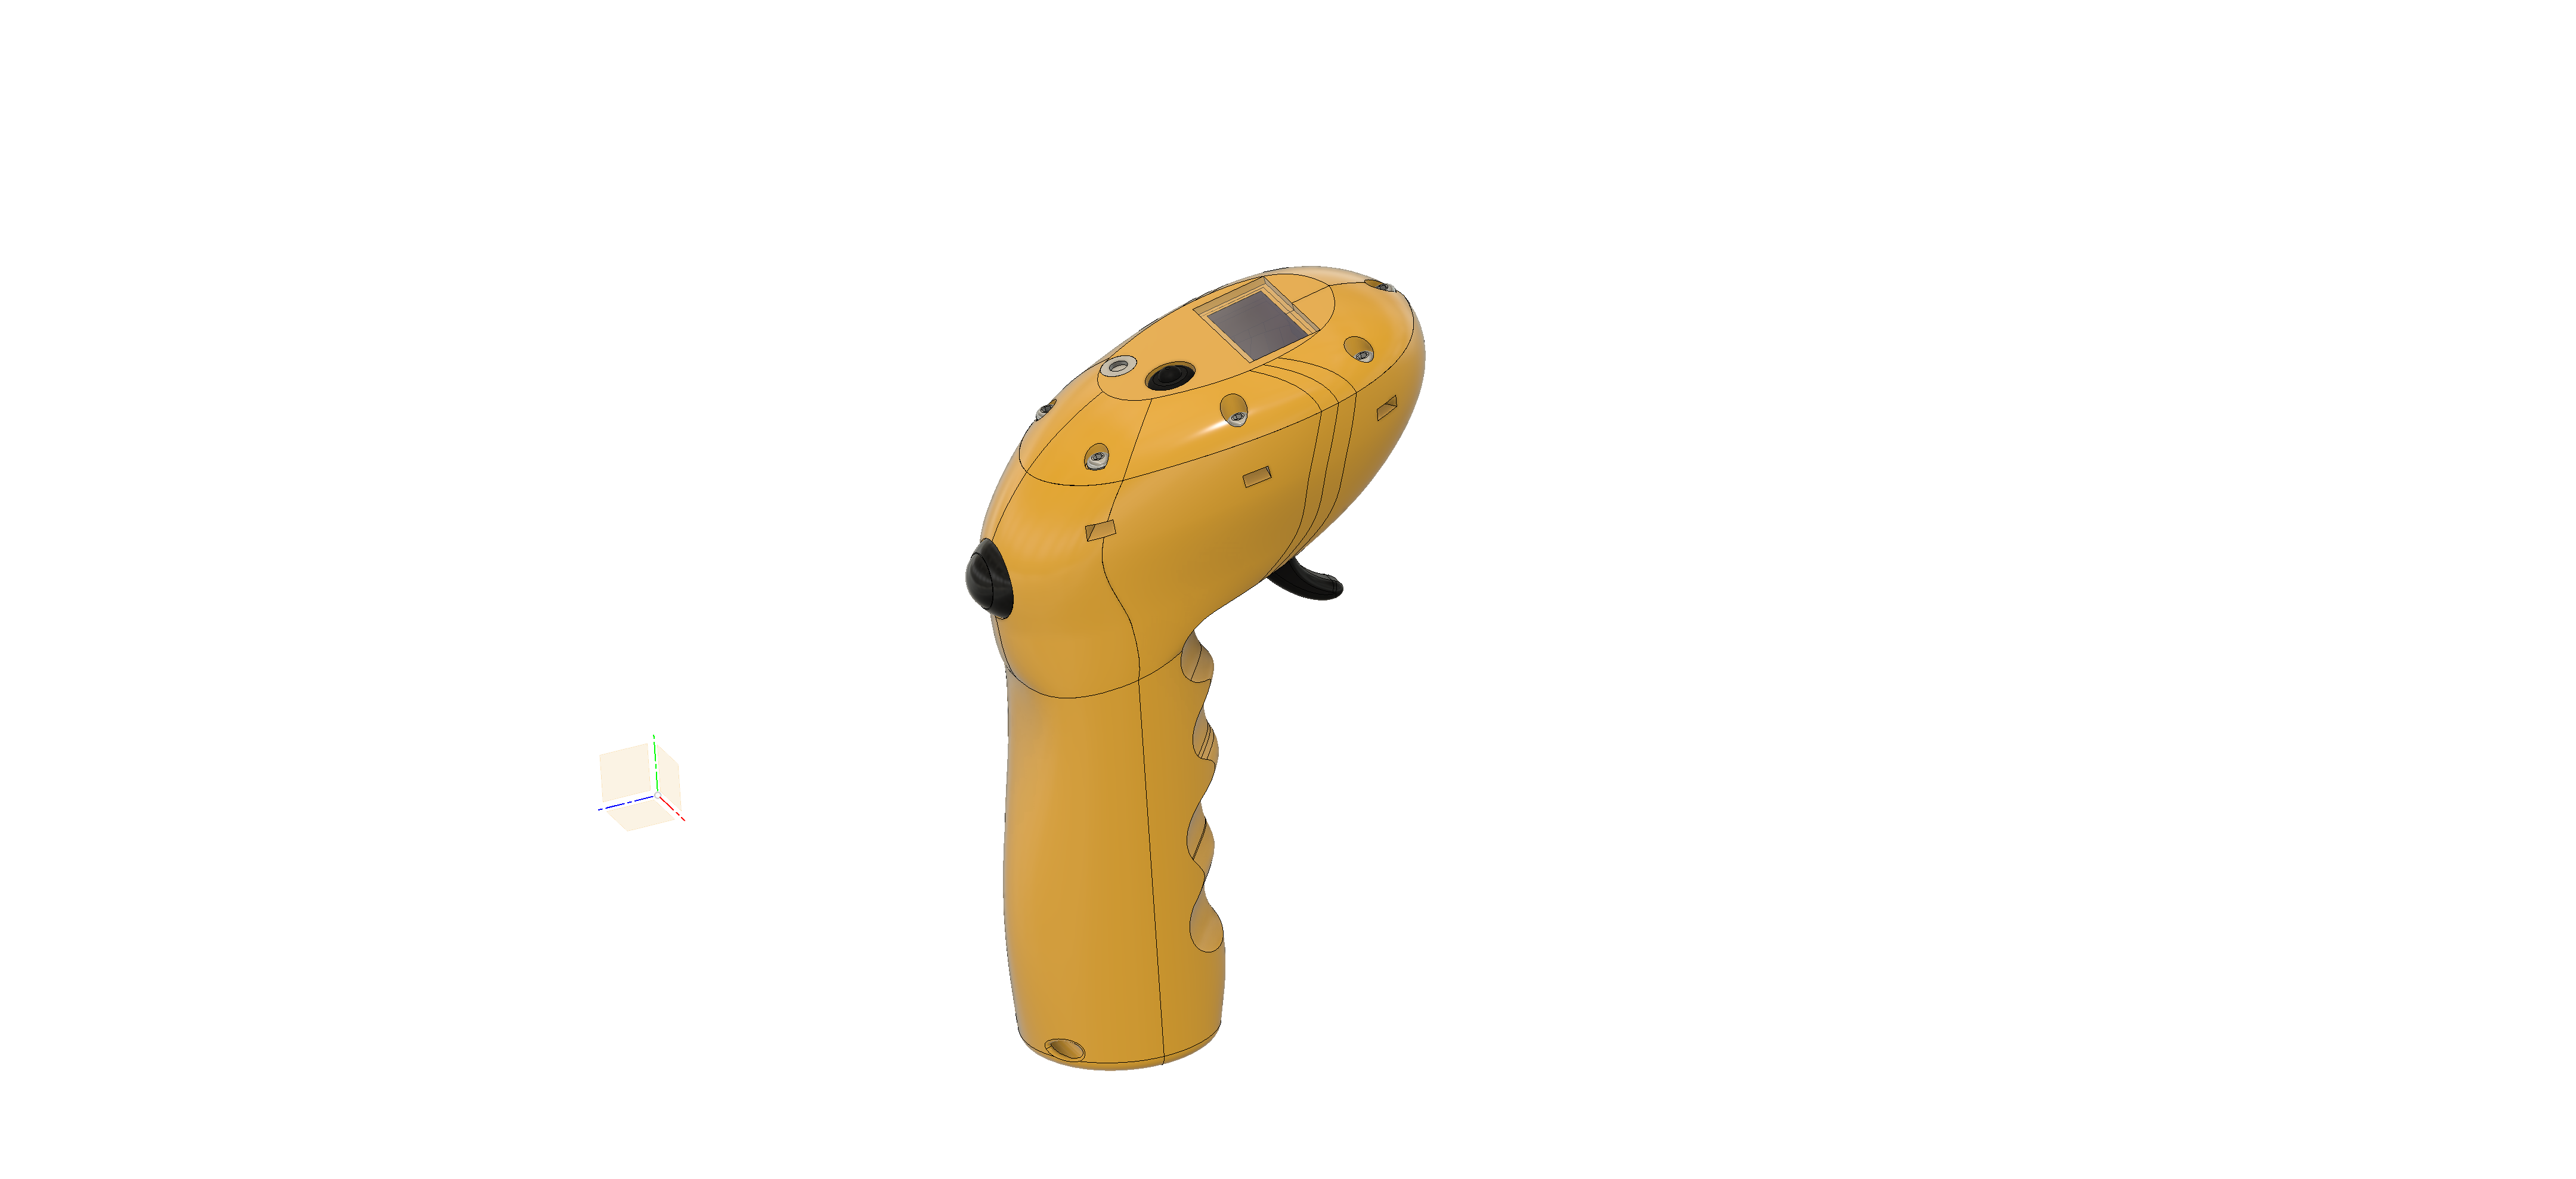
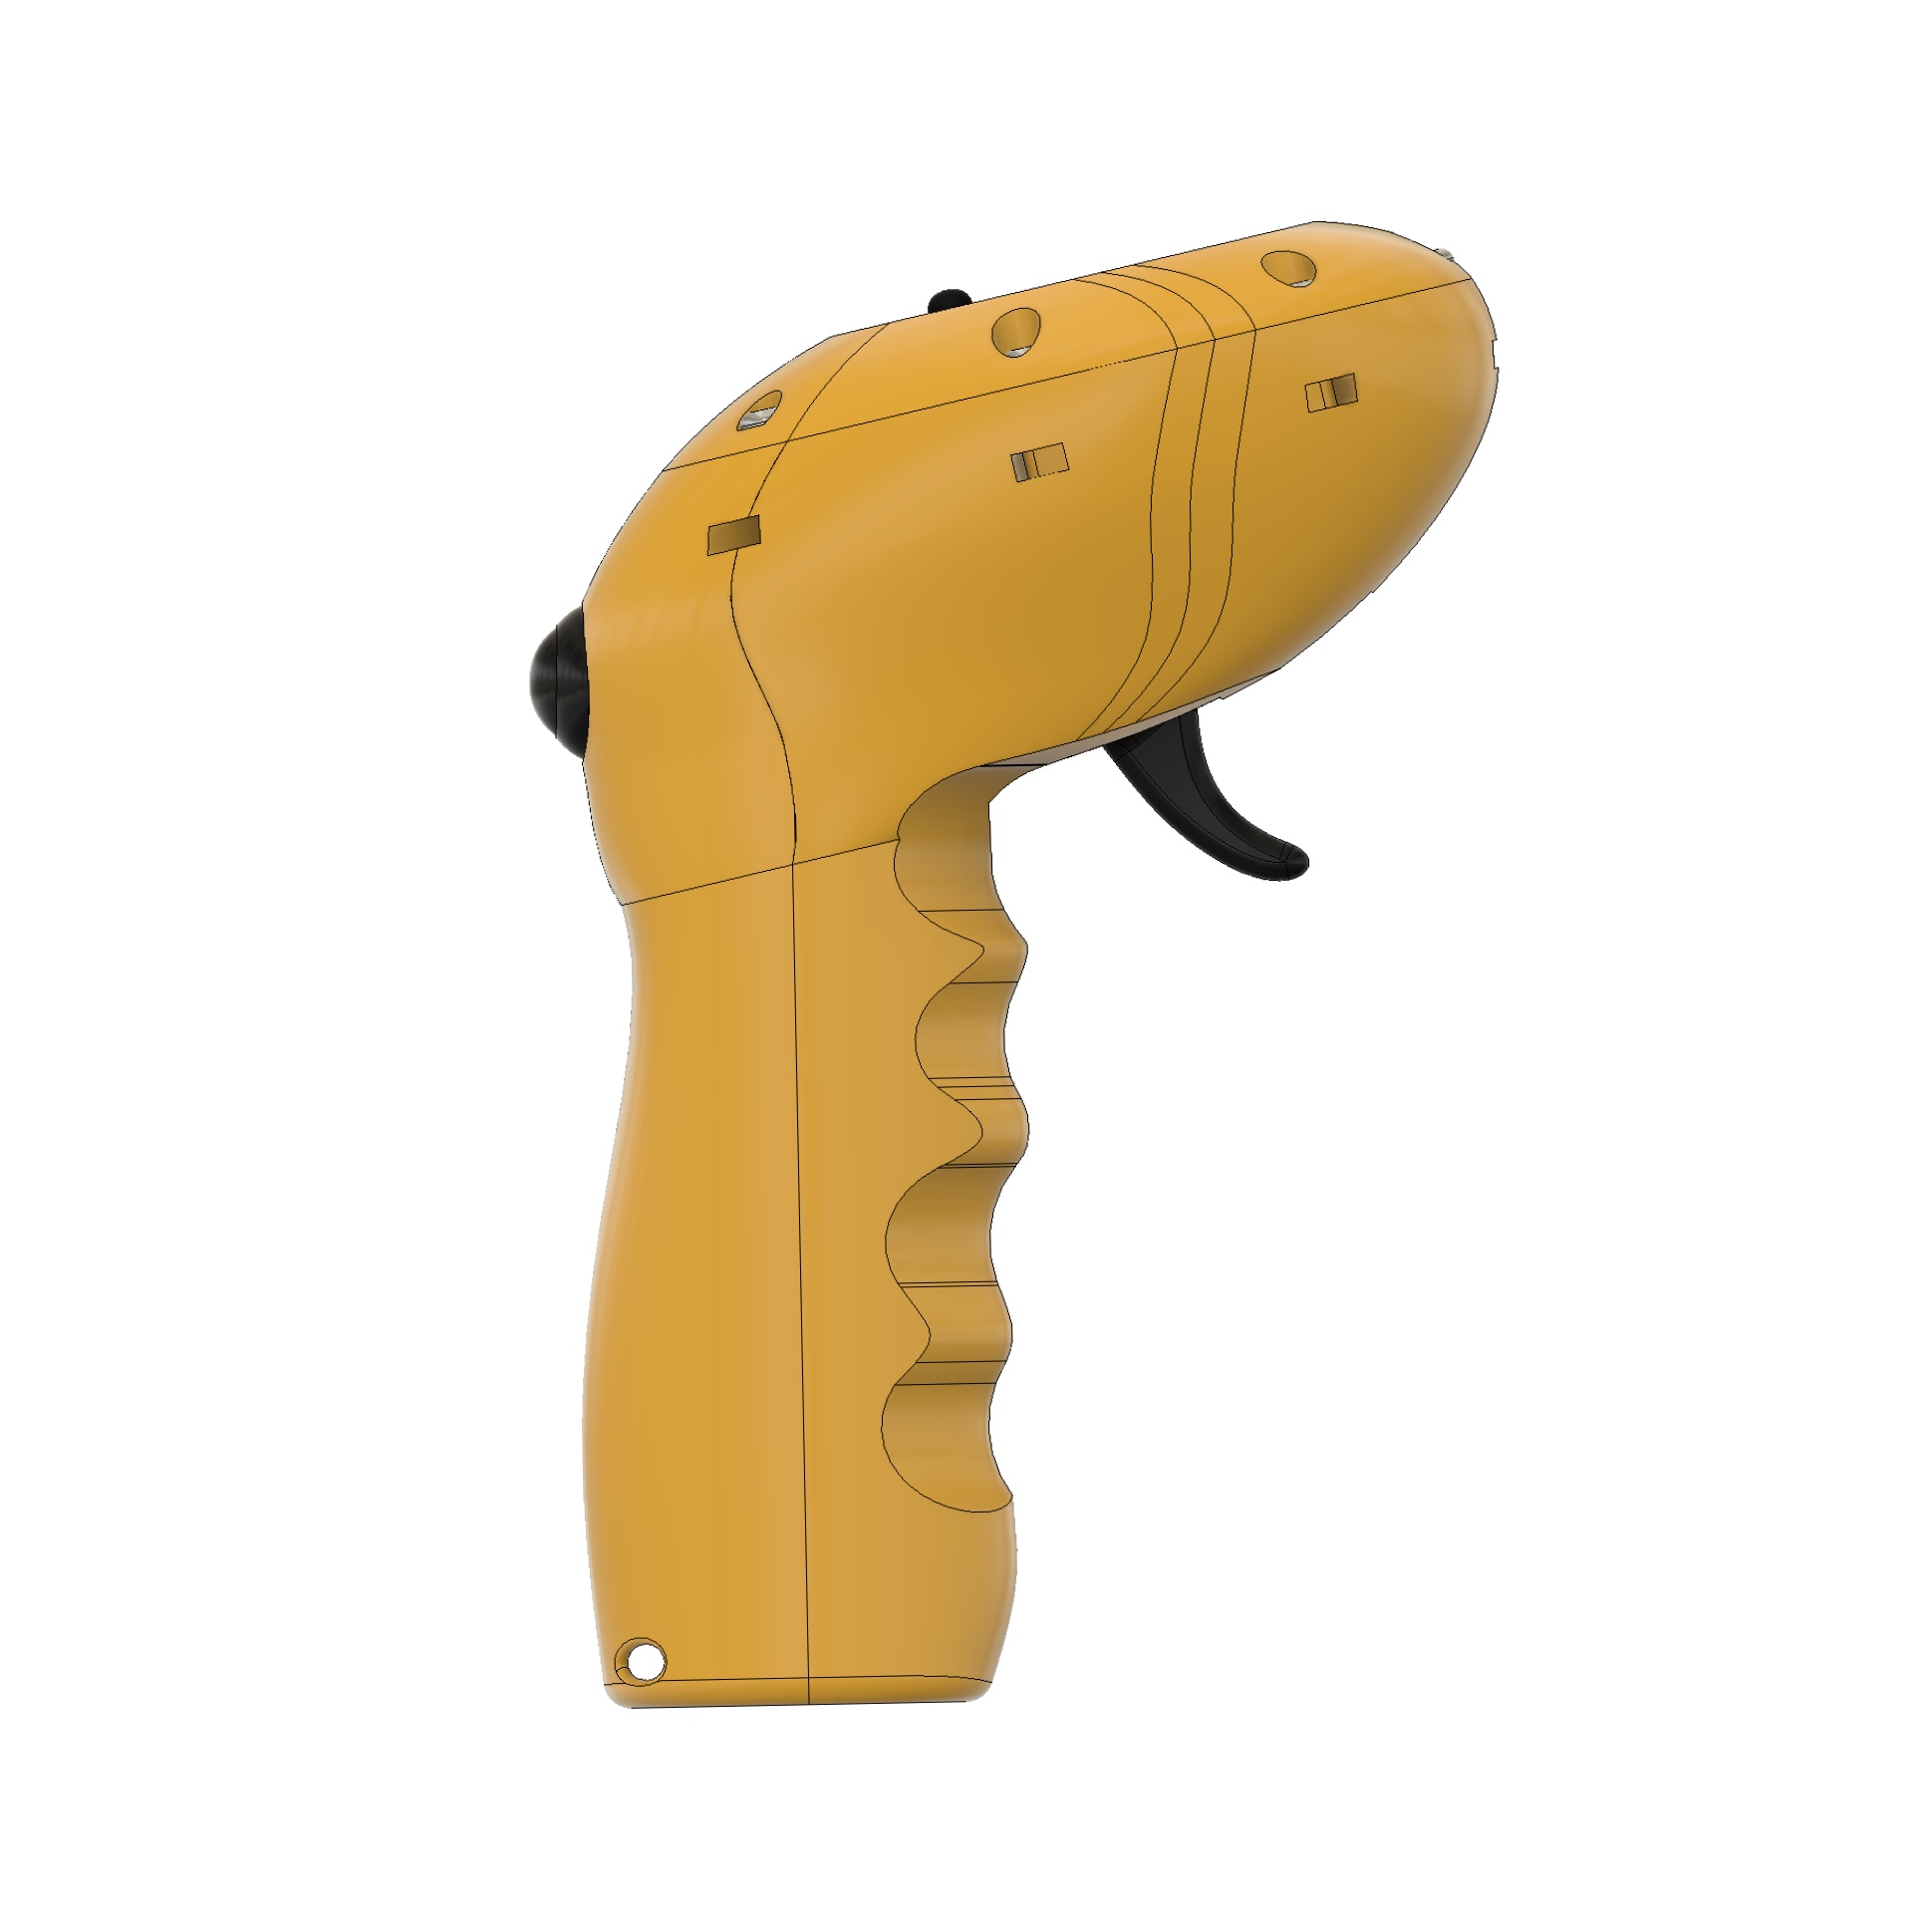
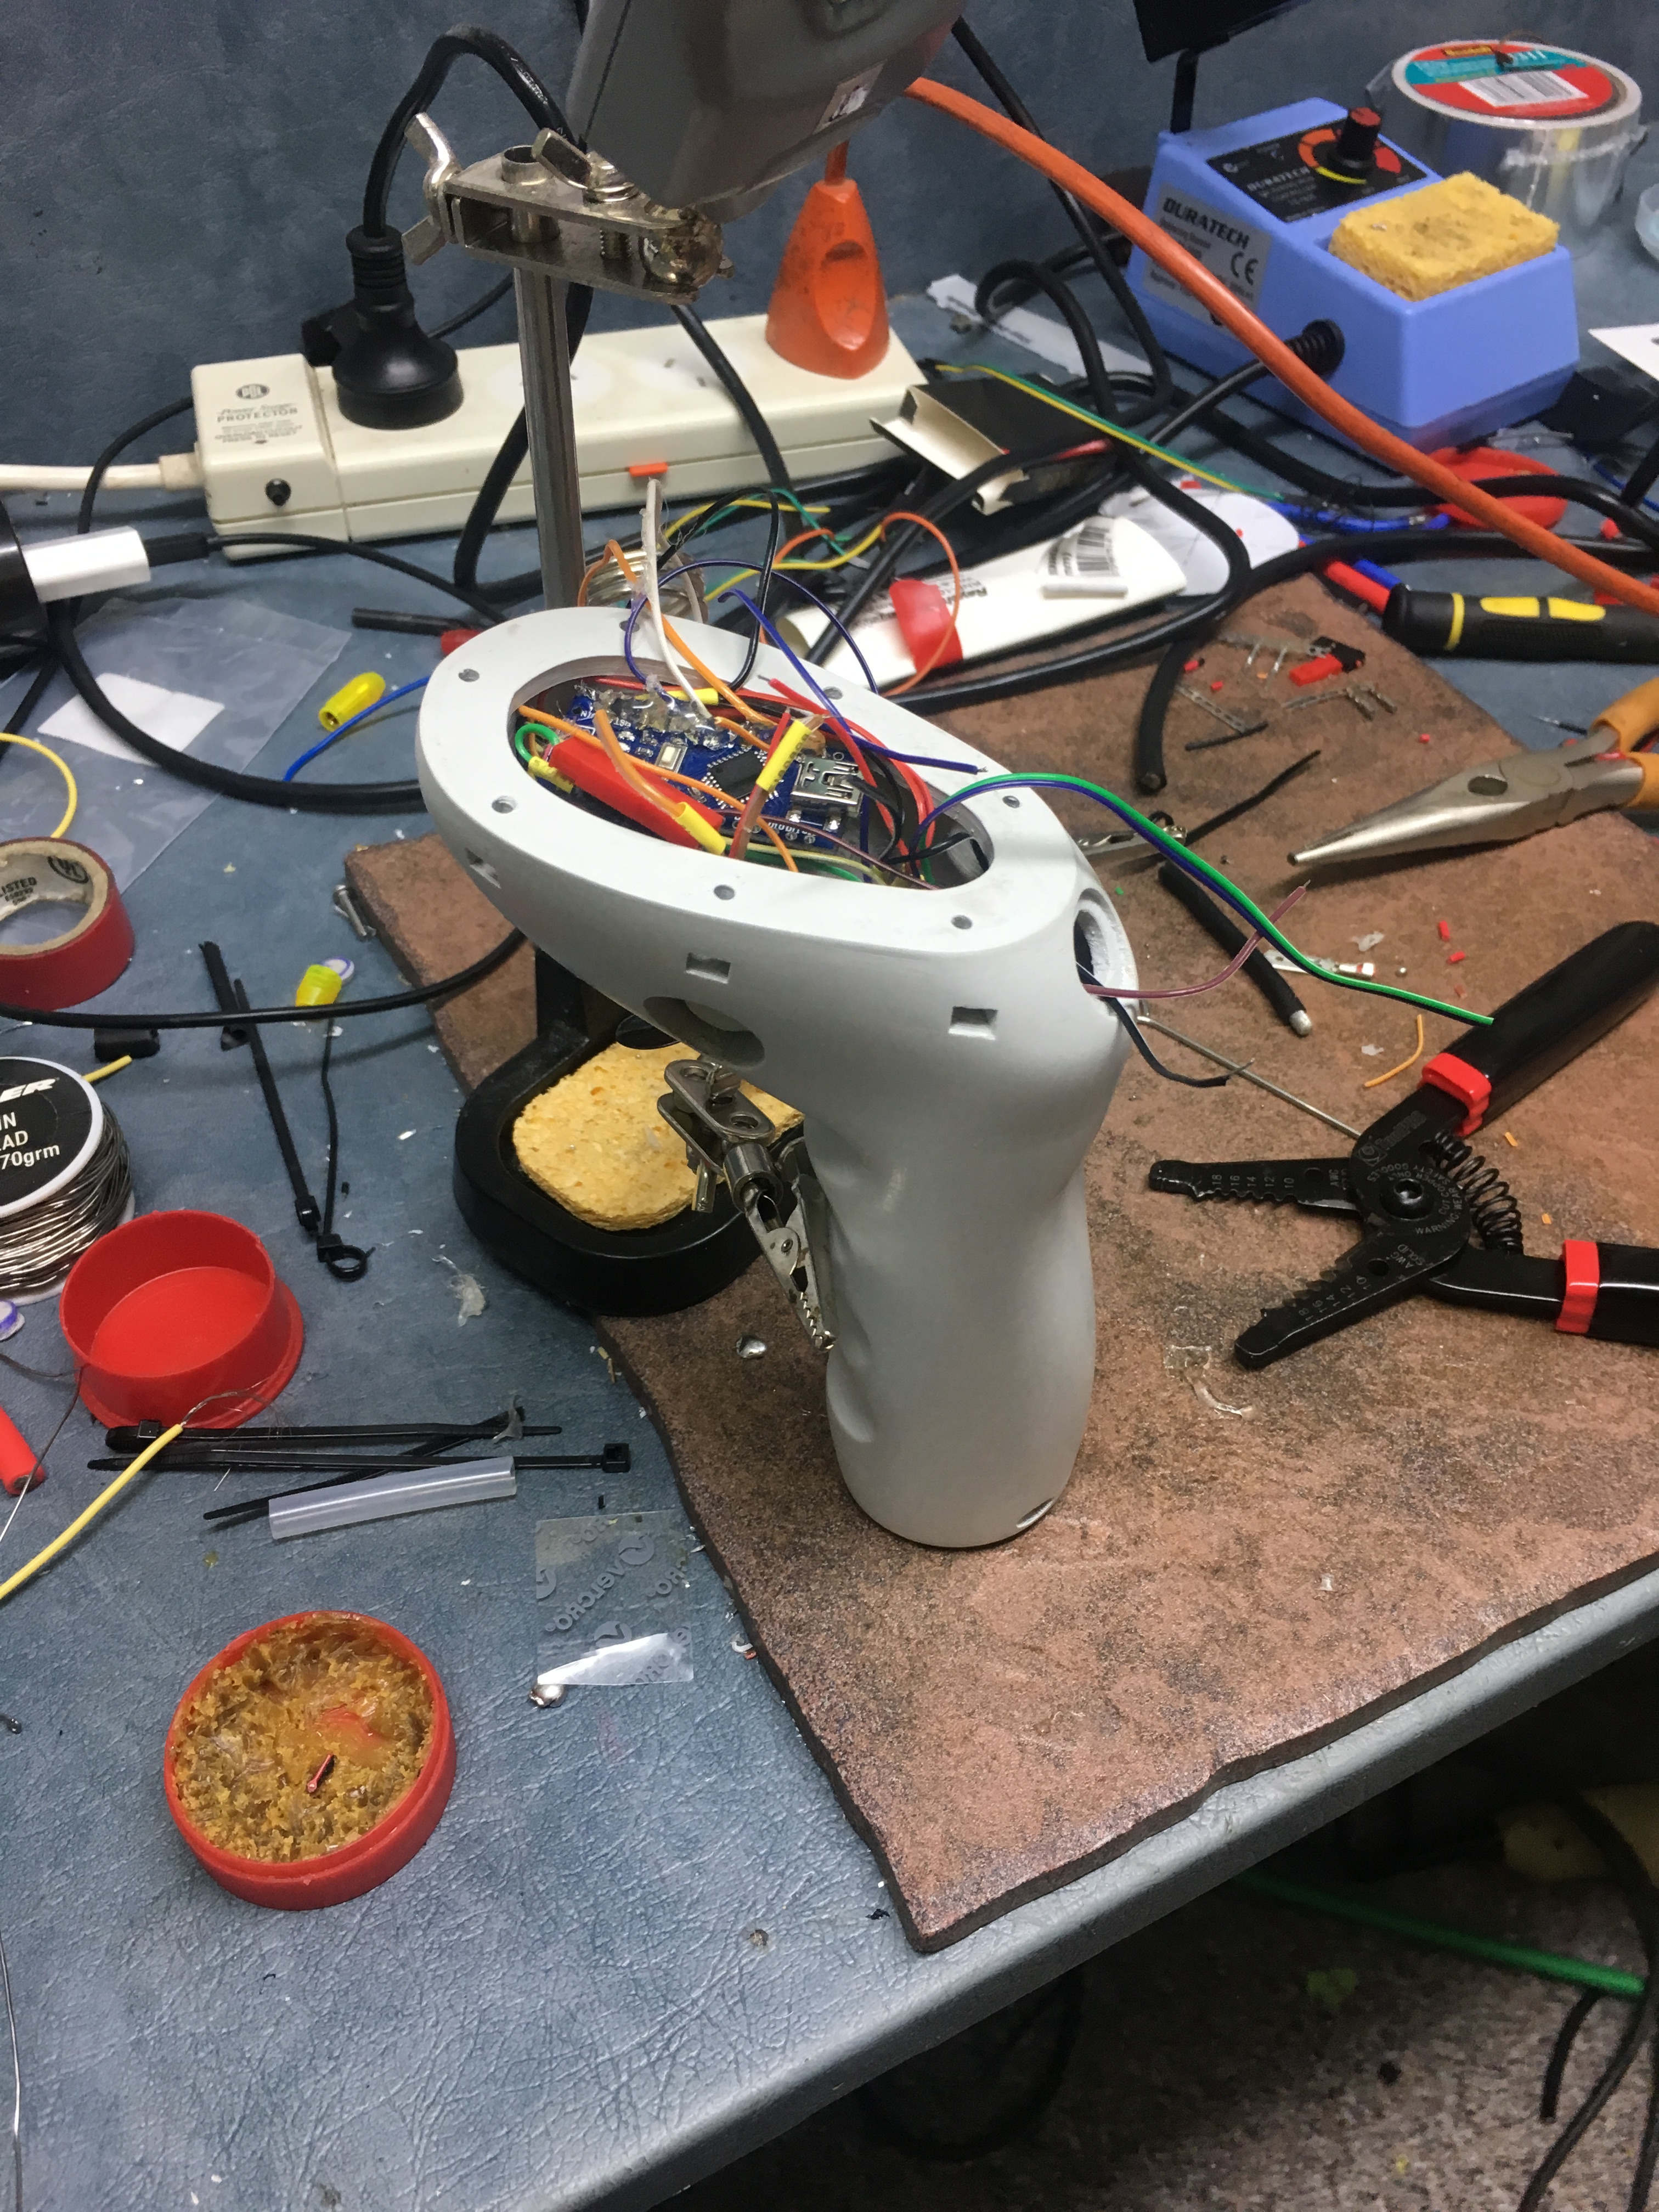
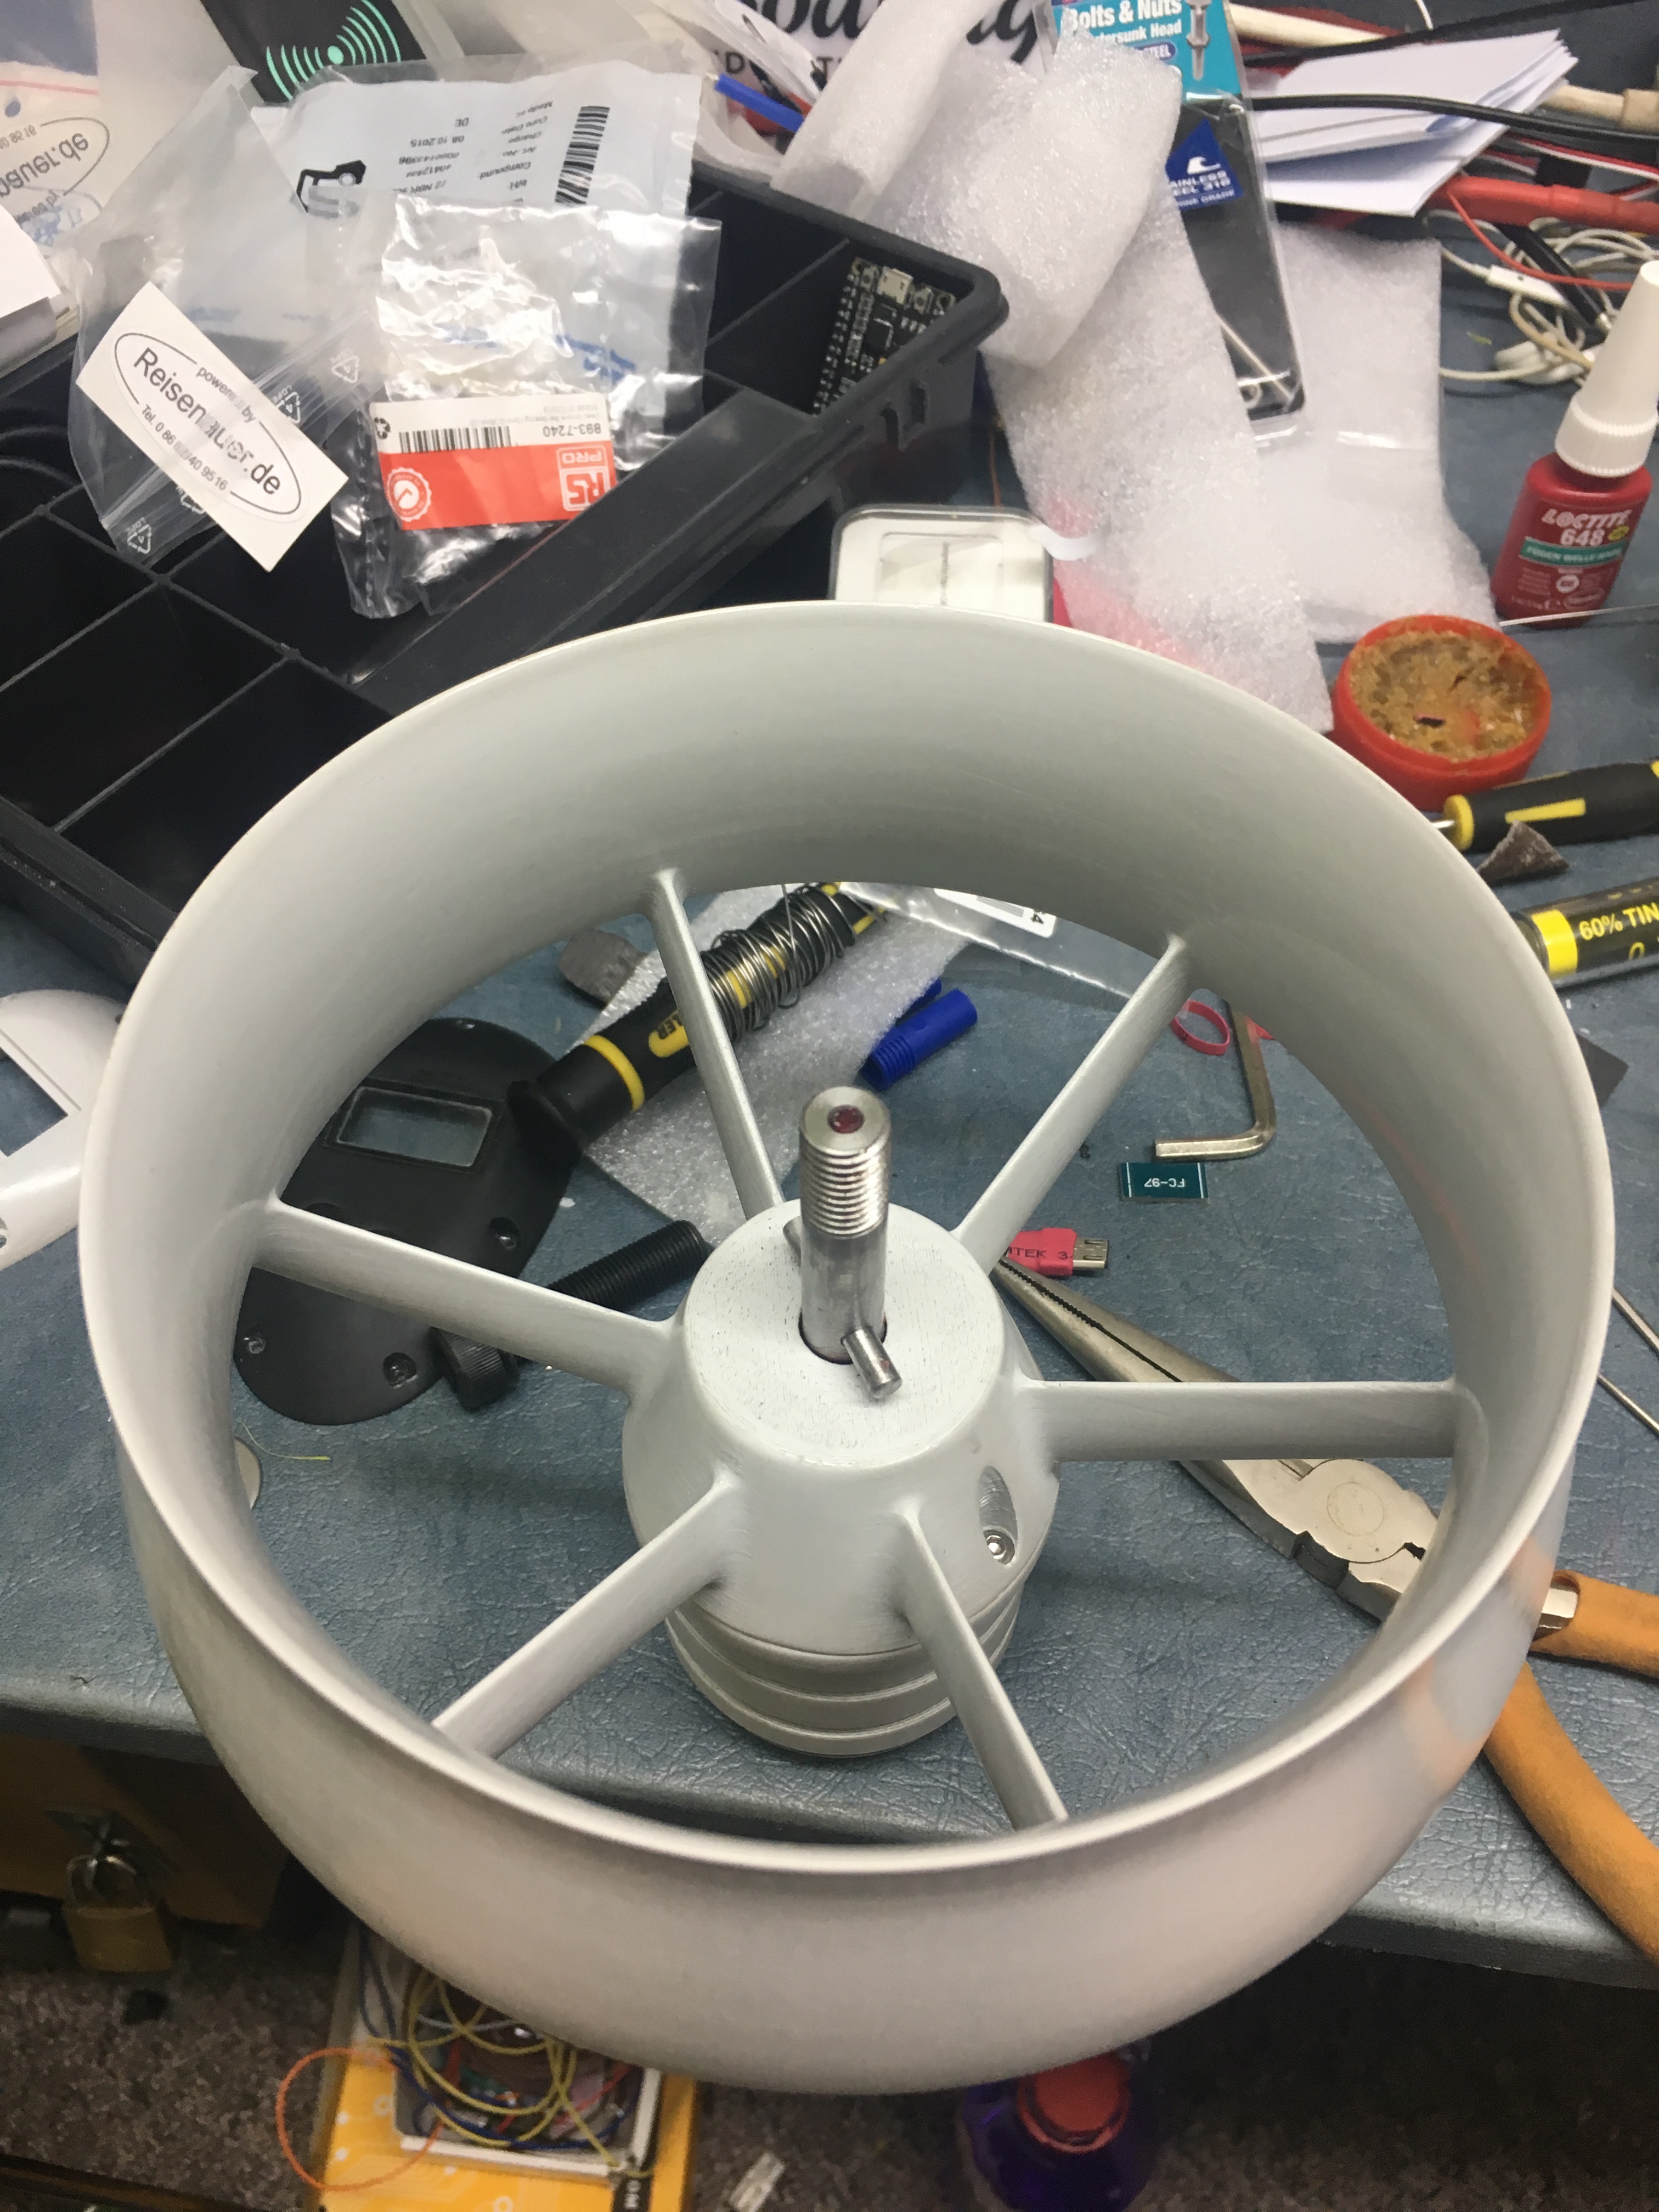
I think the remote probably took the longest for me to design and get right. It was the first thing I ever drew in Fusion 360 so may have been a bit ambitious for the first project but got there in the end. Bluetooth with Arduino nano, Oled screen for remote and board Battery level and deadman switch for safety. Huge thanks to @hiorth for your help.
Great job! Your 3d prints look like manufactured plastic. Did you sand and treat the plastic? Do you happen to have a parts list too? And maybe I missed it, but what did you do to make the foam look like that at the end?
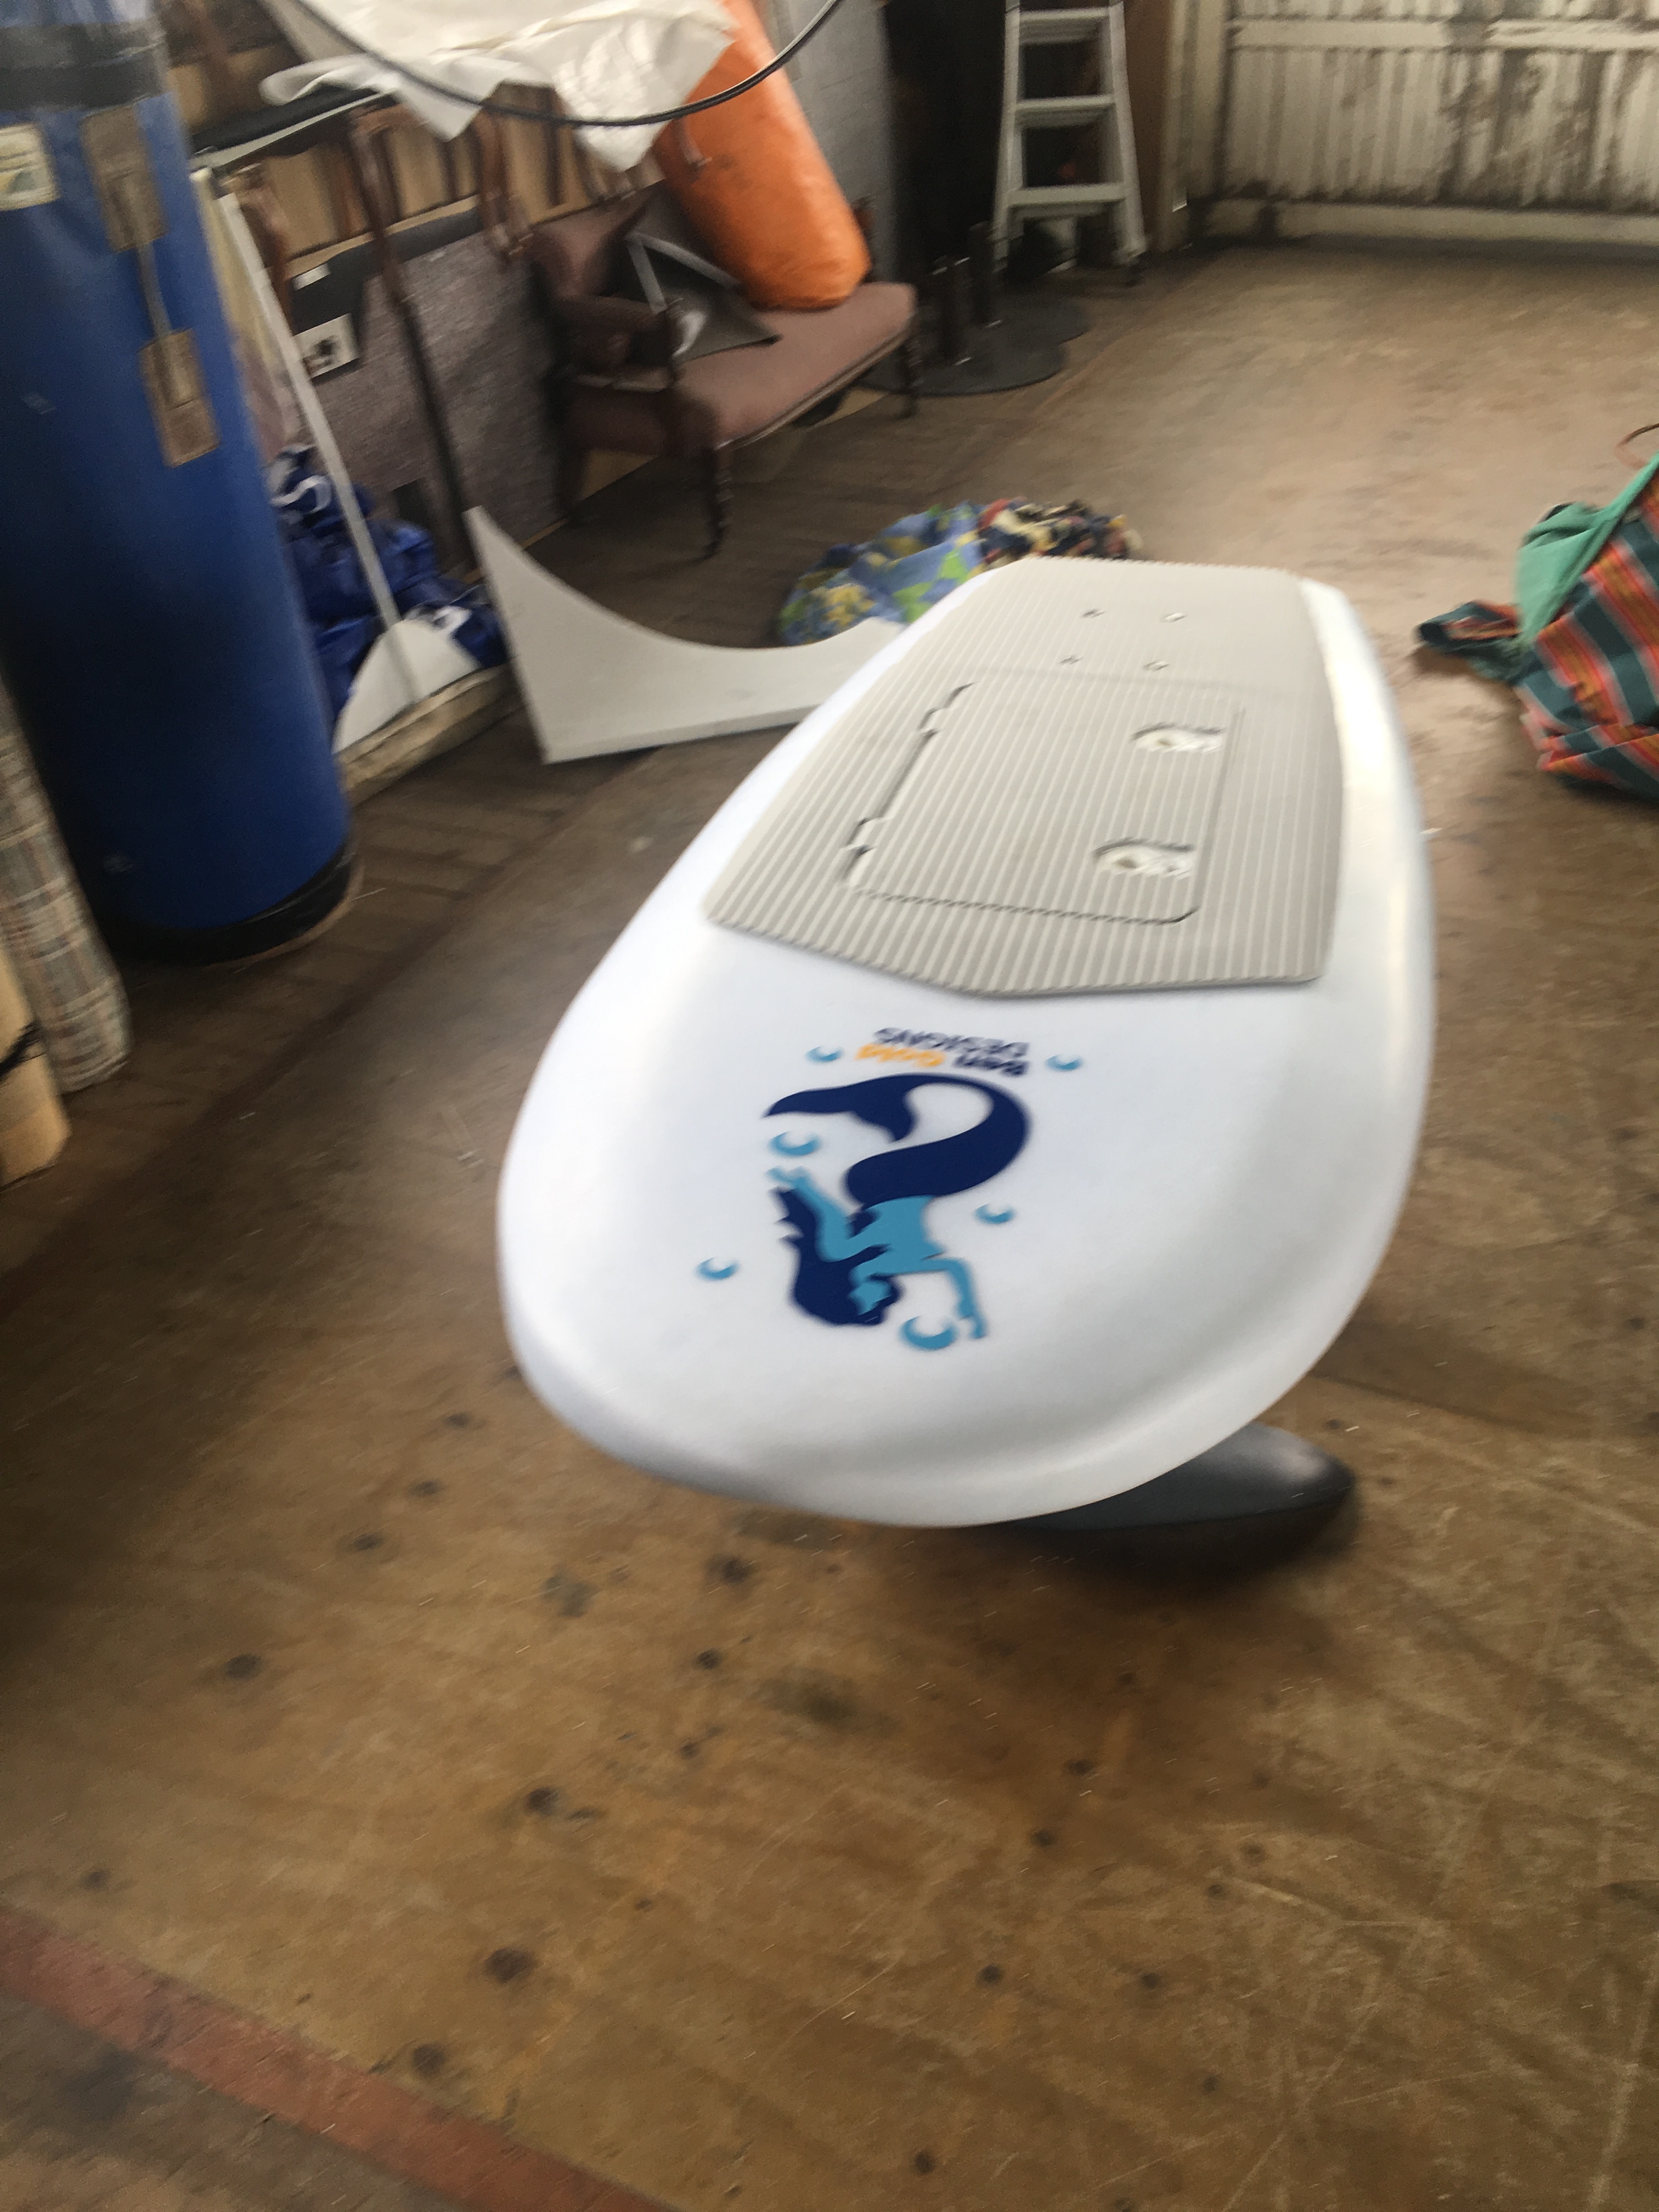
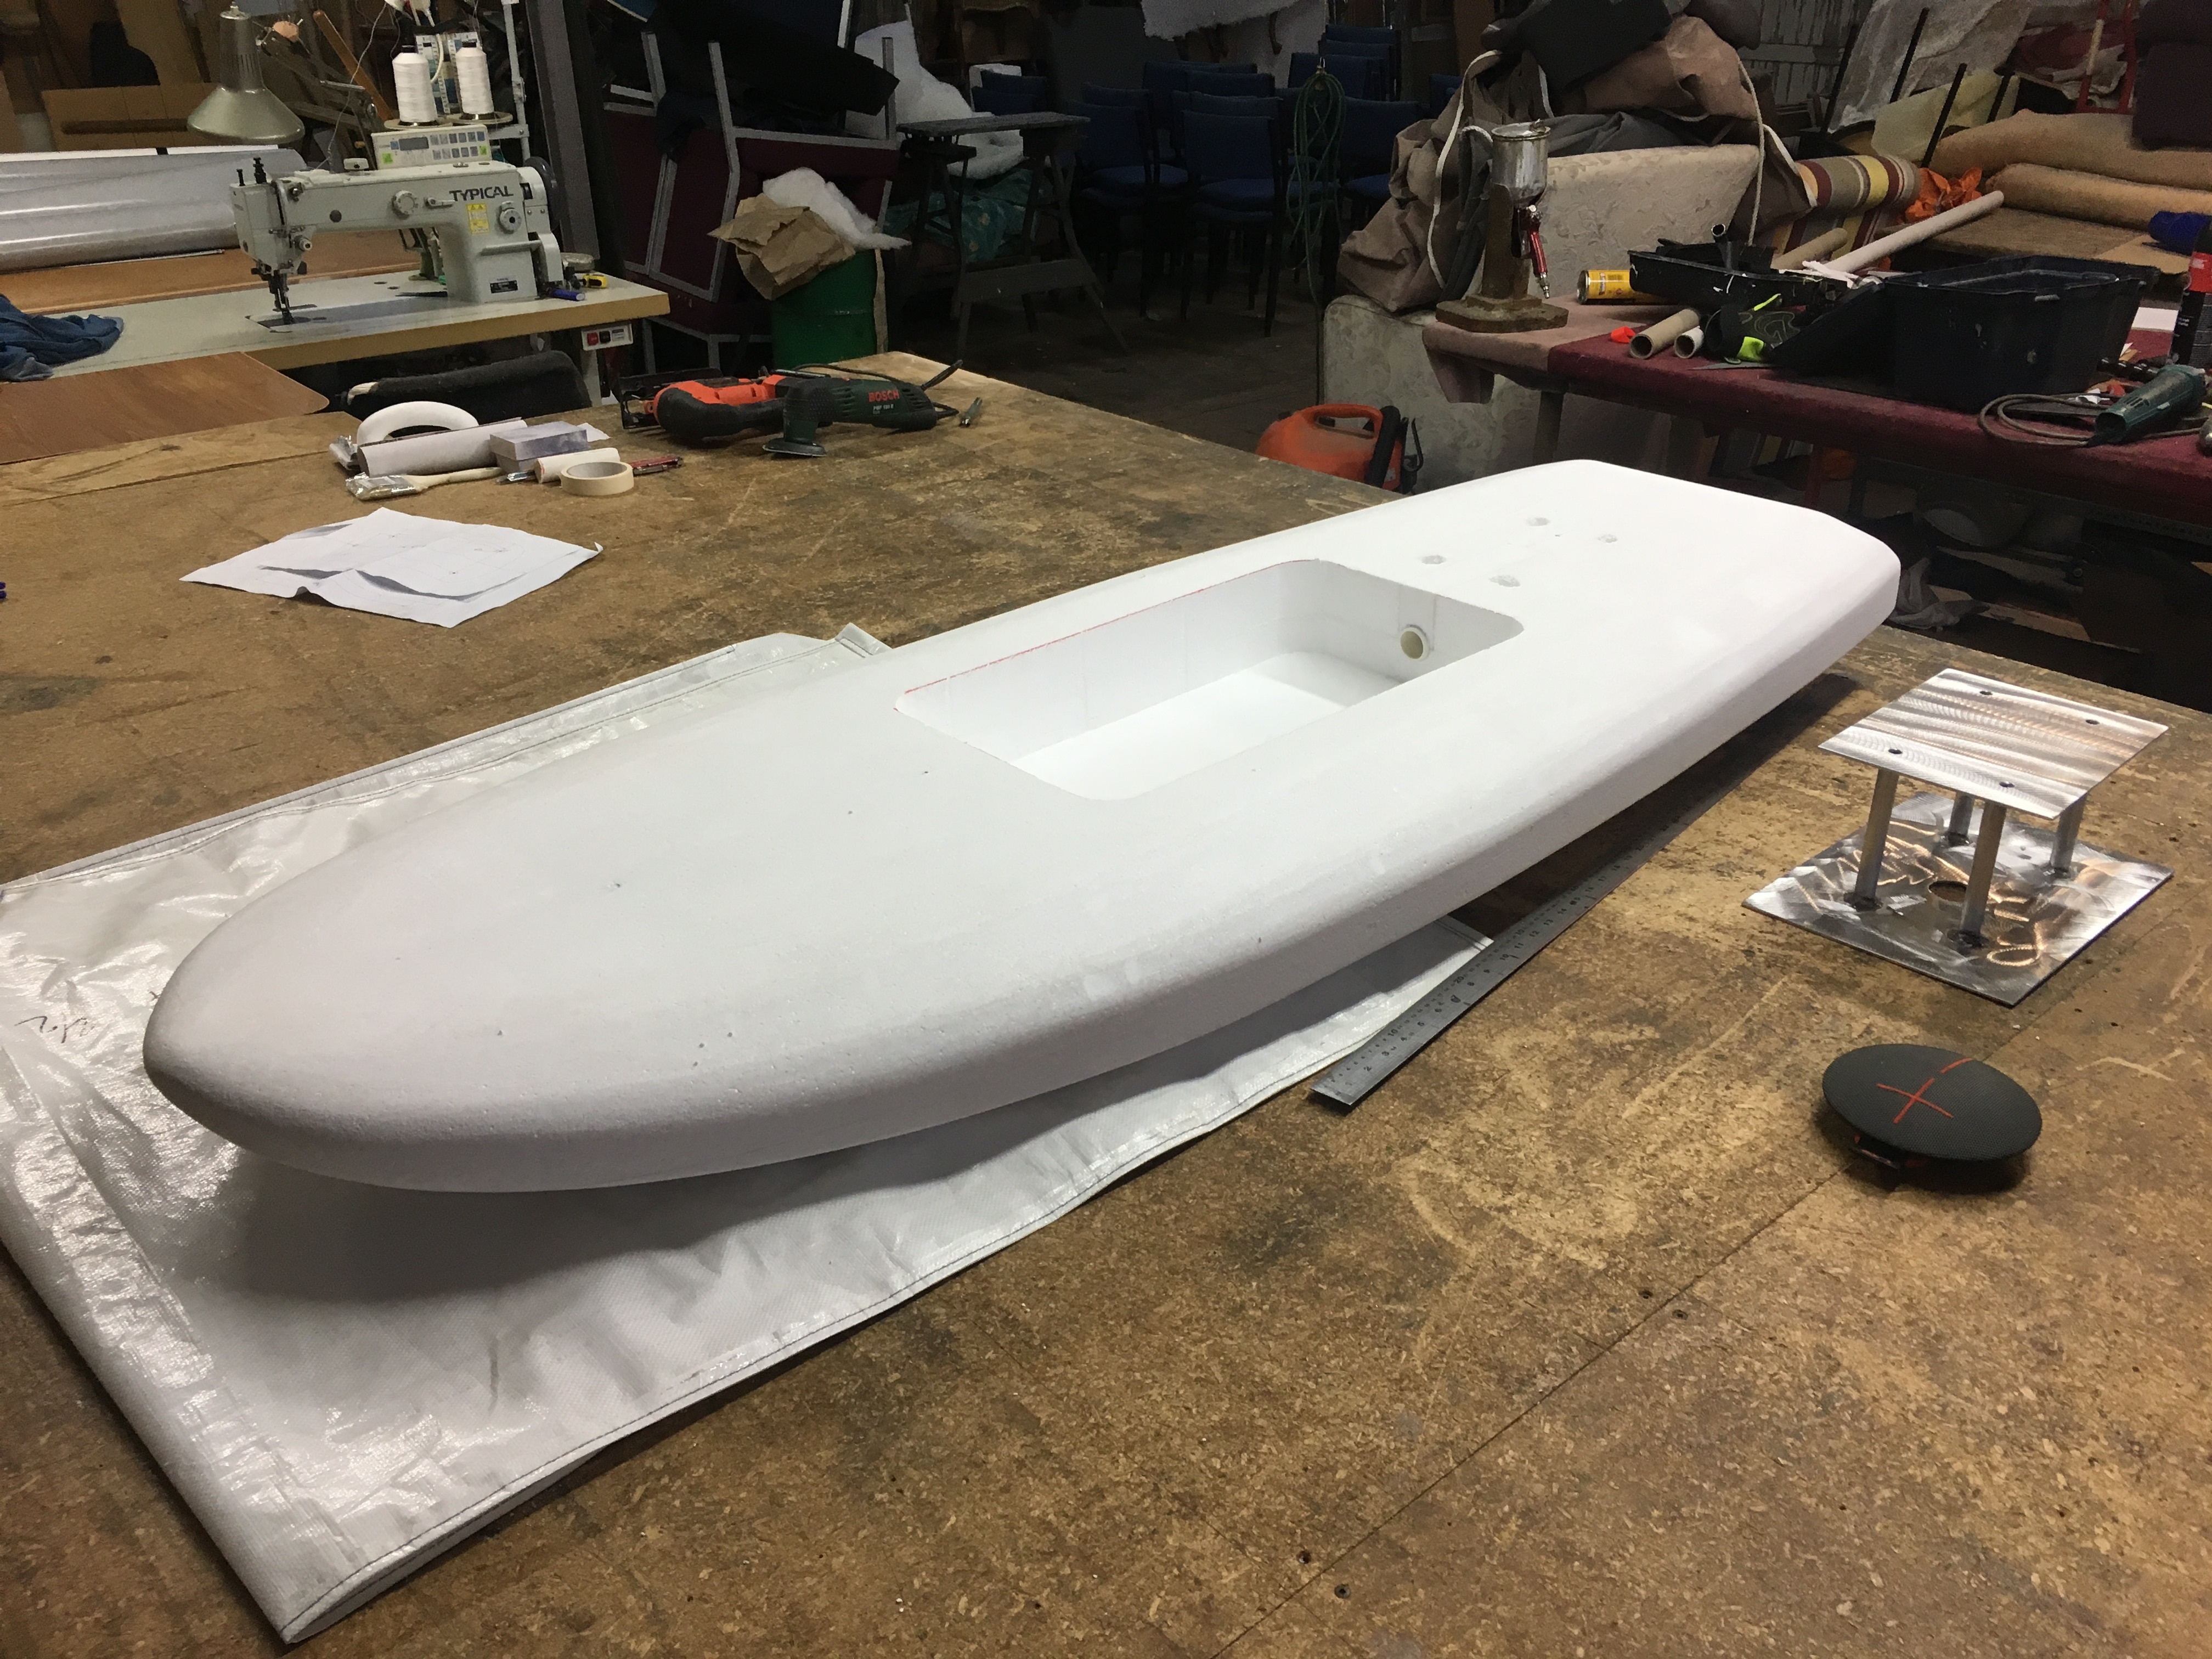
I sanded all the parts with, 80, 120, 240, 400, 600, 800 grit sandpaper then I sprayed with a product called Nyalic, it’s a type of spray polymer resin, it’s quite expensive but makes a great finish and is really durable. I cut all the foam with a hot wire cutter then sanded it with a soft sanding block of about 120 grit. The board then has 2 x layers of 6oz glass and then I sanded the last gloss coat of epoxy to 1200 grit. Will get a parts list together and post it here when I get a bit of free time.
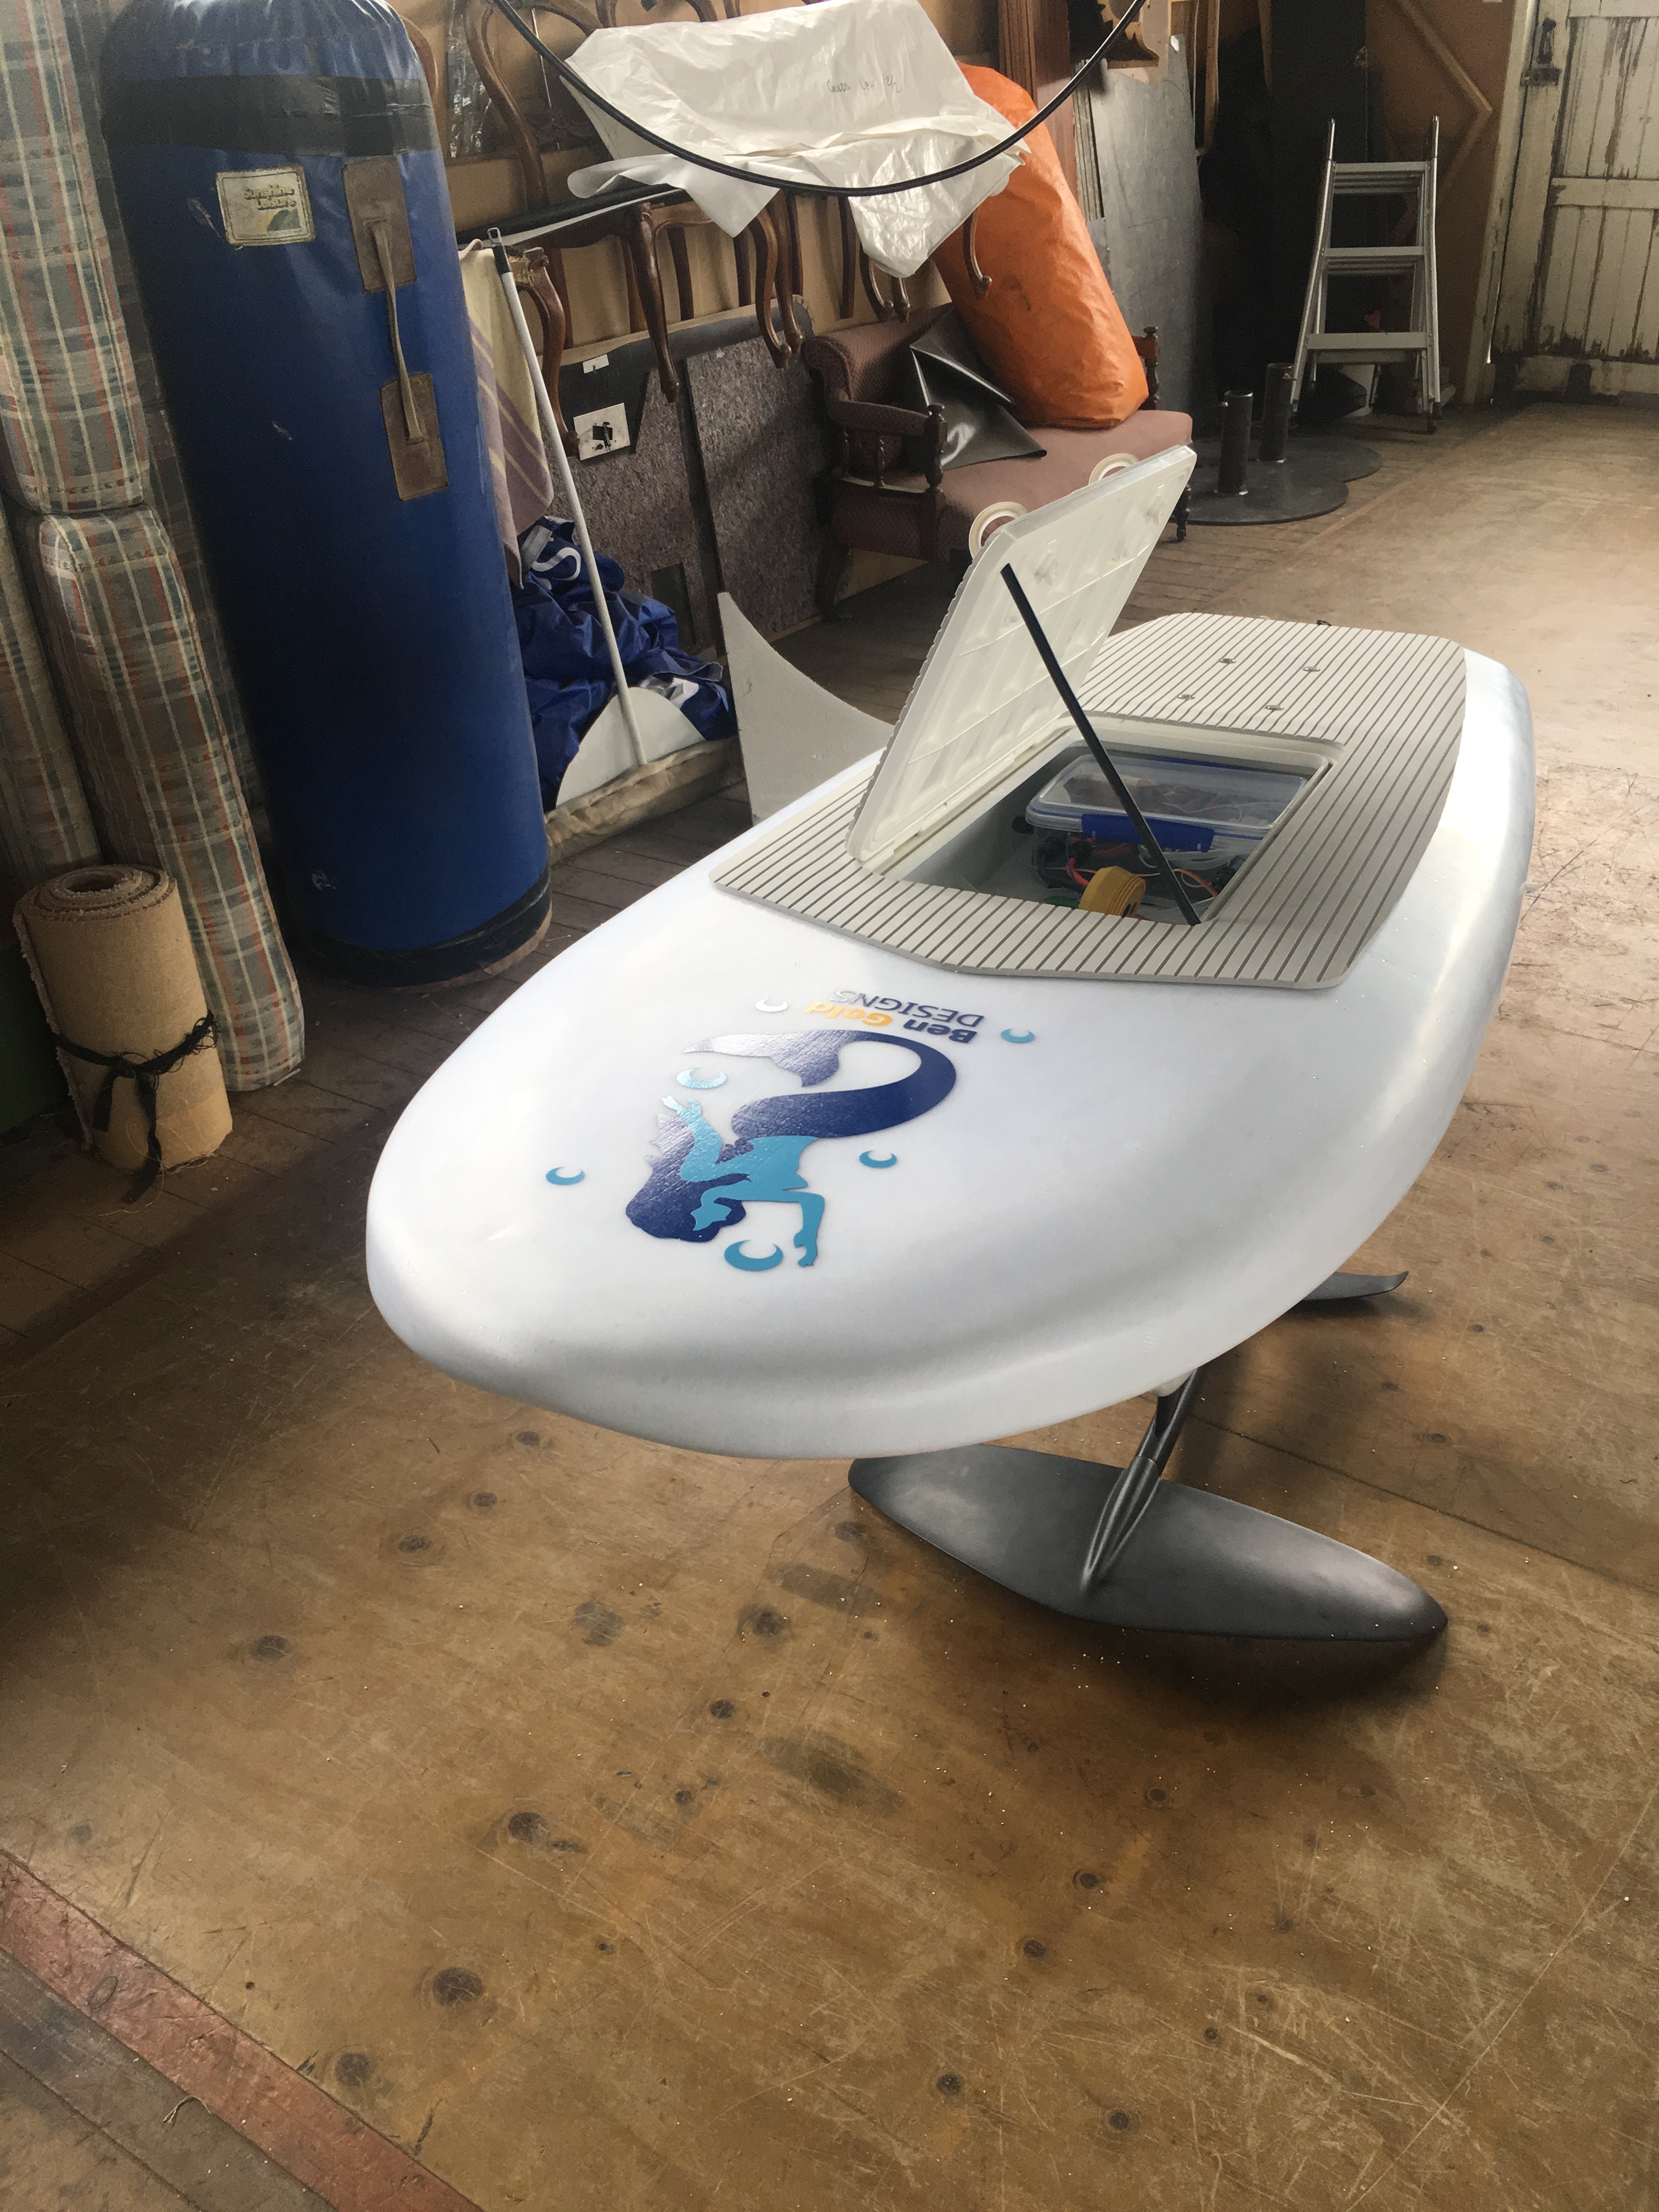
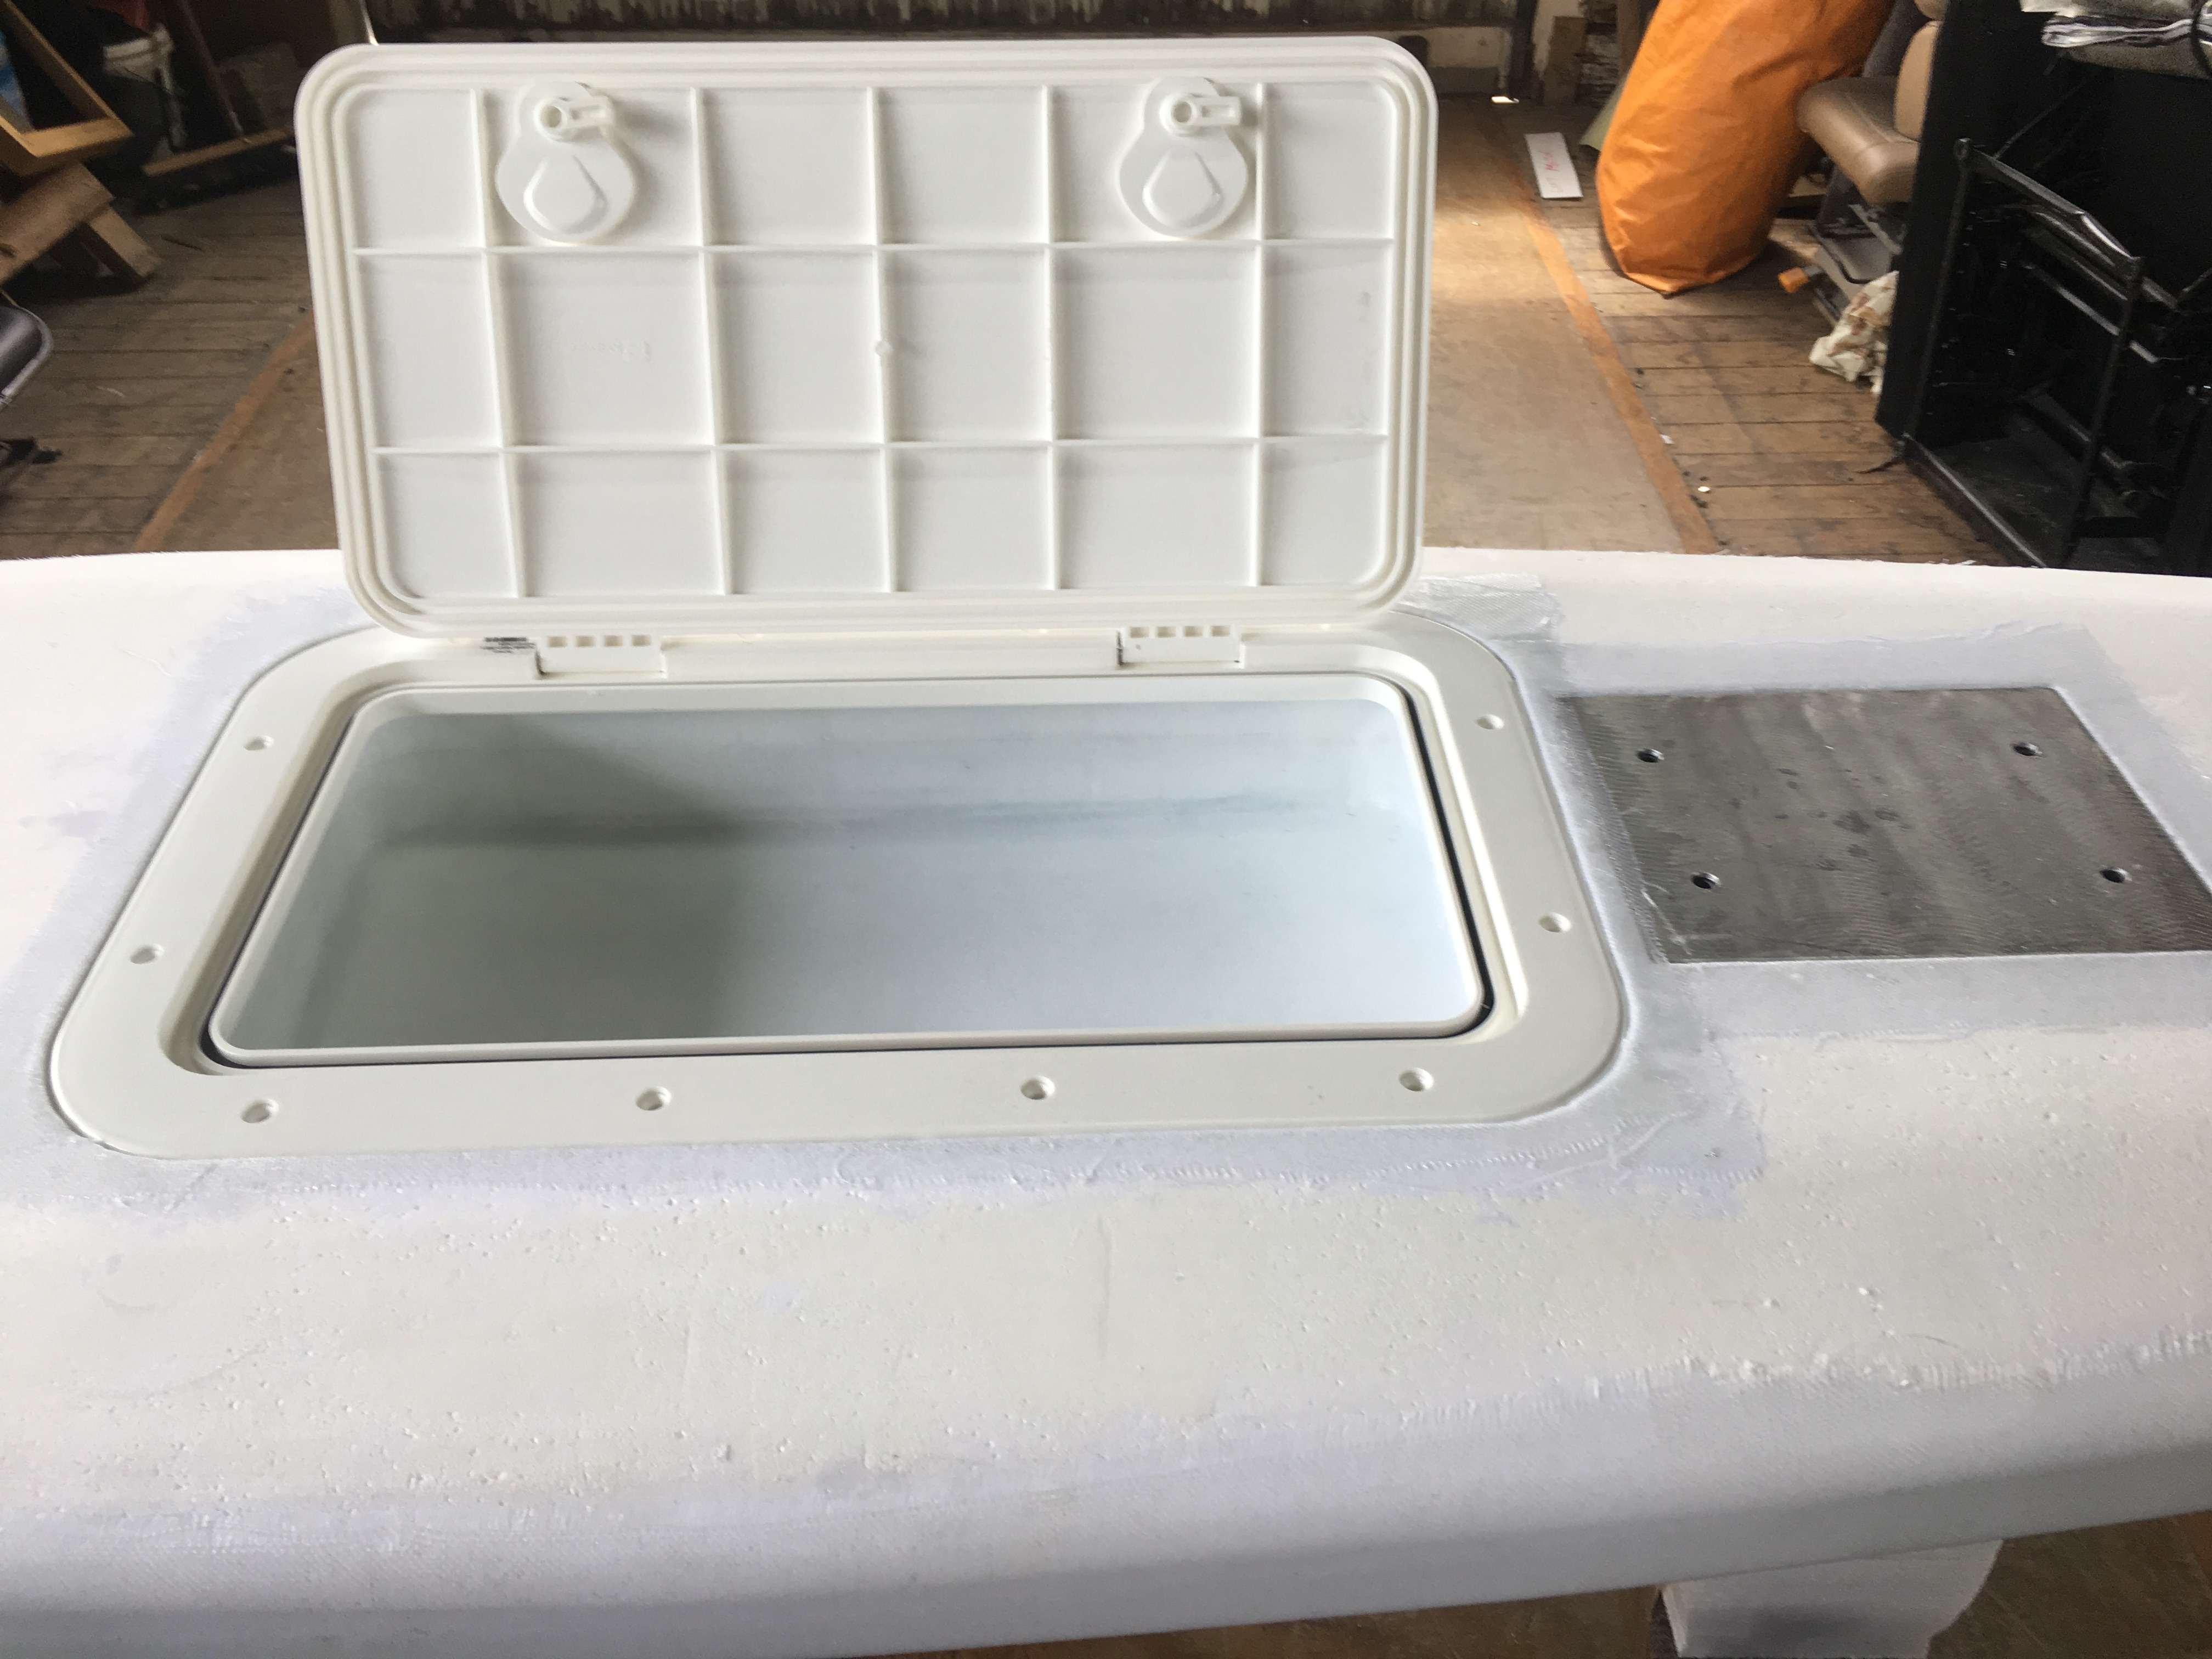
Nice job Have you tested that boat hatch under water/pressurized it? We bought a similar hatch, but it was not very waterproof. The one we bought might have been of bad quality tho.
I have noticed a few dodgy seals on the boat hatches. I bought one and definitely would replace the seal.
I was more worried that the hatch might not hold foot pressure if full weight was applied.
Very nice work, and thank you for the detail in the picture,
I’m starting from the same principle as you concerning the electrical room: a NUOVA RADE boat hatch. @Hiorth , I tested my hatch in my bathtub: no leaks. After asking the manufacturer he declares me an IP 66.
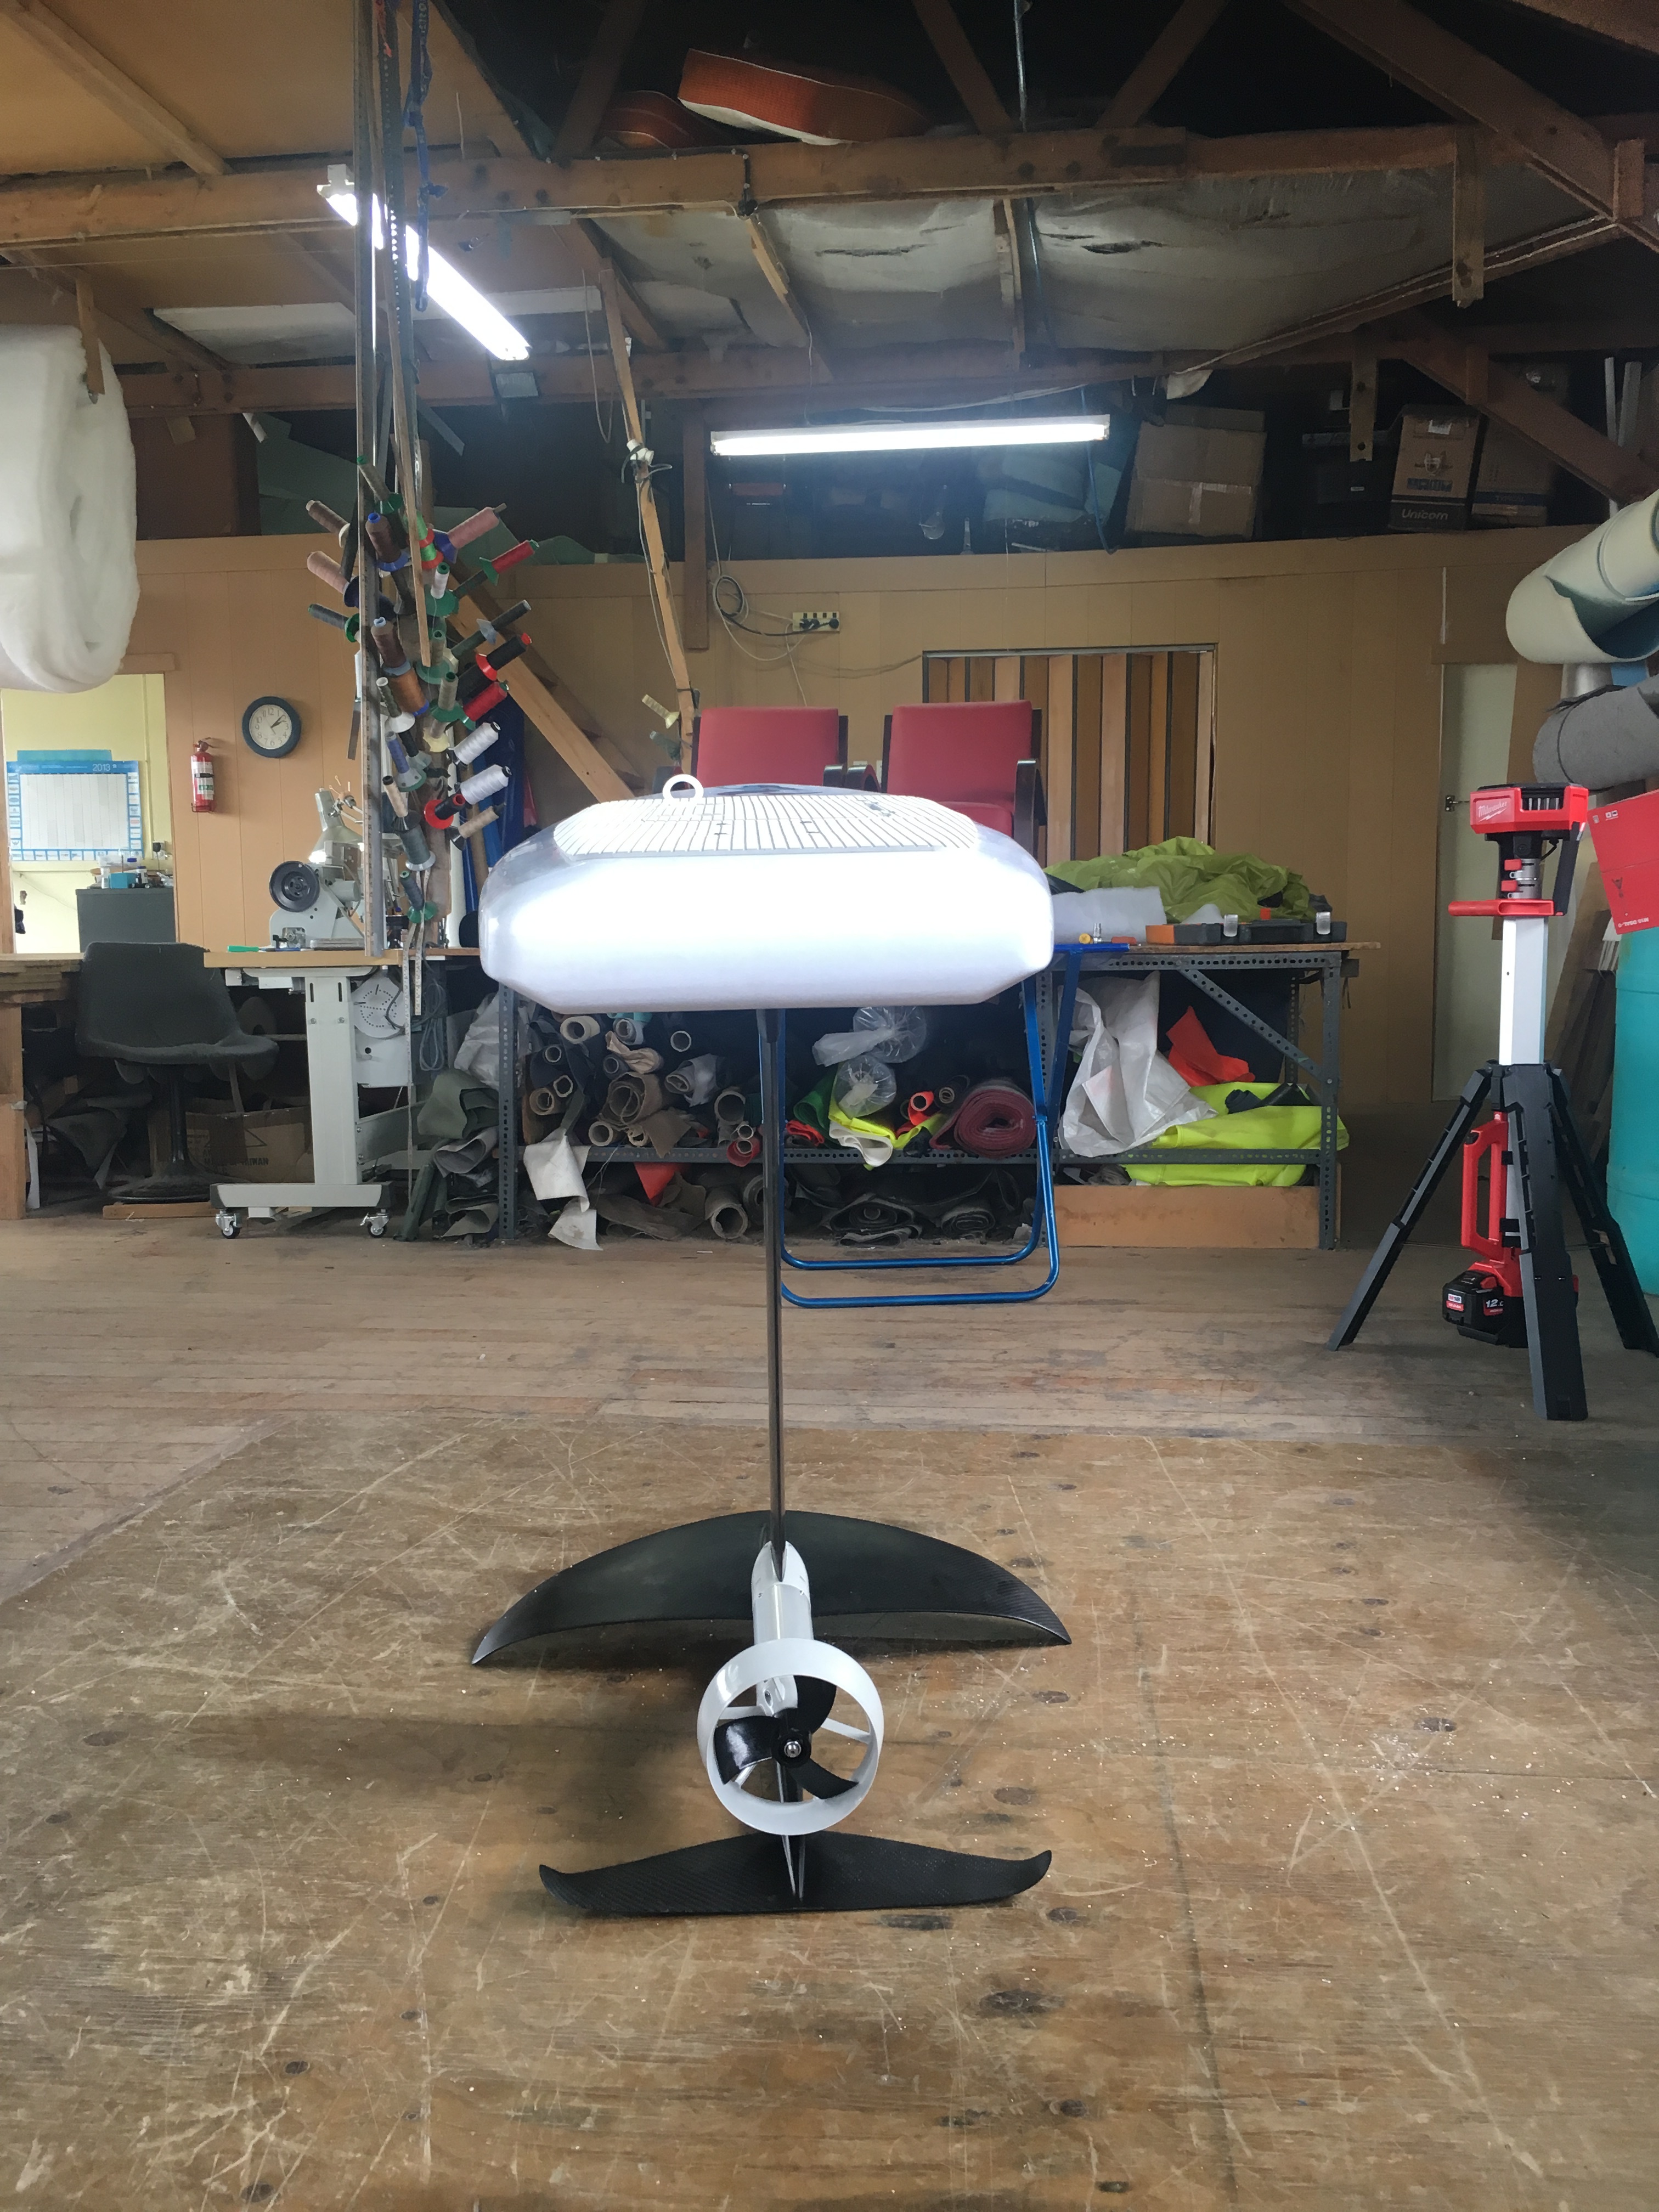
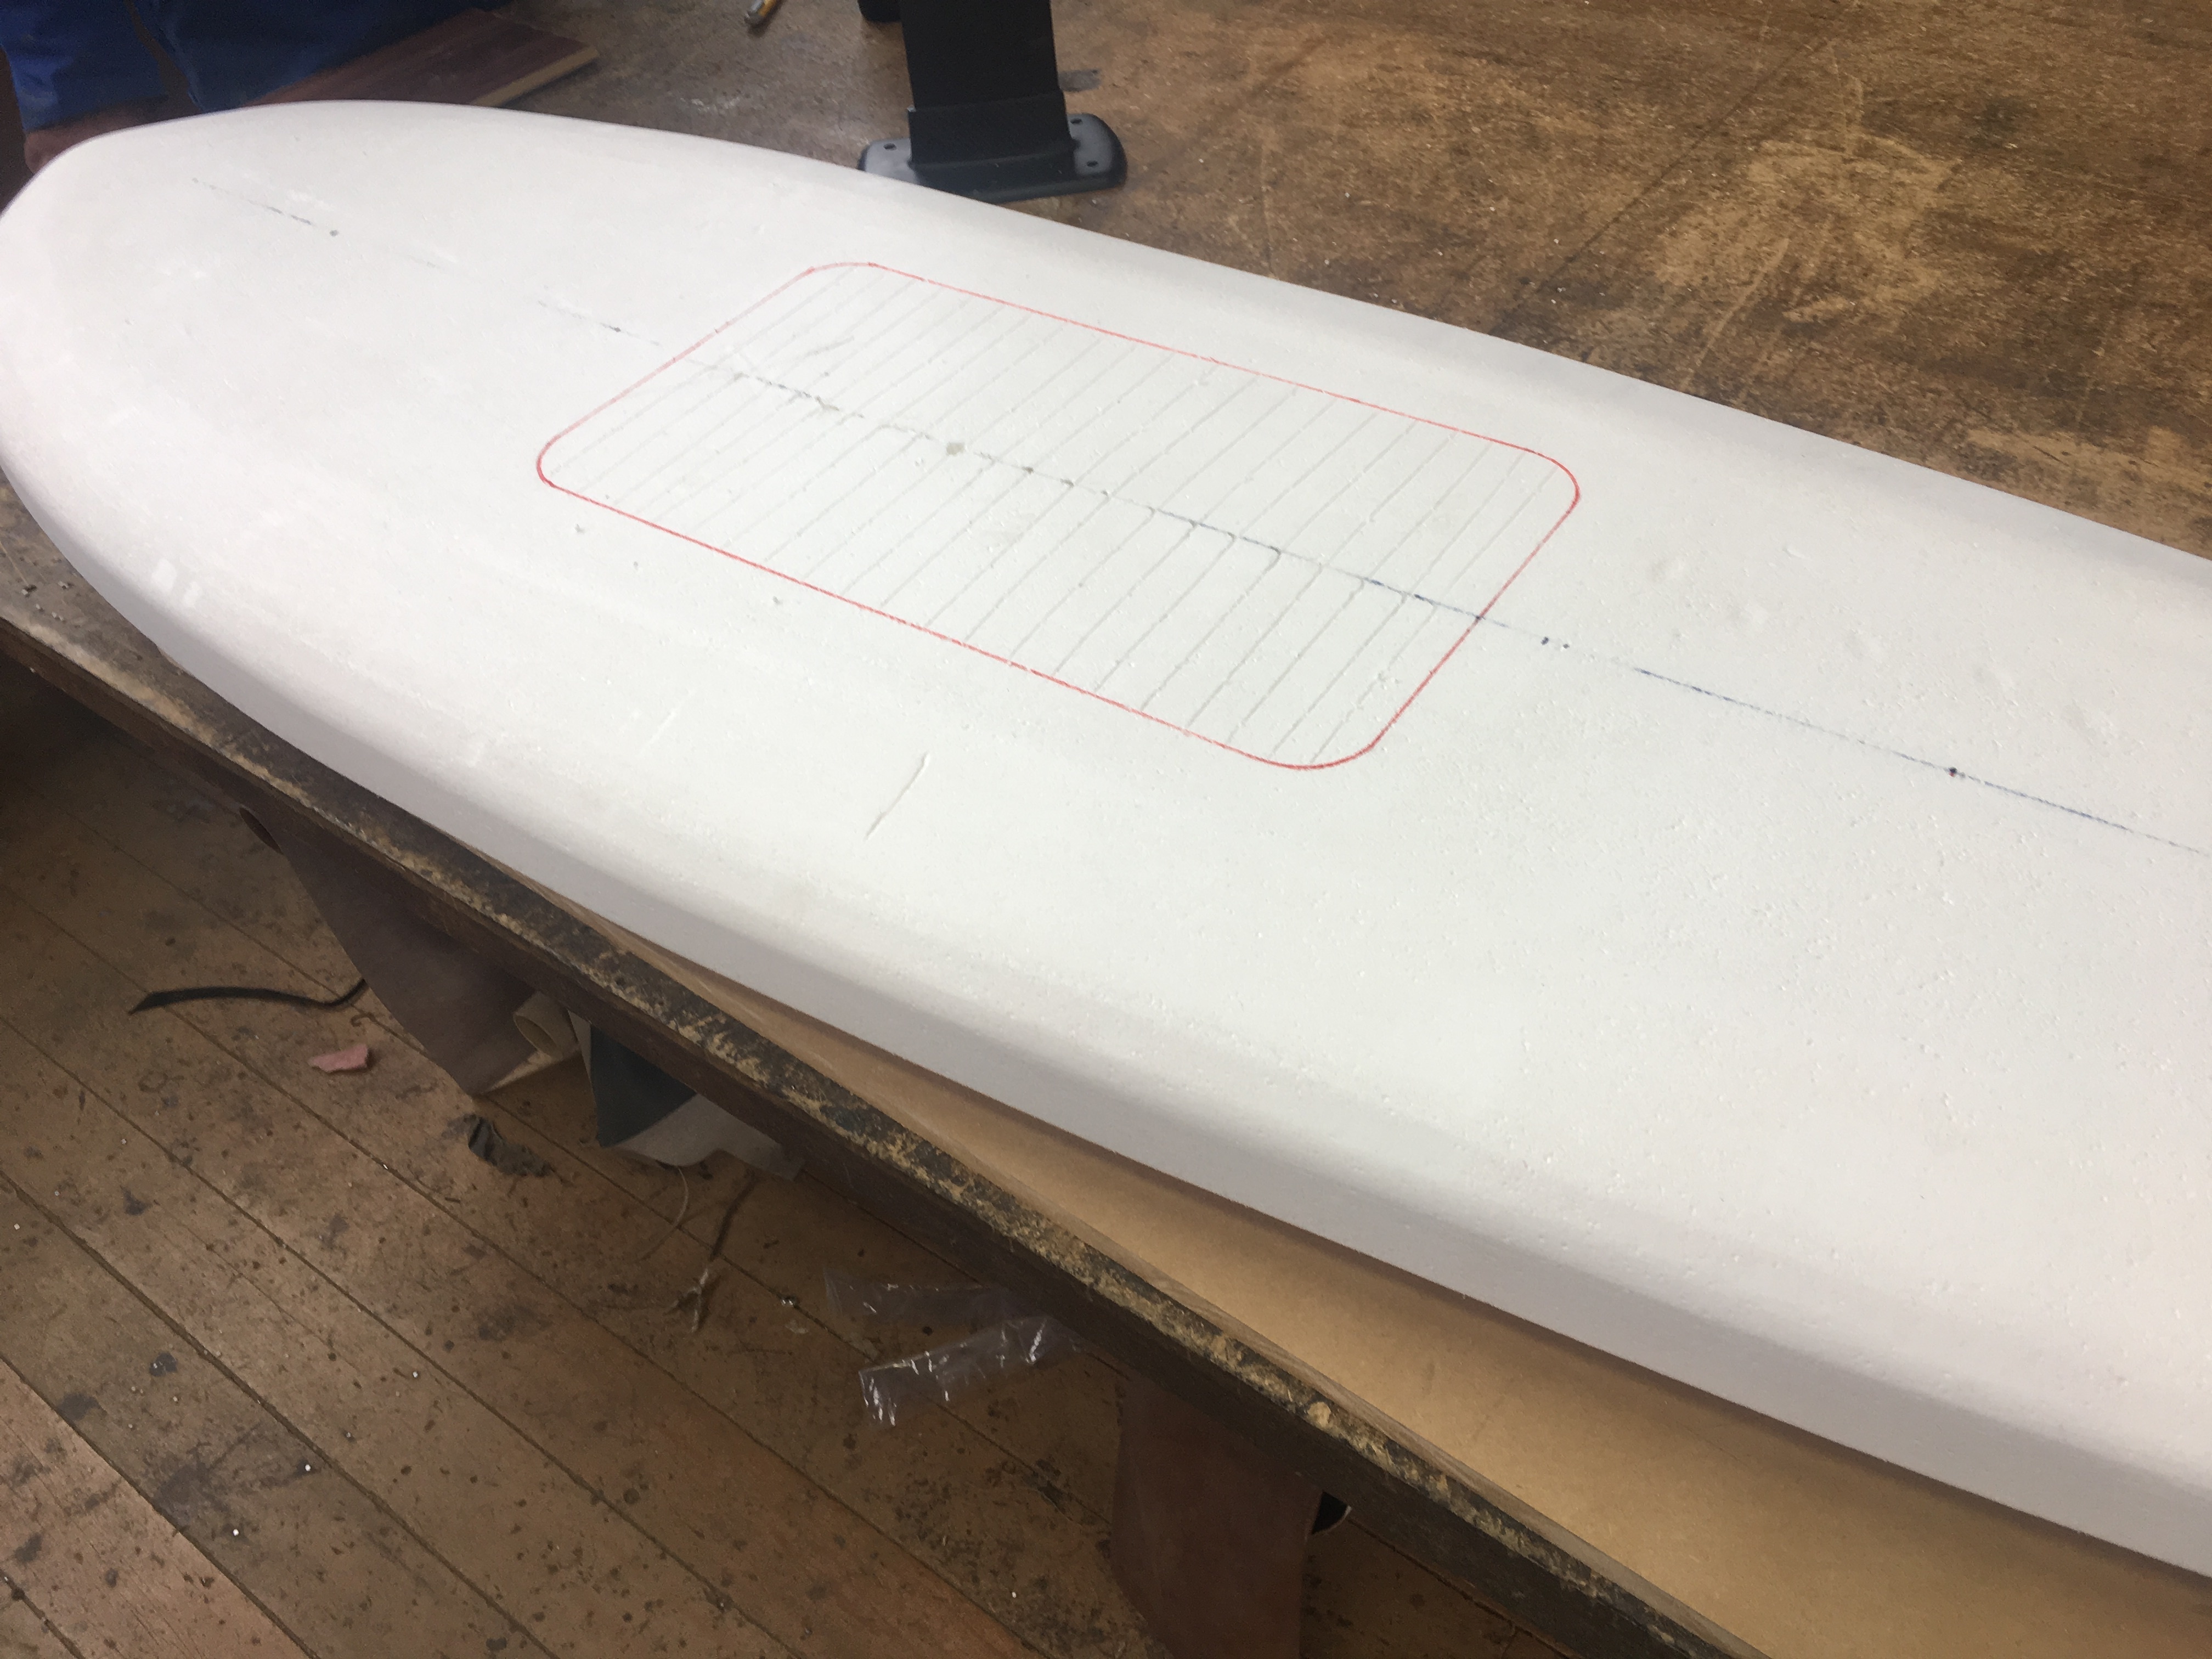
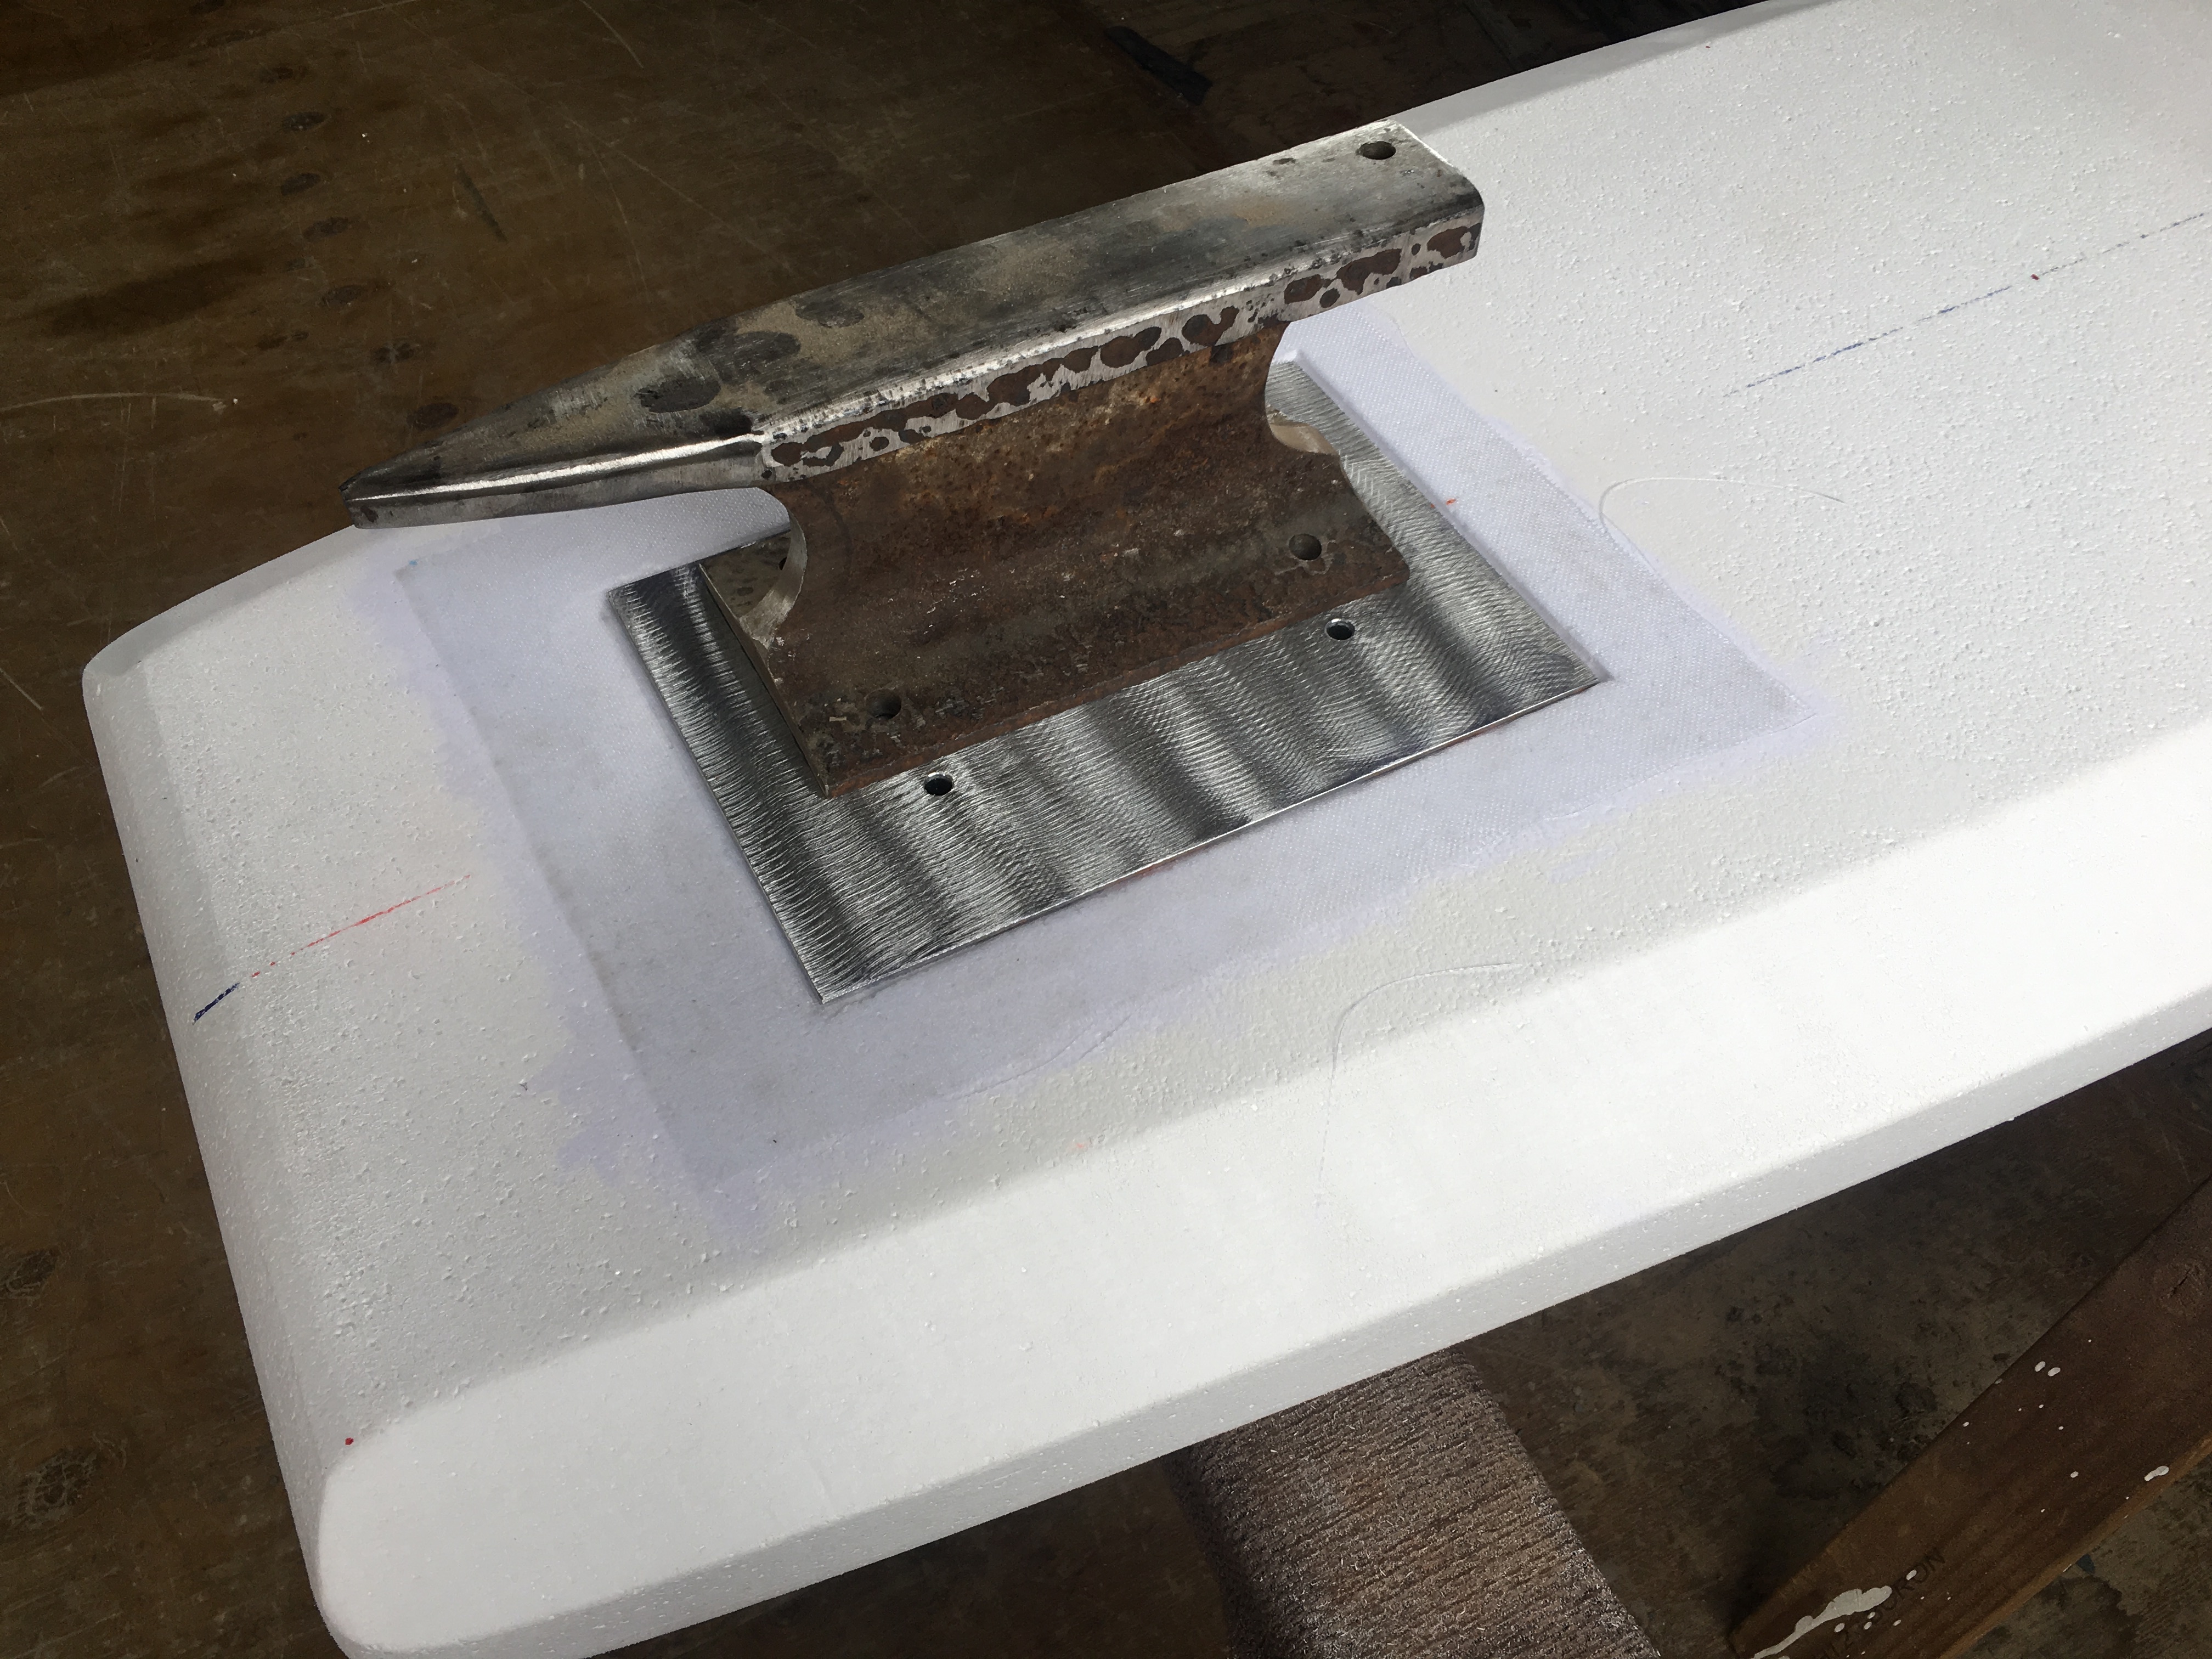
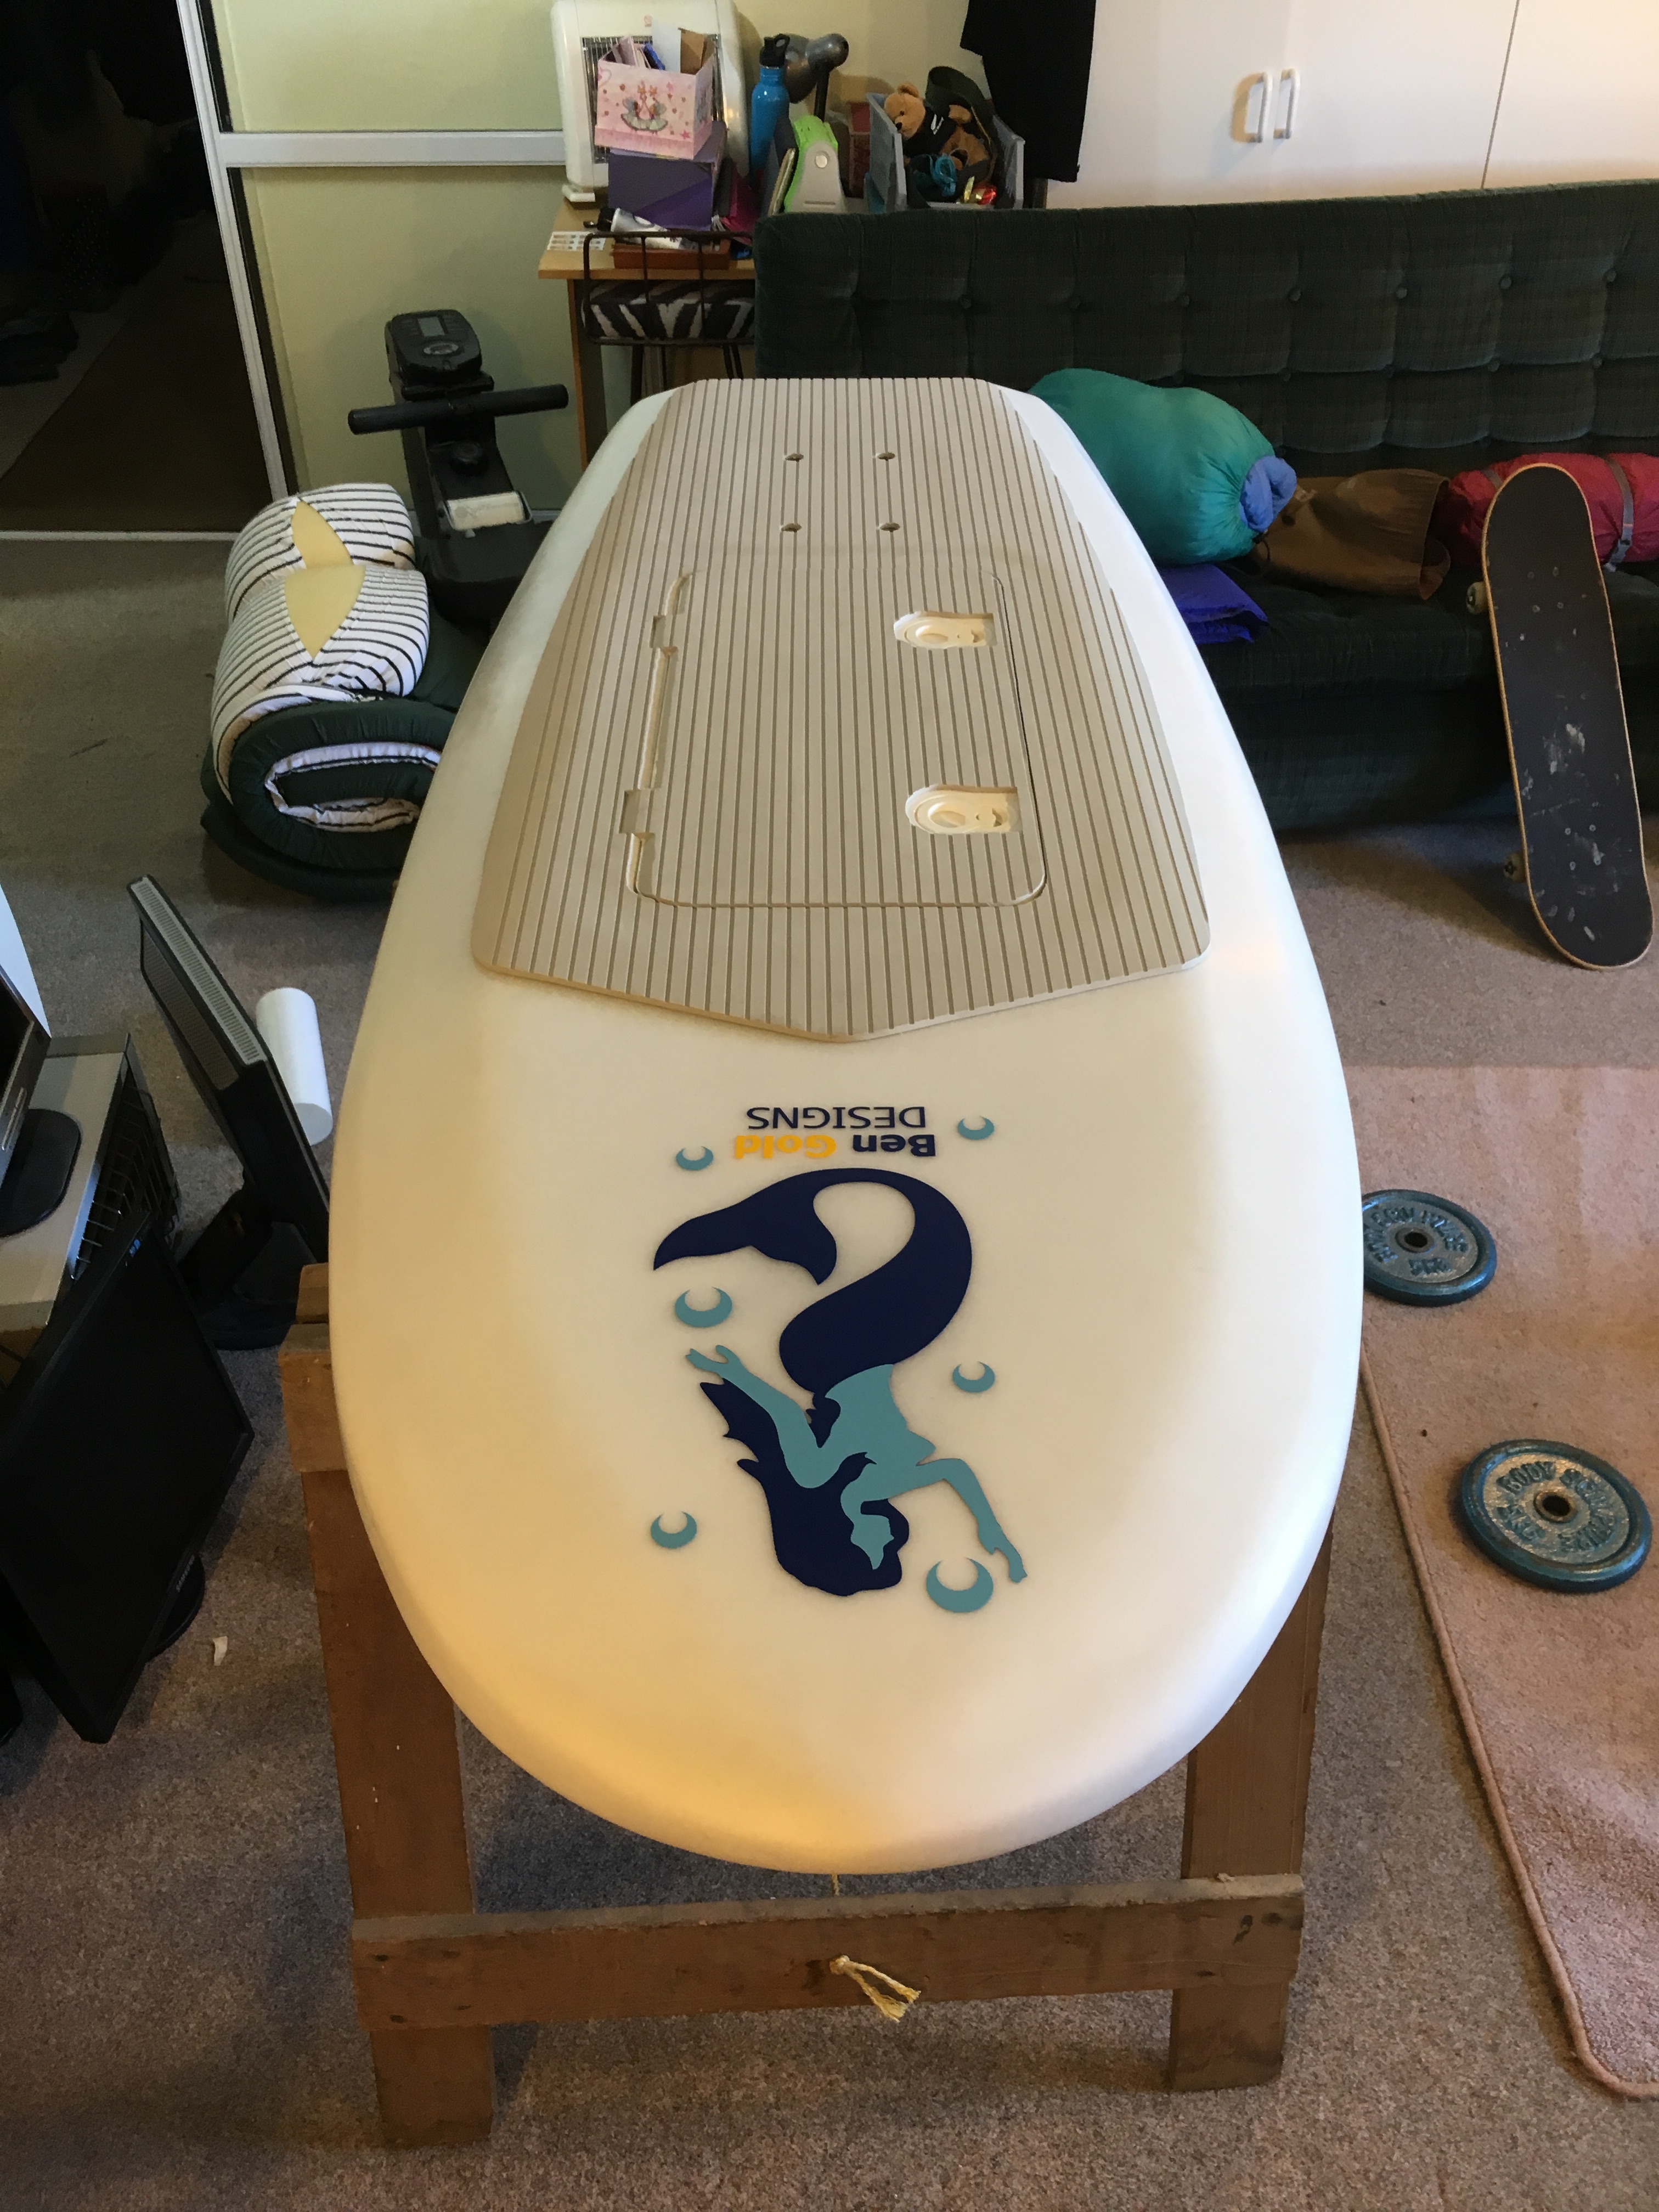
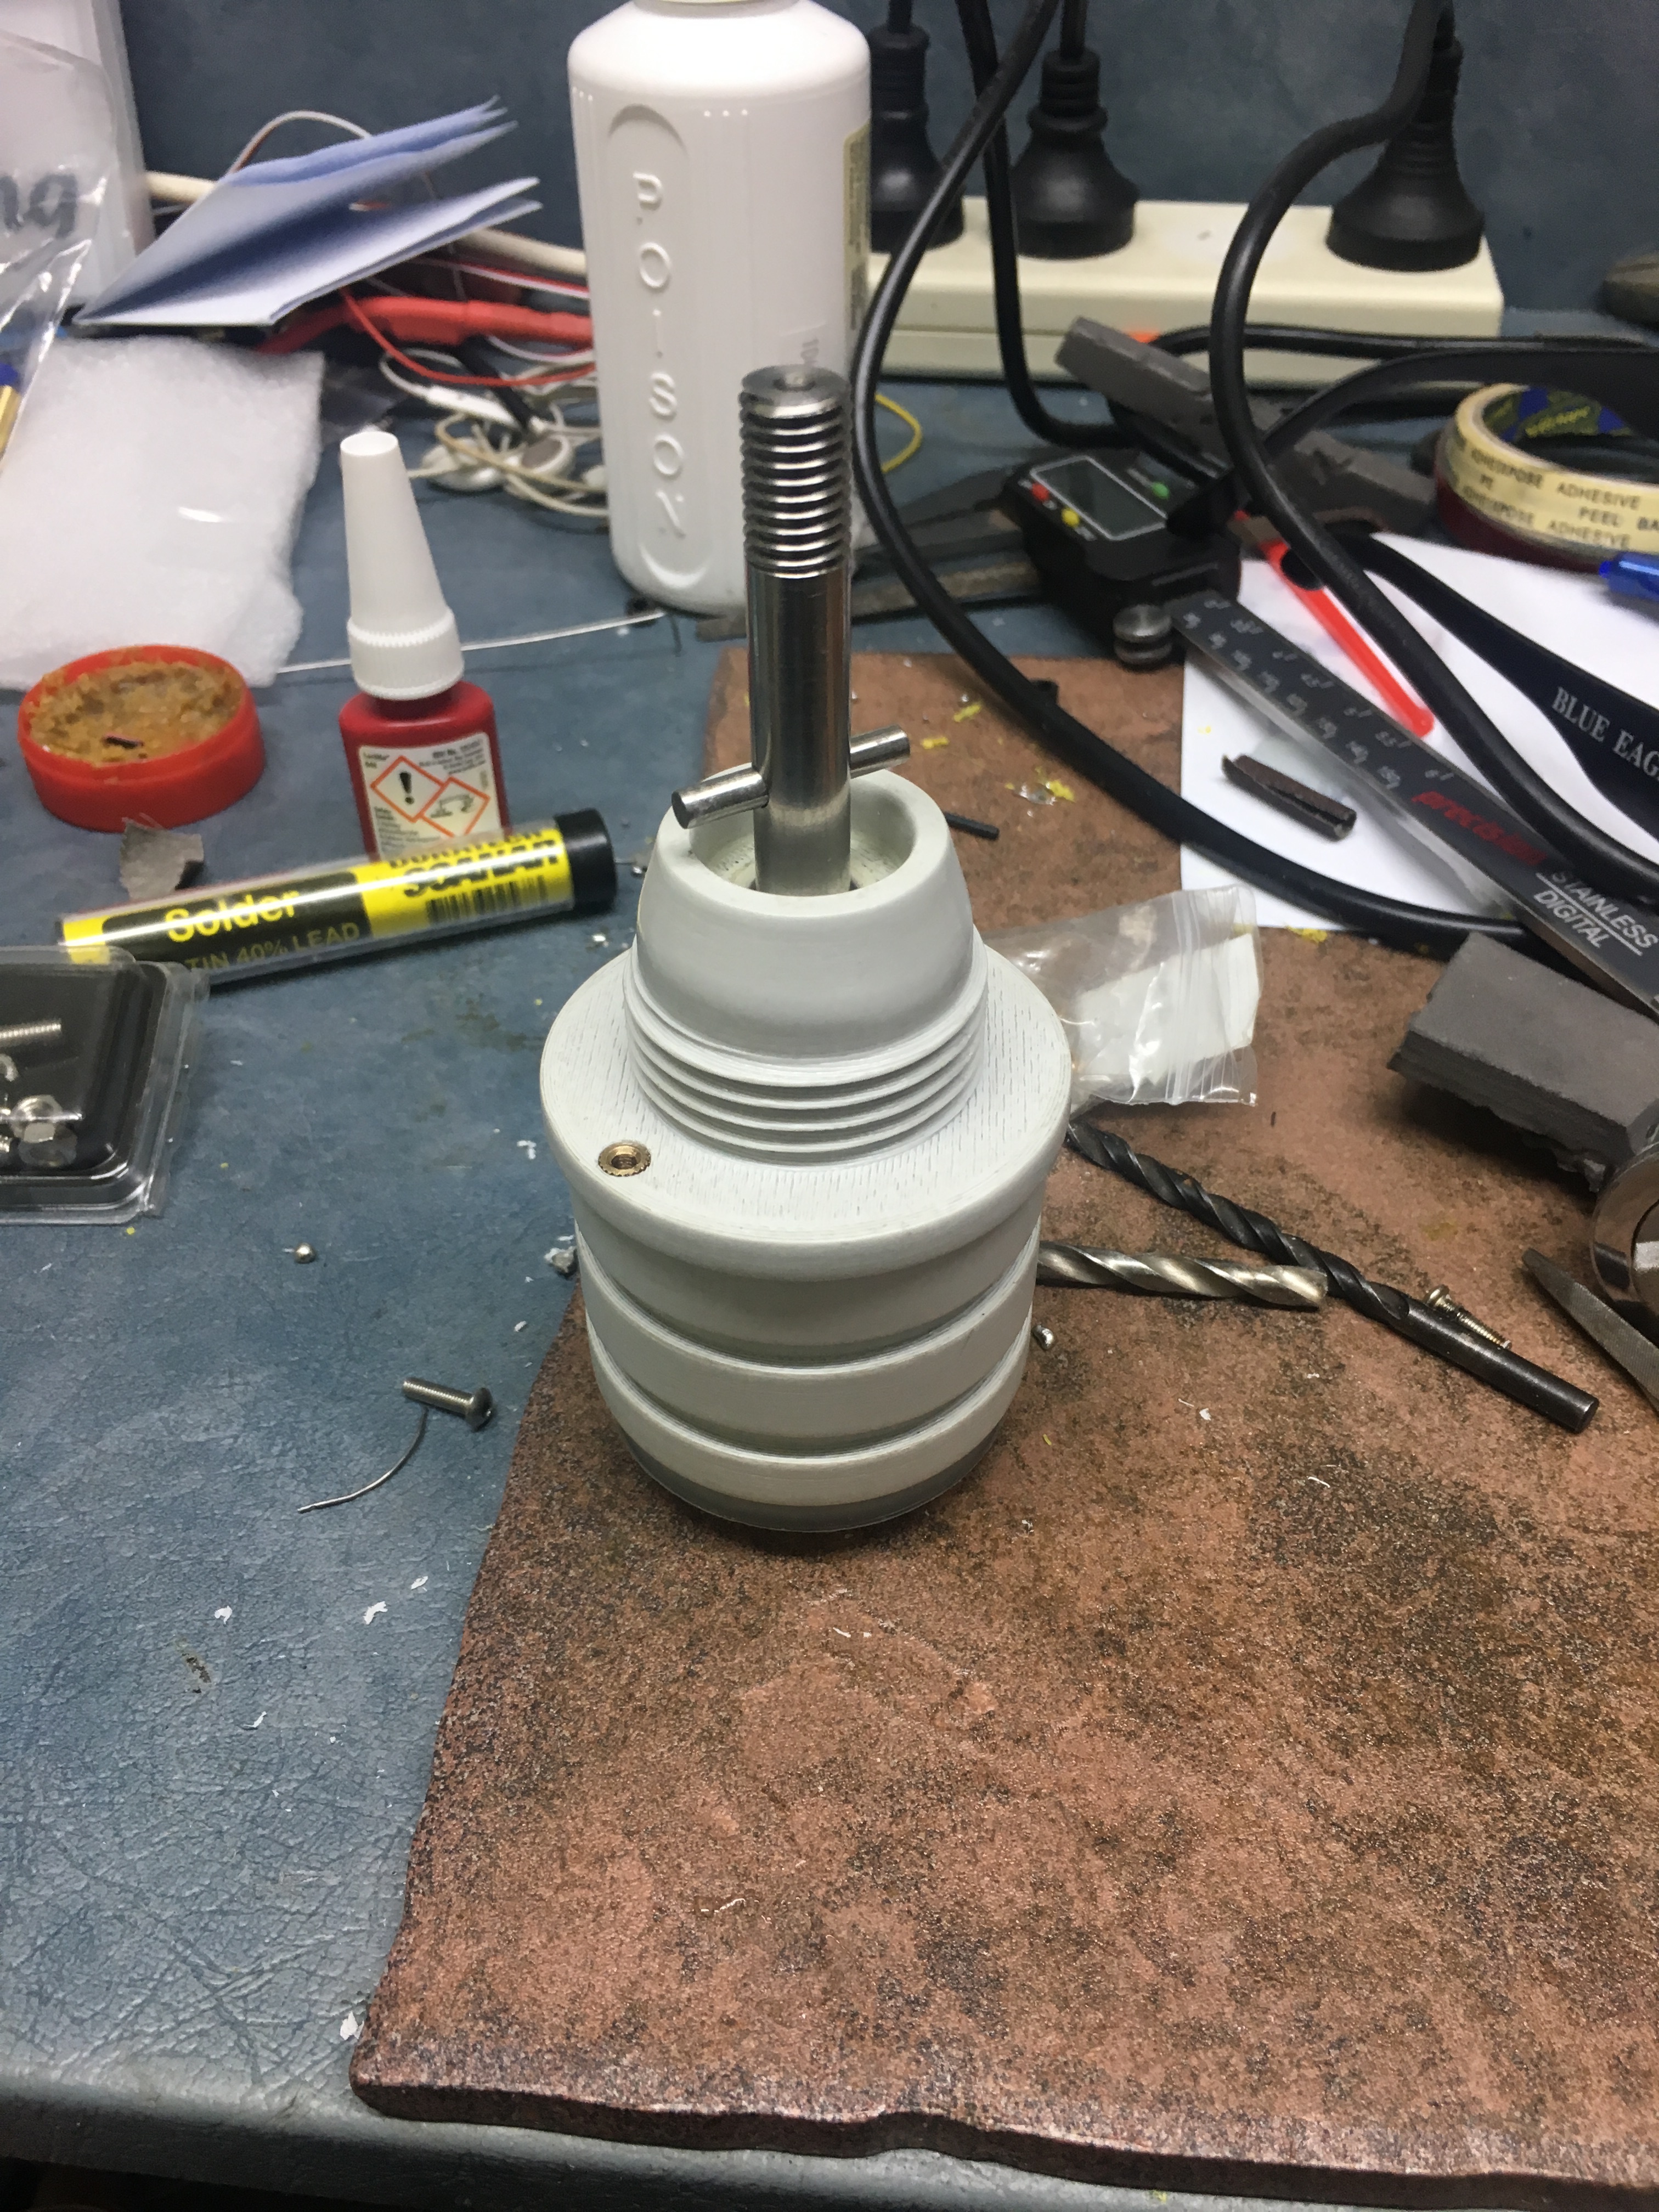
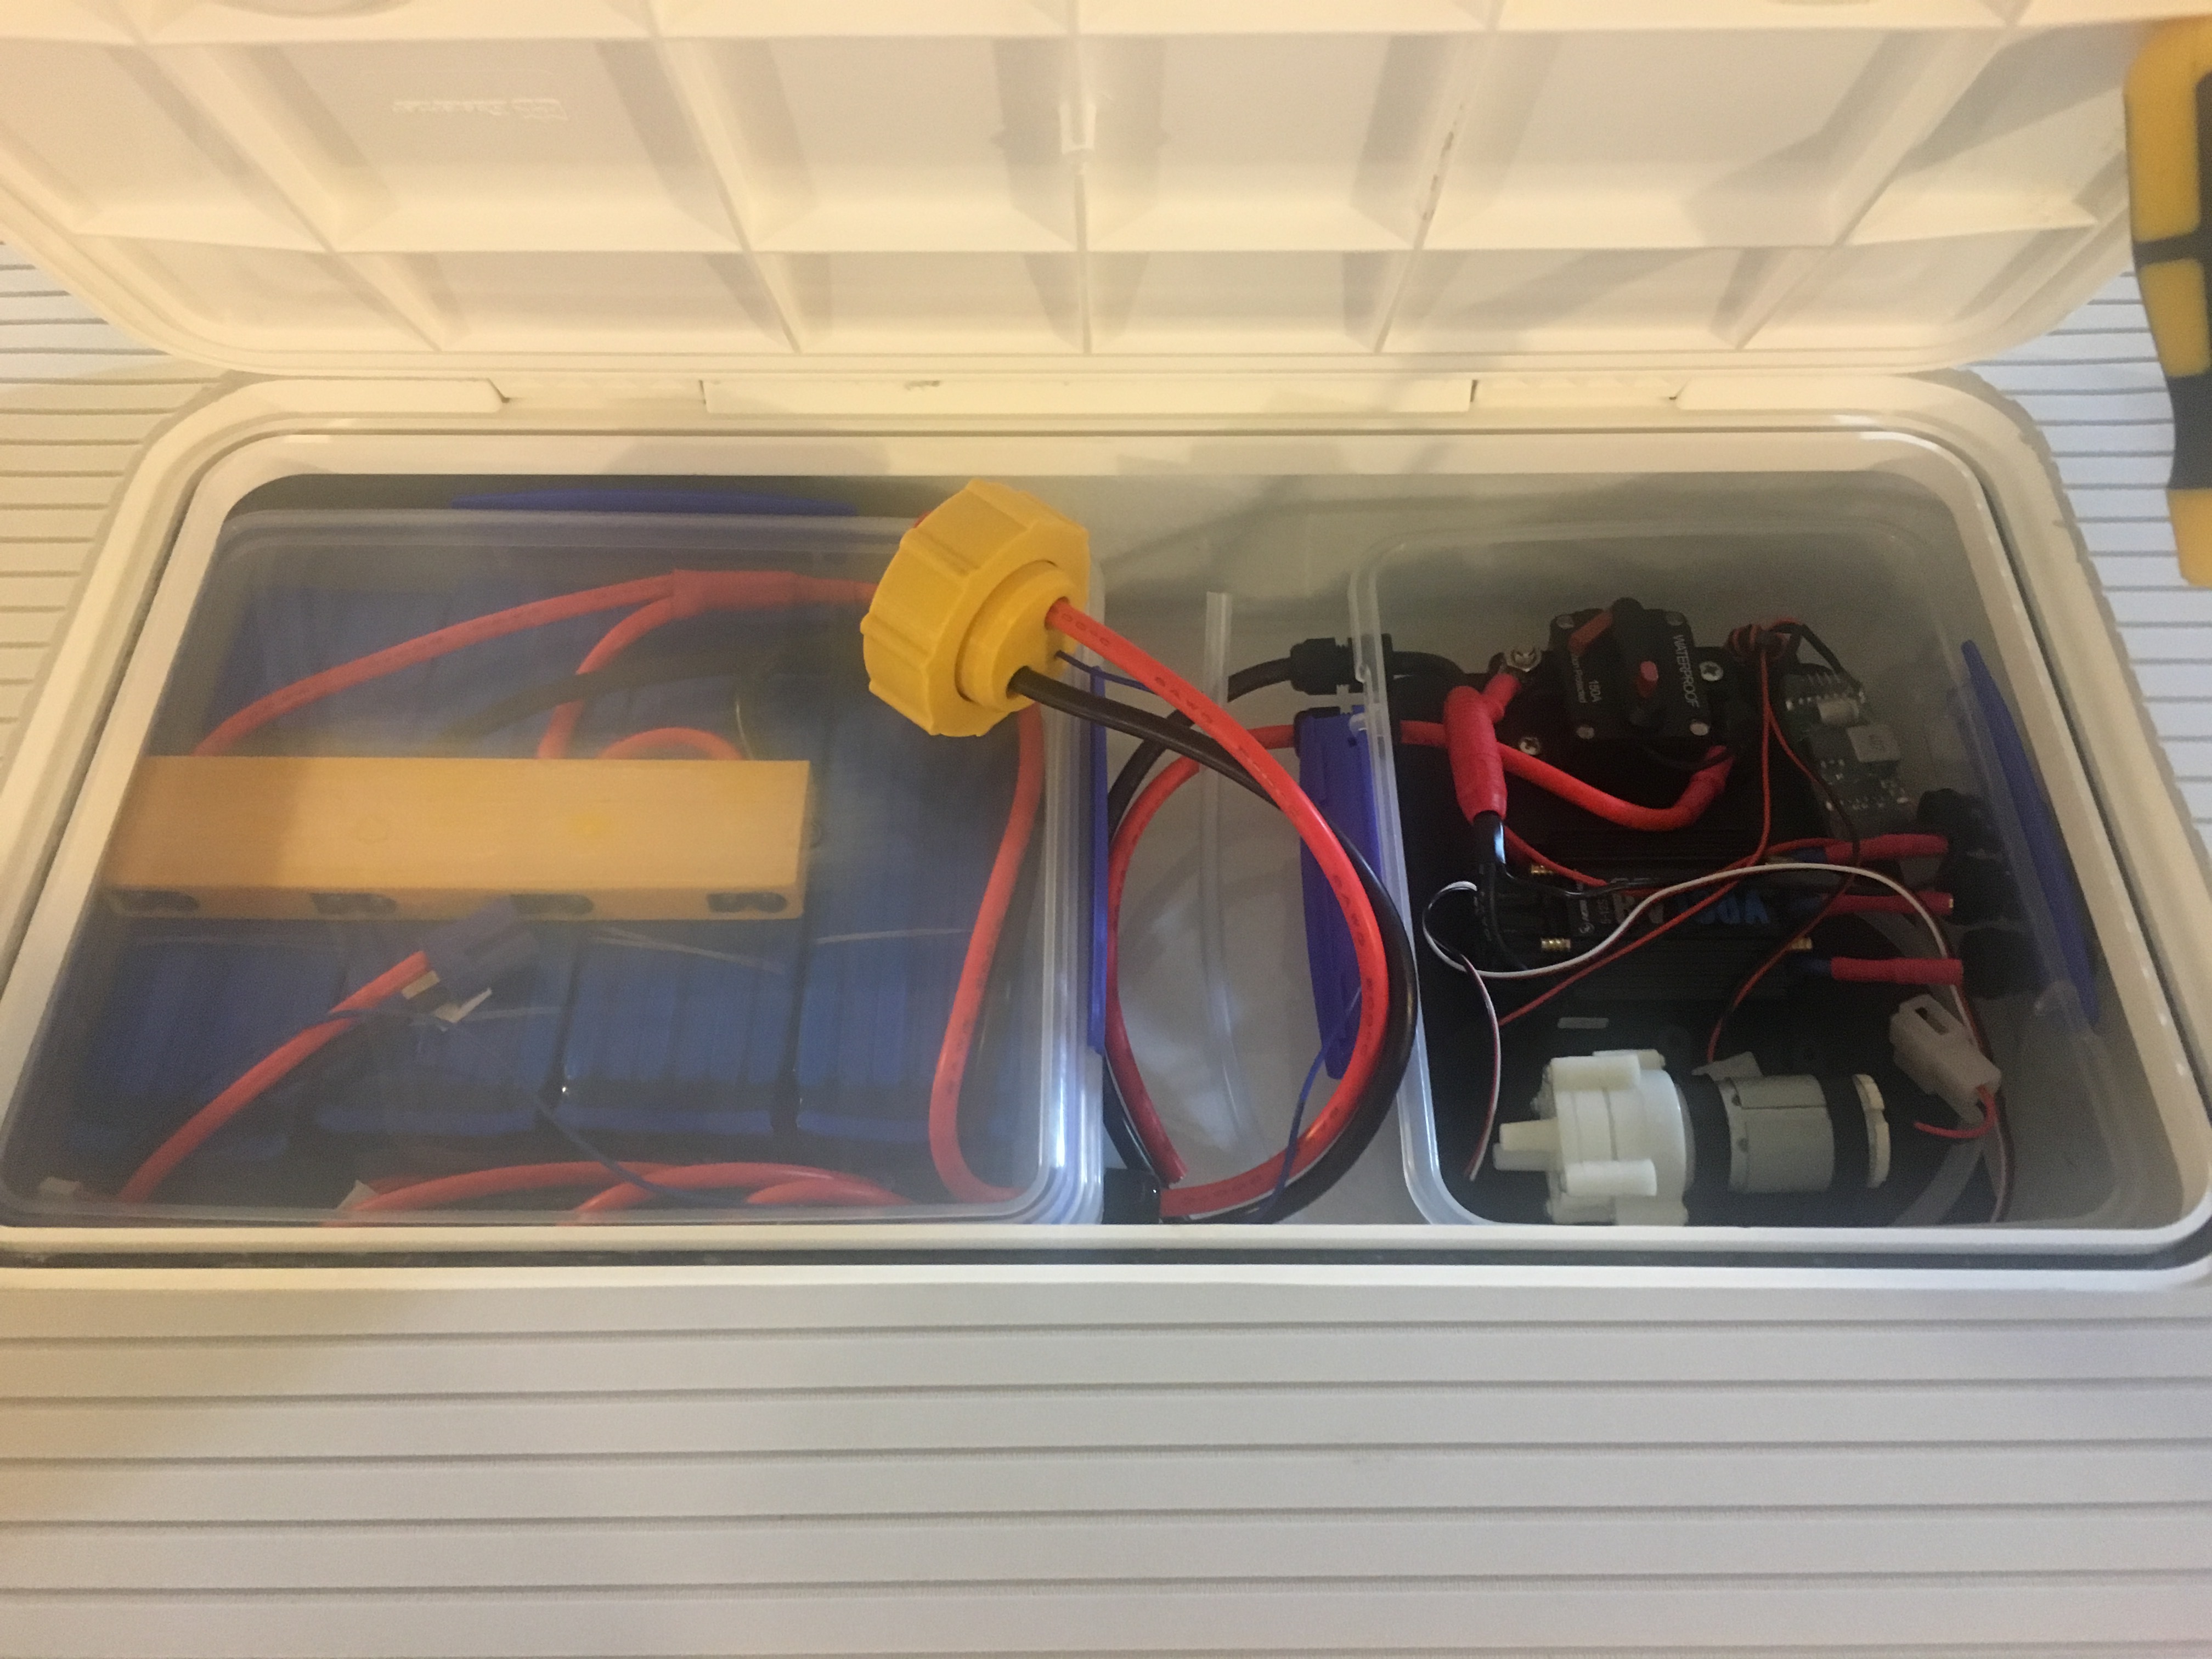
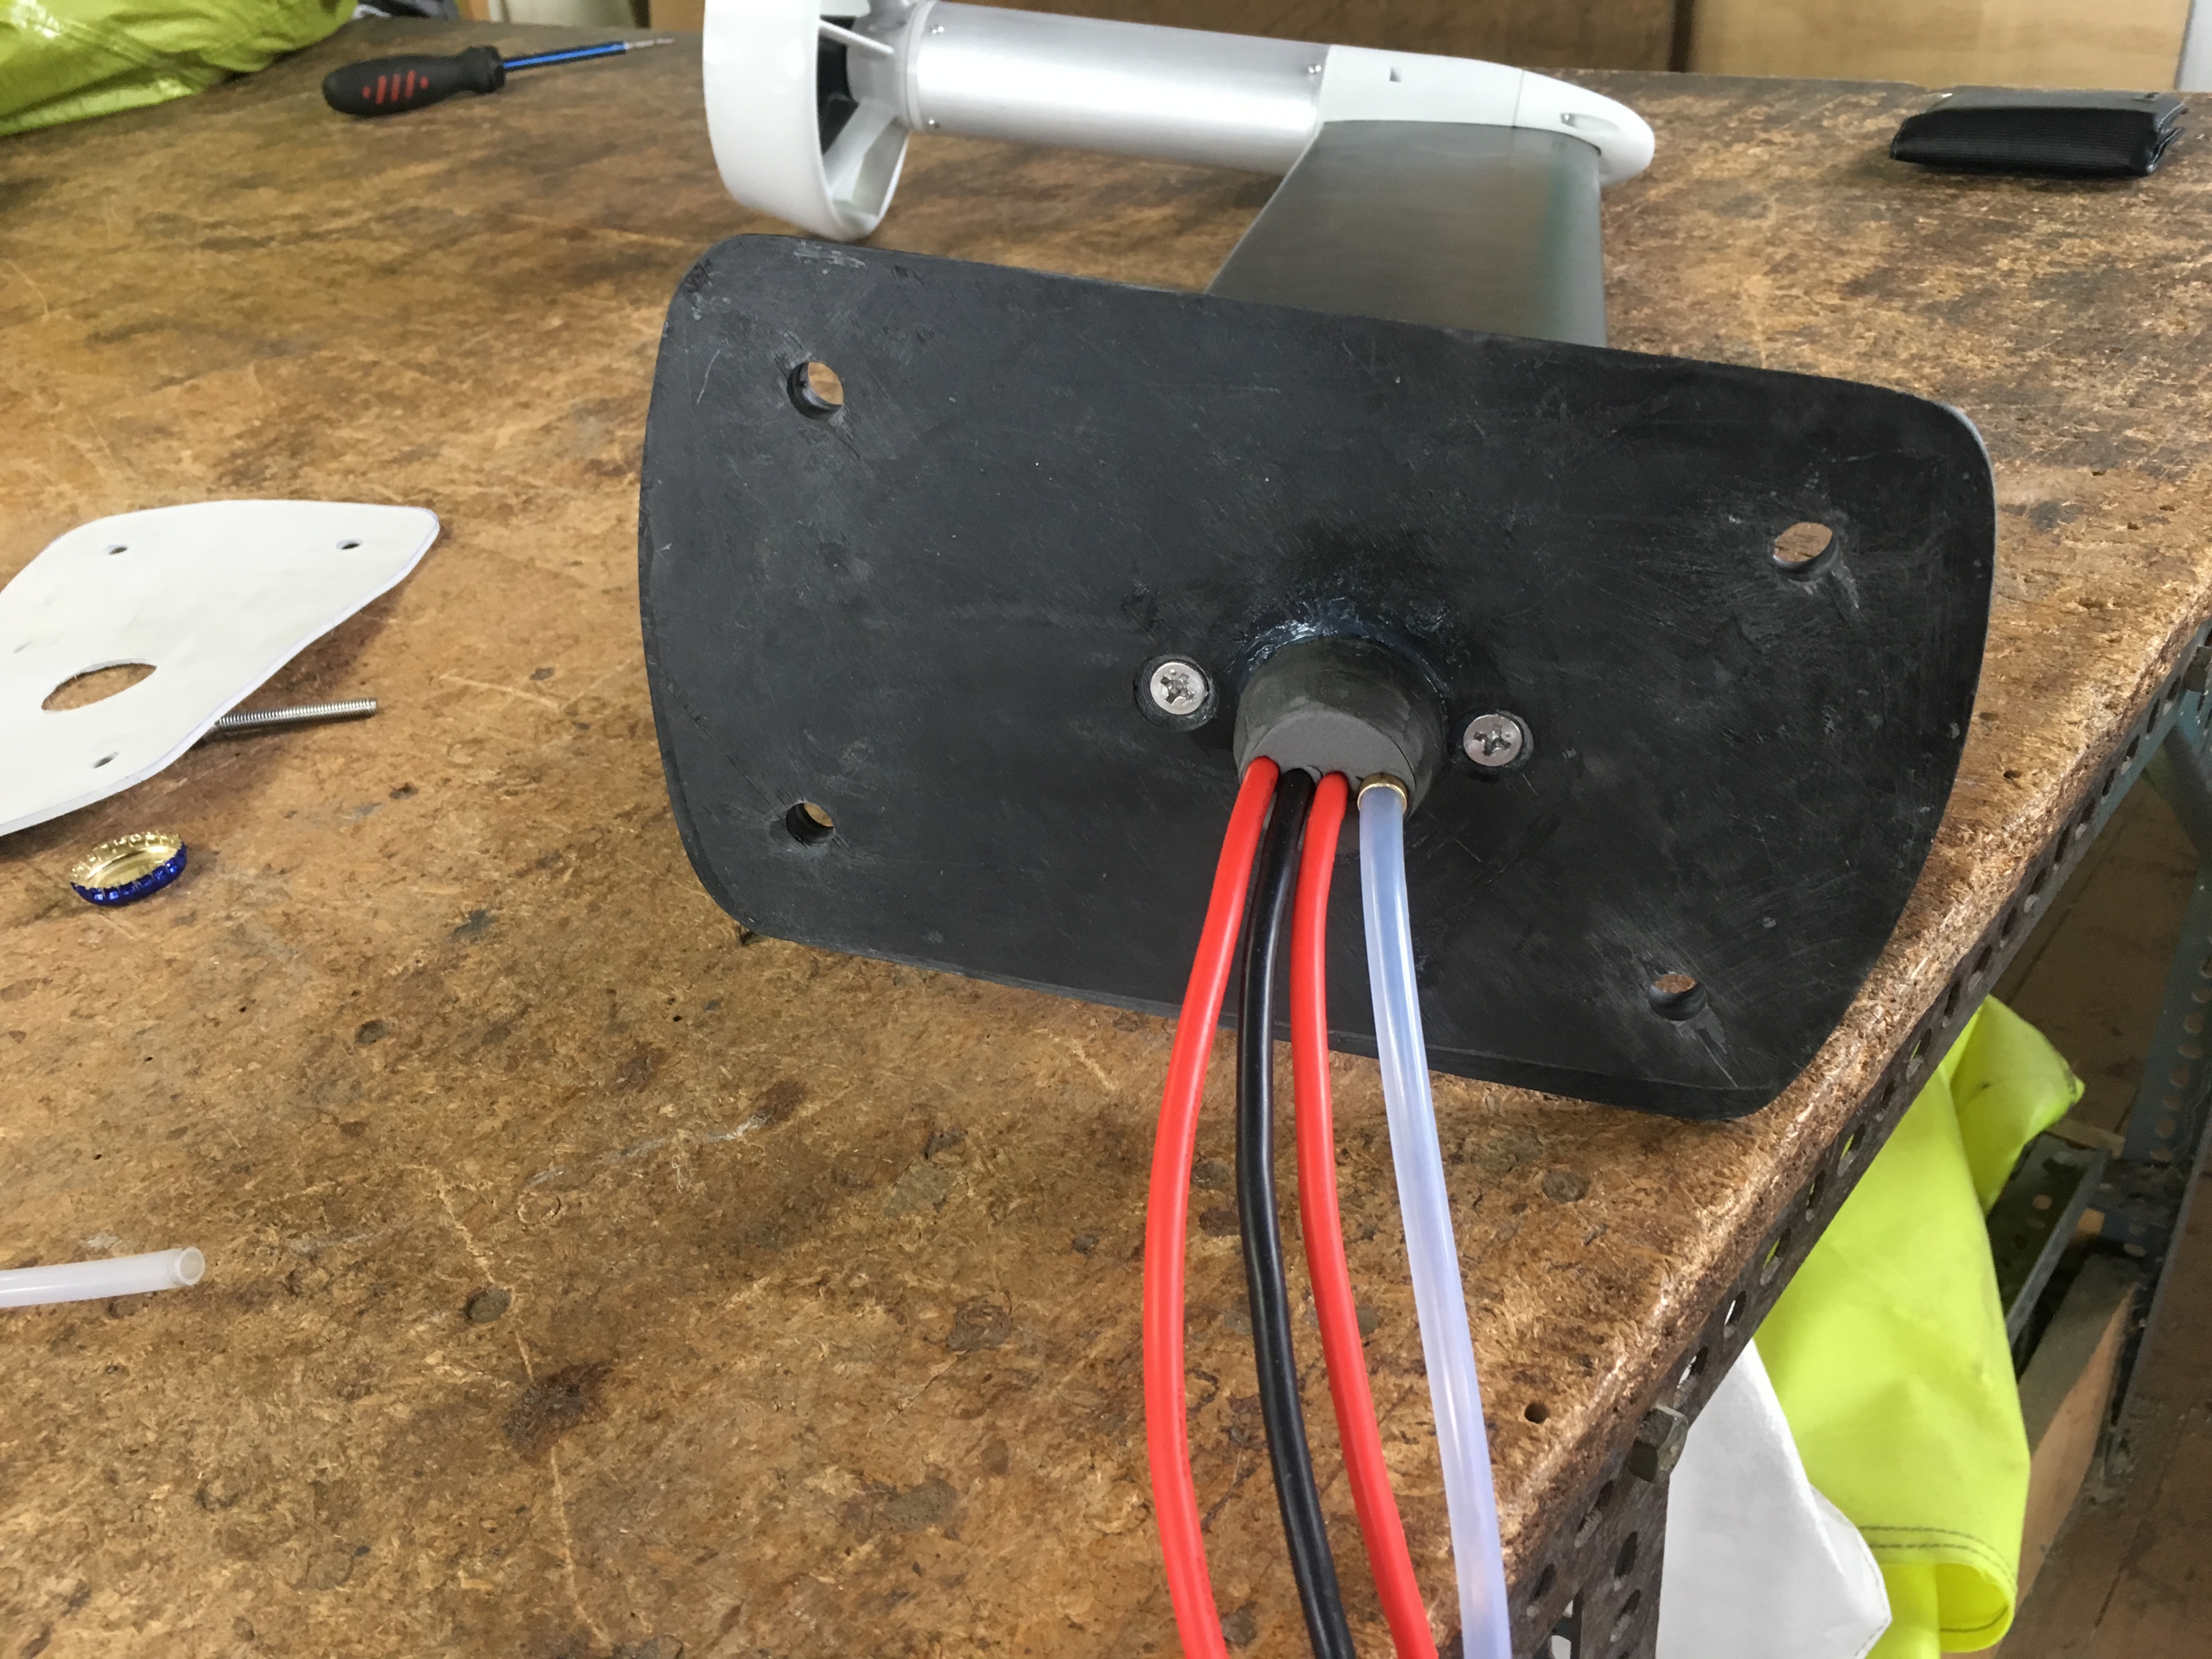
Hatch didn’t seem to leak when I tested it. I bought a hatch made here in New Zealand and it is really durable, once installed barely flexes at all when it is stood on. Also going to fill the cavity where the seal sits with some marine grease for a bit of extra protection. I have all my batteries and electronics in seperate waterproof boxes inside the hatch so if a bit of water did get in it shouldn’t cause any damage. I also designed and printed a waterproof plug to house my as150 connectors for the main power connection. @samisin I can send you the plans for the board via email if you like. Just pm me your email address.
Hi Tyler, I got one very similar in size to this, not this exact model but I think the size is the same. Couldn’t find the exact one I bought anymore. Cheers
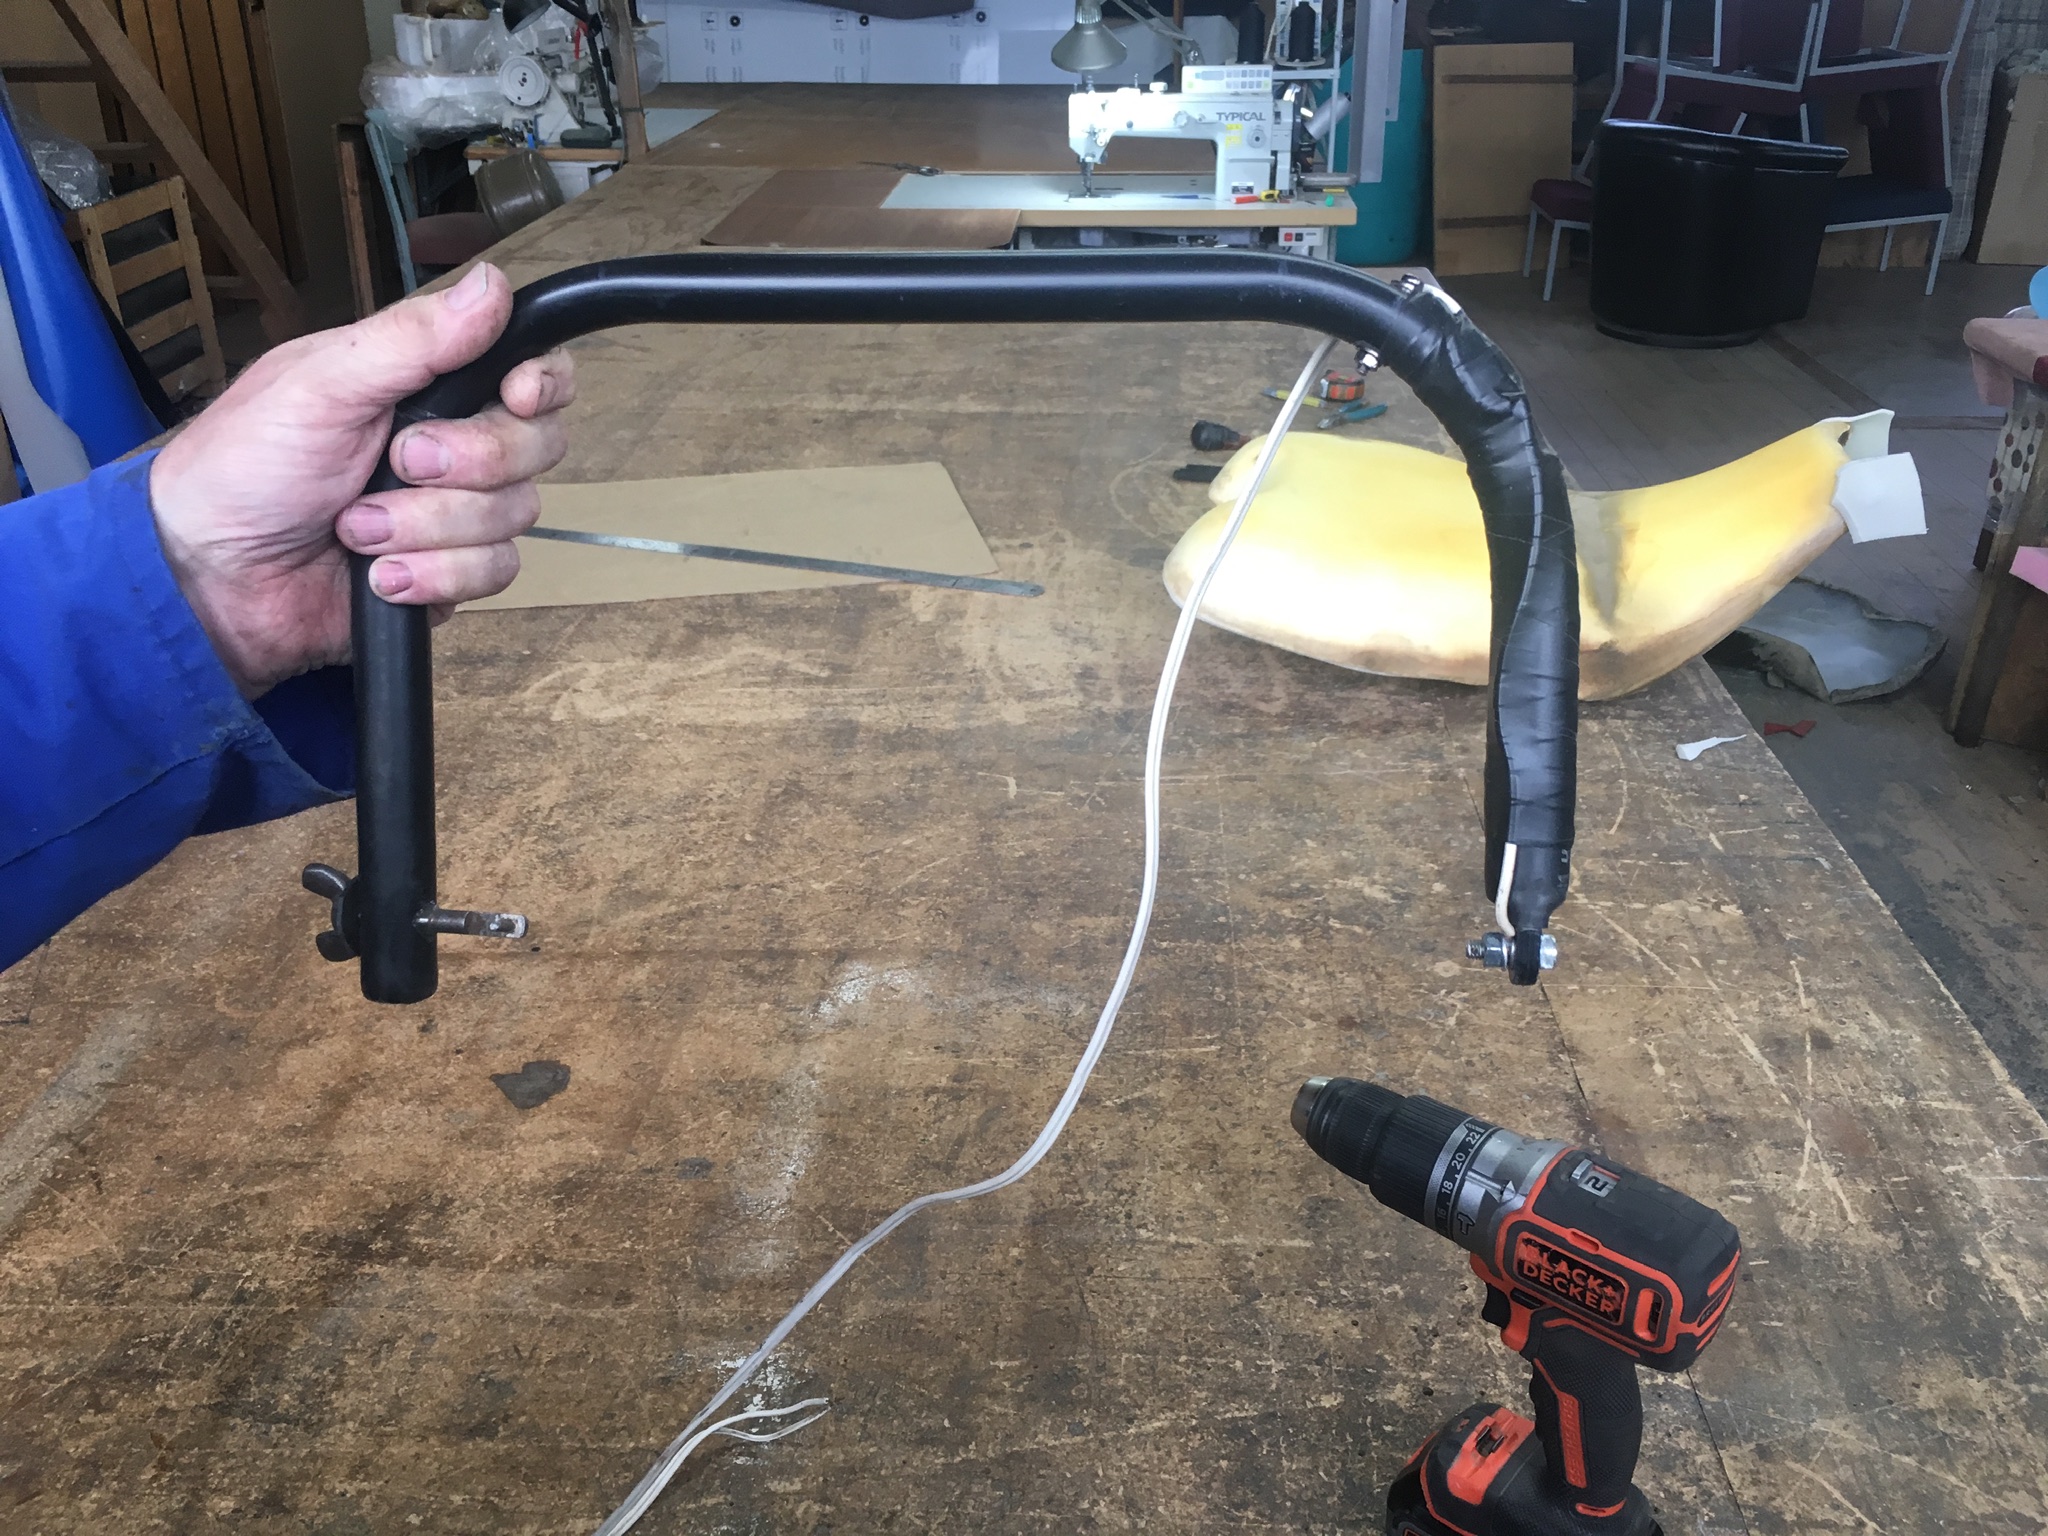
Thanks. I made two hot wire cutters, one Large one out of steel conduit to do the main shape of the board and then a smaller one out of aluminium tube to do the angle cuts. They both use the same power supply which is from an old electric blanket. I tape out all my lines with double layers of masking tape and then run the hot wire cutter along that to get as good a line as I can. After that I use a flat sanding block to get it smooth and then a soft sanding block to do any final details. Cheers
If you move at a good speed the wire doesn’t burn through the tape and works great as a guide. I used a couple of layers of masking tape to make it harder for the wire to burn.
this type of tape is often large … 2 or 3 pieces can be cut lengthwise not a big deal on 6" (2m) long pieces.
CON: can be pricey.
Perfect tool for EPS and XPS, I’ve read that Hot wire cutting on urethane releases cyanide into the air. So urethane must be hot cut in a well ventilated place, ideally outside with a light breeze on the back
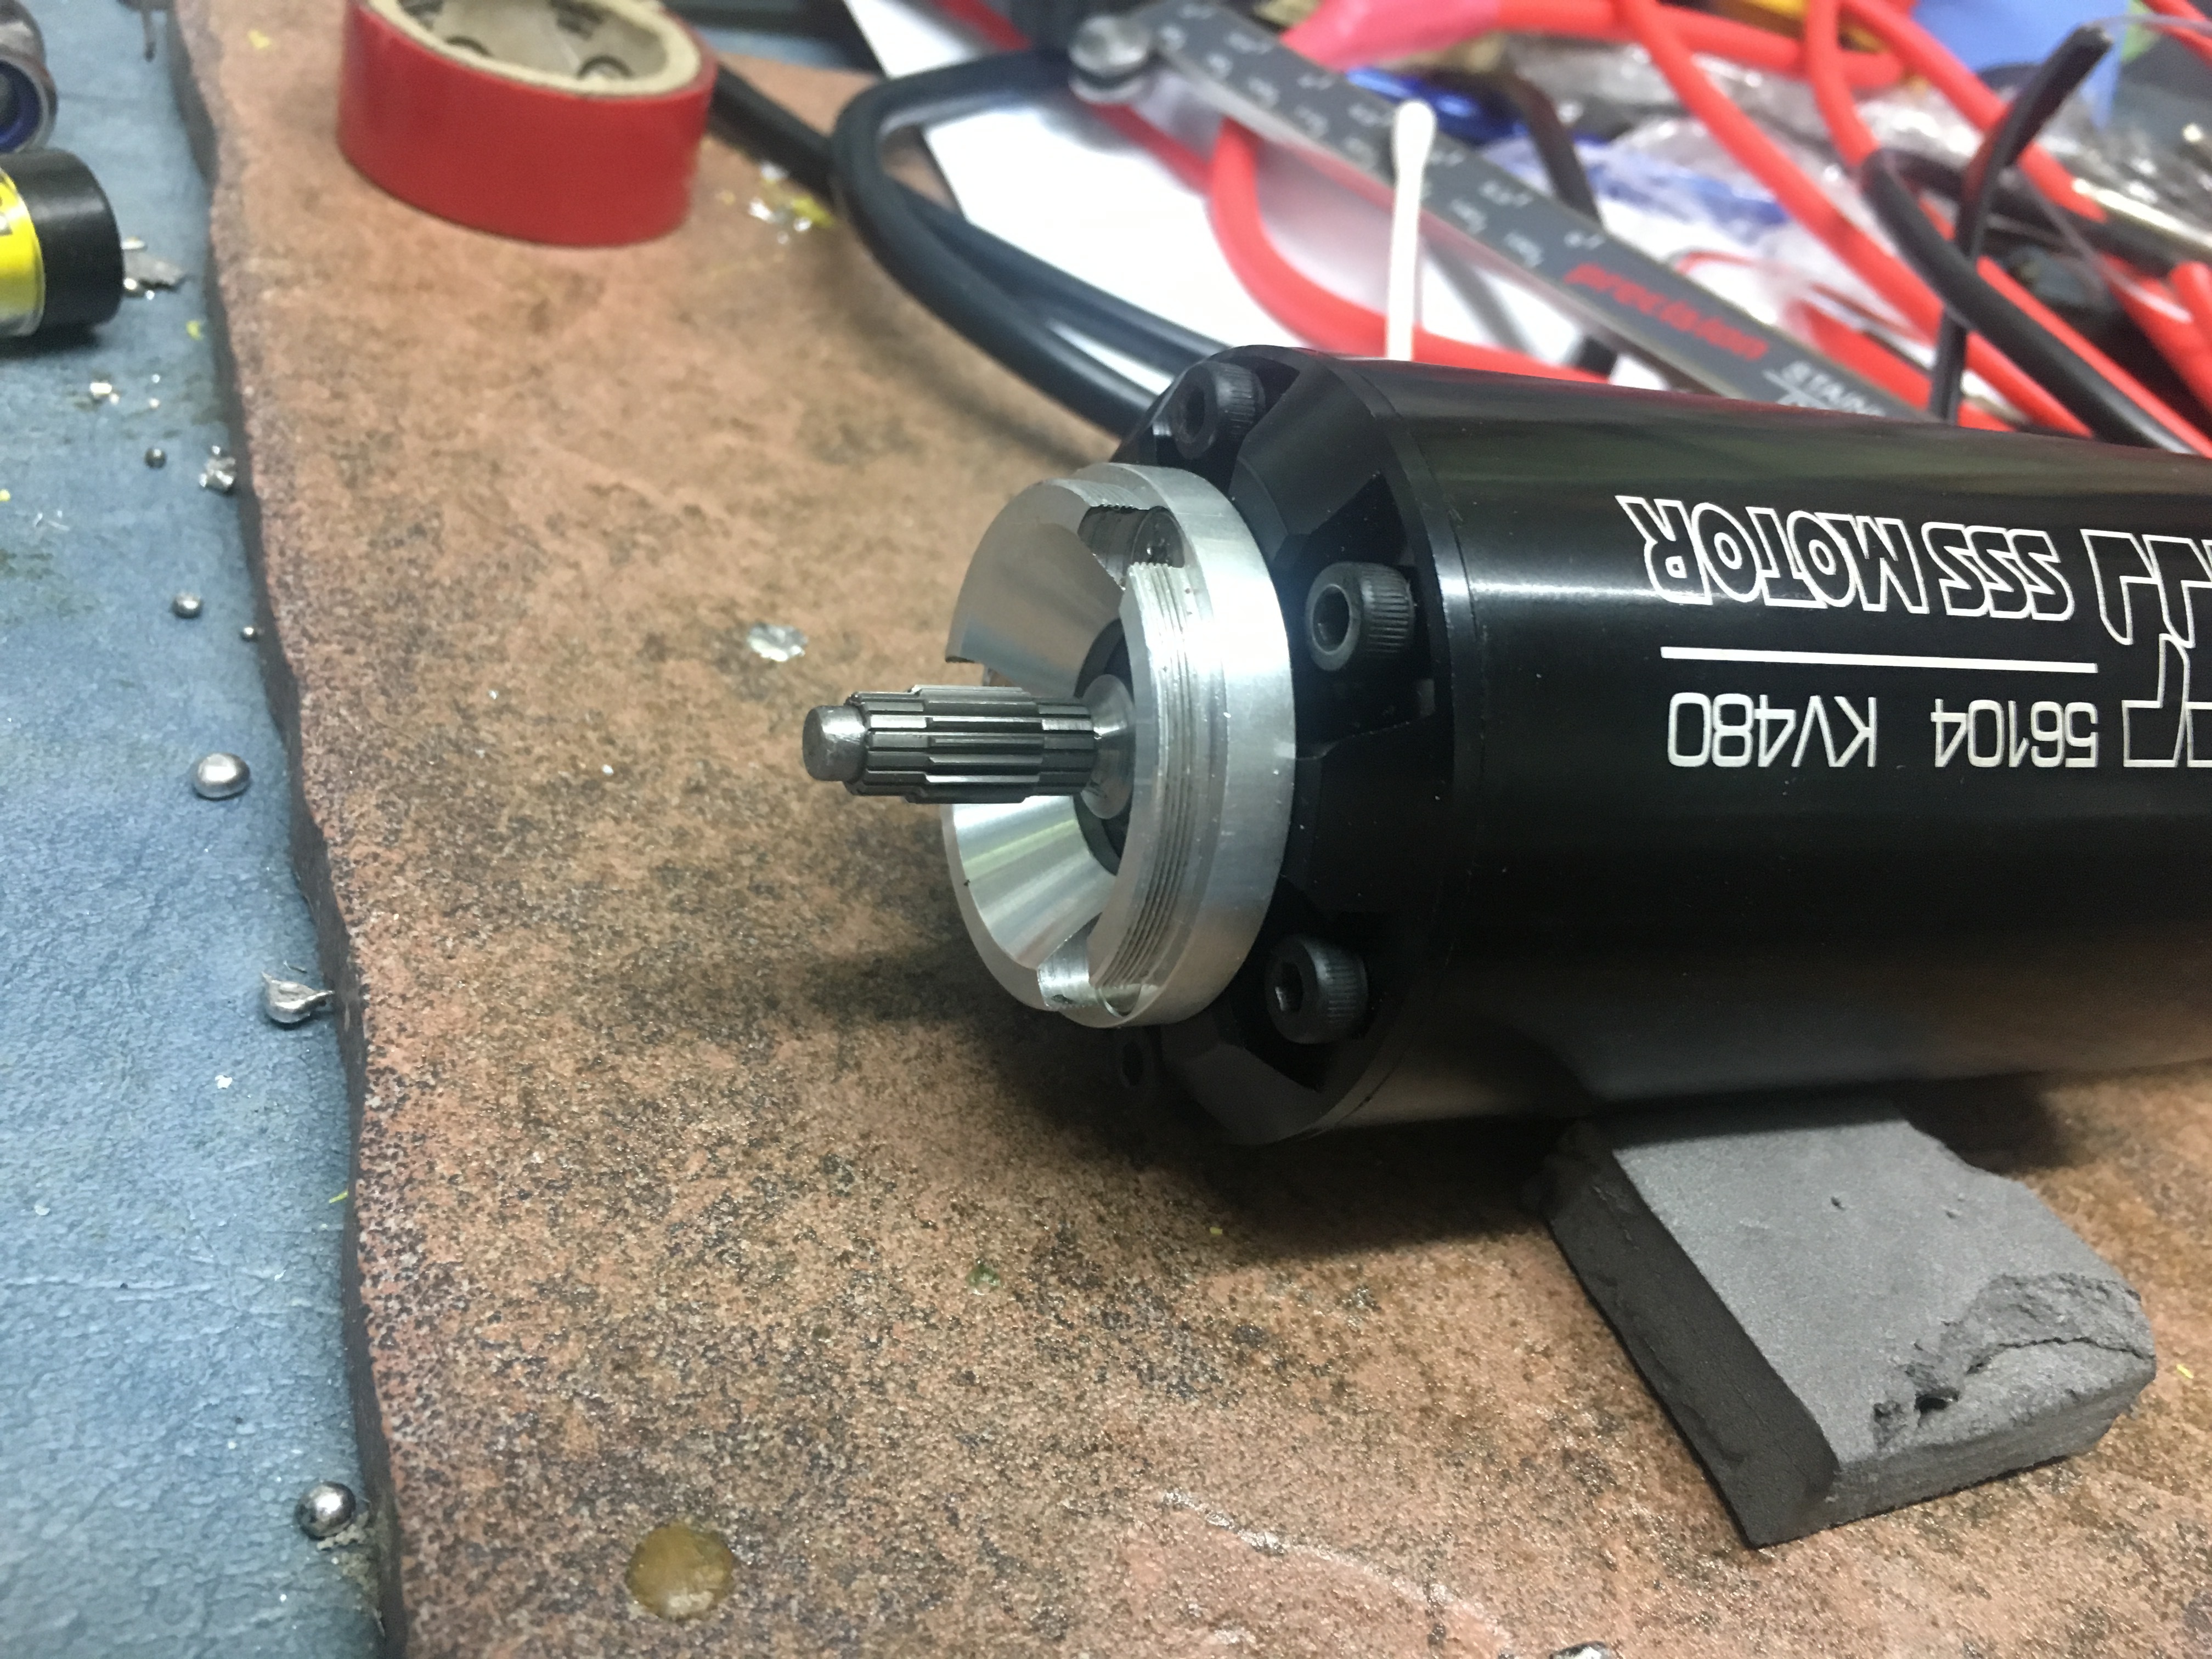
@goldey when you purchased the sss 480kv motor And the 6:1 Reissenaur gearbox what motor shaft size did you need for the pinion to just fit on without modification. ?
are you happy with the 6:1 ratio as others seem to be using 4:1 or 5:1 gearboxes on the same motor but with the 500 kv motor.
Also your hatch idea is really good and i will do the same in my build but i intend to foil in the surf and expect the board will experience more rough water treatment than basic flat water foiling that most do. do you think such a hatch will be ridged enough provided the board is well reinforced.
Yes you need to size down the motor shaft ( see my built ) , the higher reduction on the gearbox : the higher the torque will be , but you need to increase the propeller pitch to increase the speed …


 Have you tested that boat hatch under water/pressurized it? We bought a similar hatch, but it was not very waterproof. The one we bought might have been of bad quality tho.