Hi jezypeti
I agree with your 3d printer PETG parameters
FLOW 100
Heat bed 80
Extruder 229
Fan 60 %
LAYER 2.5
INFILL 30%
SHELL 5 Perimeters super strong.
Hi jezypeti
I agree with your 3d printer PETG parameters
FLOW 100
Heat bed 80
Extruder 229
Fan 60 %
LAYER 2.5
INFILL 30%
SHELL 5 Perimeters super strong.
Can you upgrade a printers extruder to run PETG?
Hi!
We did print our foils using PLA on a 80% infill. Printed on a ultimaker 2.
For some more information check Facebook:
And
Do you have any idea what the chemical composition is? Is it just epoxy?
I just preordered the MK3S. They have made a lot of improvements over the MK2S so hopefully I won’t have the same problems you had. So, since we have almost the same printer, any tips will be appreciated.
It only does its smoothing magic on some materials such as ABS.
What kinda printer do you have, most printers should print PETG stock.
Thanks David, I did look into it after my post and I agree. I have ordered some XTC 3D to see how it works.
The manufacturer doesn’t claim it waterproofs, but i’m thinking a smoother surface would have to be less porus. If nothing else it’ll make it look shiny.
Hey Mate,
You didn’t heed my warning! I really hope you don’t have the same problems I did with the new i3 machine…
Nonetheless, if you want to print ABS or PC your going to need an enclosure. Lots of cheap options out there. I went with the ikea lack box approach which works well and is quite nice (photo attached). Happy to share the CAD bits a pieces that are 3D printed. If you going to print ASA no need. If your going to print carbon, your going to need a hardened steel nozzle or a something that can deal with the abrasion.
Honestly, my best advice is not to mess with the settings that comes loaded in prusa’s sli3er. They are pretty much dialed in for the machine out of the box. That is if your going to print with the matierals preloaded into the software.
Read this article back to front. So when you have problems, you know where to looks quickly without following the rabbit down the hole. The guys on the live chat are pretty good at helping out. Print Quality Guide | Simplify3D Software
Make up some calibration blocks. A cylinder, square, pipe, and square with a hole in it should do. Print them out at varying shell thickness and infill to get a feel for your printers tolerances. Double check them at 2 different sizes with the matierals your going to print parts out of. All materials shrink or in some cases don’t shrink. So you’ll need to design your parts accordingly. Personally I notice that small bolt holes shrink much more than larger cylindrical or square parts. You just need to get a feel for your printer.
I’m not an expert so I can only attest to my own experiences. I’m assuming that you want to print your parts out of PC-max? Why not right? It’s pretty much the strongest stuff money can buy other than some of the crazy carbon stuff out there for $250 a roll!
So… Printing PC-max:
Honestly other than the simplify 3D stipulation, follow what polymaker recommends and you’ll be fine.
The only other thing I can think of right now is to always triple check how the slicer carved up your part. Sometimes it does just insane things. I find myself going back and forth between the settings and the print preview 4 or 5 times in an effort to minimise the stupidity sometimes.
Let me know if you have any issues. I’ll try and help.
Aaron
I preordered my printer before your warning  . A fellow engineer at work (who is very reputable) highly recommend Prusa. He has two at home and that’s what we use at work too.
Thanks so much for all your information! Particularly the specifics about PC max… I will study it carefully and I’ll let you know my success or failure with it.
Hi tylerclark,
extruder should have no problem with PETG. But heated bed is a must.
Hi everybody,
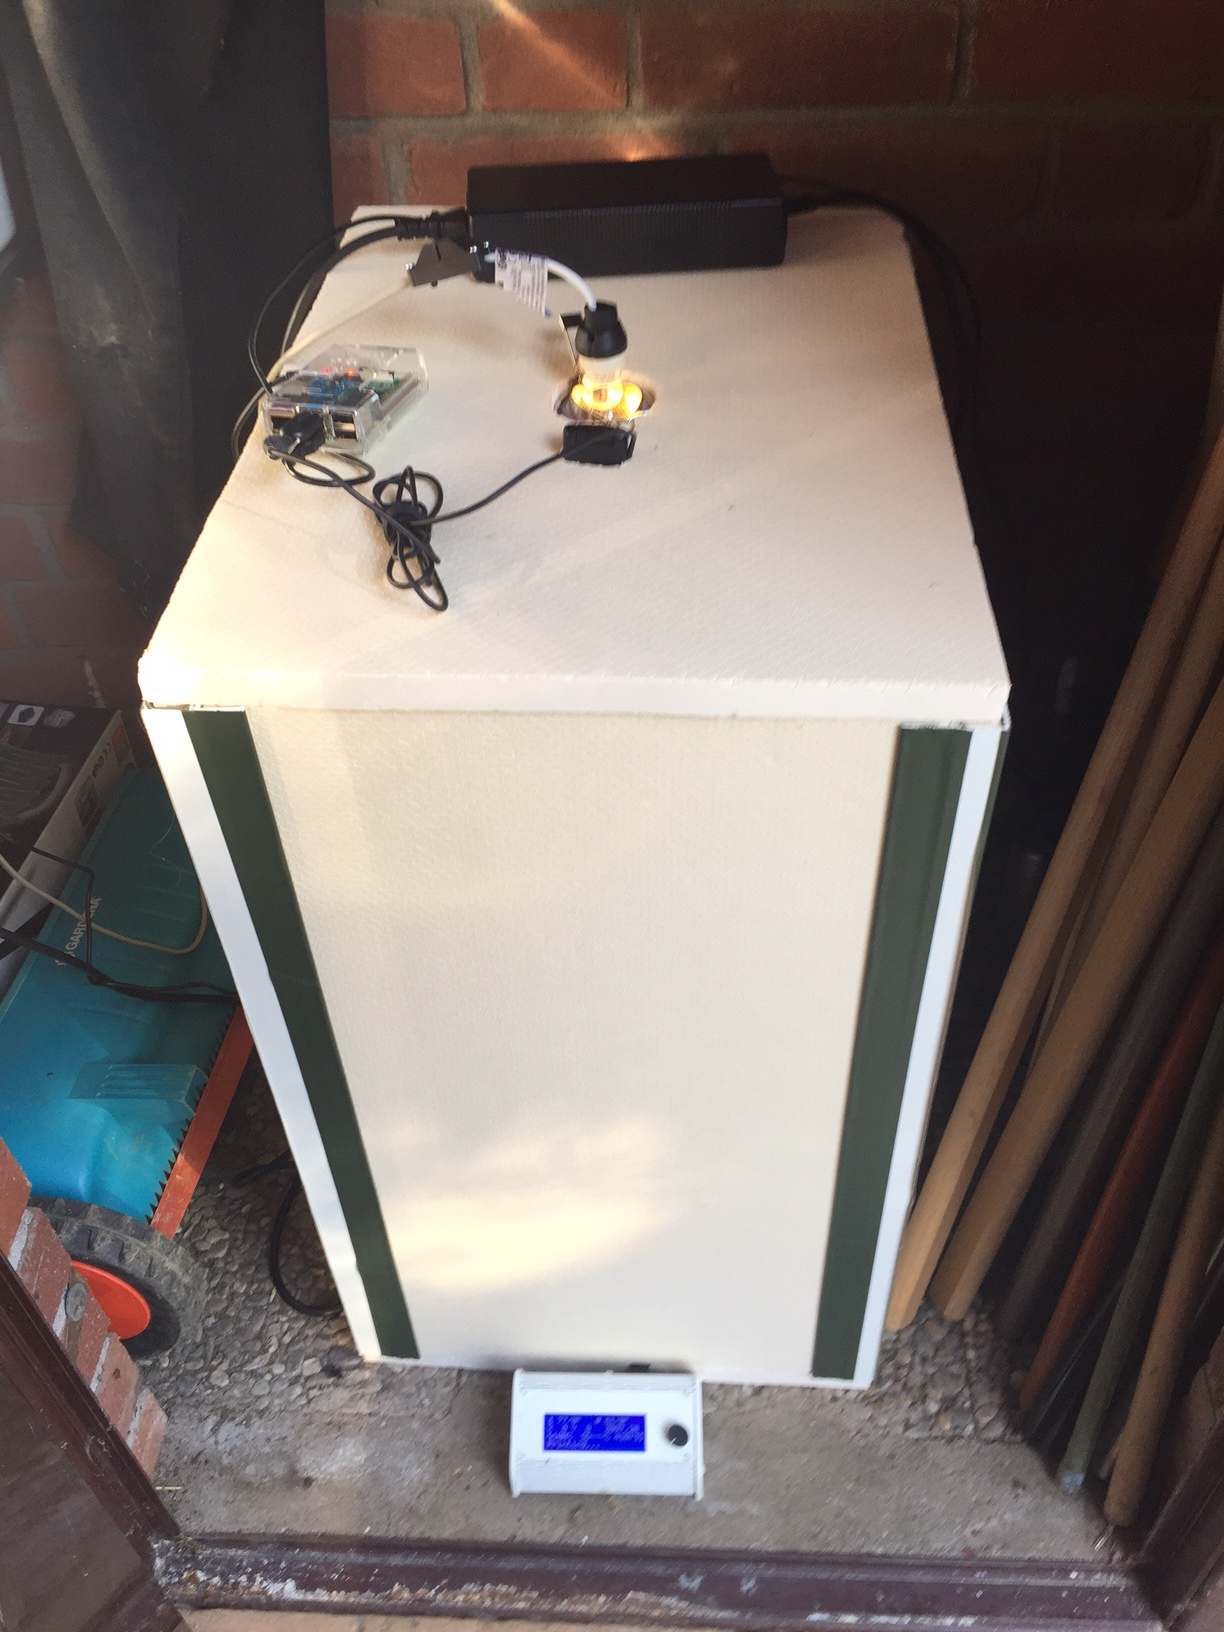
I prefer to print in ABS for higher durability of the parts. I use an Ultimaker Original plus with a heated bed. To avoid warping I built a cheap but very effective housing around my printer with styrofoam plates from a local hardware store (cost me about 5 EUR).
Her is what it looks like. Never had any issues with warping since I built this. 
I also use an Octopi as a print server. With that I’m able to remotely supervise the print progress with a webcam. That’s why I integrated a lamp in the top plate of the housing.
PLA and a small bit of epoxy resin and fiberglass! watertight. extremly cheap and ofcourse the strength quadruples
I have tried hard to print with petg but with little success. My problem is it does not want to stick to bed but wants to stick to itself causing balling issues and poor overhang results.
I kinda wanna experiment with PETG but my 3D printer claims it only does ABS/PLA on the Amazon website. Is PETG safe through the extruder or do I need to change it up? I know the platform needs to be hotter which isn’t an issue.
Fancyfoam, try this:
this will solve the first problem! (I had the second issue too ,but only by the first 1-2 layer, masking tape solves this too)
Thanks for the link. I will pick some up. I will also try the settings above and see what I get.
You can also use regular blue painter’s tape.
Put slices side by side and you’re good to go.
However, don’t forget to re-calibrate your bed level after applying the tape… or leave it as is to ensure great adhesion (with a crappy first layer…)
If you want petg to stick well i suggest you to buy LOKBUILD and everything will be ok .
Dont forget heatbed must be at 80 celcius
I have not printed the parts on the forum here, but i have been printing PLA parts for the development of a jet water pump the last two years. PLA is neither air tight nor watertight with standard print settings. (But I’m printing with a cheap Pollin 3dp-100.) I had some success with clear laquer.
I recently discovered how to get airtight parts. I printed these with Cura 2.6.2 (in short: 0.1mm layers, first layer 0.25, nozzle: 0.4mm, 5 contour lines and 16 top and bottom layers, 105% flow (=overextrusion), 225°C for the first layers and 210°C after that, 60°C on diy heated bed) High infill settings were not useful in my experiments. Contour lines were the solution for me. I printed pipe connectors for hoses with these settings. I pressurized the parts with 5 bars (73psi) of airpressure and sprayed them with soap water. I have them in use with water now and don’t have any visible leaks.
I would love to have more scientific results on this topic. Please let me know of any ideas.