Hi @Phu_Le, nice to have you here. I suggest you start reading the posts and ask specific questions if you can’t find something. I also recommend the search feature, it works great. Good luck with your build!
If you’re using the Parker gearbox, you might like my post on some of the challenges you’ll face:
Hi Pacificmeister,
Great work on the CAD files and your build. A question about the Aluminium tube and how it fits to the Seal mount 3d printed part. Also the same at the front where the tube interfaces with the mast clamp back bracket. Are you using silicon adhesive or some other type of water proof glue to join the tube the the printed parts.
1 Like
It’s a tight fit with double O rings in back, locked with a couple short screws (or set screws) on the wet side of the seal. I epoxied the front piece to the alu tube, mast mount side. Thought about double O rings here too but it would have made it a little longer and I didn’t see an urgent need. Silicon to seal wires coming through. To disassemble, I peel out silicon and pull motor/gear combo out through the back.
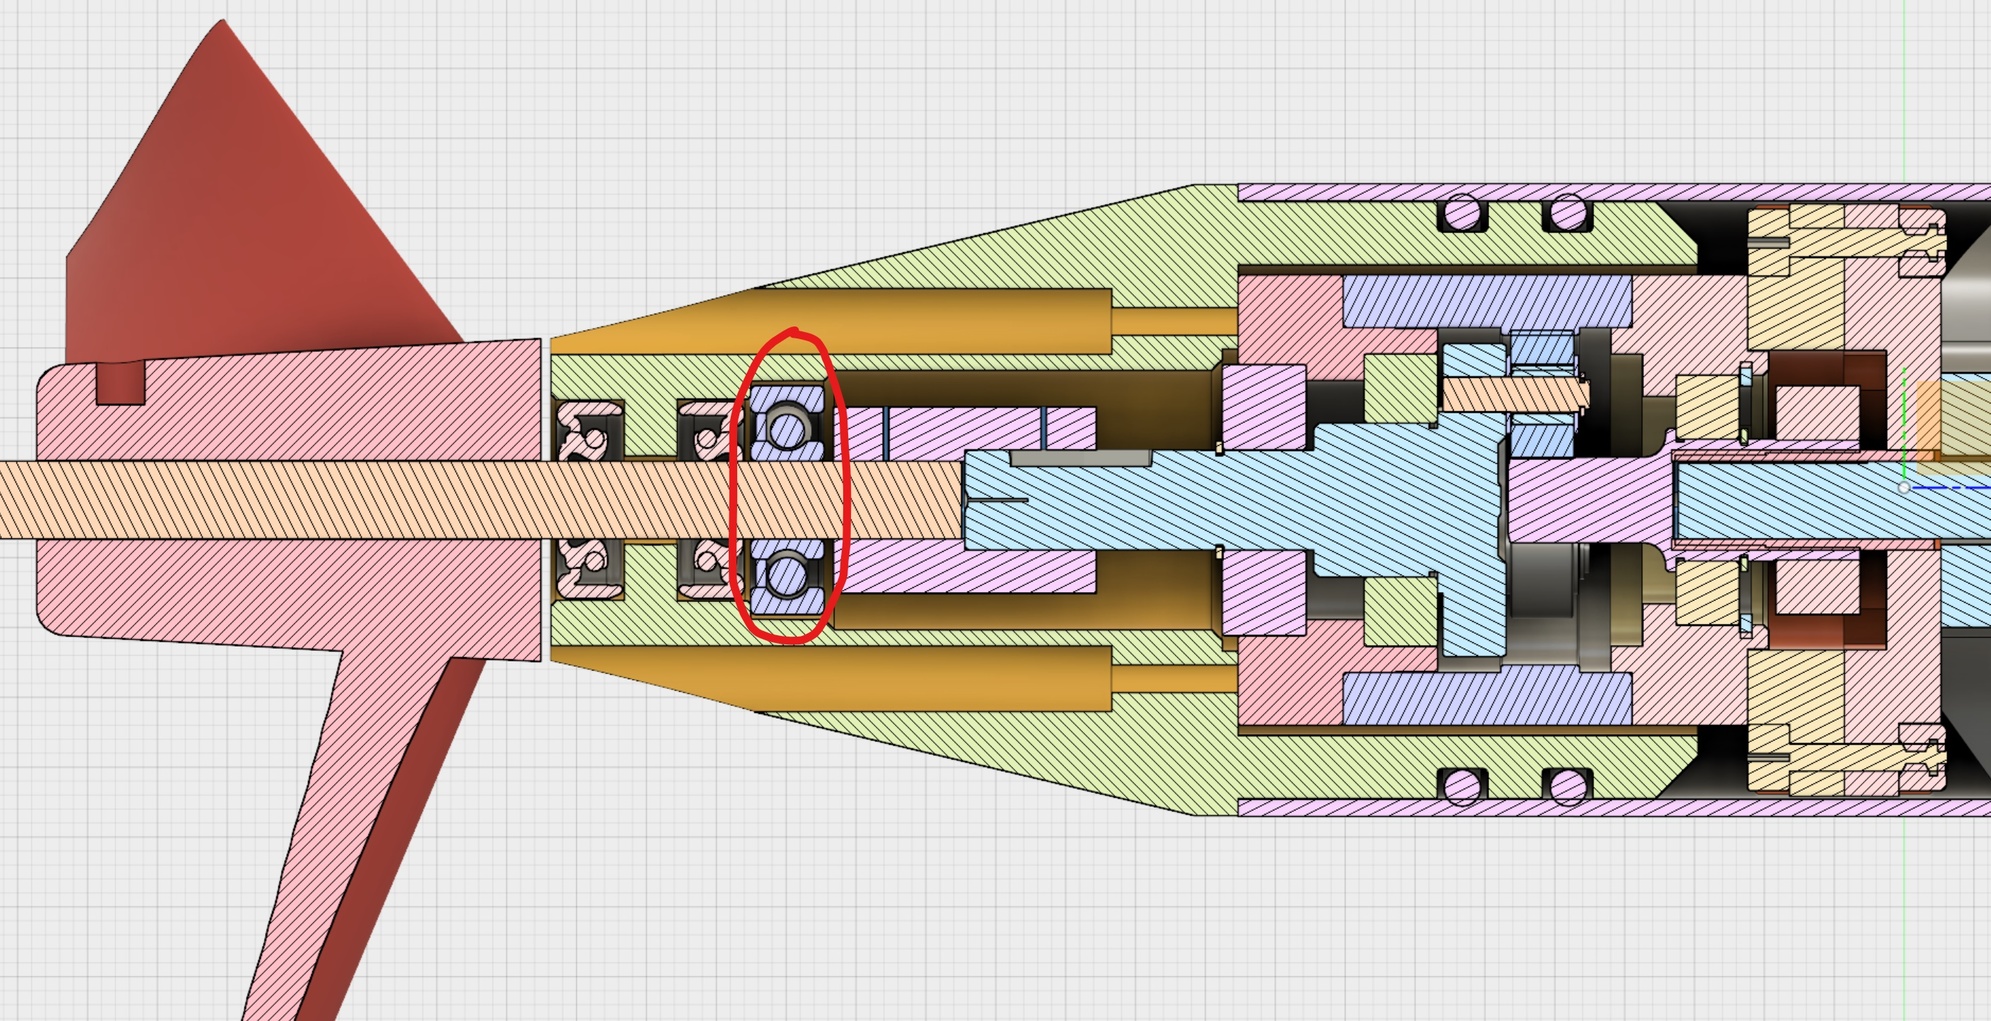
I just disassembled my rig and found water inside. I assume it came in though the lip seals in back, they wore out because my shaft coupler came lose and the prop wiggled. I might have to go back and add an extra bearing do the design just before the inner lip seal, I had that in my first version. Gives it more shaft stability. Took it out to make it shorter when I added the thrust bearing.
Hope this helps.
4 Likes
Thanks for the feedback…only time will tell if the design holds up. Will look into this issue.
CAD Update - REV2 (last update11/17, fixed duct thread issue)
I made an update to the CAD and added a bearing again. Here is the complete REV2 assembly. The only changed part is the SealMount. I’ll also post links in first post above.
Reason for this update is that I am trying to minimize vibration to keep the two shaft seals alive. This time I am adding a ceramic bearing on the wet side so it is even closer to the prop for max shaft stability.
Here some history on this setup:
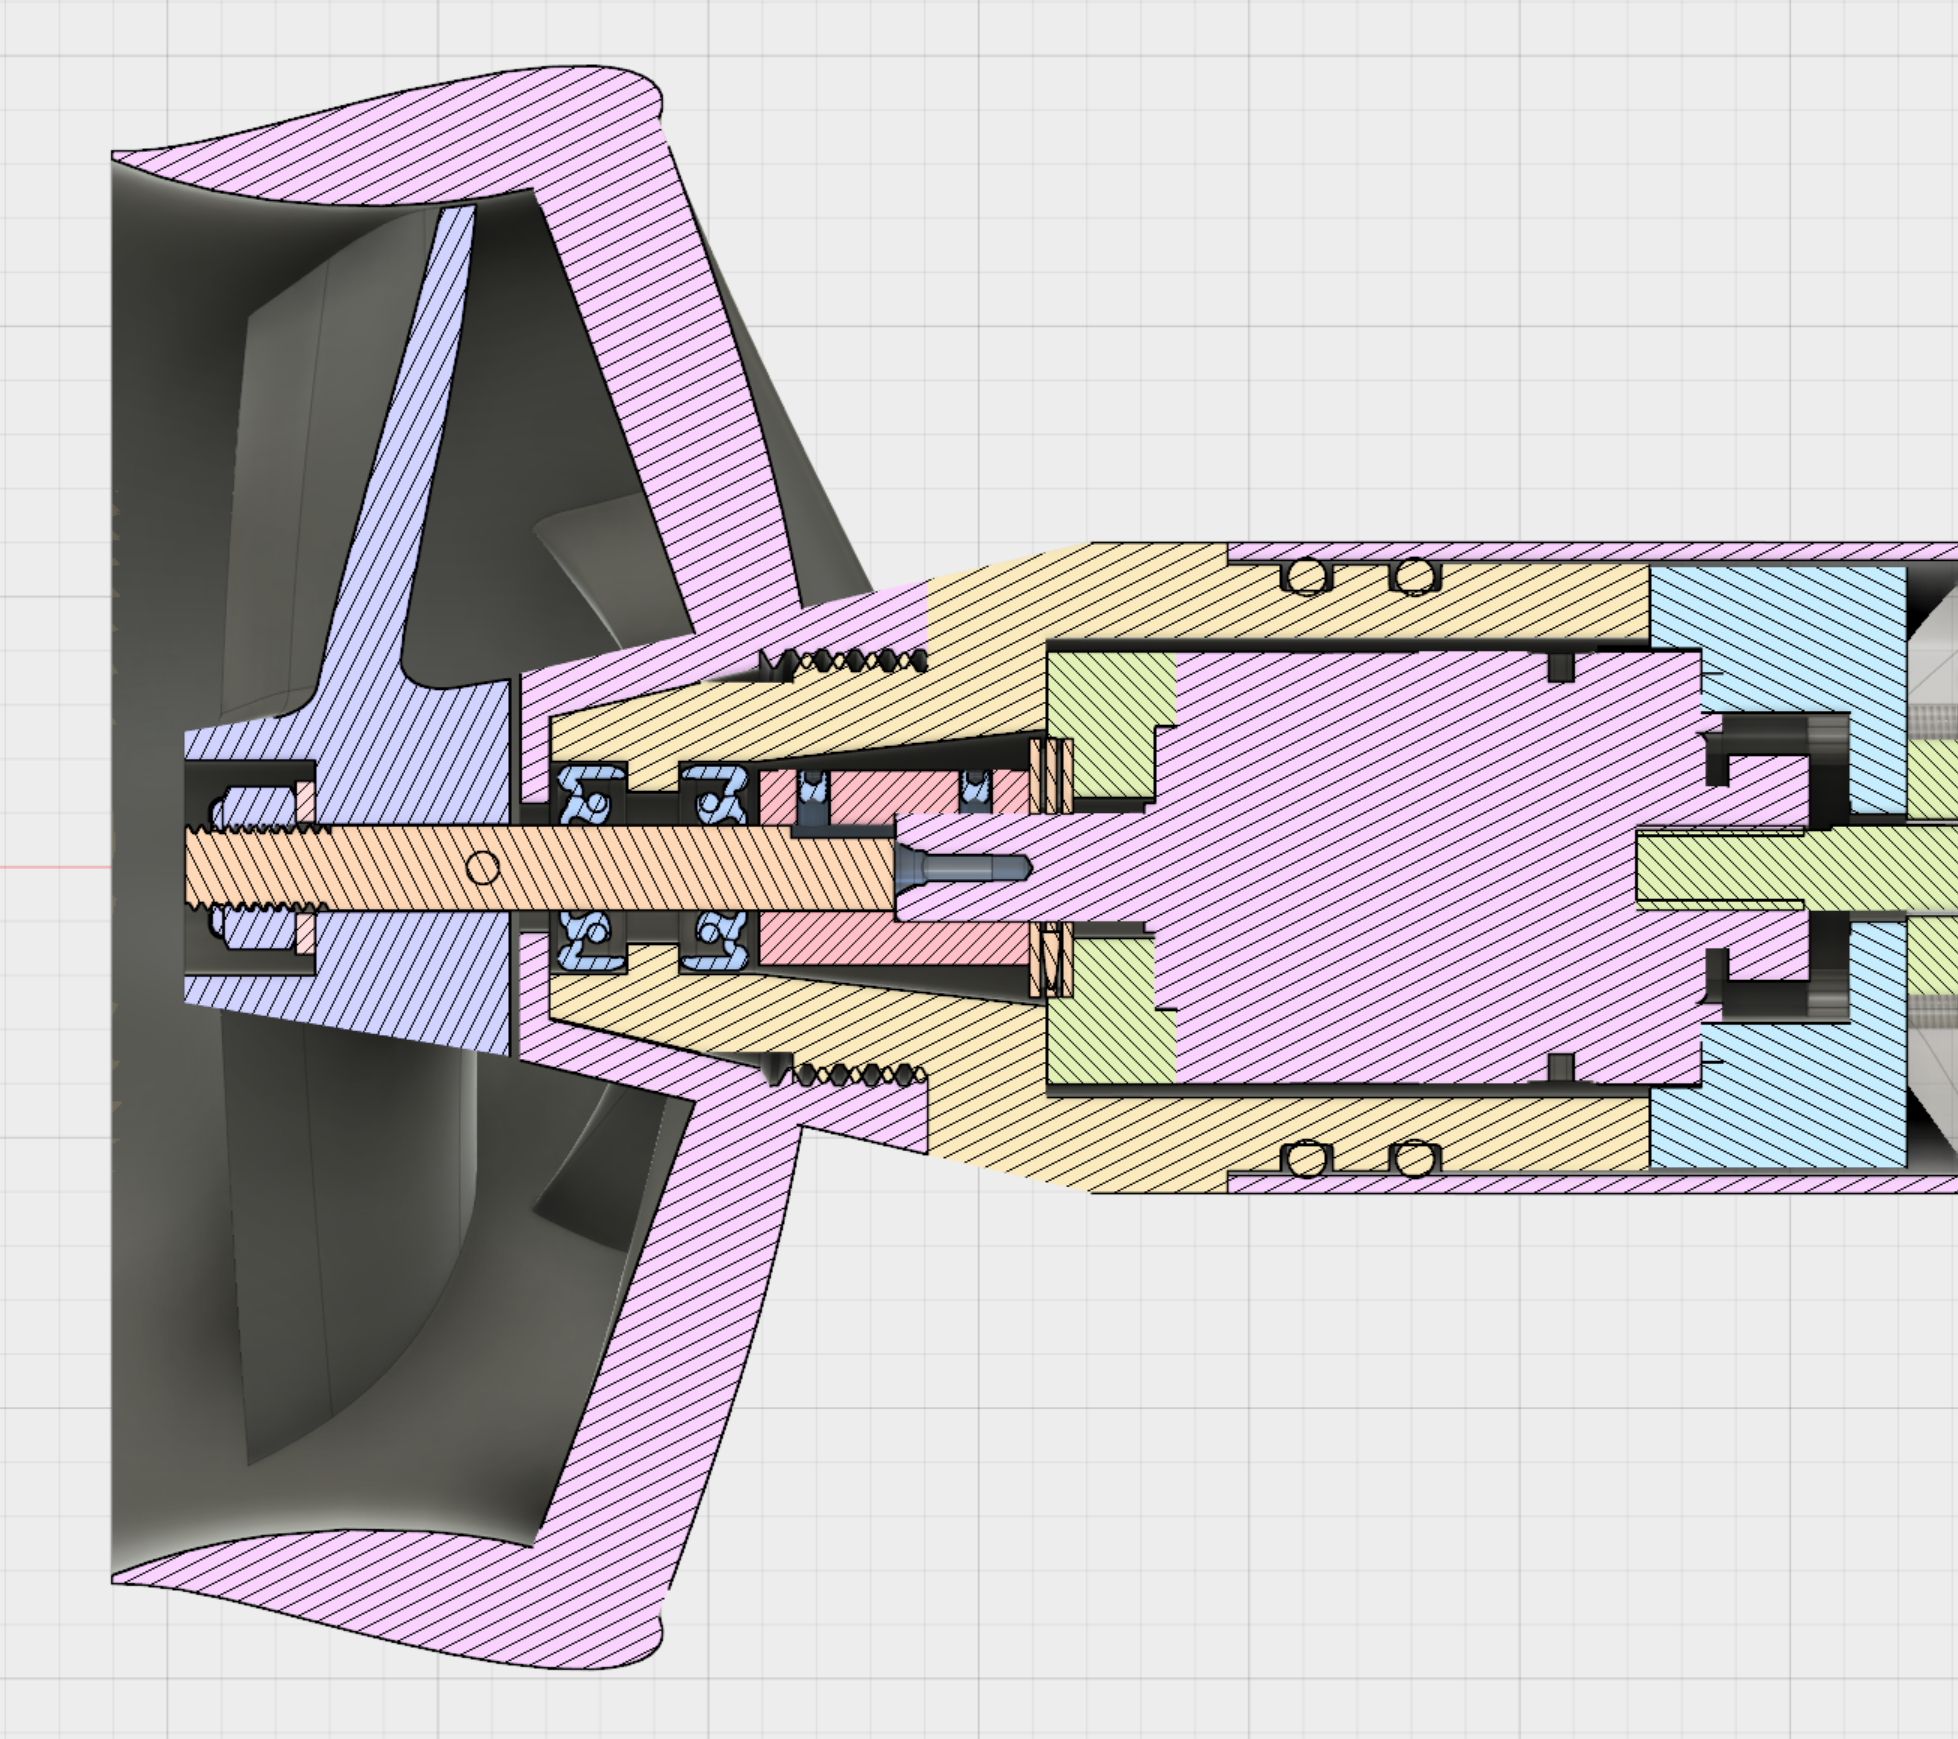
Frist Parker 7:1 gearbox based design. You see I had a bearing on the inside (should have kept it):
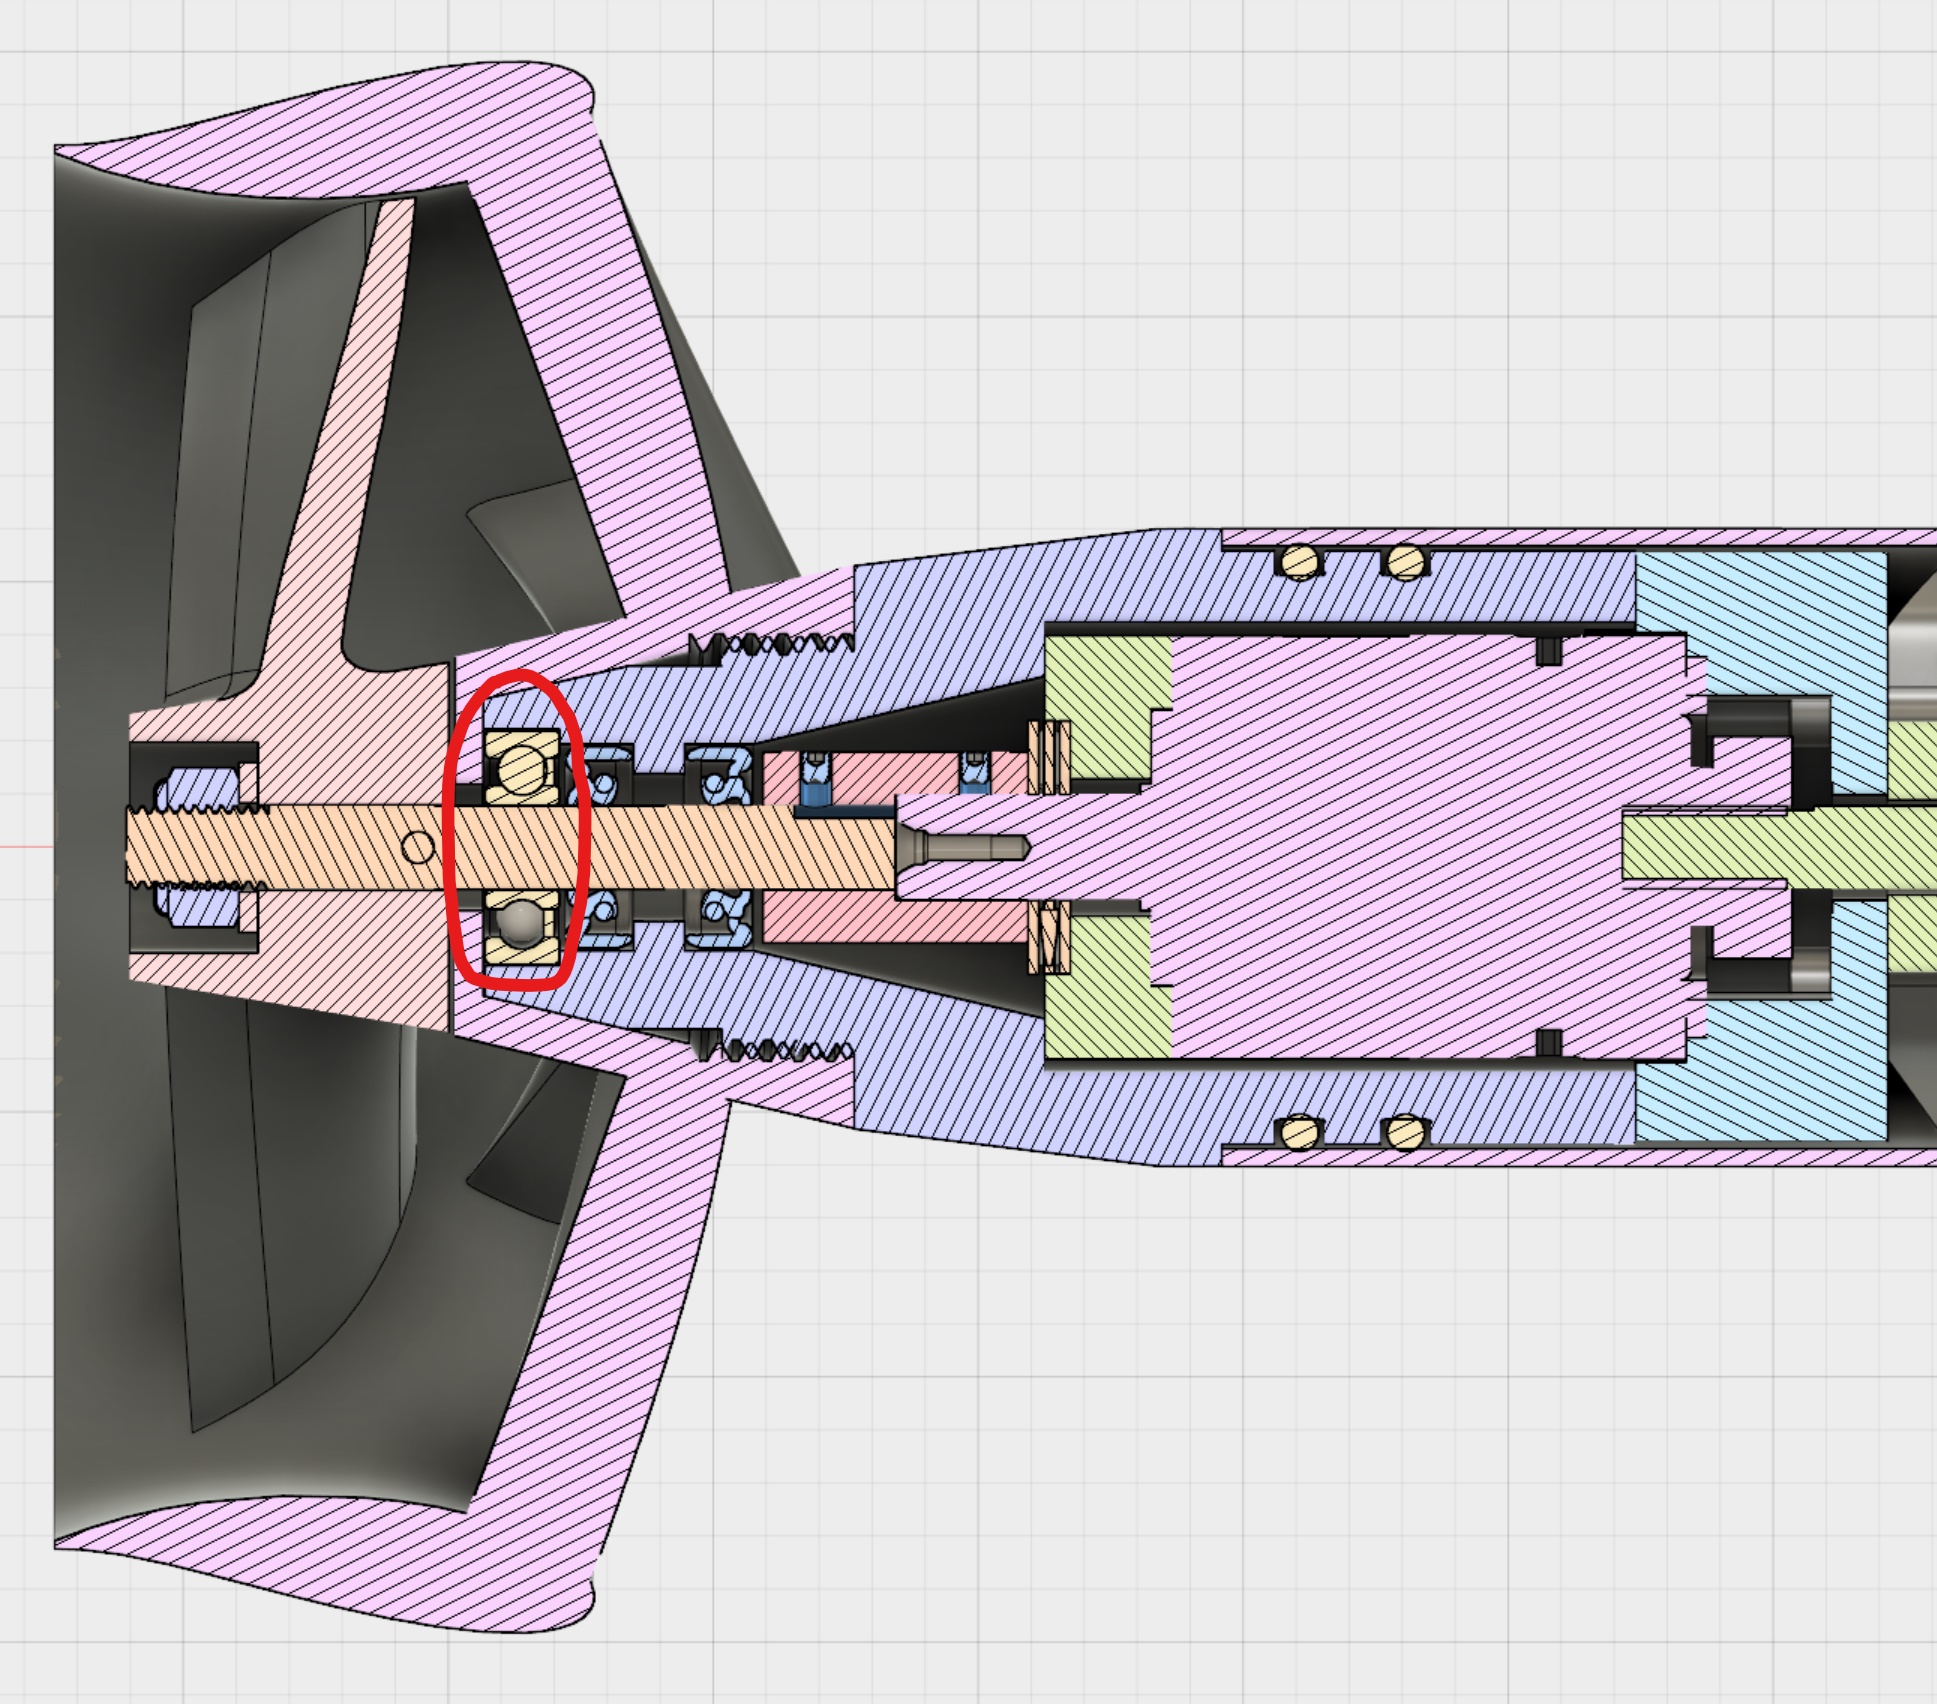
This is the second Neugart 5:1 gearbox desing (current version posted above). I removed the bearing, added a thrust bearing close to gearbox. I wanted to minimize length and was hoping the shaft is short enough to be stable:
Now this below is Rev2, haven’t printed and tried yet. You see a bearing at the very outside close to prop. I just ordered this ceramic bearing. Hope that stabilizes everything. If I would have a lathe here I would make a custom shaft with that 10mm pressfit bore for the gearbox output. These hobby shaft adapters are not the best solution but they work.
7 Likes
The oil seal near the prop needs to be rotated.
Hi pacificmesiter, I come in work today opened my CAD machine up to have a look at the shaft seal bearing issue and you had already modeled it…speedy skills.
Are you modelling the bearing , gear boxes from data sheets or are you getting them from suppliers?
@superlefax is that because you assume the pressure is higher from the water side? I wasn’t sure from which side there is more pressure because of the heat building up inside the tube…therefore I have one seal in each direction  . I would like to learn more.
@morgansteven1970. Lol  . Both, from suppliers (e.g. Neugart or Parker gearboxes) or measuring and modeling them myself (like the oil seal or the SSS). What’s awesome in Fusion it that McMaster integration. Any bolt and nut you need you can just pull in directly from the supplier as CAD.
2 Likes
@pacificmeister: Yes, because the higher pressure comes from the water side. But I think it only get relevant if you have a higher pressure difference like in a combustion motor.
The more important fact is too keep the shaft spinning completely centric. I struggle with the same problem although I have a second bearing. The non centric rotation t is coming from the bad quality of the coupler.
1 Like
Vibrations also might be more significant due to unbalanced prop ( which is 3d printed). So prop balancing is important to reduce vibrations as much as possible:
Cheap couplers, chafts, and unbalanced props will definitely cause a wobble which leads to shaft seal leakage. If you can use a flex coupler of some kind between motor and prop it can help reduce this. The longer your shaft the more the wobble in amplified and stratch the shaft seal/leak.
@pacificmeister Hey Merten, hope you are having a nice weekend.
I was just going through your parts list and see you have bought the same cooling pump as me.
just giving you the heads up that the pump you have isnt “self priming” . I made this mistake also.
unless you are going to mount it at the bottom of the mast it will be a nightmare to pre prime it for
water circulation.
Cheers, David
Hey David, thanks for the info, good to know. It is still in the box, not doing any water cooling yet. I saw people discussing that we might get away without pumps if the intake is positioned right. And with pump, wouldn’t the travel speed in a similar way help to prime it eventually?
I dont know, the travel speed might work but then again it might not! wouldnt like to take the risk. I did some static testing with a 1 meter length of pipe into water and it didnt work at all.
I think we may need to put a water cooling nozzle in the duct to get water pressure from the prop thust
1 Like
Yup, thats what we did, works very well.
I though of this but wiped it off the whiteboard because I didn’t think the prop wash would be enough to push water up the mast and around the esc/batteries.
Are you getting good pressure ?
Cheers, DavidC
Yes, great pressure and we had 10foot water line, it actually surprised me. It will be better when we have our electronics mounted inside the middle of our board, reduce 5’ of hose will definitely help in reducing back pressure.
1 Like