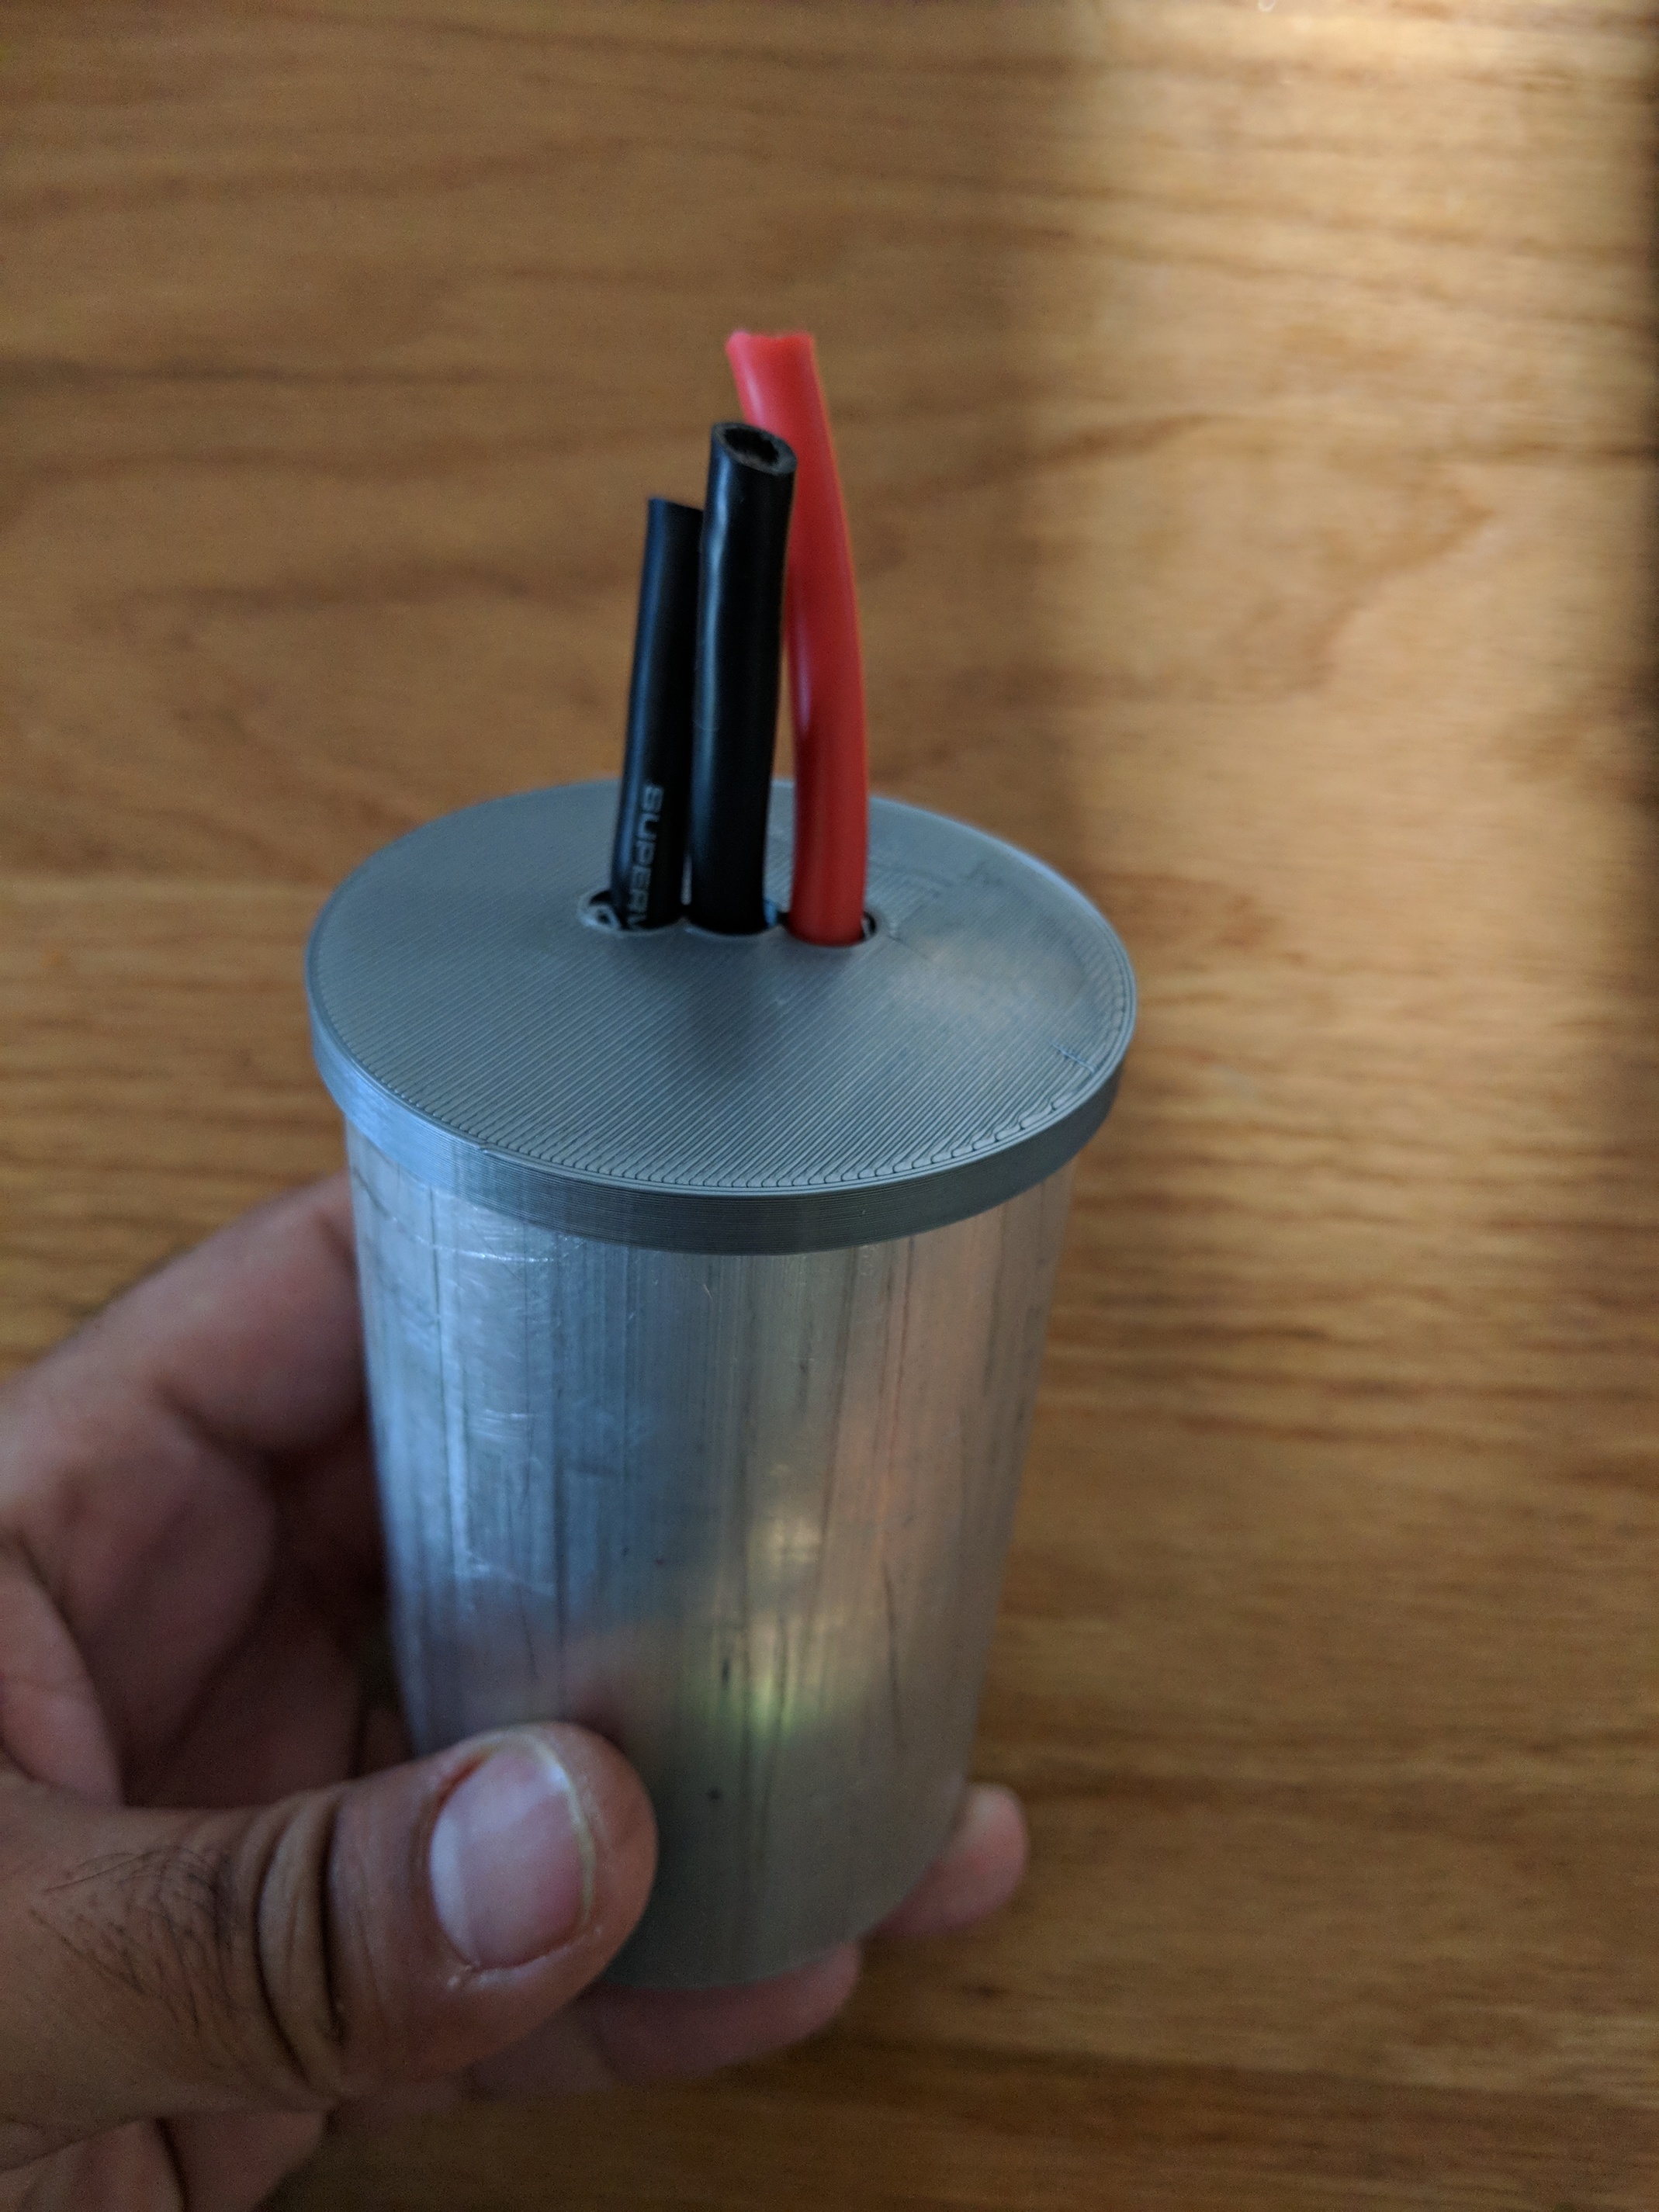
I’m taking a stub at modifying @pacificmeister 's mast back clam so it is more maintainable. I want to be able to disassemble the build. Specifically the tube from the mast back clamp, which means no glue is involved, neither between the back clamp and the tube, nor for holding the wires in place.
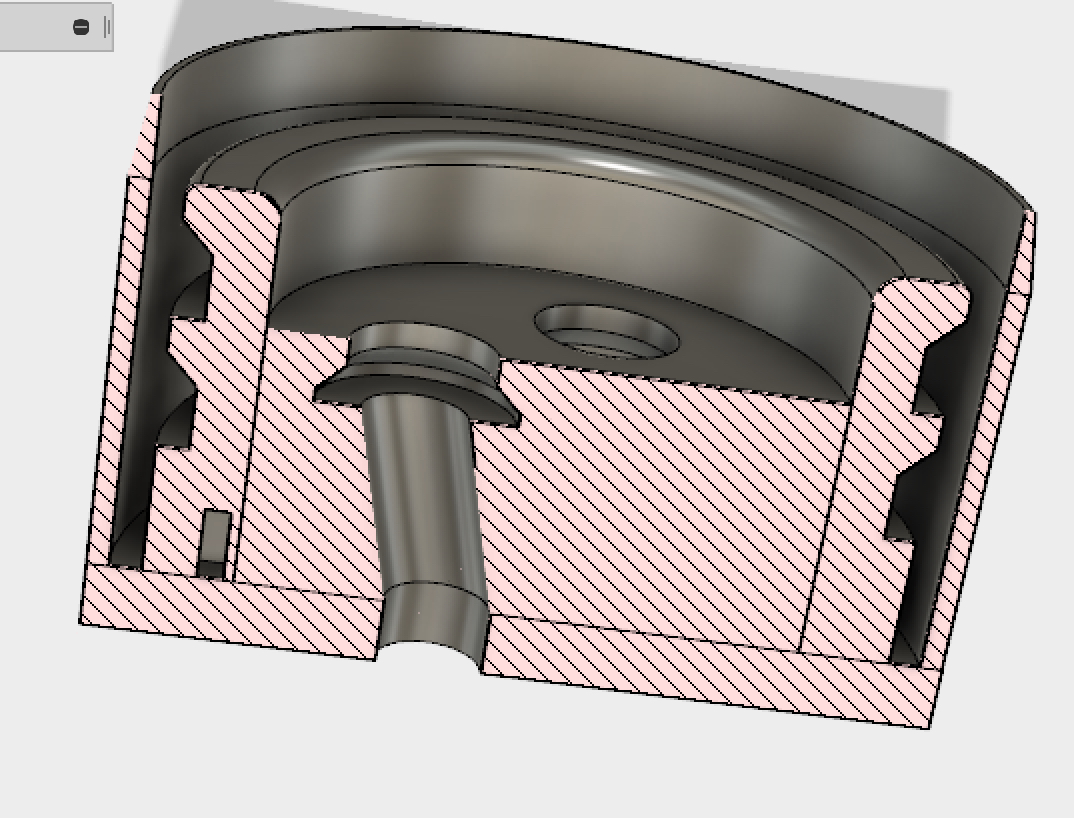
The design (frozen, I’ll update the thread upon changes):
I still didn’t connect it to the part that is connected to the clam, and I still didn’t add the screws that will hold it in place (I’m going to plant a square nut to accept the screw).
Some pictures (printed at this stage without the outer cover for the tube):
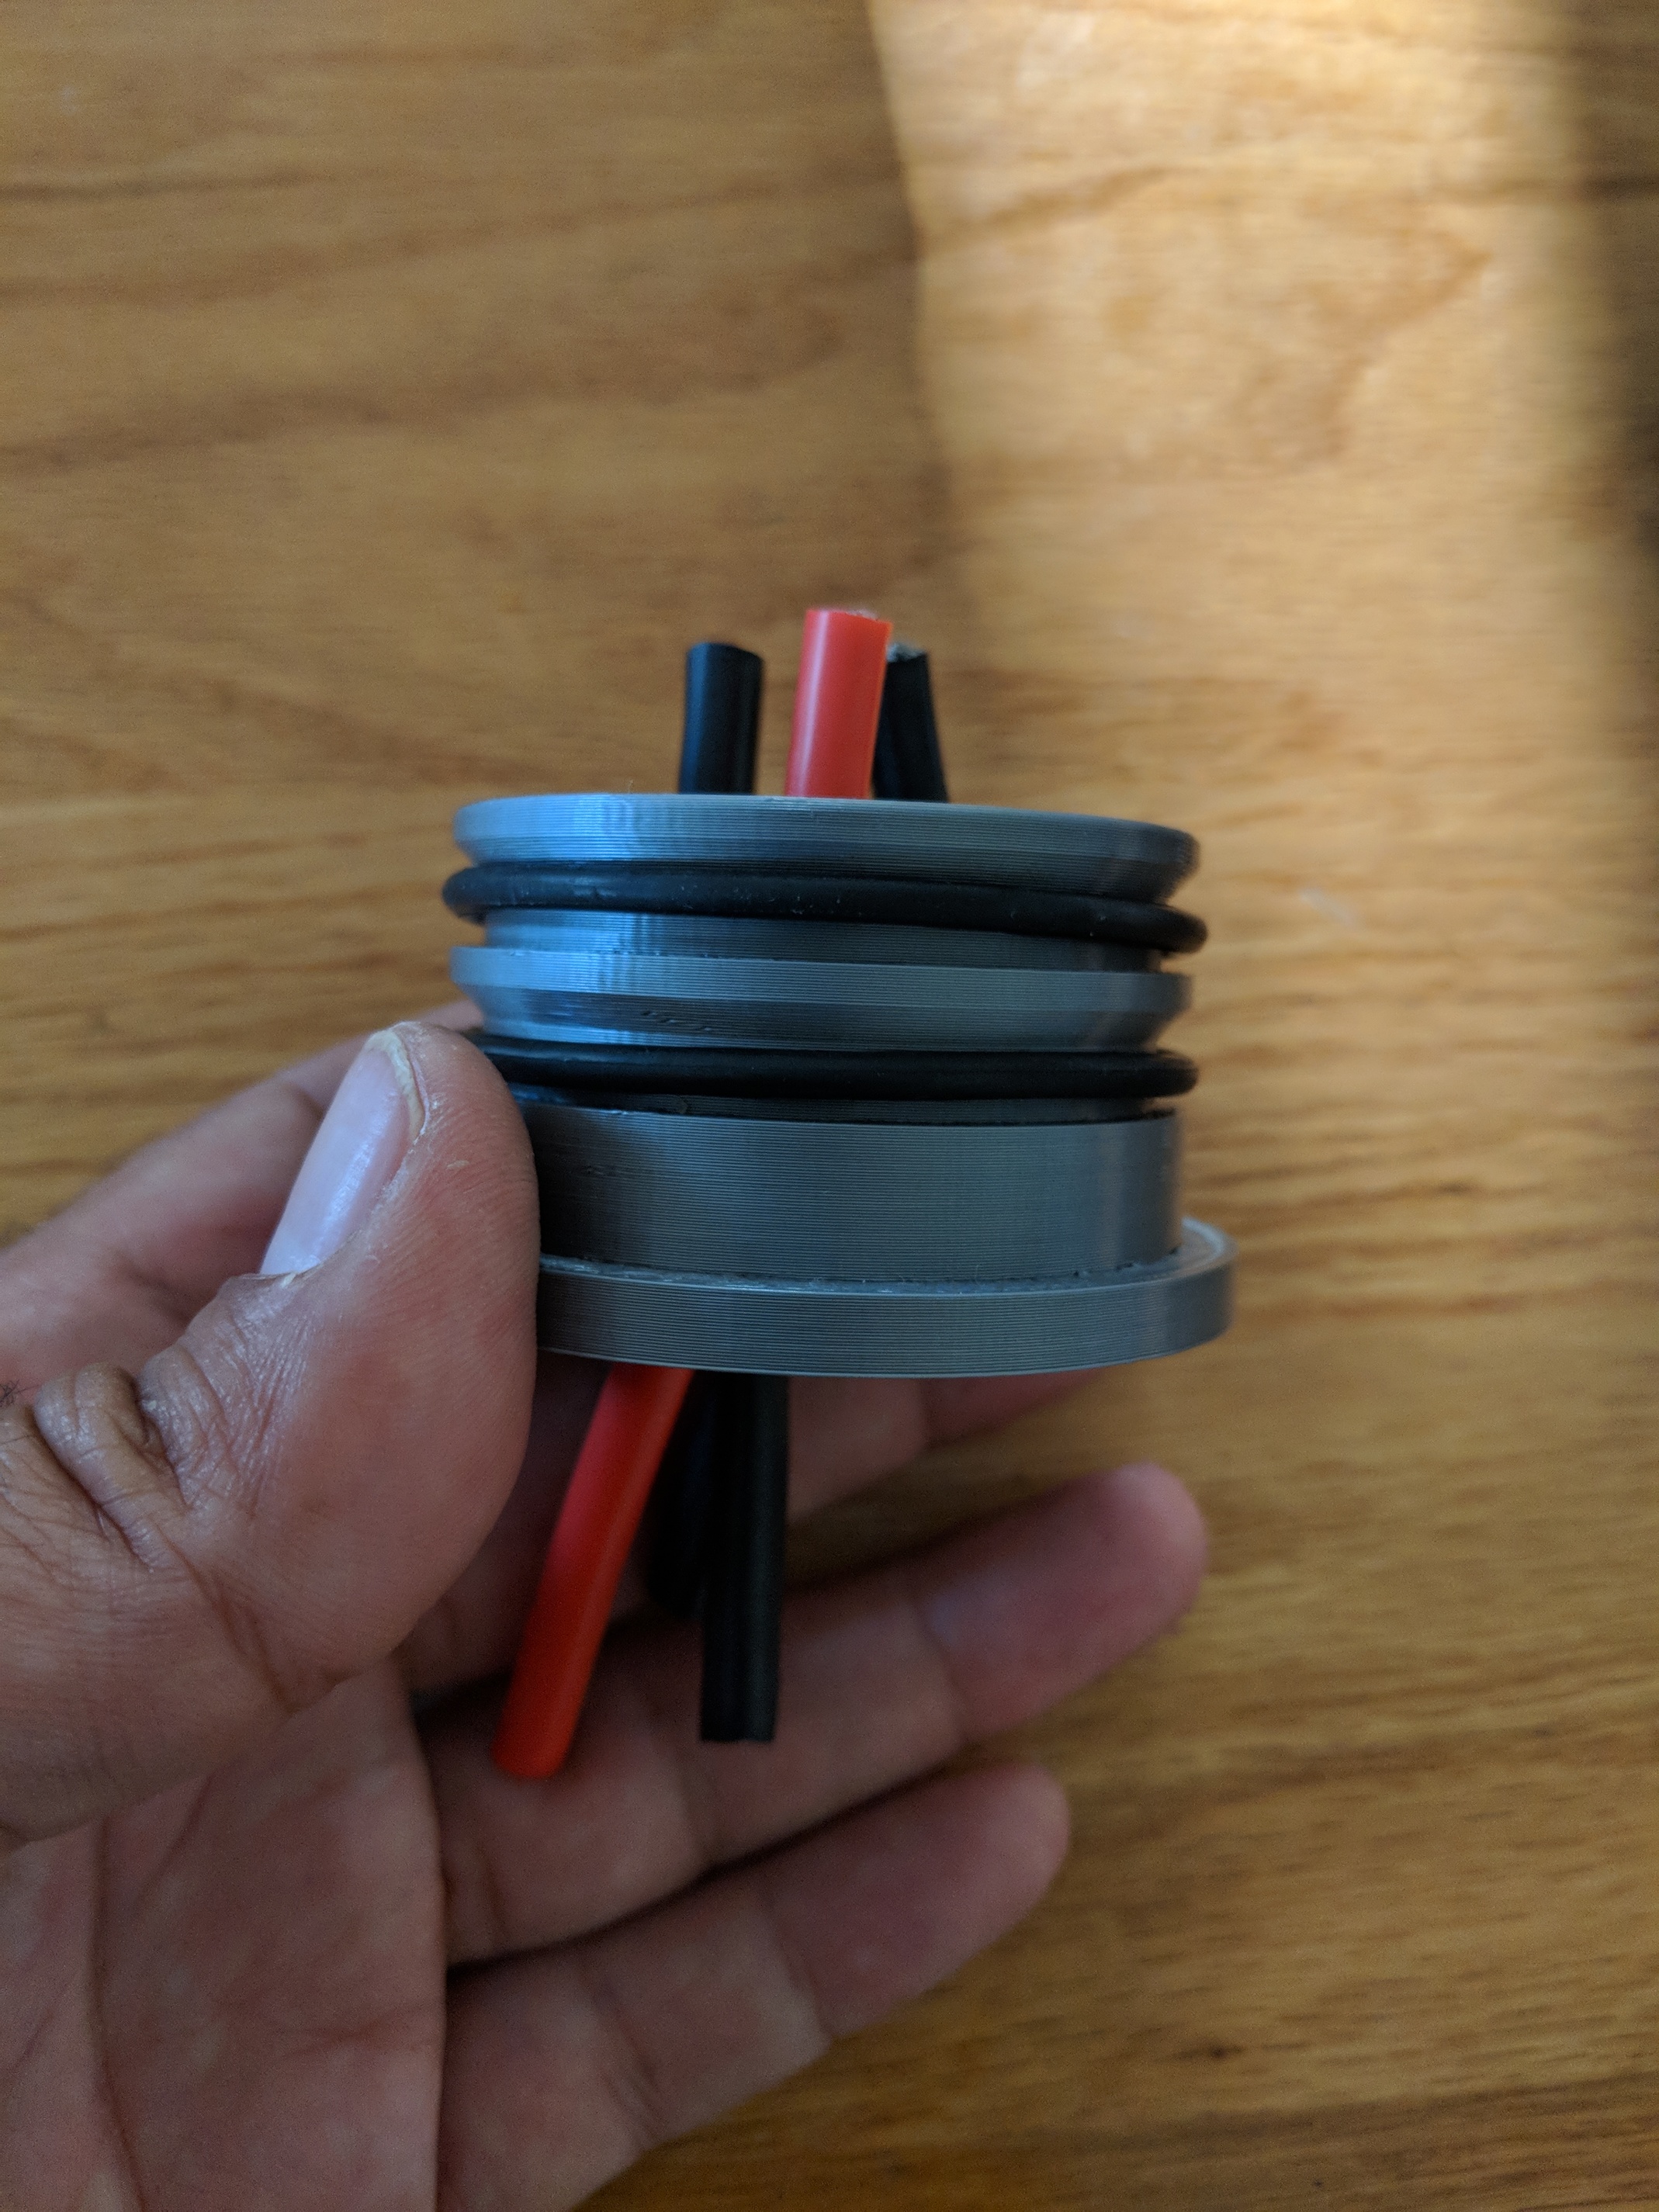
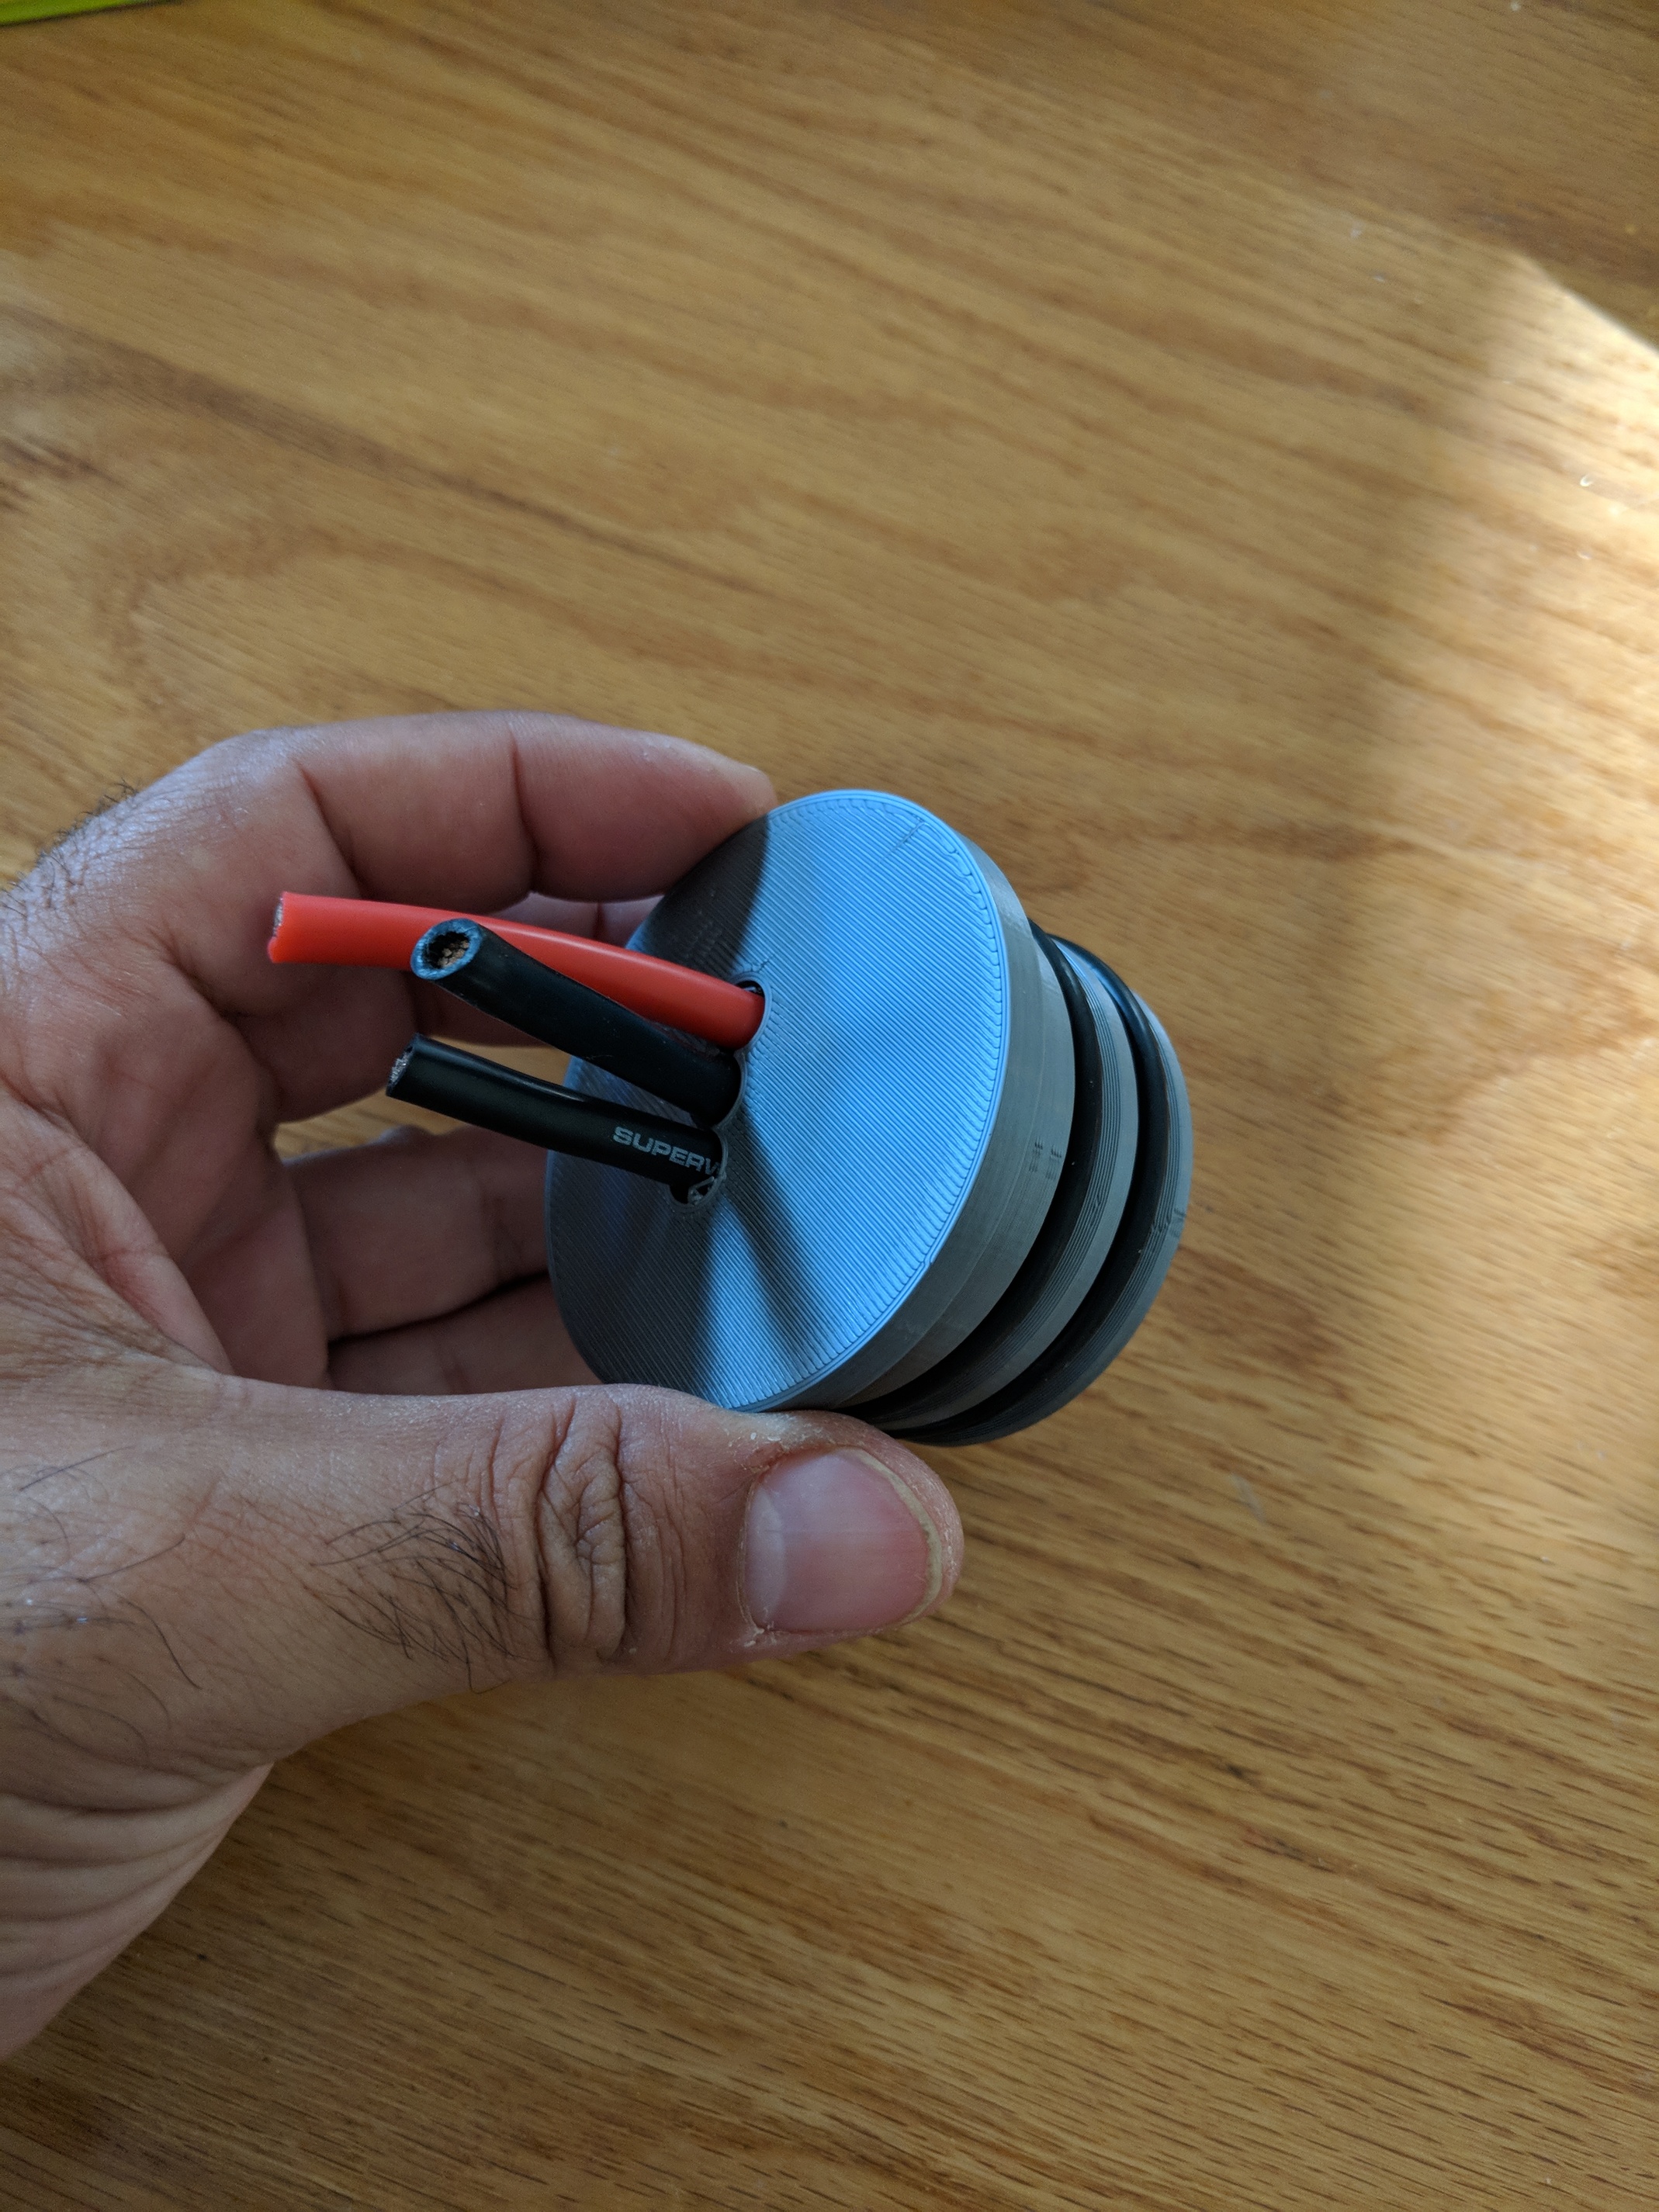
I followed the same idea for water-tighting the tube/print as the one used for the seal mount (two o-rings). I did modified it a bit to avoid >45 degree overhangs (and support).
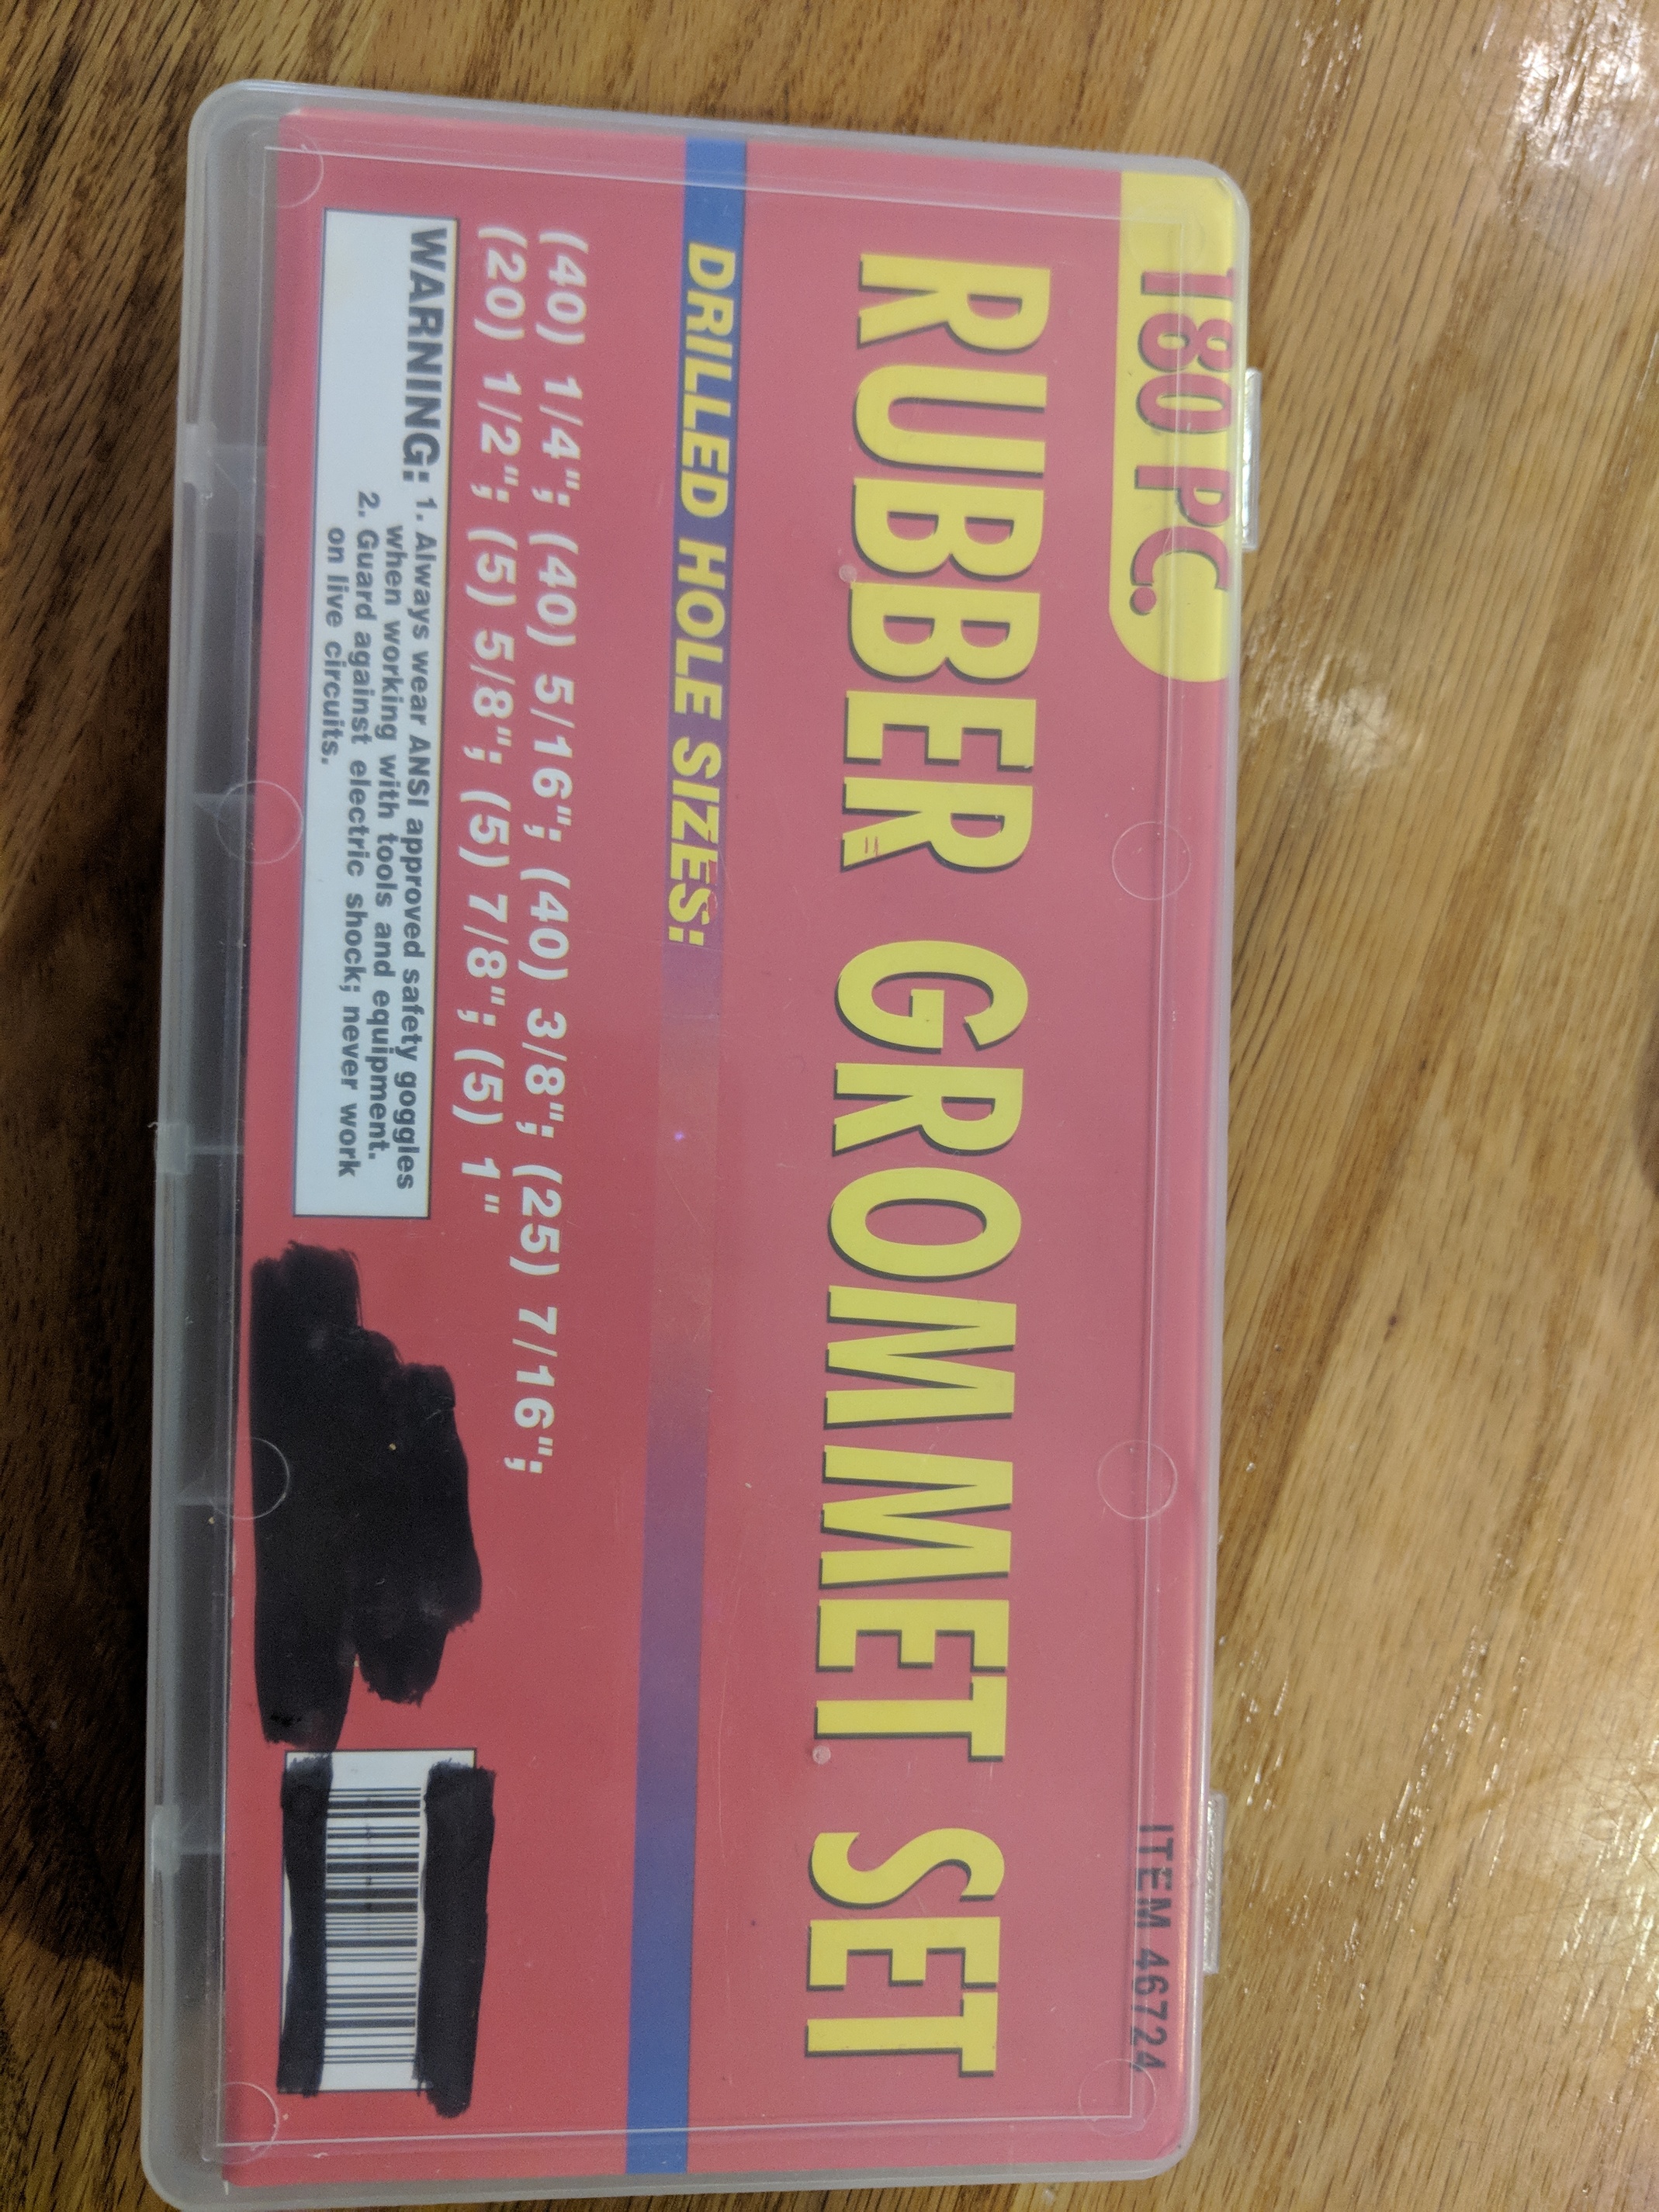
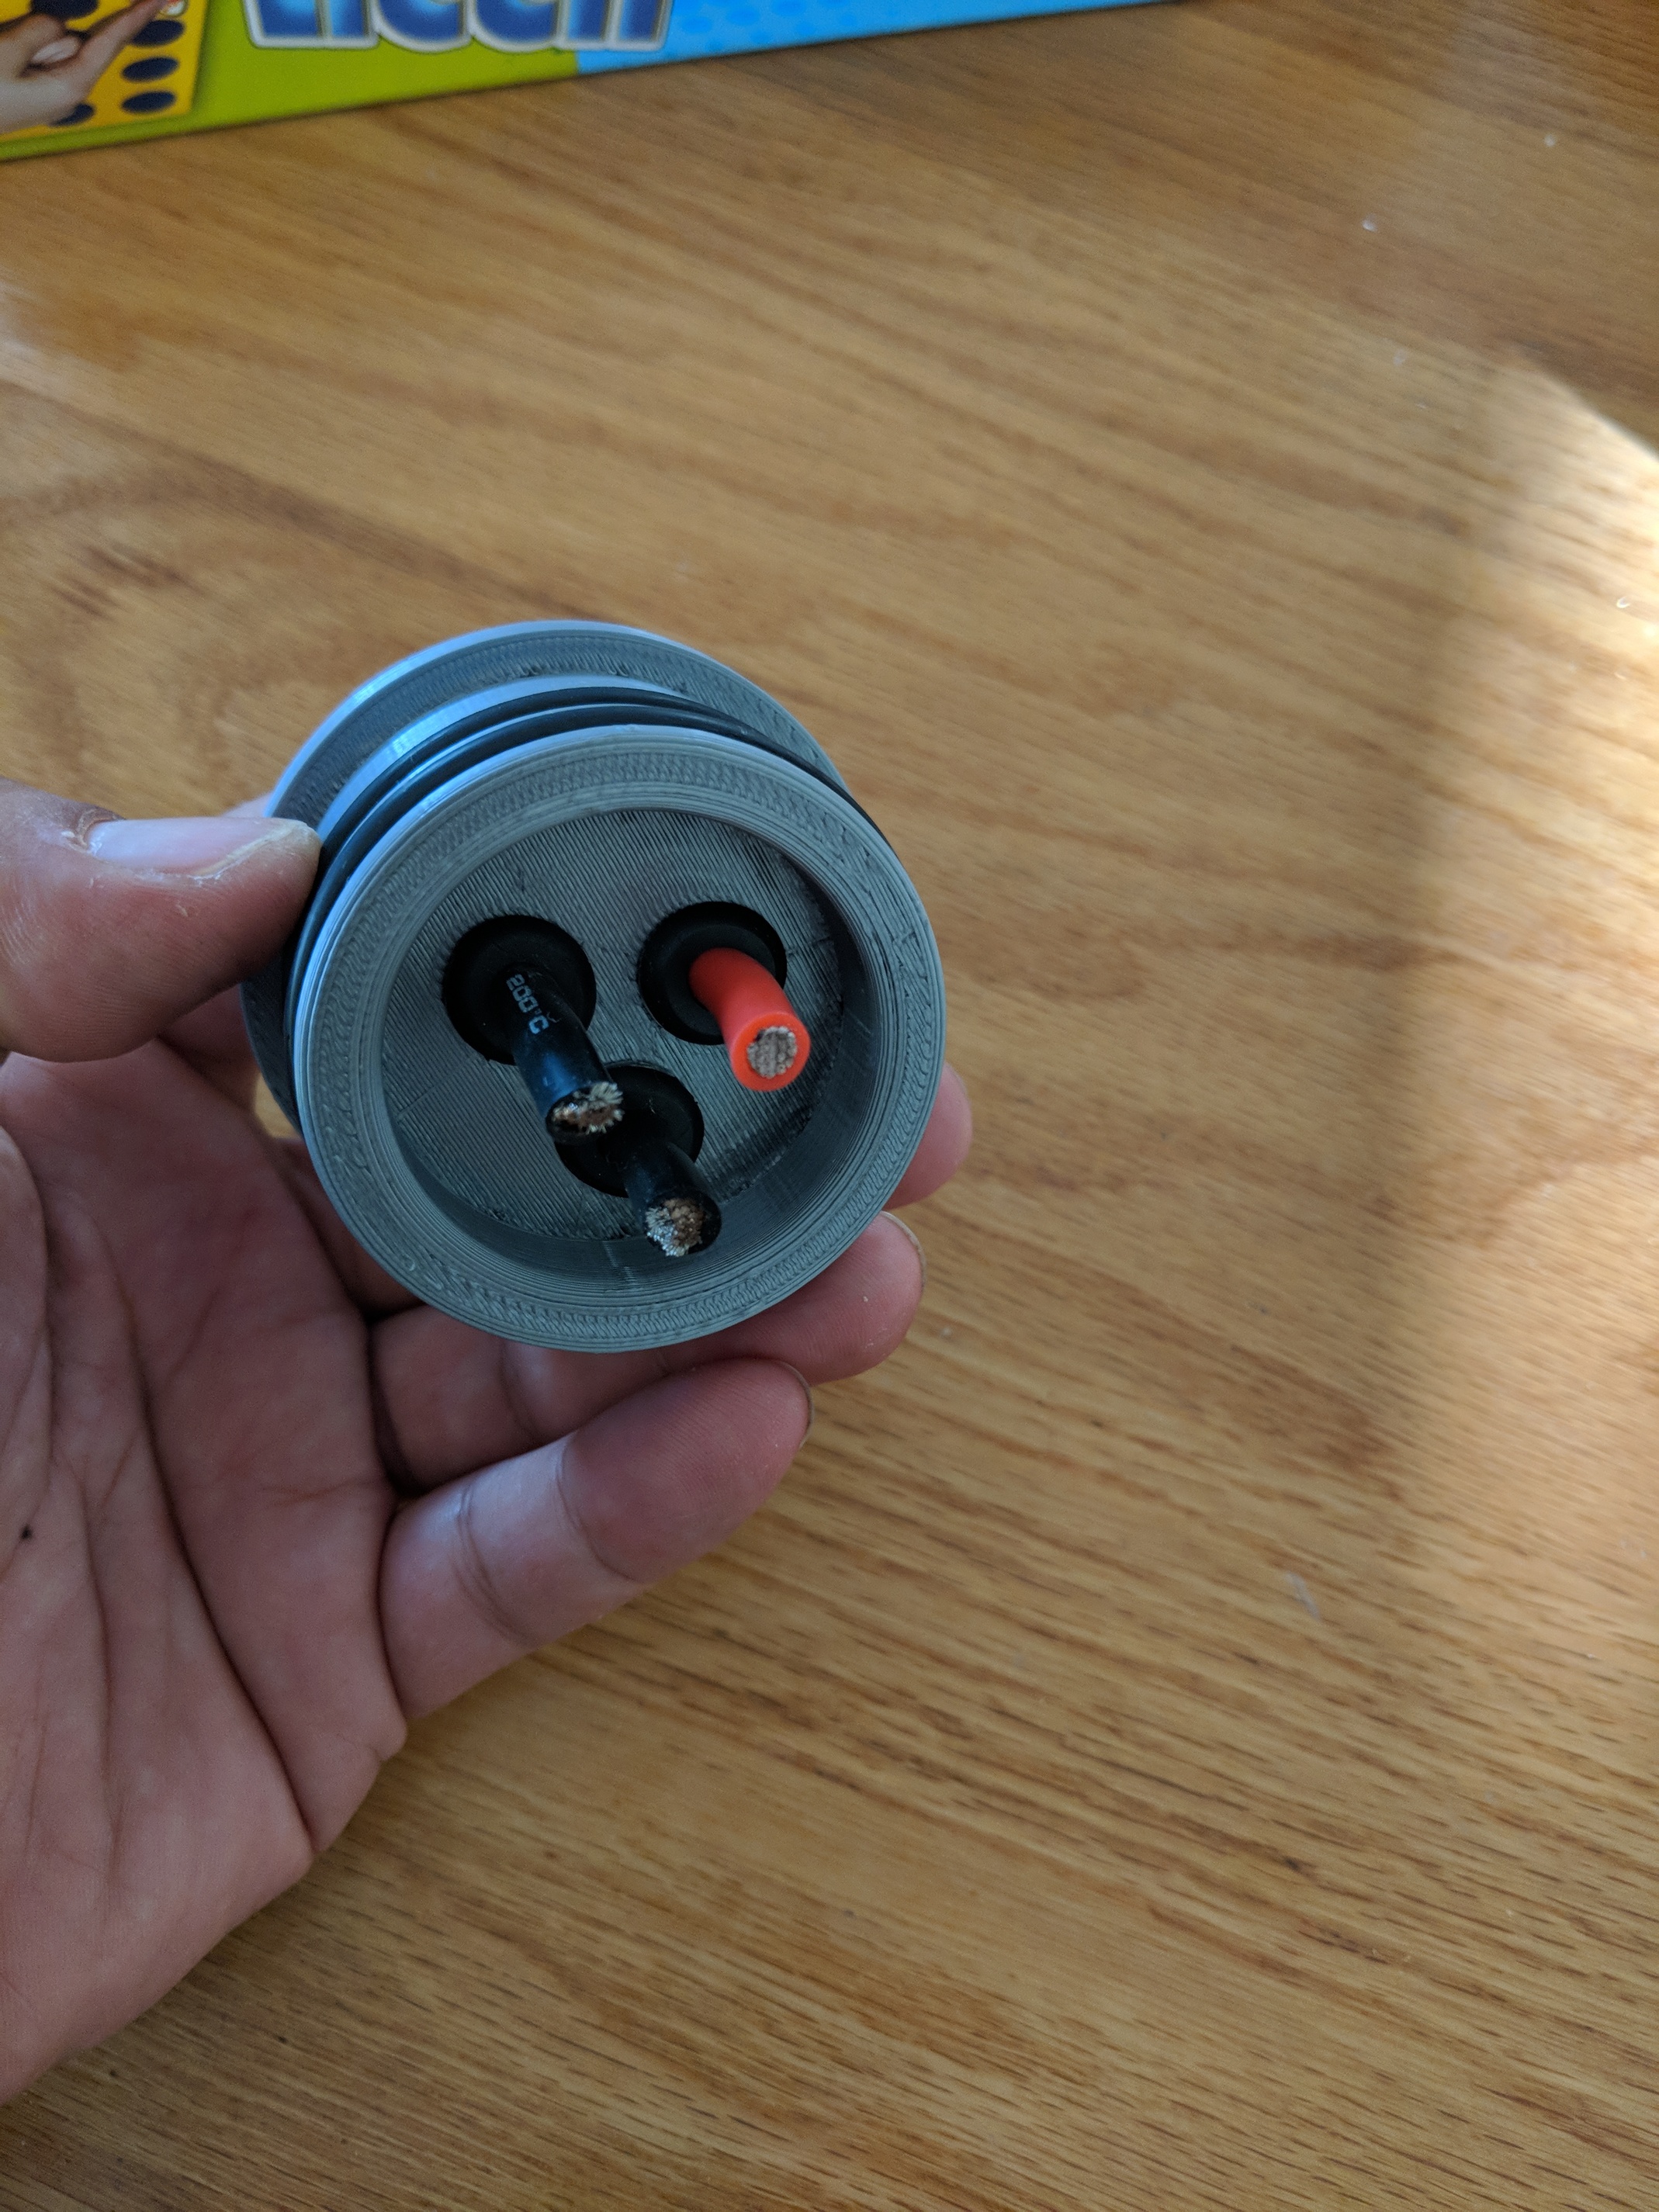
For the cables, I’m using rubber grommets. I might glue these in place (as there is no need to remove those from the print).
From the actual print. Specifically from an inside corner. This can be the result of my slicing parameters (10% infill 0.2 hight, thin shell, make the first iterations faster). This might also be the result of my solid being an assembly of several parts (for design simplicity) - there might be a gap there as a result of rounding errors. I’ll also try and add fillet to that corner. One experiment I’m going to do soon is to print a similar part with no wire holes, so I nail down the printing parameters for water-tight print (or epoxy it if I have to…)
Your feedback / suggestions / questions are most welcome.
Cheers.
Its a great idea and I hope it works. My main concern would be that with the motor almost a meter under water the water pressure could be to high for the rubber grommets.
Thanks. I should probably find a way to test it under high pressure. I’m actually more concerned about the pressure which can be built as a result of speed. So allowing water to flow freely around the assembly might be critical.
Forget about grommets! Those are not even close to IP65, in split second you’ll flood the motor pod.
The only way would be PGs and silicone, or simply a good silicone on clean surface, if the holes are tight fitting the cables.
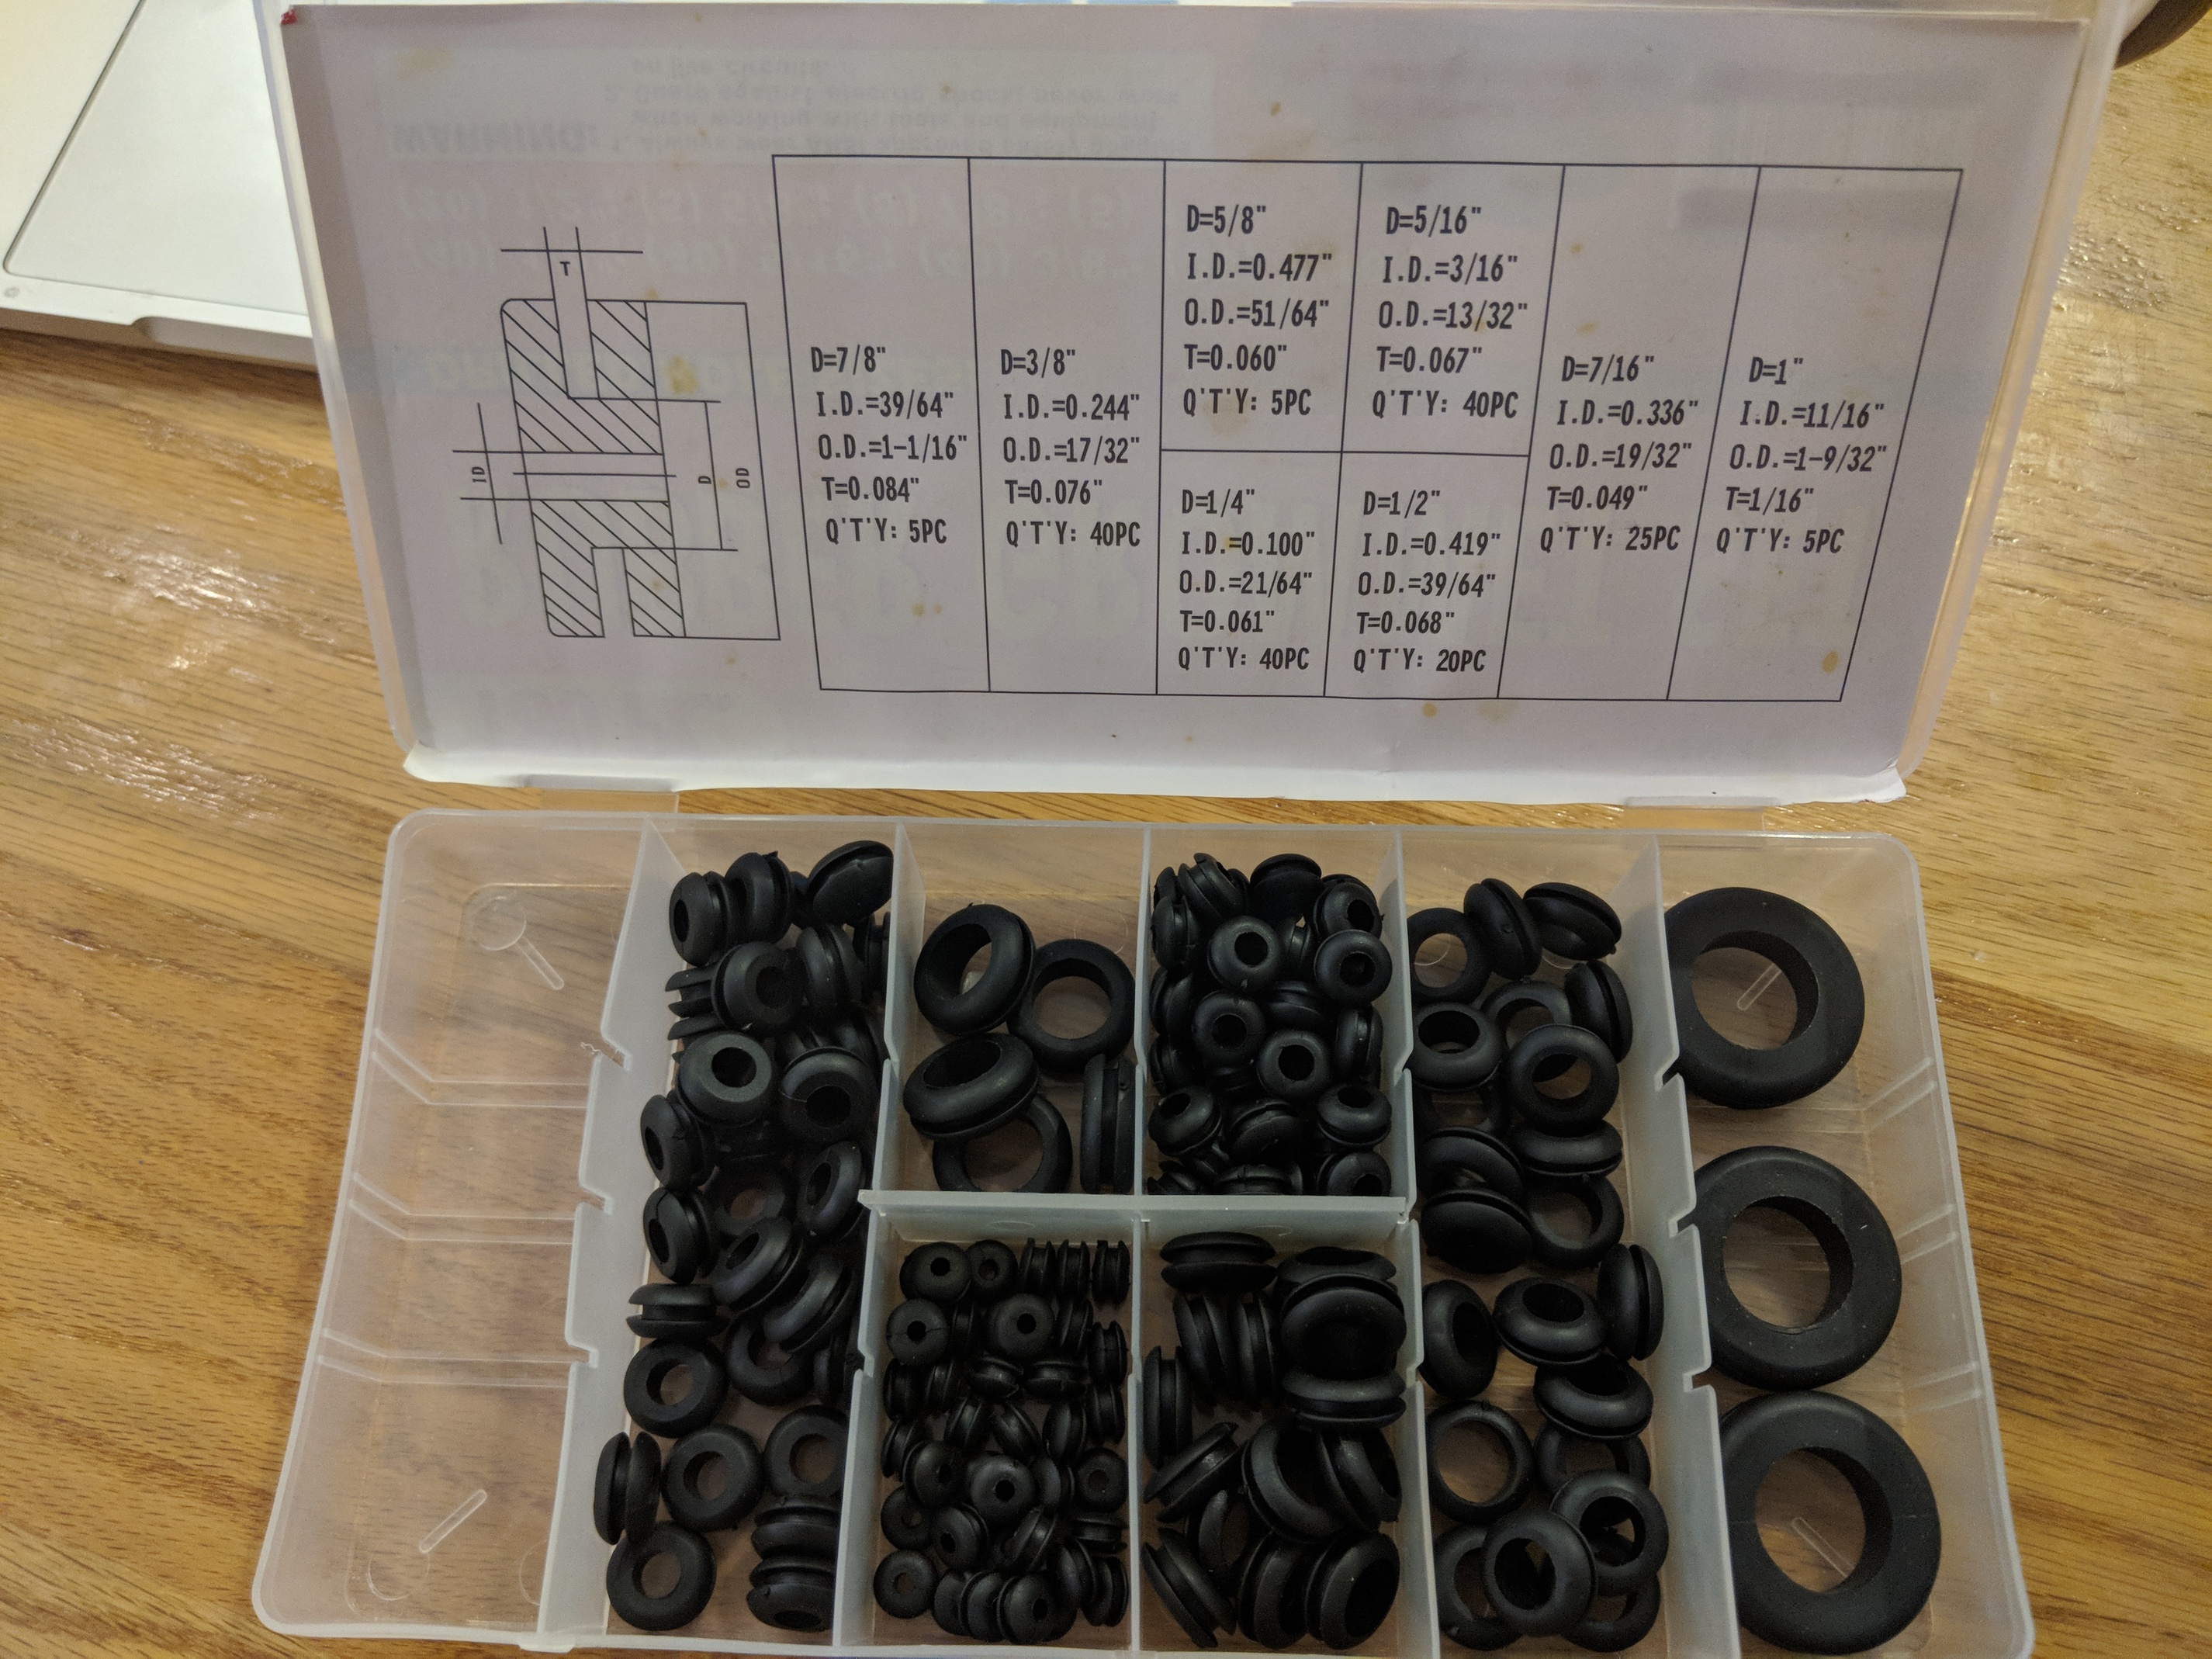
Another tip, I would double-check O-ring gooves shape and size, there are lables with all the dimensions you should respect to obtain a good static seal. From your photo, you still too lose.
Last one: what will prevent the whole tube to fall away if you hit that? The resistance of two Oring, greased? At least drill 2 holes thru the pipe, out of the oring sealed section, and secure the tube with 2 screw.
Last for good: 3d print, “structural watertight” parts are way more effective printed 100% linear infill. Little overextrusion helps, eventually, clean an refine holes with a drillbit.
I dig the idea of disassembling hub, i was not able to design it compact printable and watertight at the same, but that’s how a motor hub should be. Keep up!
Thanks for the valuable info! This will save me some work. I guess I’ll modify the design to relay on the o-rings for the tube sealing and silicon for the wires. I hope to find a good way to apply the silicon, preferably only from the wire holes at the front of the assembly.
What are PGs? is there a full name?
How long would you make those holes? I assume longer is better, but space is of an essence…
Tighter is always better? it seems like if I go too tight, it is hard to properly apply silicon along the entire hole. Is that a concern? Or should I plan to use a syringe with liquid epoxy (I don’t like that approach so much)
Also, any tricks for removing the silicon when needed?
I started with @pacificmeister dimension from the seal mount and added the champer to avoid support). Can you point me to the tables so I can adjust?
That’s on my TODO list (I noted it above, but it was easy to miss), certainly.
Google PG cable gland. “Tight” enough to pass cable thru and apply silicone, for Oring sizing, google Oring handbook or design seal… usually mechanical designer books have such sizing charts.
Those will be the best and most reliable solutions I think.
I printed 100% infill on my parts and they still let water in on my very first design. After that I moved to aluminium and only using 3D printing for the mast mount. You can also look at OP seal or Dualseal’s instead of O-rings as they are better for our purposes.